Page 86 of 442
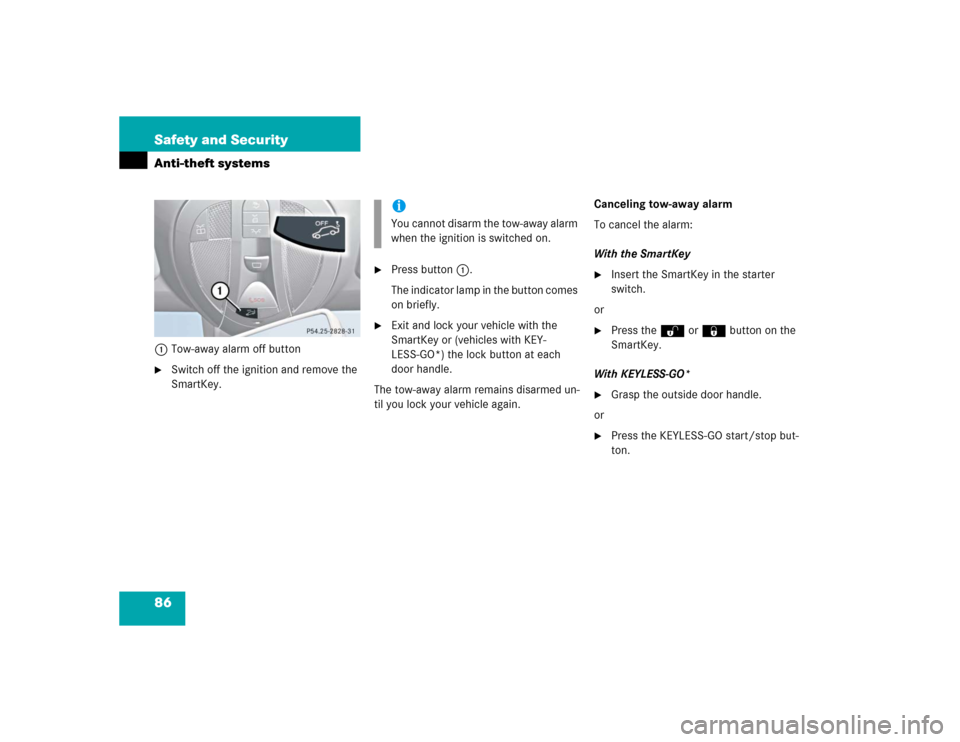
86 Safety and SecurityAnti-theft systems1Tow-away alarm off button�
Switch off the ignition and remove the
SmartKey.
�
Press button1.
The indicator lamp in the button comes
on briefly.
�
Exit and lock your vehicle with the
SmartKey or (vehicles with KEY-
LESS-GO*) the lock button at each
door handle.
The tow-away alarm remains disarmed un-
til you lock your vehicle again.Canceling tow-away alarm
To cancel the alarm:
With the SmartKey
�
Insert the SmartKey in the starter
switch.
or
�
Press the Œ or ‹ button on the
SmartKey.
With KEYLESS-GO*
�
Grasp the outside door handle.
or
�
Press the KEYLESS-GO start/stop but-
ton.
iYou cannot disarm the tow-away alarm
when the ignition is switched on.
Page 106 of 442
.
�
Insert the mechanical key in the trunk
lid lock.
�
Turn the mec")
106 Controls in detailLocking and unlockingSeparately unlocking the trunk�
Pull the mechanical key out of the
SmartKey (
�page 353).
�
Insert the mechanical key in the trunk
lid lock.
�
Turn the mechanical key completely to
the left to position2, (
�page 105).
You can now open the trunk (�page 97).
A minimum height clearance of 5.90 ft
(1.80 m) is required to open the trunk lid.
Automatic central locking
The doors and the trunk automatically lock
when the ignition is switched on and the
wheels are turning at vehicle speeds of ap-
proximately 9mph (15km/h) or more.
You can open a locked door from the in-
side. Open door only when conditions are
safe to do so.Information on towing the vehicle can be
found in the “Practical hints” section
(
�page 381).
You can deactivate the automatic locking
mode over the control system
(�page 149).
iUnlocking the trunk with the mechani-
cal key will trigger the anti-theft alarm
system. To cancel the alarm, do one of
the following:�
Press button Œ or ‹ on the
SmartKey.
�
Insert the SmartKey in the starter
switch.
iThe doors unlock automatically after an
accident if the force of the impact ex-
ceeds a preset threshold.
The vehicle automatically locks when
the ignition is switched on and the
wheels are turning at vehicle speeds of
approximately 9 mph (15 km/h) or
more. You could therefore lock yourself
out when the vehicle�
is pushed or towed
�
is on a test stand
Page 110 of 442
110 Controls in detailSeatsRear seat head restraints
Folding head restraints back with
switch in the center console
The rear seat head restraints can be folded
backward for increased visibility.
1Head restraint release switch
�
Make sure the ignition is switched on.
All the lights in the instrument cluster
come on.
�
Press the symbol-side on rocker
switch1to release the head re-
straints.
The head restraints will fold backward.Placing head restraints upright
�
Pull the head restraint forward until it
locks into position.
!The rear seat head restraints cannot be
adjusted.
Warning!
G
For safety reasons, always drive with the
rear head restraints in the upright position
when the rear seats are occupied.
Keep the area around head restraints clear
of articles (e.g. clothing) to not obstruct the
folding operation of the head restraints.
!Make sure the head restraints engage
when placing them upright. Otherwise
their protective function cannot be as-
sured.
Page 111 of 442

Multicontour s")
111 Controls in detailSeats
Removing and installing rear seat head
restraints
For removing and installing rear seat head
restraints, see “Expanding the cargo ar-
ea*” (
�page 239)
Multicontour seat*
The multicontour seat has a movable seat
cushion and inflatable air cushions built
into the backrest to provide additional lum-
bar and side support.
The seat cushion movement, backrest
cushion height and curvature can be con-
tinuously varied with switches on the right
side of the seat after turning the SmartKey
in the starter switch to position2 or press-
ing the KEYLESS-GO* start/stop button
twice.1Seat cushion depth
2Backrest bottom
3Backrest center
4Backrest side bolster adjustment
�
Make sure the ignition is switched on.
All lights in the instrument cluster
come on.Seat cushion depth
�
Adjust the seat cushion depth to the
length of your upper leg using
switch1.
Backrest contour
�
Adjust the contour of the backrest to
the desired position using æ or
ç.
�
Move the backrest support to the bot-
tom by using button2 or to the center
by using button3.
Backrest side bolsters
�
Adjust the side bolsters so that they
provide good lateral support using
switch4.
Page 113 of 442

The massage function can help prevent
muscle tension during long drives.�
Press button6.
The indicator lamp in button2 comes
on. The air cushions")
113 Controls in detailSeats
Massage function (PULSE)
The massage function can help prevent
muscle tension during long drives.�
Press button6.
The indicator lamp in button2 comes
on. The air cushions in the lumbar area
pulsate.
Heated seats*
Both switches for the front seats are locat-
ed in the center console. The red indicator
lamps in the switch come on to show
which heating level you have selected.
1Seat heating switch
�
Make sure the ignition is switched on.
All lights in the instrument cluster
come on.
Switching seat heating on
�
Press button1 repeatedly until the
desired heating level is set.
One or more red indicator lamps on the
switch show the selected heater level
iThe massage function turns off auto-
matically after approximately five min-
utes.
Leveloff
No indicator lamps on
1
One indicator lamp on
2
Two indicator lamps onThe seat heater automatically
switches to level 1 after approxi-
mately ten minutes.
3
Three indicator lamps onThe seat heater automatically
switches to level 2 after approxi-
mately five minutes.
Page 114 of 442

114 Controls in detailSeatsSwitching seat heating off�
Press button1 repeatedly until all in-
dicator lamps go out.
Seat ventilation*
The switch is located on the center con-
sole. Seat ventilation can be activated
manually with the ignition on, or by the
summer opening feature (
�page 199).
The blue indicator lamps on the switch
show the ventilation level selected:
1Seat ventilation switch
�
Make sure the ignition has been
switched on.
All lights in the instrument cluster
come on.
iThe seat heating will be automatically
switched off after approximately
20 minutes.!If one or more of the lamps on the seat
heater switch are flashing, there is in-
sufficient voltage available since too
many electrical consumers are turned
on. The seat heater switches off auto-
matically.
The seat heater will switch back on
again automatically as soon as suffi-
cient voltage is available.
Level3
Three indicator lamps lit
2
Two indicator lamps lit
1
One indicator lamp lit
off
No indicator lamp lit
Page 117 of 442

117 Controls in detail
Memory function
The memory switch is located on the door.
MMemory button
1, 2, 3Stored positions�
Be sure the ignition is switched on or
the relevant door is open and the
SmartKey is inserted in the starter
switch.
Storing positions in memory�
Adjust the seats, steering wheel and
exterior rear view mirrors to the de-
sired position (
�page 34).
�
Press memory buttonM.
�
Release memory button and press
stored position button 1, 2 or 3 within
three seconds.
All the settings are stored at the select-
ed position.
Recalling positions from memory�
On memory button, press and hold
stored position button1, 2 or3 until
the seat, steering wheel and exterior
rear view mirrors have fully moved to
the stored positions.iReleasing the button immediately
stops movement to the stored posi-
tions.Warning!
G
Do not operate the power seats using the
memory button if the seat backrest is in an
excessively reclined position. Doing so
could cause damage to front or rear seats.
First move backrest to an upright position.
Page 118 of 442

118 Controls in detailMemory functionStoring exterior rear view mirror park-ing position
For easier parking you can adjust the pas-
senger-side exterior rear view mirror so
that you can see the right rear wheel as
soon as you engage reverse gearR.
For information on activating the parking
position, see “Activating exterior rear view
mirror parking position” (
�page 169).
1Passenger side, exterior rear view mir-
ror
2Adjustment button
�
Stop the vehicle.
�
Switch on ignition (if not already on).
�
Press button1.
The passenger-side exterior rear view
mirror is selected.
�
Adjust the exterior rear view mirror
with button2 so that you see the rear
wheel and the road curb.
�
Press memory button M.
�
Within three seconds, press bottom of
adjustment button2.
The parking position is stored if the
mirror does not move.
iYou can store a parking position for the
passenger side exterior rear view mir-
ror for each SmartKey using the memo-
ry button.
iIf the mirror does move, repeat the
above steps. After the setting is stored,
you can move the mirror again.