Page 47 of 442
47 Getting started
Driving
Switching on headlampsExterior lamp switch1Off
2Low beam headlamps on�
Turn the switch toB.
More information can be found in the
“Controls in detail” section (
�page 119).
Turn signals and high beam
The combination switch is located on the
left of the steering column.Combination switch1Turn signal, right
2Turn signal, left�
Press the combination switch up1 or
down2.
The corresponding turn signal indicator
lamp L or K flashes in the in-
strument cluster.High beam
�
Push the combination switch forward.
The high beam headlights are switched
on.
The high beam symbolA in the
tachometer comes on.
More information can be found in the
“Controls in detail” section (
�page 123).
iTo signal minor directional changes,
move combination switch to point of
resistance only and release. The turn
signal flashes three times.
Page 52 of 442
52 Getting startedParking and locking
Switching off headlamps�
Turn the exterior lamp switch toM
(�page 47).
More information can be found in the
“Controls in detail” section (
�page 119).
Turning off engine �
Place the gear selector lever in
positionP.
Warning!
G
When leaving the vehicle, always remove the
SmartKey from the starter switch, take the
SmartKey with KEYLESS-GO* with you and
lock the vehicle. Do not leave children unat-
tended in the vehicle, or with access to an
unlocked vehicle. Children could release the
parking brake and/or move the gear selec-
tor lever from positionP, either of which
could result in an accident and/or serious
injury.
Warning!
G
Getting out of your vehicle with the gear se-
lector lever not fully engaged in positionP is
dangerous. Also, when parked on an incline,
positionP alone may not prevent your vehi-
cle from moving, possibly hitting people or
objects.
Always set the parking brake in addition to
shifting to positionP.
When parked on an incline, turn front wheels
towards the road curb.
iAlways set the parking brake in addi-
tion to shifting to positionP.
On steep slopes, turn the front wheels
towards the road curb.
Page 53 of 442
53 Getting started
Parking and locking
Turning off with the SmartKey�
Turn the SmartKey in the starter switch
(�page 31) to position0 and remove
it.
The immobilizer is activated.
�
Press the seat belt release button
(�page 41).
Allow the retractor to completely re-
wind the seat belt by guiding the latch
plate.
�
After exiting the vehicle press the lock
button‹ on the SmartKey
(�page 30).
All turn signal lamps flash three times.
The locking knobs on the doors move
down.More information can be found in the
“Controls in detail” section (
�page 88).
Turning off with KEYLESS-GO*
�
Place the gear selector lever inP.
�
Press the KEYLESS-GO start/stop but-
ton to shut off the engine.
With the driver's door closed, the start-
er switch is now in position1. With the
driver’s door opened, the starter switch
is set to position0, same as SmartKey
removed from starter switch
(�page 31).
iThe SmartKey can only be removed
from the starter switch with the gear
selector lever in positionP.!With the SmartKey removed and the
driver’s door open, a warning sounds if
the vehicle’s exterior lamps are not
switched off.
Warning!
G
To prevent possible personal injury, always
keep hands and fingers away from the door
openings when closing the doors. Be espe-
cially careful when small children are
around.
Before closing doors, make sure that there
is no possibility of someone getting caught
in a door during closing.
Warning!
G
When leaving the vehicle, always remove the
SmartKey from the starter switch and lock
your vehicle. Do not leave children unat-
tended in the vehicle, or with access to an
unlocked vehicle. Unsupervised use of vehi-
cle may cause an accident and/or serious
personal injury.
��
Page 54 of 442
54 Getting startedParking and locking�
Press the seat belt release button
(�page 41).
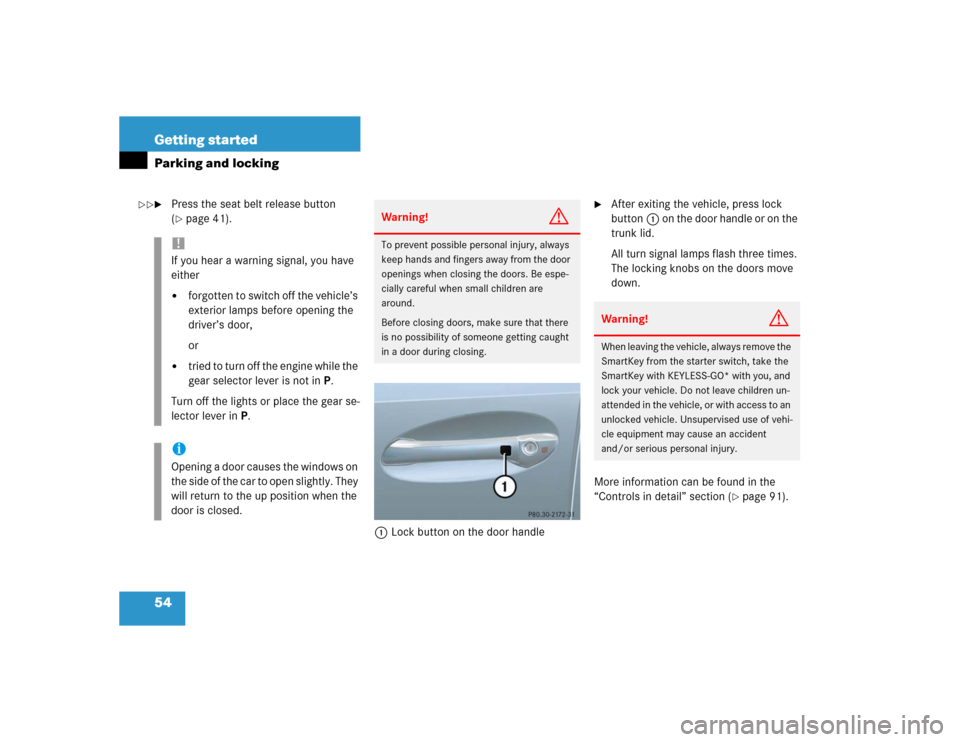
1Lock button on the door handle
�
After exiting the vehicle, press lock
button1 on the door handle or on the
trunk lid.
All turn signal lamps flash three times.
The locking knobs on the doors move
down.
More information can be found in the
“Controls in detail” section (
�page 91).
!If you hear a warning signal, you have
either�
forgotten to switch off the vehicle’s
exterior lamps before opening the
driver’s door,
or
�
tried to turn off the engine while the
gear selector lever is not inP.
Turn off the lights or place the gear se-
lector lever inP.
iOpening a door causes the windows on
the side of the car to open slightly. They
will return to the up position when the
door is closed.
Warning!
G
To prevent possible personal injury, always
keep hands and fingers away from the door
openings when closing the doors. Be espe-
cially careful when small children are
around.
Before closing doors, make sure that there
is no possibility of someone getting caught
in a door during closing.
Warning!
G
When leaving the vehicle, always remove the
SmartKey from the starter switch, take the
SmartKey with KEYLESS-GO* with you, and
lock your vehicle. Do not leave children un-
attended in the vehicle, or with access to an
unlocked vehicle. Unsupervised use of vehi-
cle equipment may cause an accident
and/or serious personal injury.
��
Page 58 of 442
58 Safety and SecurityOccupant safety�
Adjust the driver seat as far as possible
rearward, still permitting proper opera-
tion of vehicle controls. The distance
from the center of the driver’s breast-
bone to the center of the airbag cover on
the steering wheel must be at least 10 in
(25 cm) or more. You should be able to
accomplish this by a combination of ad-
justments to the seat and steering
wheel. If you have any problems, please
see your authorized Mercedes-Benz
Center.
�
Do not lean with your head or chest
close to the steering wheel or dash-
board.
�
Keep hands on the outside of steering
wheel rim. Placing hands and arms in-
side the rim can increase the risk and
potential severity of hand/arm injury
when driver front airbag inflates.
�
Adjust the front passenger seat as far as
possible rearward from the dashboard
when the seat is occupied.
�
Occupants, especially children, should
never lean their heads in the area of the
door where the side airbag inflates. This
could result in serious injuries or death
should the airbag be triggered. Always
sit upright, properly use the seat belts
and appropriate size infant or child re-
straint system.
�
Children 12 years old and under must
never ride in the front seat, except in a
Mercedes-Benz authorized
BabySmart
TM compatible child seat,
which operates with the BabySmart
TM
system installed in the vehicle to deacti-
vate the passenger front airbag when it
is properly installed. Otherwise they will
be struck by the airbag when it inflates
in a crash. If this happens, serious or fa-
tal injury will result.
Failure to follow these instructions can re-
sult in severe injuries to you or other occu-
pants.
If you sell your vehicle you are responsible
to make the buyer aware of these points. Be
sure to give the buyer this Operator’s Manu-
al.
Warning!
G
Accident research shows that the safest
place for children in an automobile is in the
rear seat. Should you choose to place a child
12 years old or under in the passenger front
seat of your vehicle, you must properly use
a BabySmart
TM child restraint which will
turn off the passenger front airbag.
BabySmart
TM will not, however, turn off any
side impact airbag.
It should be noted that with respect to both
front and rear side impact airbags there is a
possibility for a side airbag related injury if
occupants, especially children, are not prop-
erly seated or restrained when next to a side
airbag which needs to deploy rapidly in a
side impact in order to do its job.
��
Page 72 of 442
72 Safety and SecurityOccupant safety
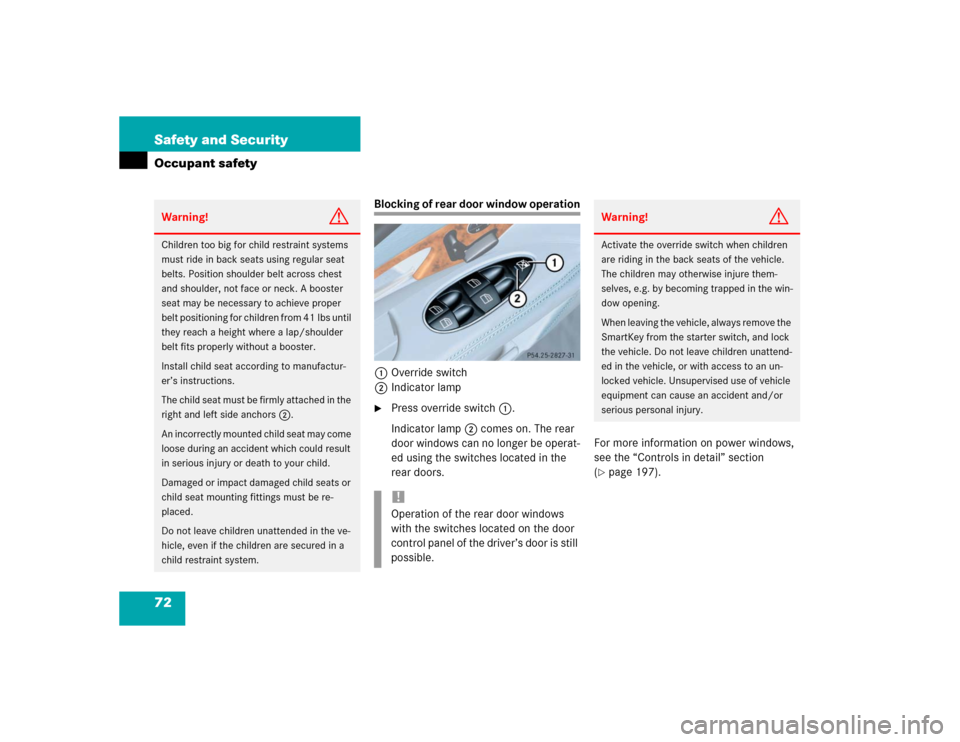
Blocking of rear door window operation
1Override switch
2Indicator lamp�
Press override switch1.
Indicator lamp2 comes on. The rear
door windows can no longer be operat-
ed using the switches located in the
rear doors.For more information on power windows,
see the “Controls in detail” section
(
�page 197).
Warning!
G
Children too big for child restraint systems
must ride in back seats using regular seat
belts. Position shoulder belt across chest
and shoulder, not face or neck. A booster
seat may be necessary to achieve proper
belt positioning for children from 41 lbs until
they reach a height where a lap/shoulder
belt fits properly without a booster.
Install child seat according to manufactur-
er’s instructions.
T h e c h i l d s e a t m u s t b e f i r m l y a t t a c h e d i n t h e
right and left side anchors2.
An incorrectly mounted child seat may come
loose during an accident which could result
in serious injury or death to your child.
Damaged or impact damaged child seats or
child seat mounting fittings must be re-
placed.
Do not leave children unattended in the ve-
hicle, even if the children are secured in a
child restraint system.
!Operation of the rear door windows
with the switches located on the door
control panel of the driver’s door is still
possible.
Warning!
G
Activate the override switch when children
are riding in the back seats of the vehicle.
The children may otherwise injure them-
selves, e.g. by becoming trapped in the win-
dow opening.
When leaving the vehicle, always remove the
SmartKey from the starter switch, and lock
the vehicle. Do not leave children unattend-
ed in the vehicle, or with access to an un-
locked vehicle. Unsupervised use of vehicle
equipment can cause an accident and/or
serious personal injury.
Page 87 of 442
87 Controls in detail
Locking and unlocking
Seats
Memory function
Lighting
Instrument cluster
Control system
Automatic transmission
Good visibility
Climate control
Automatic climate control*
Power windows
Sliding / pop-up roof*
Panorama sliding / pop-up roof*
Driving systems
Loading
Useful features
Page 88 of 442

88 Controls in detailLocking and unlocking
�In the “Controls in detail” section you will
find detailed information on how to oper-
ate the equipment installed on your vehi-
cle. If you are already familiar with the
basic functions of your vehicle, this section
will be of particular interest to you.
To quickly familiarize yourself with the ba-
sic functions of the vehicle, refer to the
“Getting started” section of this manual.
The corresponding page numbers are giv-
en at the beginning of each segment.
Locking and unlocking
SmartKey
Your vehicle comes supplied with two
SmartKeys, each with remote controls and
a removable mechanical key. The locking
tabs for the mechanical key portion of the
two SmartKeys are a different color to help
distinguish each key unit.
The SmartKey provides an extended oper-
ating range. To prevent theft, however, it is
advisable to only unlock the vehicle when
you are in close proximity to it.
The SmartKey centrally locks and unlocks�
the doors
�
the trunk
�
the fuel filler flap
SmartKey 1‹ Lock button
2Š Unlock button for the trunk lid
3Mechanical key locking tab
4ΠUnlock button
5Battery check lamp
6Â Panic button (
�page 73)