Page 232 of 442

232 Controls in detailDriving systemsSwitching the Parktronic system
on / off
You can switch off the Parktronic system
manually.
The Parktronic system switch is located in
the lower section of the center console.
1Parktronic system on / off
2Indicator lampSwitching off the Parktronic system
�
Press button 1.
Indicator lamp 2 comes on.
Switching on the Parktronic system
�
Press button 1 again.
Indicator lamp 2 goes out.
Parktronic system malfunction
There is a malfunction in the Parktronic
system if the red segments of the
Parktronic system warning indicator come
on and a warning sounds. The Parktronic
system will switch itself off after
30 seconds and the indicator lamp on the
Parktronic system switch comes on.
�
Have the Parktronic system checked
by an authorized Mercedes-Benz Cen-
ter as soon as possible.If only the red segments of the Parktronic
system warning indicator come on and no
warning sounds, then the sensors of the
Parktronic system are dirty or malfunction-
ing. Malfunction may also be caused by in-
terference from other radio or ultrasonic
signals. The Parktronic system will switch
itself off after 20 seconds.
�
Clean Parktronic system sensors
(�page 305).
�
Switch on the ignition.
or
�
Check Parktronic system operation at
another location to rule out interfer-
ence from outside radio or ultrasonic
signals.
Page 235 of 442
235 Controls in detail
Loading
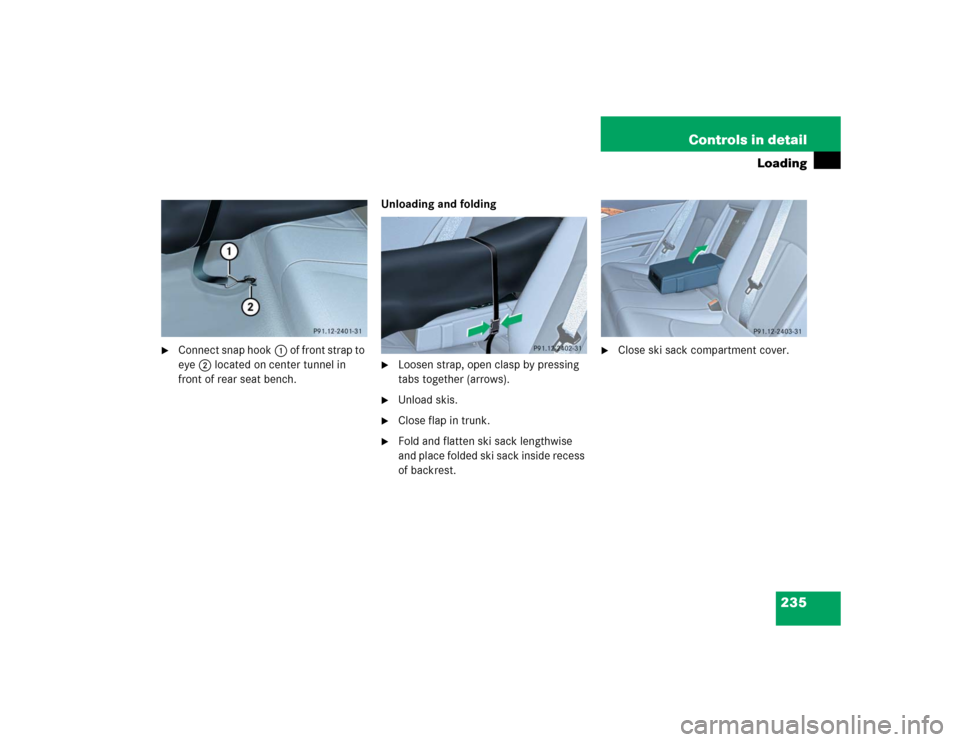
�
Connect snap hook1 of front strap to
eye2 located on center tunnel in
front of rear seat bench.Unloading and folding
�
Loosen strap, open clasp by pressing
tabs together (arrows).
�
Unload skis.
�
Close flap in trunk.
�
Fold and flatten ski sack lengthwise
and place folded ski sack inside recess
of backrest.
�
Close ski sack compartment cover.
Page 237 of 442
237 Controls in detail
Loading
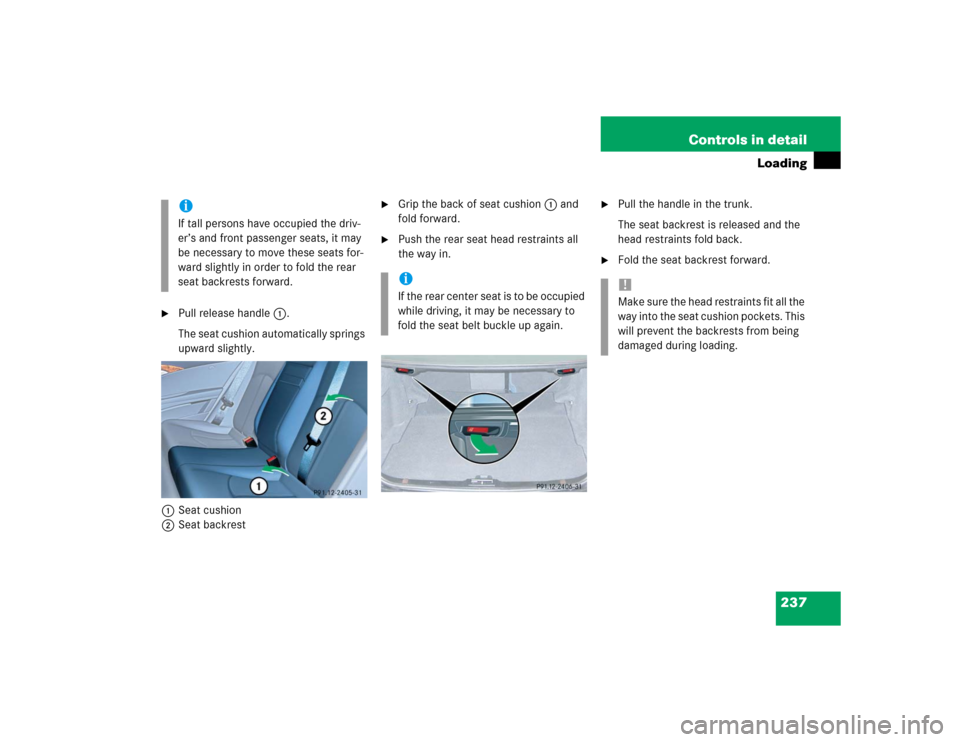
�
Pull release handle1.
The seat cushion automatically springs
upward slightly.
1Seat cushion
2Seat backrest
�
Grip the back of seat cushion1 and
fold forward.
�
Push the rear seat head restraints all
the way in.
�
Pull the handle in the trunk.
The seat backrest is released and the
head restraints fold back.
�
Fold the seat backrest forward.
iIf tall persons have occupied the driv-
er’s and front passenger seats, it may
be necessary to move these seats for-
ward slightly in order to fold the rear
seat backrests forward.
iI f t h e r e a r c e n t e r s e a t i s t o b e o c c u p i e d
while driving, it may be necessary to
fold the seat belt buckle up again.
!Make sure the head restraints fit all the
way into the seat cushion pockets. This
will prevent the backrests from being
damaged during loading.
Page 238 of 442
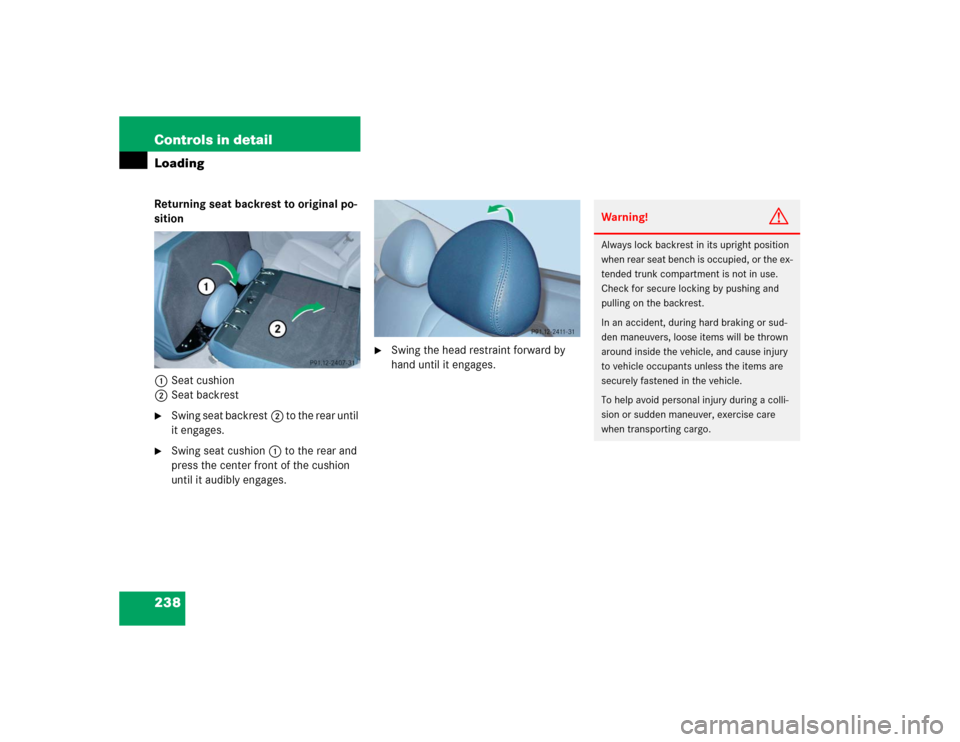
238 Controls in detailLoadingReturning seat backrest to original po-
sition
1Seat cushion
2Seat backrest�
Swing seat backrest2 to the rear until
it engages.
�
Swing seat cushion1 to the rear and
press the center front of the cushion
until it audibly engages.
�
Swing the head restraint forward by
hand until it engages.
Warning!
G
Always lock backrest in its upright position
when rear seat bench is occupied, or the ex-
tended trunk compartment is not in use.
Check for secure locking by pushing and
pulling on the backrest.
In an accident, during hard braking or sud-
den maneuvers, loose items will be thrown
around inside the vehicle, and cause injury
to vehicle occupants unless the items are
securely fastened in the vehicle.
To help avoid personal injury during a colli-
sion or sudden maneuver, exercise care
when transporting cargo.
Page 240 of 442

240 Controls in detailLoadingLoading instructions
The total load weight including vehicle oc-
cupants and luggage / cargo should not ex-
ceed the vehicle capacity weight indicated
on the certification tag which can be found
on the left door pillar.The handling characteristics of a fully load-
ed vehicle depend greatly on the load dis-
tribution. It is therefore recommended to
load the vehicle according to the illustra-
tions shown, with the heaviest items being
placed towards the front of the vehicle.
Always place items being carried against
front or rear seat backrests, and fasten
them as securely as possible.
The heaviest portion of the cargo should al-
ways be kept as low as possible since it in-
fluences the handling characteristics of
the vehicle.
Warning!
G
Always fasten items being carried as secure-
ly as possible.
In an accident, during hard braking or sud-
den maneuvers, loose items will be thrown
around inside the vehicle and can cause in-
jury to vehicle occupants unless the items
are securely fastened in the vehicle.
To help avoid personal injury during a colli-
sion or sudden maneuver, exercise care
when transporting cargo. Put luggage or car-
go in the trunk if possible. Do not pile lug-
gage or cargo higher than the seat backs.
Do not place anything on the rear-window
shelf.
Never drive vehicle with trunk open. Deadly
carbon monoxide (CO) gases may enter ve-
hicle interior resulting in unconsciousness
and death.
Page 242 of 442

242 Controls in detailUseful features
�Useful featuresInterior storage spaces Parcel net in front passenger footwell
A small convenience parcel net is located
in the front passenger footwell. It is for
small and light items, such as road maps,
mail, etc.Glove box
1Glove box lid release
2Compartment for mobile
phone / glasses
Opening the glove box
�
Push lid release1.
The glove box lid opens downward.
Closing the glove box
�
Push lid up to close.
Warning!
G
To help avoid personal injury during a colli-
sion or sudden maneuver, exercise care
when stowing objects in the vehicle. Put lug-
g a g e o r c a r g o i n t h e t r u n k i f p o s s i b l e . D o n o t
pile luggage or cargo higher than the seat
backs. Do not place anything on the shelf
below the rear window.
Luggage nets cannot secure hard or heavy
objects.
Keep compartment lids closed. This will help
to prevent stored objects from being thrown
about and injuring vehicle occupants during
an accident.
Warning!
G
The parcel net is intended for storing
light-weight items only.
Heavy objects, objects with sharp edges or
fragile objects may not be transported in the
parcel net.
The parcel net cannot protect transported
goods in the event of an accident.
Page 244 of 442
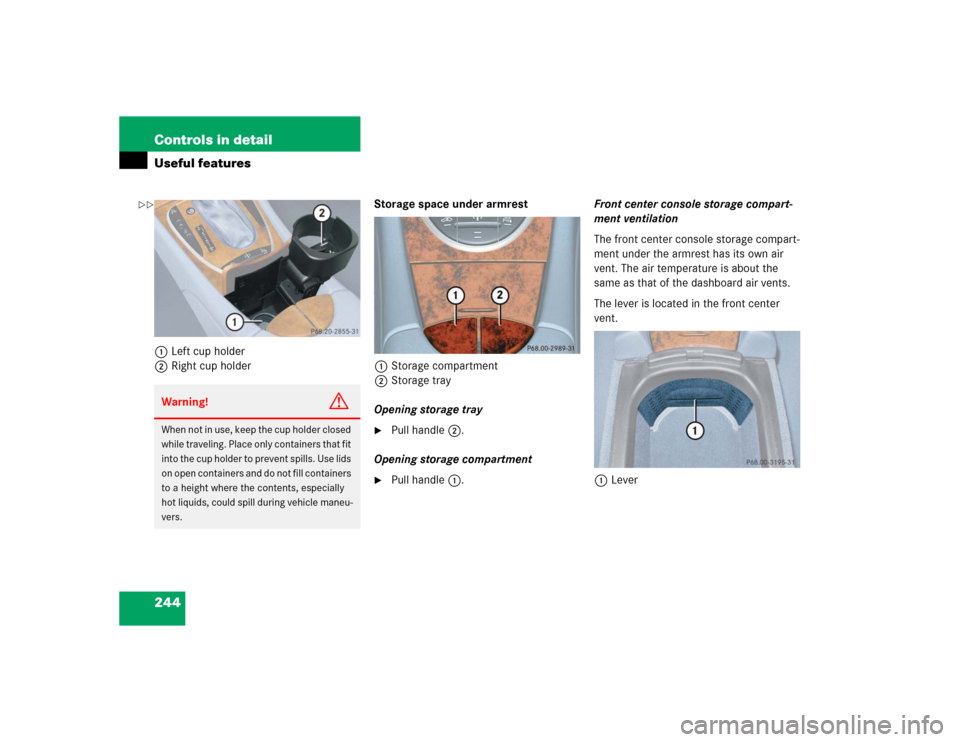
244 Controls in detailUseful features1Left cup holder
2Right cup holderStorage space under armrest
1Storage compartment
2Storage tray
Opening storage tray
�
Pull handle2.
Opening storage compartment
�
Pull handle1.Front center console storage compart-
ment ventilation
The front center console storage compart-
ment under the armrest has its own air
vent. The air temperature is about the
same as that of the dashboard air vents.
The lever is located in the front center
vent.
1Lever
Warning!
G
When not in use, keep the cup holder closed
while traveling. Place only containers that fit
into the cup holder to prevent spills. Use lids
on open containers and do not fill containers
to a height where the contents, especially
hot liquids, could spill during vehicle maneu-
vers.
��
Page 245 of 442
245 Controls in detail
Useful features
�
To open air vent slide the lever up.
�
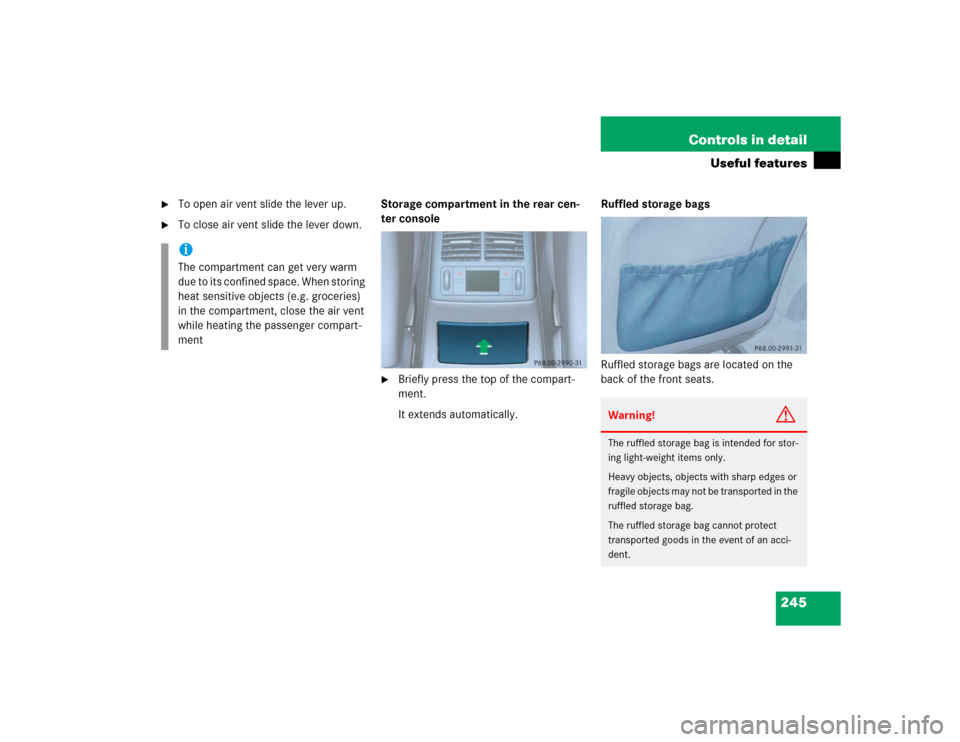
To close air vent slide the lever down.Storage compartment in the rear cen-
ter console
�
Briefly press the top of the compart-
ment.
It extends automatically.Ruffled storage bags
Ruffled storage bags are located on the
back of the front seats.
iThe compartment can get very warm
due to its confined space. When storing
heat sensitive objects (e.g. groceries)
in the compartment, close the air vent
while heating the passenger compart-
ment
Warning!
G
The ruffled storage bag is intended for stor-
ing light-weight items only.
Heavy objects, objects with sharp edges or
fragile objects may not be transported in the
ruffled storage bag.
The ruffled storage bag cannot protect
transported goods in the event of an acci-
dent.