Page 108 of 440
108 Controls in detailSeatsRemoving and installing front seat head restraints
Information on head restraint adjustment
can be found in the “Getting started” sec-
tion (
�page 36).
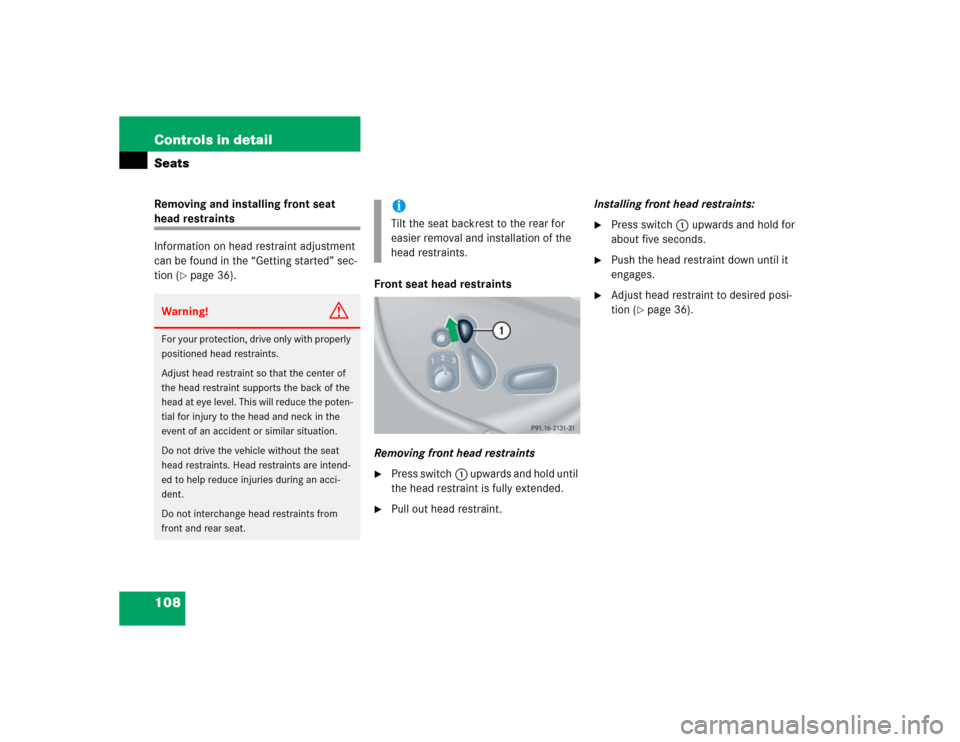
Front seat head restraints
Removing front head restraints
�
Press switch1 upwards and hold until
the head restraint is fully extended.
�
Pull out head restraint.Installing front head restraints:
�
Press switch1 upwards and hold for
about five seconds.
�
Push the head restraint down until it
engages.
�
Adjust head restraint to desired posi-
tion (
�page 36).
Warning!
G
For your protection, drive only with properly
positioned head restraints.
Adjust head restraint so that the center of
the head restraint supports the back of the
head at eye level. This will reduce the poten-
tial for injury to the head and neck in the
event of an accident or similar situation.
Do not drive the vehicle without the seat
head restraints. Head restraints are intend-
ed to help reduce injuries during an acci-
dent.
Do not interchange head restraints from
front and rear seat.
iTilt the seat backrest to the rear for
easier removal and installation of the
head restraints.
Page 109 of 440
109 Controls in detailSeats
Rear seats head restraints
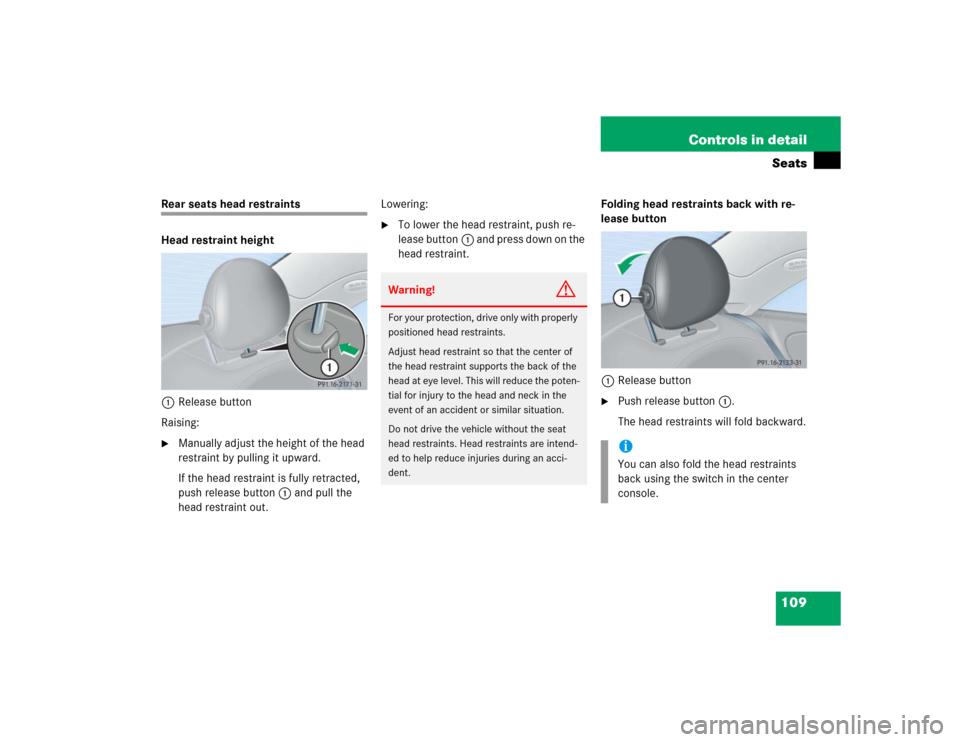
Head restraint height
1Release button
Raising:�
Manually adjust the height of the head
restraint by pulling it upward.
If the head restraint is fully retracted,
push release button1 and pull the
head restraint out.Lowering:
�
To lower the head restraint, push re-
lease button1 and press down on the
head restraint.Folding head restraints back with re-
lease button
1Release button
�
Push release button1.
The head restraints will fold backward.
Warning!
G
For your protection, drive only with properly
positioned head restraints.
Adjust head restraint so that the center of
the head restraint supports the back of the
head at eye level. This will reduce the poten-
tial for injury to the head and neck in the
event of an accident or similar situation.
Do not drive the vehicle without the seat
head restraints. Head restraints are intend-
ed to help reduce injuries during an acci-
dent.
iYou can also fold the head restraints
back using the switch in the center
console.
Page 110 of 440
110 Controls in detailSeatsFolding head restraints back with
switch in the center console
1Head restraint release button�
Start the engine.
�
Press the symbol-side on the rocker
switch1 to release the head re-
straints.
The head restraints will fold backward.Placing rear head restraints upright
�
Pull the rear head restraint forward un-
til it locks into position.
Head restraint tilt
Two different head restraint angle posi-
tions are available.
�
Press the release button and tilt the
head restraint to the desired position.
Warning!
G
For safety reasons, always drive with the
rear head restraints in the upright position
when the rear seats are occupied.
Keep the area around head restraints clear
of articles (e.g. clothing) to not obstruct the
folding operation of the head restraints.
!Make sure the head restraints engage
when placing them upright. Otherwise
their protective function cannot be as-
sured.
Page 111 of 440
111 Controls in detailSeats
Removing and installing rear seats
head restraints
1Release button
Removing rear seat head restraints
�
Fold back head restraint.
�
Pull head restraint to its highest posi-
tion.
�
Push release button1 and pull out
head restraint.Installing rear head restraints
�
Insert head restraint and push it down
until it engages.
�
Push release button1 and adjust
head restraint to desired position.
Warning!
G
For your protection, drive only with properly
positioned head restraints.
Adjust head restraint so that the center of
the head restraint supports the back of the
head at eye level. This will reduce the poten-
tial for injury to the head and neck in the
event of an accident or similar situation.
Do not drive the vehicle without the seat
head restraints. Head restraints are intend-
ed to help reduce injuries during an acci-
dent.
Do not interchange head restraints from
front and rear seat.
Page 112 of 440
112 Controls in detailSeatsMulticontour seat*
The multicontour seat has a movable seat
cushion and inflatable air cushions built
into the backrest to provide additional lum-
bar and side support.
The seat cushion movement, backrest
cushion height and curvature can be con-
tinuously varied with switches on the right
side of the seat after starting the engine.
1Seat cushion depth
2Backrest bottom
3Backrest center
4Side bolster adjustment
�
Start the engine.
Seat cushion depth
�
Adjust the seat cushion depth to the
length of your upper leg using
switch1.
Backrest contour
�
Adjust the contour of the backrest to
the desired position using switches2
and3.
Backrest side bolsters
�
Adjust the backrest side bolsters so
that they provide good lateral support
using switch4.
Page 113 of 440
113 Controls in detailSeats
Seat ventilation*
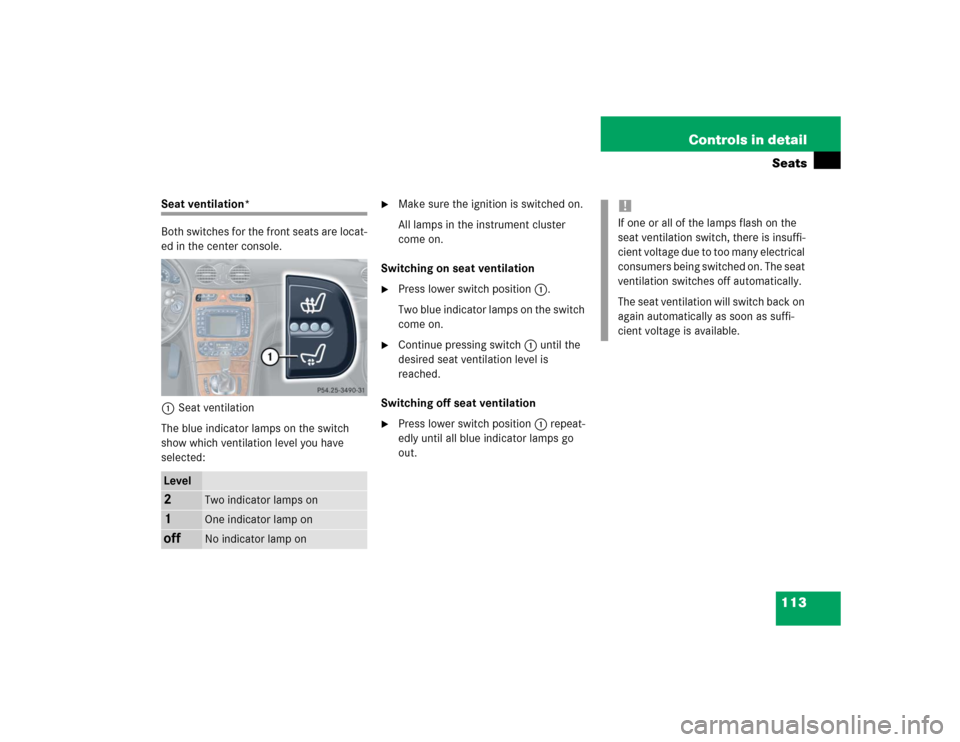
Both switches for the front seats are locat-
ed in the center console.
1Seat ventilation
The blue indicator lamps on the switch
show which ventilation level you have
selected:
�
Make sure the ignition is switched on.
All lamps in the instrument cluster
come on.
Switching on seat ventilation
�
Press lower switch position1.
Two blue indicator lamps on the switch
come on.
�
Continue pressing switch1 until the
desired seat ventilation level is
reached.
Switching off seat ventilation
�
Press lower switch position1 repeat-
edly until all blue indicator lamps go
out.
Level2
Two indicator lamps on
1
One indicator lamp on
off
No indicator lamp on
!If one or all of the lamps flash on the
seat ventilation switch, there is insuffi-
cient voltage due to too many electrical
consumers being switched on. The seat
ventilation switches off automatically.
The seat ventilation will switch back on
again automatically as soon as suffi-
cient voltage is available.
Page 114 of 440
114 Controls in detailSeatsSeat heating*
Vehicles without seat ventilation*
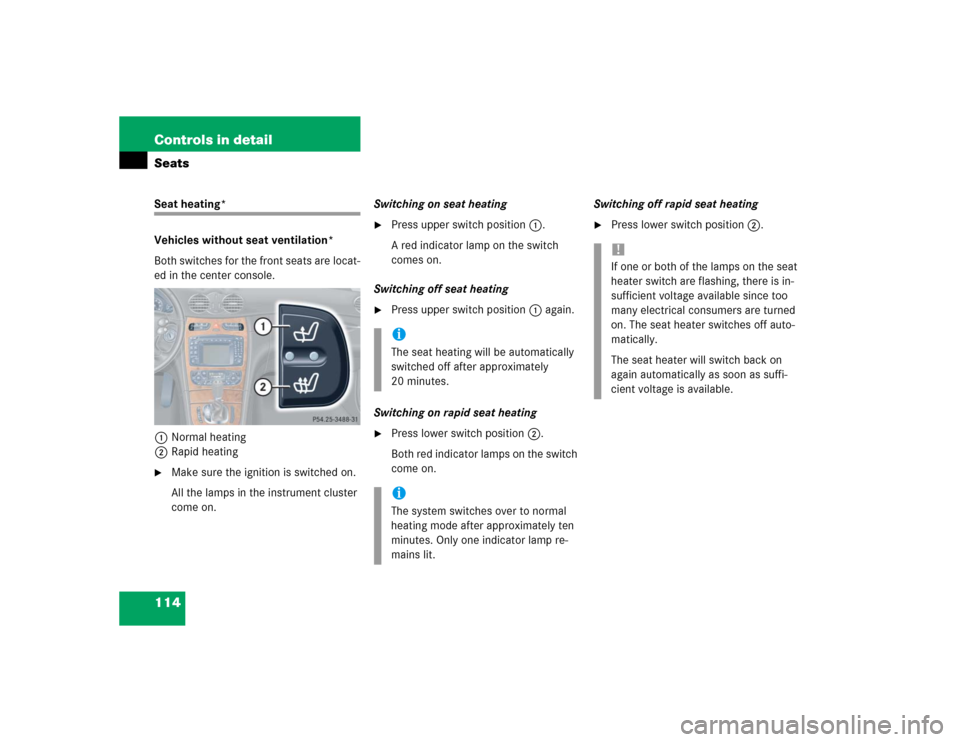
Both switches for the front seats are locat-
ed in the center console.
1Normal heating
2Rapid heating�
Make sure the ignition is switched on.
All the lamps in the instrument cluster
come on.Switching on seat heating
�
Press upper switch position1.
A red indicator lamp on the switch
comes on.
Switching off seat heating
�
Press upper switch position1 again.
Switching on rapid seat heating
�
Press lower switch position2.
Both red indicator lamps on the switch
come on.Switching off rapid seat heating
�
Press lower switch position2.
iThe seat heating will be automatically
switched off after approximately
20 minutes. iThe system switches over to normal
heating mode after approximately ten
minutes. Only one indicator lamp re-
mains lit.
!If one or both of the lamps on the seat
heater switch are flashing, there is in-
sufficient voltage available since too
many electrical consumers are turned
on. The seat heater switches off auto-
matically.
The seat heater will switch back on
again automatically as soon as suffi-
cient voltage is available.
Page 115 of 440
115 Controls in detailSeats
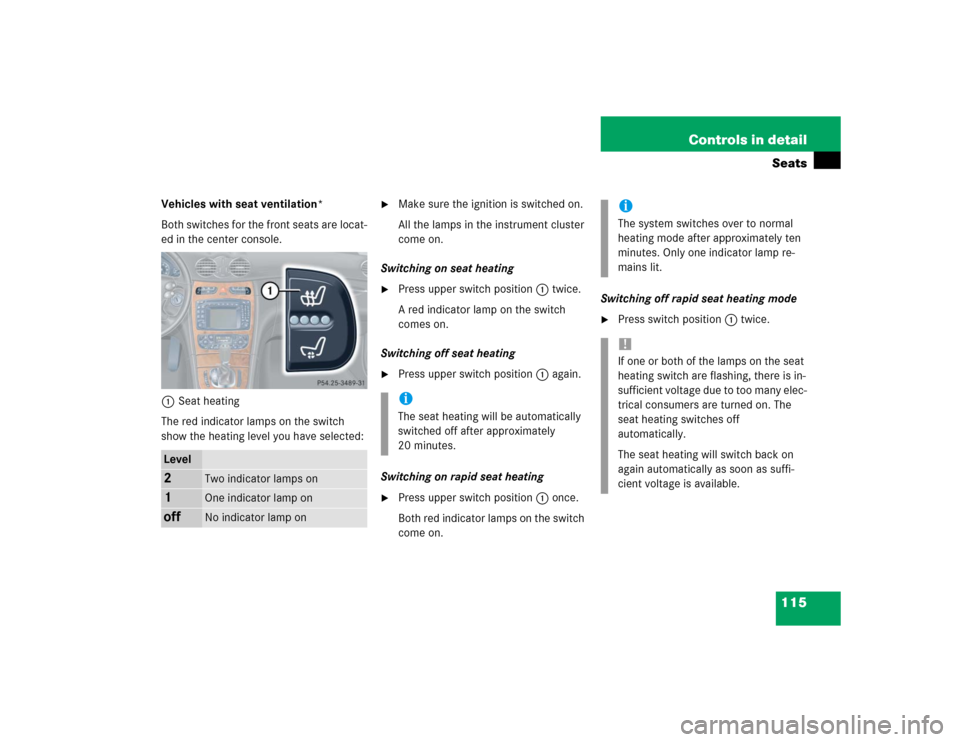
Vehicles with seat ventilation*
Both switches for the front seats are locat-
ed in the center console.
1Seat heating
The red indicator lamps on the switch
show the heating level you have selected:
�
Make sure the ignition is switched on.
All the lamps in the instrument cluster
come on.
Switching on seat heating
�
Press upper switch position1 twice.
A red indicator lamp on the switch
comes on.
Switching off seat heating
�
Press upper switch position1 again.
Switching on rapid seat heating
�
Press upper switch position1 once.
Both red indicator lamps on the switch
come on. Switching off rapid seat heating mode
�
Press switch position1 twice.
Level2
Two indicator lamps on
1
One indicator lamp on
off
No indicator lamp on
iThe seat heating will be automatically
switched off after approximately
20 minutes.
iThe system switches over to normal
heating mode after approximately ten
minutes. Only one indicator lamp re-
mains lit. !If one or both of the lamps on the seat
heating switch are flashing, there is in-
sufficient voltage due to too many elec-
trical consumers are turned on. The
seat heating switches off
automatically.
The seat heating will switch back on
again automatically as soon as suffi-
cient voltage is available.