Page 113 of 440
113 Controls in detailSeats
Seat ventilation*
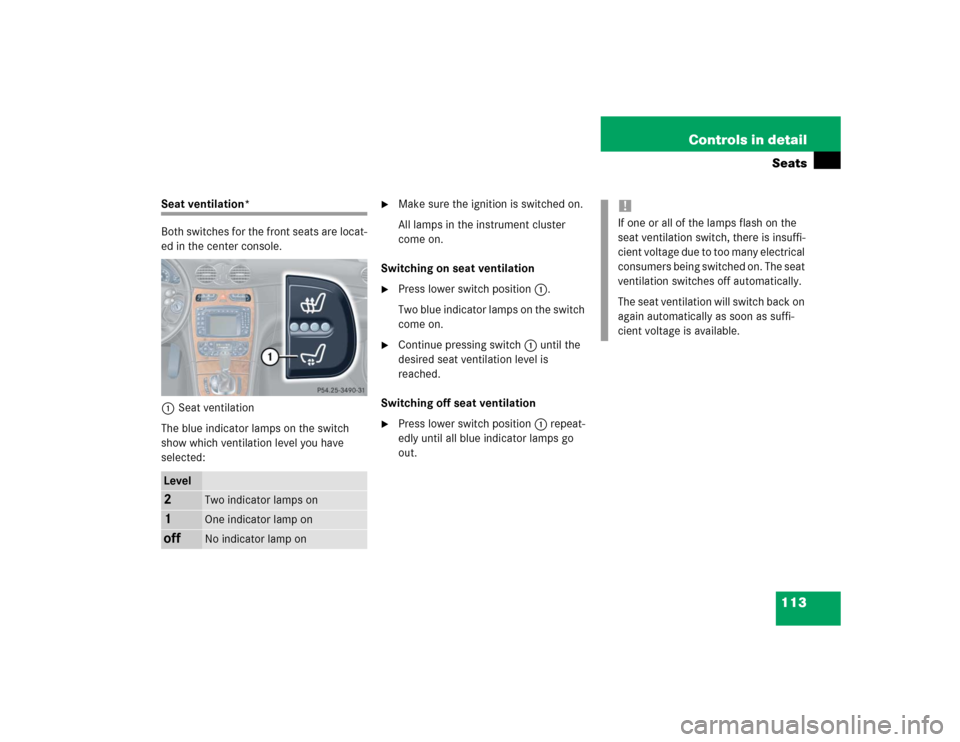
Both switches for the front seats are locat-
ed in the center console.
1Seat ventilation
The blue indicator lamps on the switch
show which ventilation level you have
selected:
�
Make sure the ignition is switched on.
All lamps in the instrument cluster
come on.
Switching on seat ventilation
�
Press lower switch position1.
Two blue indicator lamps on the switch
come on.
�
Continue pressing switch1 until the
desired seat ventilation level is
reached.
Switching off seat ventilation
�
Press lower switch position1 repeat-
edly until all blue indicator lamps go
out.
Level2
Two indicator lamps on
1
One indicator lamp on
off
No indicator lamp on
!If one or all of the lamps flash on the
seat ventilation switch, there is insuffi-
cient voltage due to too many electrical
consumers being switched on. The seat
ventilation switches off automatically.
The seat ventilation will switch back on
again automatically as soon as suffi-
cient voltage is available.
Page 114 of 440
114 Controls in detailSeatsSeat heating*
Vehicles without seat ventilation*
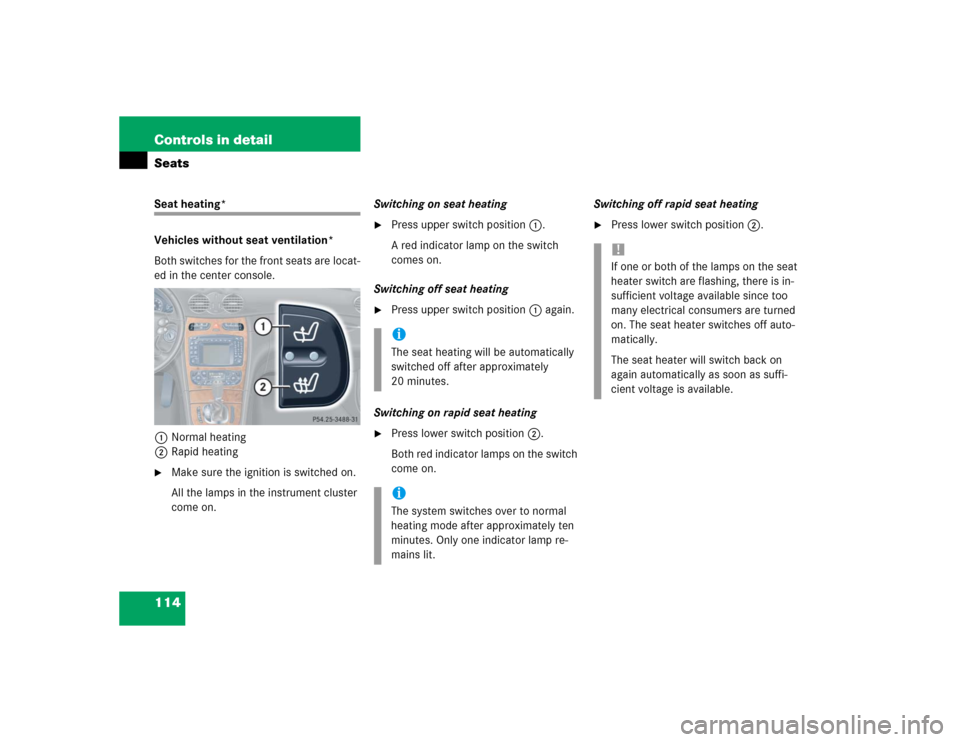
Both switches for the front seats are locat-
ed in the center console.
1Normal heating
2Rapid heating�
Make sure the ignition is switched on.
All the lamps in the instrument cluster
come on.Switching on seat heating
�
Press upper switch position1.
A red indicator lamp on the switch
comes on.
Switching off seat heating
�
Press upper switch position1 again.
Switching on rapid seat heating
�
Press lower switch position2.
Both red indicator lamps on the switch
come on.Switching off rapid seat heating
�
Press lower switch position2.
iThe seat heating will be automatically
switched off after approximately
20 minutes. iThe system switches over to normal
heating mode after approximately ten
minutes. Only one indicator lamp re-
mains lit.
!If one or both of the lamps on the seat
heater switch are flashing, there is in-
sufficient voltage available since too
many electrical consumers are turned
on. The seat heater switches off auto-
matically.
The seat heater will switch back on
again automatically as soon as suffi-
cient voltage is available.
Page 115 of 440
115 Controls in detailSeats
Vehicles with seat ventilation*
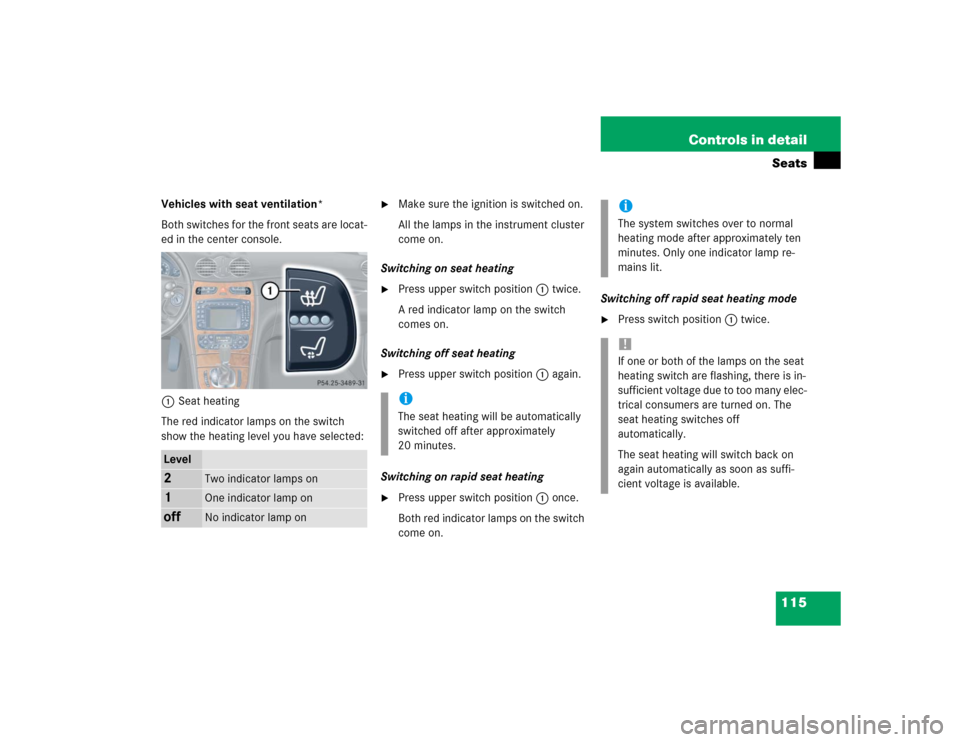
Both switches for the front seats are locat-
ed in the center console.
1Seat heating
The red indicator lamps on the switch
show the heating level you have selected:
�
Make sure the ignition is switched on.
All the lamps in the instrument cluster
come on.
Switching on seat heating
�
Press upper switch position1 twice.
A red indicator lamp on the switch
comes on.
Switching off seat heating
�
Press upper switch position1 again.
Switching on rapid seat heating
�
Press upper switch position1 once.
Both red indicator lamps on the switch
come on. Switching off rapid seat heating mode
�
Press switch position1 twice.
Level2
Two indicator lamps on
1
One indicator lamp on
off
No indicator lamp on
iThe seat heating will be automatically
switched off after approximately
20 minutes.
iThe system switches over to normal
heating mode after approximately ten
minutes. Only one indicator lamp re-
mains lit. !If one or both of the lamps on the seat
heating switch are flashing, there is in-
sufficient voltage due to too many elec-
trical consumers are turned on. The
seat heating switches off
automatically.
The seat heating will switch back on
again automatically as soon as suffi-
cient voltage is available.
Page 116 of 440
116 Controls in detailMemory function
�Memory function
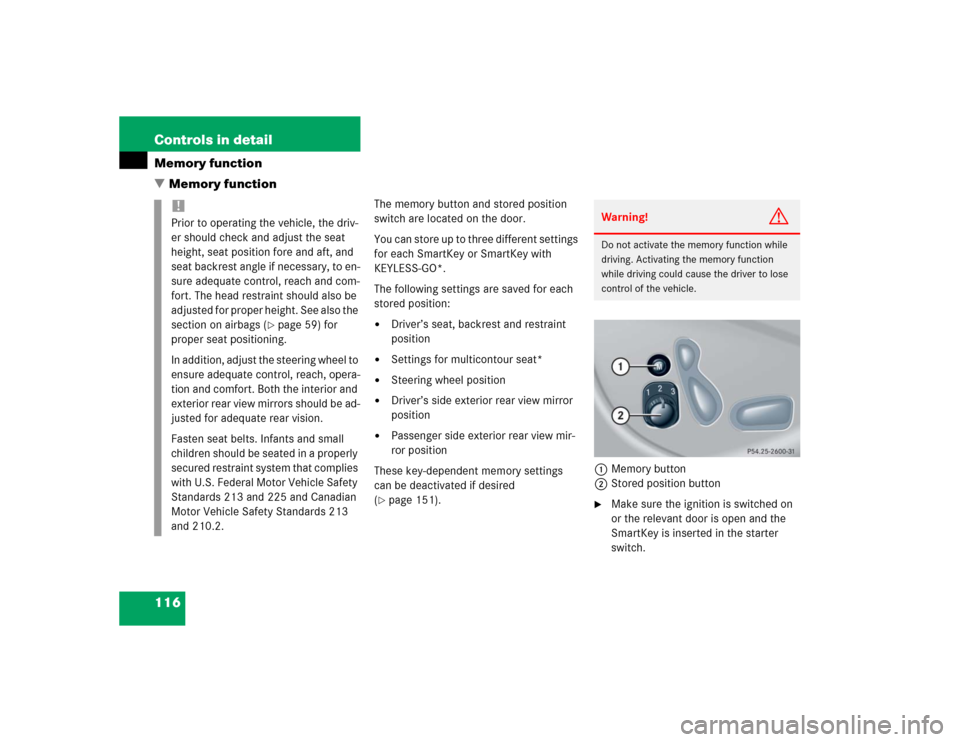
The memory button and stored position
switch are located on the door.
You can store up to three different settings
for each SmartKey or SmartKey with
KEYLESS-GO*.
The following settings are saved for each
stored position:�
Driver’s seat, backrest and restraint
position
�
Settings for multicontour seat*
�
Steering wheel position
�
Driver’s side exterior rear view mirror
position
�
Passenger side exterior rear view mir-
ror position
These key-dependent memory settings
can be deactivated if desired
(
�page 151).1Memory button
2Stored position button
�
Make sure the ignition is switched on
or the relevant door is open and the
SmartKey is inserted in the starter
switch.
!Prior to operating the vehicle, the driv-
er should check and adjust the seat
height, seat position fore and aft, and
seat backrest angle if necessary, to en-
sure adequate control, reach and com-
fort. The head restraint should also be
adjusted for proper height. See also the
section on airbags (
�page 59) for
proper seat positioning.
In addition, adjust the steering wheel to
ensure adequate control, reach, opera-
tion and comfort. Both the interior and
exterior rear view mirrors should be ad-
justed for adequate rear vision.
Fasten seat belts. Infants and small
children should be seated in a properly
secured restraint system that complies
with U.S. Federal Motor Vehicle Safety
Standards 213 and 225 and Canadian
Motor Vehicle Safety Standards 213
and 210.2.
Warning!
G
Do not activate the memory function while
driving. Activating the memory function
while driving could cause the driver to lose
control of the vehicle.
Page 118 of 440
118 Controls in detailMemory functionStoring exterior rear view mirror park-ing position
For easier parking, you can adjust the pas-
senger-side exterior rear view mirror so
that you can see the right rear wheel as
soon as you engage reverse gearR.
For information on activating the parking
position feature, see “Setting parking posi-
tion for exterior rear view mirror”
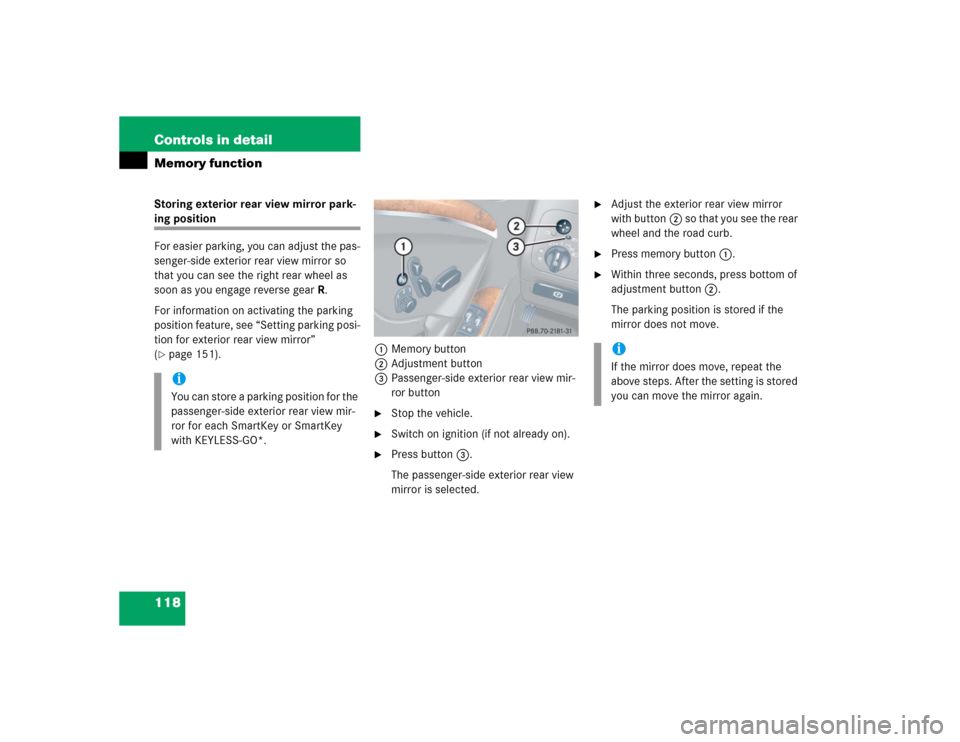
(�page 151).1Memory button
2Adjustment button
3Passenger-side exterior rear view mir-
ror button
�
Stop the vehicle.
�
Switch on ignition (if not already on).
�
Press button3.
The passenger-side exterior rear view
mirror is selected.
�
Adjust the exterior rear view mirror
with button2 so that you see the rear
wheel and the road curb.
�
Press memory button1.
�
Within three seconds, press bottom of
adjustment button2.
The parking position is stored if the
mirror does not move.
iYou can store a parking position for the
passenger-side exterior rear view mir-
ror for each SmartKey or SmartKey
with KEYLESS-GO*.
iIf the mirror does move, repeat the
above steps. After the setting is stored
you can move the mirror again.
Page 123 of 440
123 Controls in detail
Lighting
Combination switch
The combination switch is located on the
left side of the steering column.
1High beam
2High beam flasherSwitching on high beams
�
Turn exterior lamp switch to
positionB or toU
(�page 119).
�
Push the combination switch in
direction1.
The high beam indicator A on the
instrument cluster is illuminated
(�page 22).
High beam flasher
�
Pull the combination switch briefly in
direction2.
Hazard warning flasher
The hazard warning flasher can be activat-
ed with the ignition switched on or off. It is
activated automatically when an airbag is
deployed.
The switch is located on the center con-
sole.
1Hazard warning flasher switch
Switching on the hazard warning
flasher�
Press the hazard warning flasher
switch.
All turn signals will flash.
Page 126 of 440
126 Controls in detailInstrument cluster
�Instrument clusterA full view illustration of the instrument
cluster can be found in the “At a glance”
section of this manual (
�page 22).
The instrument cluster is activated when
you
�
open a door
�
turn on the ignition
�
press the reset button,
see (
�page 126)
�
switch on the exterior lamps
You can change the instrument cluster set-
tings in the Instrument cluster submenu of
the control system (
�page 142).
Instrument cluster illumination
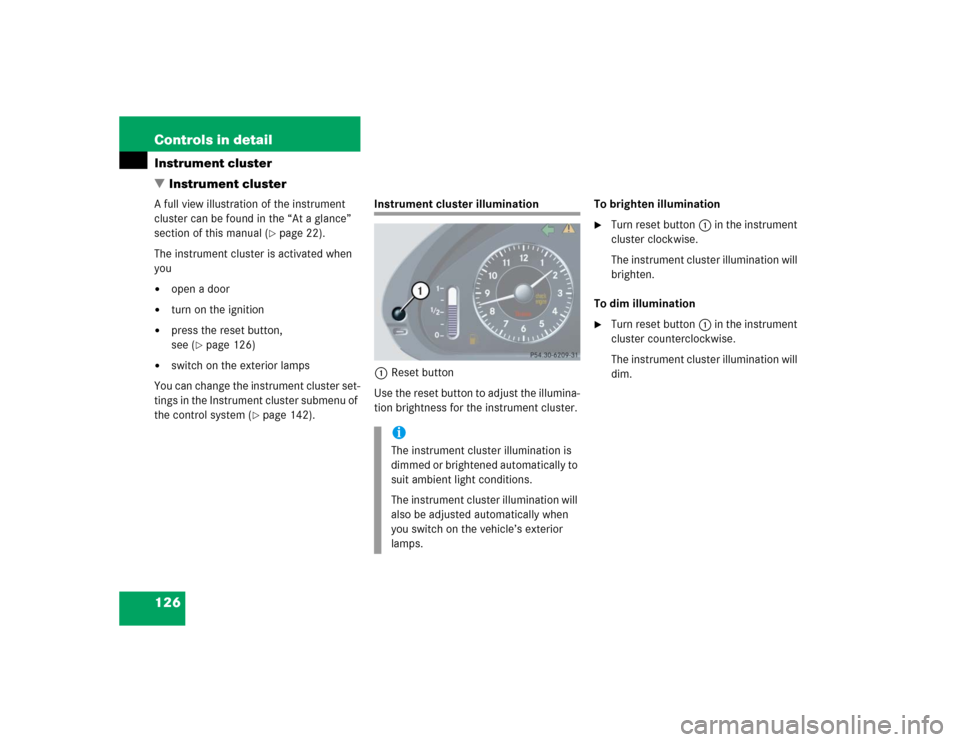
1Reset button
Use the reset button to adjust the illumina-
tion brightness for the instrument cluster.To brighten illumination
�
Turn reset button1 in the instrument
cluster clockwise.
The instrument cluster illumination will
brighten.
To dim illumination
�
Turn reset button1 in the instrument
cluster counterclockwise.
The instrument cluster illumination will
dim.
iThe instrument cluster illumination is
dimmed or brightened automatically to
suit ambient light conditions.
The instrument cluster illumination will
also be adjusted automatically when
you switch on the vehicle’s exterior
lamps.
Page 166 of 440
166 Controls in detailGood visibility
�Good visibilityWindshield wipers
More information on the windshield wipers
can be found in the “Getting started” sec-
tion (
�page 48).
A rain sensor automatically controls the
windshield wipers depending on how wet
the windshield is.
�
Switch ignition on.
�
Set the wiper switch to position I
(�page 49).
After the initial wipe, pauses between
wipes are automatically controlled by the
rain sensor.
Headlamp cleaning system*
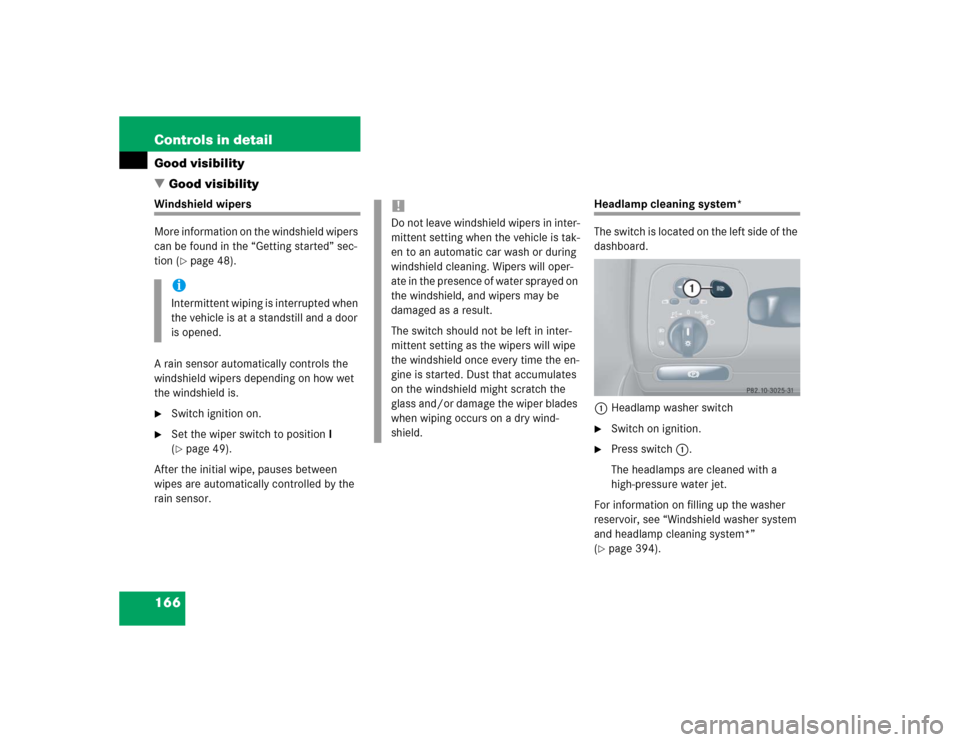
The switch is located on the left side of the
dashboard.
1Headlamp washer switch�
Switch on ignition.
�
Press switch1.
The headlamps are cleaned with a
high-pressure water jet.
For information on filling up the washer
reservoir, see “Windshield washer system
and headlamp cleaning system*”
(
�page 394).
iIntermittent wiping is interrupted when
the vehicle is at a standstill and a door
is opened.
!Do not leave windshield wipers in inter-
mittent setting when the vehicle is tak-
en to an automatic car wash or during
windshield cleaning. Wipers will oper-
ate in the presence of water sprayed on
the windshield, and wipers may be
damaged as a result.
The switch should not be left in inter-
mittent setting as the wipers will wipe
the windshield once every time the en-
gine is started. Dust that accumulates
on the windshield might scratch the
glass and/or damage the wiper blades
when wiping occurs on a dry wind-
shield.