Page 355 of 440
.
�
Twist bulb socket1 counterclockwise
and pull out.
�
Push bulb into socket, turn")
355 Practical hints
Replacing bulbs
Front turn signal lamp bulb�
Switch off the lights.
�
Open the hood (
�page 281).
�
Twist bulb socket1 counterclockwise
and pull out.
�
Push bulb into socket, turn counter-
clockwise and remove.
�
Insert new bulb in socket, push in and
twist clockwise.
�
Reinsert bulb socket in lamp and twist
clockwise.Parking and standing lamp bulb
�
Switch off the lights.
�
Open the hood (
�page 281).
�
Turn housing cover2 counterclock-
wise and remove.
�
Pull out the bulb socket with the bulb.
�
Pull the bulb out of the bulb socket.
�
Insert a new bulb in the socket.
�
Reinstall the bulb socket.
�
Align housing cover and click into
place.
Side marker lamp bulb�
Switch off the lights.
�
Carefully slide lamp towards rear.
�
Remove front end first.
�
Twist bulb socket counterclockwise
and pull out.
�
Pull bulb out of the bulb socket.
�
Insert new bulb in socket.
�
Reinstall bulb socket, push in and twist
clockwise.
�
To reinstall lamp, set rear end in
bumper and let front end snap into
place.
Page 356 of 440
356 Practical hintsReplacing bulbsReplacing bulbs for rear lamps
Tail lamp assemblies
1Brake lamp
2Turn signal lamp
3Backup lamp
4Standing and side marker lamp
5Rear fog lamp (driver’s side)/tail�
Switch off the lights.
�
Open trunk.
�
Swing the trim panel covering the cor-
responding rear lights to the side.
�
Squeeze tabs together and remove the
bulb holder with the bulb.
�
Twist bulb counterclockwise and pull
out of bulb holder.
�
Insert new bulb into the holder and turn
it clockwise.
�
Reinstall bulb holder. The tabs must au-
dibly click.
�
Close trim panel.
�
Place the housing cover back on so
that its tabs click in place. License plate lamp
1Screws
�
Switch off the lights.
�
Loosen both screws1 and remove
lamp.
�
Replace the tubular lamp and reinstall
lamp.
�
Retighten the screws.
Page 357 of 440

357 Practical hints
Replacing wiper blades
�Replacing wiper blades
Removing wiper blades�
Fold the wiper arm forward.
1Lock
2Unlock
�
Pull the tab in direction of arrow2 and
remove windshield wiper.
Installing wiper blades�
Slide the wiper blade into the cutout on
the wiper arm.
�
Slide the tab back in the direction of
arrow1 until it audibly engages.
�
Fold the wiper arm backward to rest on
the windshield. Make sure you hold on
to the wiper when folding the wiper arm
back.
Warning!
G
For safety reasons, remove SmartKey from
starter switch before replacing a wiper
blade. Otherwise the motor could suddenly
turn on and cause injury.
!Never open the hood when the wiper
arms are folded forward.
Hold on to the wiper when folding the
wiper arm back. If released, the force
of the impact from the tensioning
spring could crack the windshield.
Do not allow the wiper arms to contact
the windshield glass without a wiper
blade inserted.
Make certain that the wiper blades are
properly installed. Improperly installed
wiper blades may cause windshield
damage.
For your convenience, we recommend
that you have this work carried out by
an authorized Mercedes-Benz Center.
Page 358 of 440

358 Practical hintsFlat tire
�Flat tirePreparing the vehicle�
Park the vehicle as far as possible from
moving traffic on a hard surface.
�
Turn on the hazard warning flashers.
�
Engage the steering wheel lock in the
straight ahead position and set the
parking brake.
�
Move the gear selector lever toP.
�
Have any passenger exit the vehicle at
a safe distance from the roadway.
Mounting the Minispare wheelIn case of a flat tire, you may temporarily
use the spare wheel when observing the
following restrictions:
�
Do not exceed a vehicle speed of
50 mph (80 km/h).
�
Drive to the nearest tire repair facility
to have the flat tire repaired or re-
placed as appropriate.
�
Do not operate the vehicle with more
than one spare wheel mounted.
Prepare the vehicle as described on
(
�page 358).
�
Take the wheel wrench and the jack
out of the trunk (
�page 337).
�
Take the Minispare wheel and wheel
bolts out of the trunk (
�page 337).
Warning!
G
The dimensions of the Minispare wheel are
different from those of the road wheels. As
a result, the vehicle handling characteristics
change when driving with a Minispare wheel
mounted.
The spare wheel should only be used tempo-
rarily, and should be replaced with a regular
road wheel as quickly as possible.
Page 359 of 440
 or other sizable objects.
When changing wheel on a level")
359 Practical hints
Flat tire
Lifting the vehicle�
Prevent the vehicle from rolling away
by blocking wheels with wheel chocks
(not included) or other sizable objects.
When changing wheel on a level surface:
�
Place one chock in front of and one be-
hind the wheel that is diagonally oppo-
site to the wheel being changed.
When changing wheel on a hill:
�
Place chocks on the downhill side
blocking both wheels of the other axle.1Wheel wrench
�
On wheel to be changed, loosen but do
not yet remove the wheel bolts (ap-
proximately one full turn with wrench).
The jack take-up brackets are located di-
rectly behind the front wheel housings and
in front of the rear wheel housings.
Warning!
G
The jack is designed exclusively for jacking
up the vehicle at the jack take-up brackets
built into both sides of the vehicle. To help
avoid personal injury, use the jack only to lift
the vehicle during a wheel change. Never
get beneath the vehicle while it is supported
by the jack. Keep hands and feet away from
the area under the lifted vehicle. Always
firmly set parking brake and block wheels
before raising vehicle with jack.
Do not disengage parking brake while the
vehicle is raised. Be certain that the jack is
always vertical (plumb line) when in use, es-
pecially on hills. Always try to use the jack
on a level surface. Make sure the jack arm is
fully seated in the jack take-up bracket. Al-
ways lower the vehicle onto sufficient ca-
pacity jackstands before working under the
vehicle.
Page 362 of 440
362 Practical hintsFlat tire�
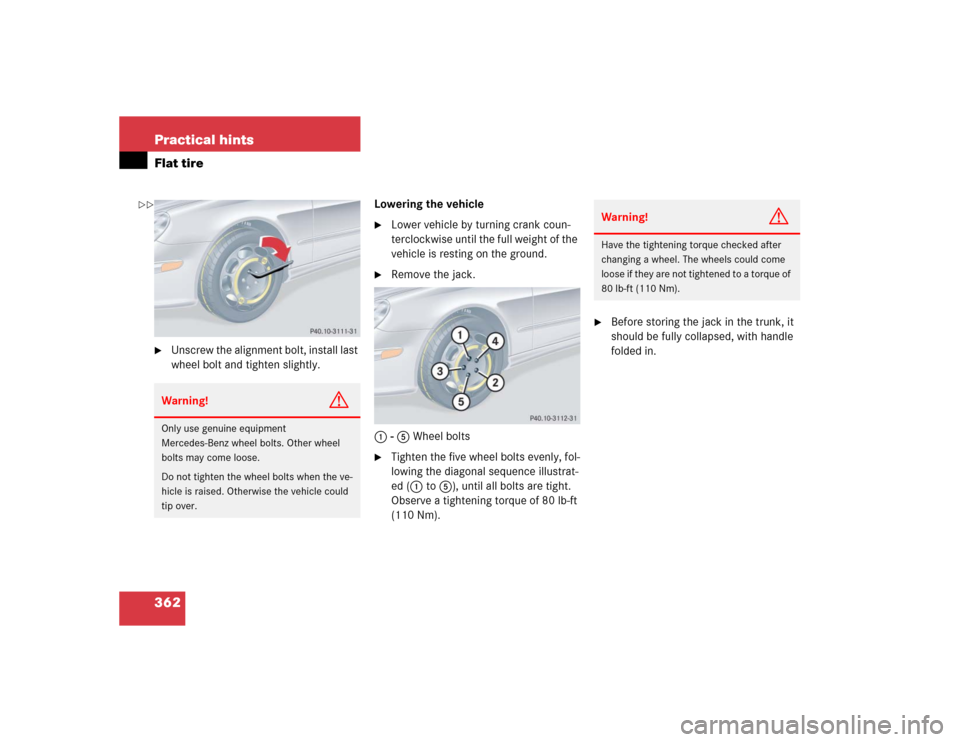
Unscrew the alignment bolt, install last
wheel bolt and tighten slightly.Lowering the vehicle
�
Lower vehicle by turning crank coun-
terclockwise until the full weight of the
vehicle is resting on the ground.
�
Remove the jack.
1 - 5 Wheel bolts
�
Tighten the five wheel bolts evenly, fol-
lowing the diagonal sequence illustrat-
ed (1 to 5), until all bolts are tight.
Observe a tightening torque of 80 lb-ft
(110 Nm).
�
Before storing the jack in the trunk, it
should be fully collapsed, with handle
folded in.
Warning!
G
Only use genuine equipment
Mercedes-Benz wheel bolts. Other wheel
bolts may come loose.
Do not tighten the wheel bolts when the ve-
hicle is raised. Otherwise the vehicle could
tip over.
Warning!
G
Have the tightening torque checked after
changing a wheel. The wheels could come
loose if they are not tightened to a torque of
80 lb-ft (110 Nm).
��
Page 364 of 440

364 Practical hintsBatteryDisconnecting the battery
1Negative terminal
2Positive terminal cover
�
Depress parking brake firmly or move
gear selector lever to positionP.
�
Turn off all electrical consumers.
�
Remove SmartKey from starter switch.
Vehicles with KEYLESS-GO*:�
Press the start / stop button until
the engine shuts off.
�
Open the driver’s door.
�
Open the hood (
�page 281).
�
Remove the filter box.
�
Disconnect the battery negative lead.
�
Remove cover2 from the positive ter-
minal.
�
Disconnect the battery positive lead.
Removing the battery�
Remove the screw securing the bat-
tery.
�
Remove the battery support and brack-
et.
�
Take out the battery.
Charging and reinstalling battery�
Charge battery in accordance with the
instructions of the battery charger
manufacturer.
�
Reinstall the charged battery. Follow
the previously described steps in re-
verse order.
Warning!
G
With a disconnected battery�
you will no longer be able to turn the
SmartKey in the starter switch and
pressing the KEYLESS-GO* start/stop
button on the gear selector lever will
have no effect
�
the gear selector lever will remain
locked in positionP
Warning!
G
Never charge a battery while still installed in
the vehicle. Gases may escape during charg-
ing and cause explosions that may result in
paint damage, corrosion or personal injury.
Page 365 of 440
365 Practical hints
Battery
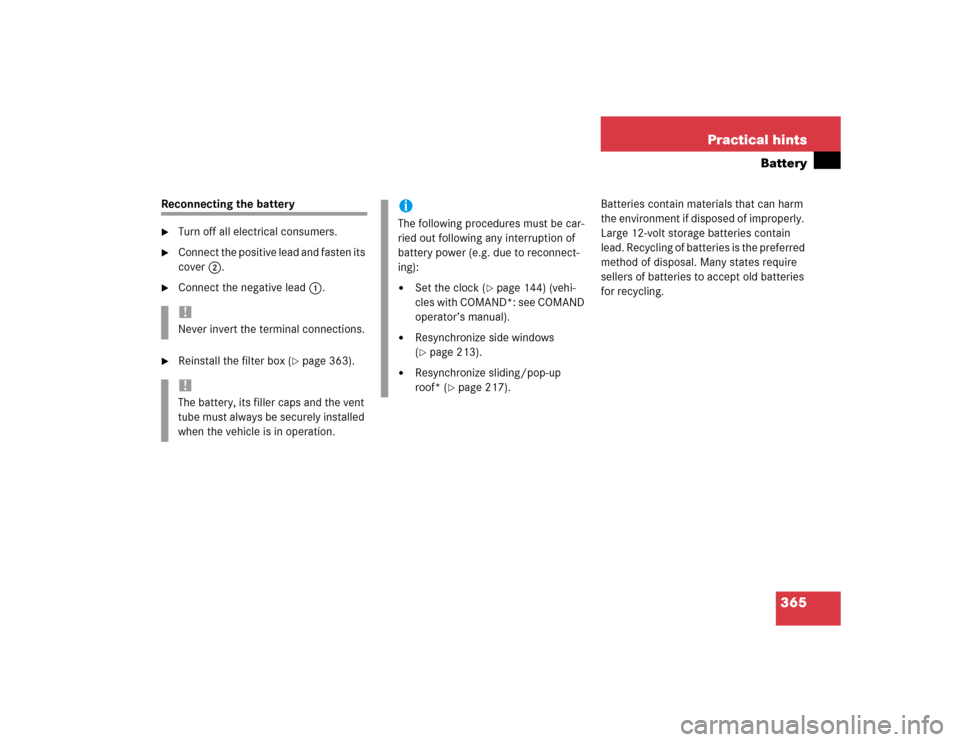
Reconnecting the battery�
Turn off all electrical consumers.
�
Connect the positive lead and fasten its
cover 2.
�
Connect the negative lead 1.
�
Reinstall the filter box (
�page 363).Batteries contain materials that can harm
the environment if disposed of improperly.
Large 12-volt storage batteries contain
lead. Recycling of batteries is the preferred
method of disposal. Many states require
sellers of batteries to accept old batteries
for recycling.
!Never invert the terminal connections.!The battery, its filler caps and the vent
tube must always be securely installed
when the vehicle is in operation.
iThe following procedures must be car-
ried out following any interruption of
battery power (e.g. due to reconnect-
ing):�
Set the clock (
�page 144) (vehi-
cles with COMAND*: see COMAND
operator’s manual).
�
Resynchronize side windows
(�page 213).
�
Resynchronize sliding/pop-up
roof* (
�page 217).