Page 99 of 418

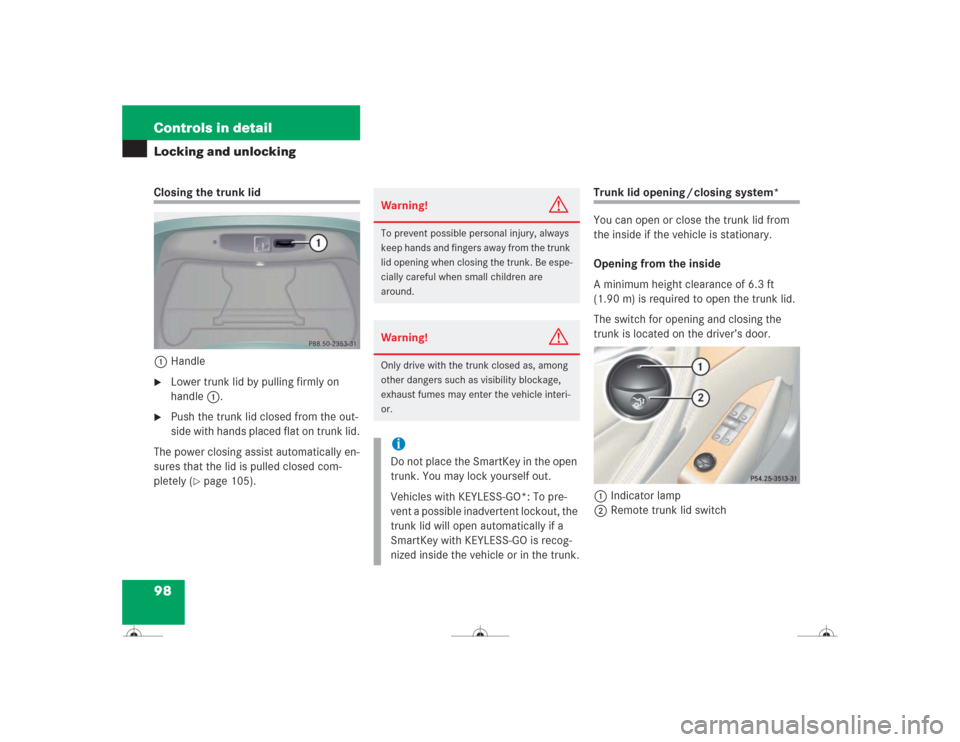
98 Controls in detailLocking and unlockingClosing the trunk lid
1Handle�
Lower trunk lid by pulling firmly on
handle1.
�
Push the trunk lid closed from the out-
side with hands placed flat on trunk lid.
The power closing assist automatically en-
sures that the lid is pulled closed com-
pletely (
�page 105).
Trunk lid opening / closing system*
You can open or close the trunk lid from
the inside if the vehicle is stationary.
Opening from the inside
A minimum height clearance of 6.3 ft
(1.90 m) is required to open the trunk lid.
The switch for opening and closing the
trunk is located on the driver’s door.
1Indicator lamp
2Remote trunk lid switch
Warning!
G
To prevent possible personal injury, always
keep hands and fingers away from the trunk
lid opening when closing the trunk. Be espe-
cially careful when small children are
around.Warning!
G
Only drive with the trunk closed as, among
other dangers such as visibility blockage,
exhaust fumes may enter the vehicle interi-
or.iDo not place the SmartKey in the open
trunk. You may lock yourself out.
Vehicles with KEYLESS-GO*: To pre-
vent a possible inadvertent lockout, the
trunk lid will open automatically if a
SmartKey with KEYLESS-GO is recog-
nized inside the vehicle or in the trunk.
Page 345 of 418

344 Practical hintsFlat tirePreparing the vehicle�
Take vehicle tool kit tray and vehicle
jack out of trunk.
�
Take the spare wheel out of wheel well
(�page 330).
Lifting the vehicle
�
Prevent the vehicle from rolling away
by blocking wheels with wheel chocks
(not included) or other sizable objects.
When changing wheel on a level surface:
�
Place one chock in front of and one be-
hind the wheel that is diagonally oppo-
site to the wheel being changed.
When changing wheel on a hill:
�
Place chocks behind the downhill sides
of both wheels of the axle not being
worked on.
�
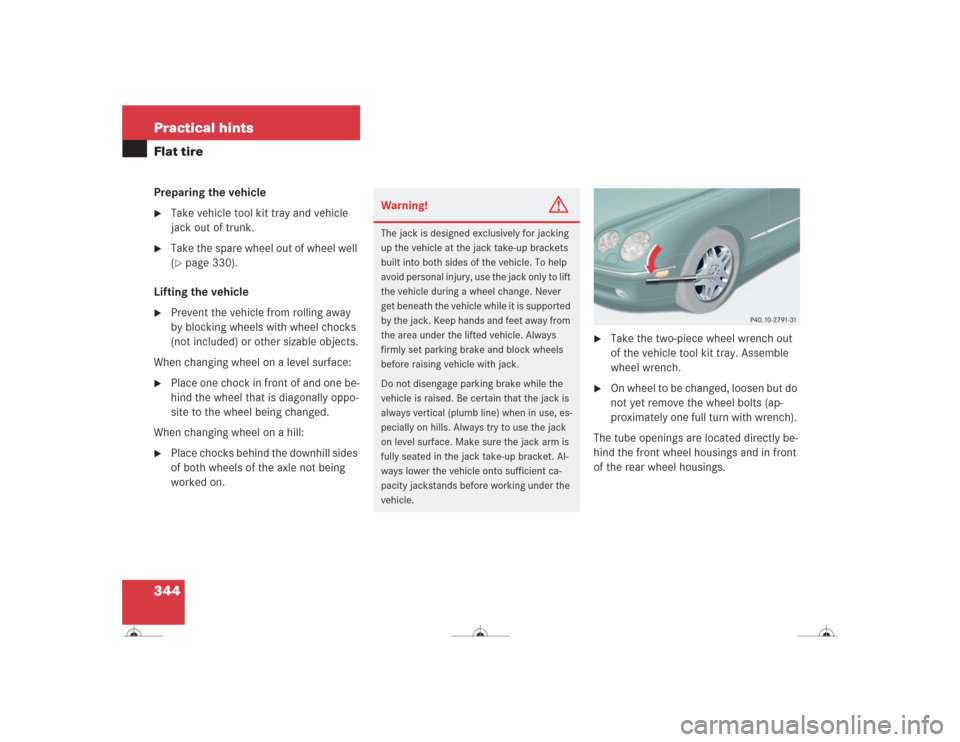
Take the two-piece wheel wrench out
of the vehicle tool kit tray. Assemble
wheel wrench.
�
On wheel to be changed, loosen but do
not yet remove the wheel bolts (ap-
proximately one full turn with wrench).
The tube openings are located directly be-
hind the front wheel housings and in front
of the rear wheel housings.
Warning!
G
The jack is designed exclusively for jacking
up the vehicle at the jack take-up brackets
built into both sides of the vehicle. To help
avoid personal injury, use the jack only to lift
the vehicle during a wheel change. Never
get beneath the vehicle while it is supported
by the jack. Keep hands and feet away from
the area under the lifted vehicle. Always
firmly set parking brake and block wheels
before raising vehicle with jack.
Do not disengage parking brake while the
vehicle is raised. Be certain that the jack is
always vertical (plumb line) when in use, es-
pecially on hills. Always try to use the jack
on level surface. Make sure the jack arm is
fully seated in the jack take-up bracket. Al-
ways lower the vehicle onto sufficient ca-
pacity jackstands before working under the
vehicle.
Page 348 of 418

347 Practical hints
Flat tire
Lowering the vehicle�
Lower vehicle by turning crank coun-
terclockwise until vehicle is resting ful-
ly on its own weight.
�
Remove the jack.
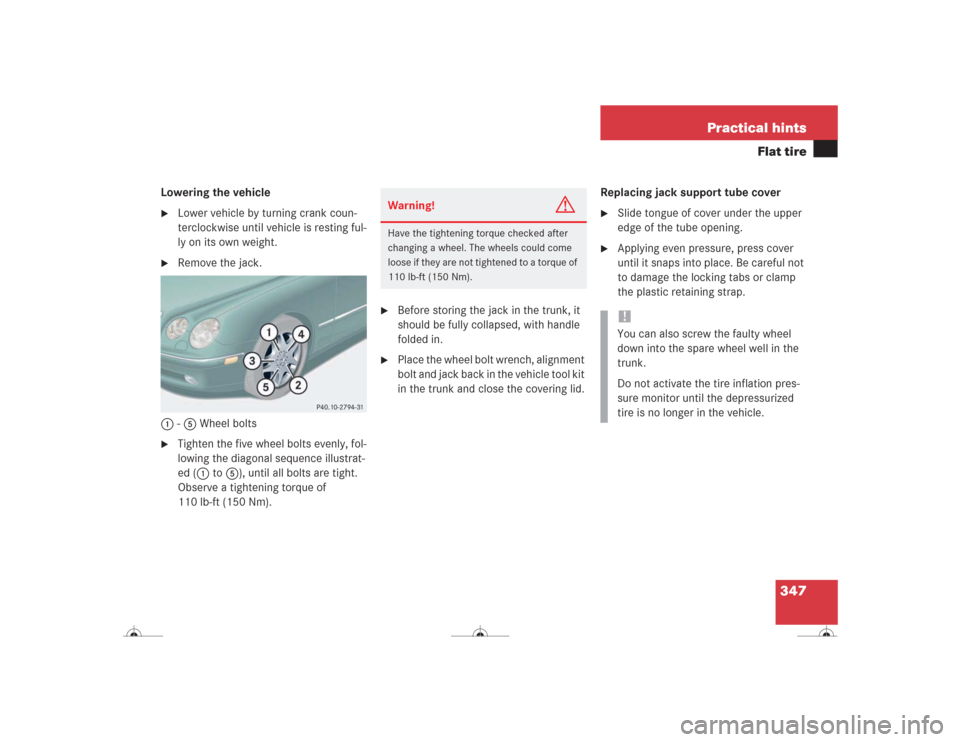
1-5 Wheel bolts
�
Tighten the five wheel bolts evenly, fol-
lowing the diagonal sequence illustrat-
ed (1 to5), until all bolts are tight.
Observe a tightening torque of
110 lb-ft (150 Nm).
�
Before storing the jack in the trunk, it
should be fully collapsed, with handle
folded in.
�
Place the wheel bolt wrench, alignment
bolt and jack back in the vehicle tool kit
in the trunk and close the covering lid.Replacing jack support tube cover
�
Slide tongue of cover under the upper
edge of the tube opening.
�
Applying even pressure, press cover
until it snaps into place. Be careful not
to damage the locking tabs or clamp
the plastic retaining strap.
Warning!
G
Have the tightening torque checked after
changing a wheel. The wheels could come
loose if they are not tightened to a torque of
110 lb-ft (150 Nm).
!You can also screw the faulty wheel
down into the spare wheel well in the
trunk.
Do not activate the tire inflation pres-
sure monitor until the depressurized
tire is no longer in the vehicle.
Page 411 of 418

410 IndexTar stains 285
Tele Aid 230
Emergency calls 232
Information 235
Initiating an emergency call
manually 233
Messages in display 318
Remote door unlock 237
Roadside Assistance 234
Stolen vehicle tracking services 238
System self-check 231
Upgrade signals 236
Tele Aid System 387
Telematics* 387
Telephone* 24, 229
Answering a call 140
Dialing a number from the phone
book 140
Ending a call 140
Hands-free microphone 27
Loading phone book* 140
Messages in display 319
Operating 139
Redialing 141Temperature
Display mode 148
Setting interior temperature 176
Setting units in display 148
Tires 272
Tie-down hooks (Trunk) 220
Tightening torque 387
Tightening torque (Wheel bolts) 347
Tire inflation pressure
Checking 259, 271
Tire inflation pressure see the placard on
the fuel filler flap
Tire speed rating 251, 387
Tire traction 251
Tires 270, 380
Direction of rotation 271
Driving instructions 250
Messages in display 321, 324
Retreads 270
Service life 271
Temperature 272
Tire pressure monitor indicator
lamp* 296
Tread depth 280Wear pattern 279
Winter 280
Tools 329
Tow-away alarm 25, 84
Arming 84
Disarming 84
Disarming for transport 84
Towing eye bolt (vehicle tool kit) 329
Installing 355
Towing the vehicle 353
Tracking services
For stolen vehicle 238
Traction 163, 387
Transmission see Automatic
transmission 266
Tread depth (tires) 280
Trip computer 143
Trip odometer
Resetting 127
Trunk
Closing 98
Lock button 95
Lock button, KEYLESS-GO* 95
Locking separately 104