Page 77 of 400

77 Safety and Security
Driving safety systems
Four wheel electronic traction system (4MATIC) with the ESP
Models with all-wheel-drive only.
The 4MATIC improves vehicle’s ability to
use available traction, e.g. during winter
operation in mountains under snowy
conditions, by applying power to all four
wheels.
Warning!
G
If you see the ESP warning lampv flash-
ing in the speedometer, proceed as follows:�
While driving off, apply as little throttle
as possible
�
While driving, ease up on the accelera-
tor
�
Adapt your speed and driving style to
the prevailing road conditions
Failure to observe these guidelines could
cause the vehicle to skid.
The ESP cannot prevent accidents resulting
from excessive speed.!Do not tow with one axle raised.
Otherwise the transfer case can be
damaged, which is not covered by the
Mercedes-Benz Limited Warranty.
!Performance testing must only be con-
ducted on a two-axle dynamometer.
Otherwise the transfer case can be
damaged, which is not covered by the
Mercedes-Benz Limited Warranty.!Because of the ESP’s automatic
operation, the engine must be shut off
(SmartKey in starter switch position0
or1) when the parking brake is being
tested on a brake test dynamometer
Active braking action through ESP may
otherwise seriously damage the front
or rear axle brake system.
Operational tests with the engine
running can only be conducted on a
two-axle dynamometer.
Page 83 of 400

83 Controls in detail
Locking and unlocking
Factory setting
Global unlocking�
Press buttonŒ.
All turn signal lamps flash once. The
locking knobs in the doors move up.
The vehicle will lock again automatically
within approximately 40 seconds of
unlocking if:
�
neither door nor trunk is opened
�
the SmartKey is not inserted in the
starter switch
�
the central locking switch is not
activatedGlobal locking
�
Press button‹.
All turn signal lamps flash three times.
The locking knobs in the doors move
down.
Selective setting
If you frequently travel alone, you may wish
to reprogram the SmartKey so that
pressingŒ only unlocks the driver’s
door and the fuel filler flap.
�
Press and hold buttonsŒ and‹
simultaneously for about five seconds
until battery check lamp5 flashes
twice.
The SmartKey will then function as
follows:
Unlocking driver’s door and fuel filler
flap�
Press buttonΠonce.Global unlocking
�
Press buttonΠtwice.
Global locking
�
Press button‹.
Restoring to factory setting
�
Press and hold buttonsŒ and‹
simultaneously for about six seconds
until battery check lamp5 flashes
twice.
!To prevent possible malfunction, avoid
exposing the SmartKey to high levels of
electromagnetic radiation.
Warning!
G
When leaving the vehicle, always remove the
SmartKey from the starter switch, take it
with you and lock the vehicle. Do not leave
children unattended in the vehicle, or with
access to an unlocked vehicle. It is possible
for children to open a locked door from the
inside, which could result in an accident
and/or serious injury.
Page 87 of 400

87 Controls in detail
Locking and unlocking
Opening the trunk from the inside
You can open the trunk from the inside if
the vehicle is stationary.
A minimum height clearance of 5.71 ft
(1.74 m) is required to open the trunk lid.
The switch is located on the driver’s door.
1Remote trunk lid switch with indicator
lamp�
Press remote trunk lid switch1.
The trunk lid opens. The indicator lamp
in the switch remains lit as long as the
trunk is open.The trunk can also be opened using the
SmartKey, see “Unlocking and opening the
trunk lid” (
�page 84) or from its inside in
an emergency, see “Trunk lid emergency
release” (
�page 88).
Closing the trunk
1Handle�
Lower trunk lid using handle1.
�
Close trunk lid with hands placed flat
on it.
!The trunk lid swings open upwards
automatically. Always make sure there
is sufficient overhead clearance.iIf the trunk lid does not open, it is still
locked separately (if applicable)
(�page 89).
If the vehicle was previously centrally
locked, the trunk lid will lock automati-
cally when closed (
�page 87). The
turn signals will flash three times to
confirm locking.
Warning!
G
To prevent possible personal injury, always
keep hands and fingers away from the trunk
opening when closing the trunk. Be espe-
cially careful when small children are
around.
Page 88 of 400
88 Controls in detailLocking and unlocking
Trunk lid emergency release
The emergency release button is located
on the inside of the trunk lid.
1Emergency release button�
Briefly press emergency release
button1.
The trunk unlocks and the trunk lid
opens.Illumination of the emergency release
button:
�
The button will flash for 30 minutes
after opening the trunk.
�
The button will flash for 60 minutes
after closing the trunk.
Warning!
G
Only drive with the trunk closed. Among
other dangers, such as your view being
blocked, exhaust fumes may enter the
vehicle interior.iDo not place the SmartKey in the open
trunk. You may lock yourself out.
!The trunk lid swings open upwards
automatically.
iThe emergency release button unlocks
and opens the trunk while the vehicle is
standing or driving.
Page 90 of 400

90 Controls in detailLocking and unlockingSeparately unlocking the trunk�
Pull the mechanical key out of the
SmartKey (
�page 305).
�
Insert the mechanical key in the trunk
lid lock.
�
Turn the mechanical key
counterclockwise to neutral
position1 (
�page 89).
You can now open the trunk (
�page 86).
A minimum height clearance of 5.71 ft
(1.74 m) is required to open the trunk lid.
Automatic central locking
The doors and the trunk automatically lock
when the ignition is switched on and the
wheels are turning at vehicle speeds of ap-
proximately 9mph (15km/h) or more.
You can open a locked door from the in-
side. Open door only when conditions are
safe to do so.For more information on towing the vehi-
cle, see see “Towing the vehicle”
(
�page 328).
You can deactivate the automatic locking
mode using the control system, see “Set-
ting automatic locking” (
�page 133).
iYou can only cancel the separate trunk
locking mode by means of the mechan-
ical key.
Warning!
G
Only drive with the trunk closed. Among
other dangers, such as your view being
blocked, exhaust fumes may enter the
vehicle interior.
iThe doors unlock automatically after an
accident if the force of the impact
exceeds a preset threshold.
The vehicle automatically locks when
the ignition is switched on and the
wheels are turning at vehicle speeds of
approximately 9 mph (15 km/h) or
more. You could therefore lock yourself
out when the vehicle�
is pushed or towed
�
is on a test stand
Page 91 of 400

91 Controls in detail
Locking and unlocking
Locking and unlocking from the inside
You can lock or unlock the doors and the
trunk from inside using the central locking
switch. This can be useful, for example, if
y o u w a n t t o l o c k t h e v e h i c l e b e f o r e s t a r t i n g
to drive.
The fuel filler flap will not be locked or
unlocked with the central locking switch.The switch is located in the center console.
Central locking switch1Locking
2Unlocking
Locking�
Press upper switch position1 of
central locking switch.
If all doors are closed, the vehicle
locks.Unlocking
�
Press lower switch position2 of
central locking switch.
The vehicle unlocks.
Warning!
G
When leaving the vehicle, always remove the
SmartKey from the starter switch, take it
with you and lock the vehicle. Do not leave
children unattended in the vehicle, or with
access to an unlocked vehicle. Unsuper-
vised use of vehicle equipment may cause
an accident and/or serious personal injury.
iYou can open a locked door from the
inside. Open door only when conditions
are safe to do so.
If the vehicle was previously centrally
locked using the SmartKey, it will not
unlock using the central locking switch.
If the vehicle was previously locked
with the central locking switch�
while in the selective remote con-
trol mode, only the door opened
from the inside is unlocked.
�
while in the global remote control
mode, the complete vehicle is
unlocked when a door is opened
from the inside.
Page 92 of 400

92 Controls in detailSeats
�SeatsFor information on seat adjustment, see
“Seats” (
�page 32).
Easy-entry/exit feature*
With the easy-entry/exit feature activated,
the steering wheel tilts upwards and the
driver’s seat moves to the rear.
This allows easier entry into and exit from
the vehicle when the driver’s door is
opened. However, the engine must be
turned off.
When the SmartKey is inserted in the
starter switch and the driver’s door is
closed, the steering wheel and the driver’s
seat return to their last set positions.You can activate the following functions:
�
Steering column:
Only the steering column is adjusted.
�
Steering column and seat:
The steering column and the seat are
adjusted.
The easy-entry/exit feature can be
switched on or off in the convenience
submenu of the control system
(
�page 133).
Warning!
G
You must make sure no one can become
trapped or injured by the moving steering
wheel and the driver’s seat when the
easy-entry/exit feature* is activated, the
driver’s door is being opened and the engine
is turned off or the SmartKey is removed
from the starter switch.
Do not leave children unattended in the
vehicle, or with access to an unlocked
vehicle. Children could open the driver’s
door and unintentionally activate the
easy-entry/exit feature*, which could result
in an accident and/or serious personal
injury.
iTo cancel seat/steering wheel
movement, do one of the following:�
Press the seat adjustment switch*
(�page 28)
�
Move the steering column stalk*
(�page 37)
�
Press the memory button*
(�page 28)
Page 93 of 400

93 Controls in detail
Seats
Removing and installing front seat head restraints
For information on head restraint
adjustment, see “Seats” (
�page 32).
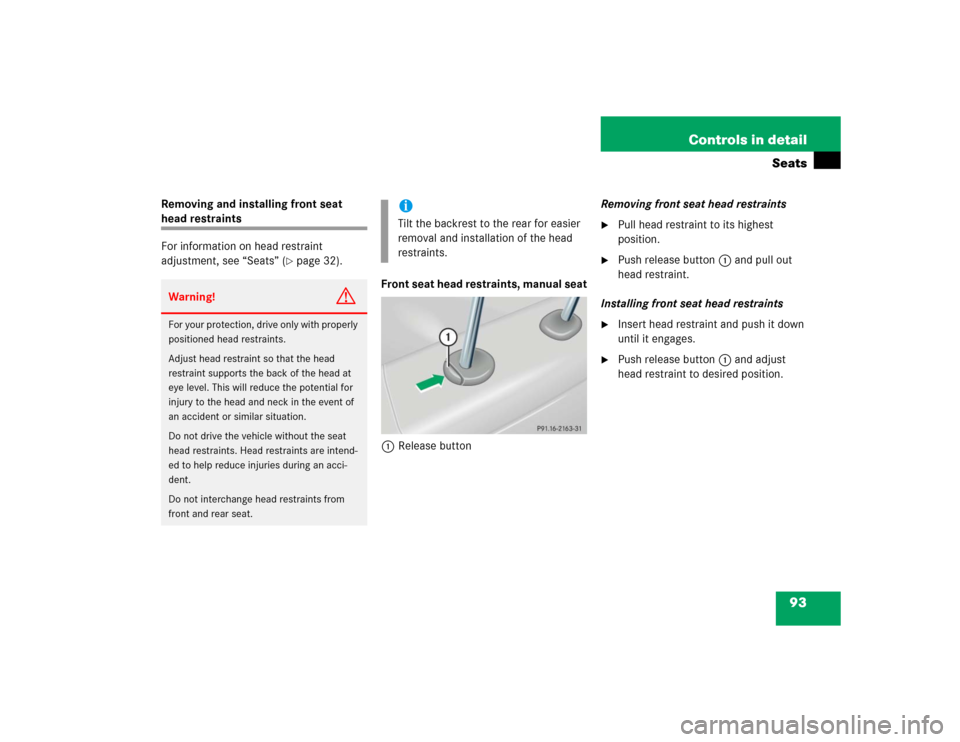
Front seat head restraints, manual seat
1Release buttonRemoving front seat head restraints
�
Pull head restraint to its highest
position.
�
Push release button1 and pull out
head restraint.
Installing front seat head restraints
�
Insert head restraint and push it down
until it engages.
�
Push release button1 and adjust
head restraint to desired position.
Warning!
G
For your protection, drive only with properly
positioned head restraints.
Adjust head restraint so that the head
restraint supports the back of the head at
eye level. This will reduce the potential for
injury to the head and neck in the event of
an accident or similar situation.
Do not drive the vehicle without the seat
head restraints. Head restraints are intend-
ed to help reduce injuries during an acci-
dent.
Do not interchange head restraints from
front and rear seat.
iTilt the backrest to the rear for easier
removal and installation of the head
restraints.