Page 183 of 400

183 Controls in detail
Audio system
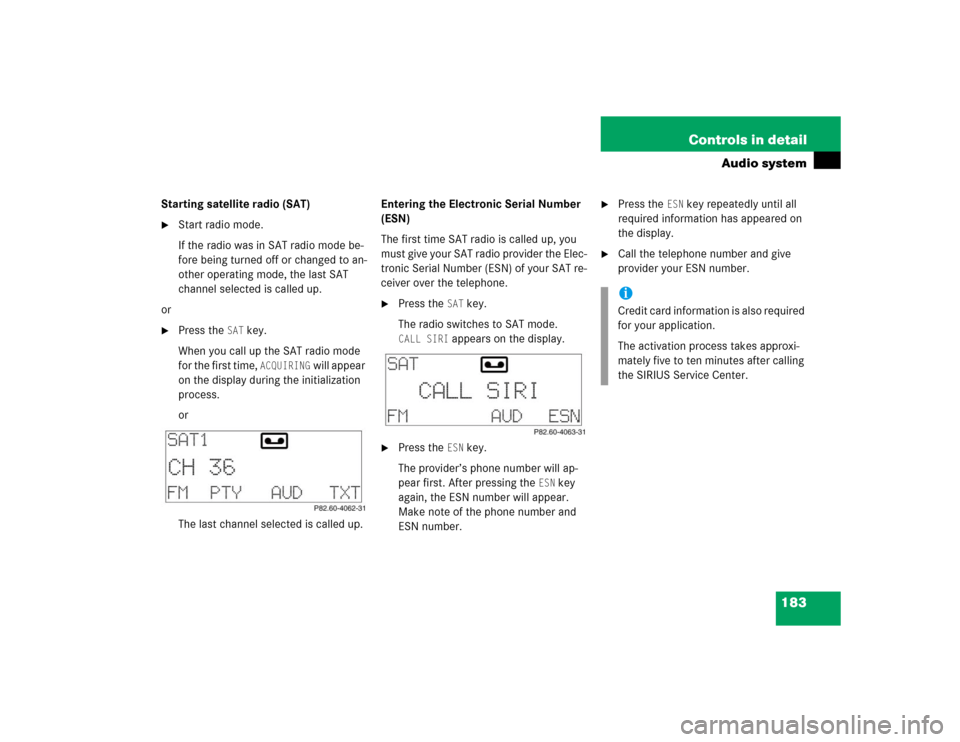
Starting satellite radio (SAT)�
Start radio mode.
If the radio was in SAT radio mode be-
fore being turned off or changed to an-
other operating mode, the last SAT
channel selected is called up.
or
�
Press the
SAT
key.
When you call up the SAT radio mode
for the first time,
ACQUIRING
will appear
on the display during the initialization
process.
or
The last channel selected is called up.Entering the Electronic Serial Number
(ESN)
The first time SAT radio is called up, you
must give your SAT radio provider the Elec-
tronic Serial Number (ESN) of your SAT re-
ceiver over the telephone.
�
Press the
SAT
key.
The radio switches to SAT mode.
CALL SIRI
appears on the display.
�
Press the
ESN
key.
The provider’s phone number will ap-
pear first. After pressing the
ESN
key
again, the ESN number will appear.
Make note of the phone number and
ESN number.
�
Press the
ESN
key repeatedly until all
required information has appeared on
the display.
�
Call the telephone number and give
provider your ESN number.iCredit card information is also required
for your application.
The activation process takes approxi-
mately five to ten minutes after calling
the SIRIUS Service Center.
Page 186 of 400

186 Controls in detailAudio systemCassette operation
Playing cassettes�
Press3 button.
The display panel folds down and the
cassette compartment becomes ac-
cessible.
�
Insert cassette into the cassette com-
partment until it engages and tap it
gently.
The cassette will be pulled in automati-
cally. The system switches to cassette
mode. Side 1 will be played and
SIDE 1
appears in the display. Side 1 is the
side of the cassette which is facing up-
ward. The cassette deck will automati-
cally detect the type of tape.
�
Fold display panel back up and press
gently on the display panel frame to
lock it in place.
or
�
If a cassette is already in the
mechanism, pressj button.Track selection
�
Press the
TRK
key.
The current track will be displayed as
SIDE 1
or
SIDE 2
.
�
You can switch sides at any time.
The side will be changed automatically
at the end of the tape.
!Do not press directly on the display
face. Otherwise the display will be
damaged.
iA warning signal will sound after 20
seconds if the display panel is left in
the down position. Fold display panel
back up. If the display panel is not
closed, a warning signal will sound and
the radio will be muted.
Page 190 of 400

190 Controls in detailAudio systemOnly use original CDs. Using copied CDs
may create problems during playback.
Clean CDs from time to time with a com-
mercially available cleaning cloth. Do not
use solvents, anti-static sprays, etc. for
cleaning. Replace the CD in its case after
use. Protect CDs from heat and direct sun-
light.
Only use CDs, which bear the label shown
and that conform to the compact disc
digital audio standard (IEC 60908). You
can therefore only use CDs with a maxi-
mum thickness of 1.3 mm.Operational readiness of CD changer
If a CD changer has been installed in the
system, it can be operated from the front
control panel of the radio. A loaded maga-
zine must be installed to play CDs.
Loading/unloading the CD magazine
�
Slide changer door to the right and
press eject buttong.
�
The magazine will be ejected.
iUse of CDs which do not meet this
standard may cause damage to the CD
changer. Do not play single-CDs
(80 mm) with an adapter.
Your CD drive has been designed to
play CDs which correspond to the
EN 60908 standard.
If you insert thicker data carriers, e.g.
ones that have data on both sides (one
side with DVD data, the other side with
audio data), they cannot be ejected and
will damage the drive.Warning!
G
The CD changer* is a Class 1 laser product.
There is a danger of invisible laser radiation
if the cover is opened or damaged.
Do not remove the cover. The CD changer*
does not contain any parts which can be ser-
viced by the user. For safety reasons, have
any service work which may be necessary
performed only by qualified personnel.
Page 206 of 400

206 Controls in detailDriving systems
�Driving systemsThe driving system of your vehicle is
described on the following pages:�
Cruise control, with which the vehicle
can maintain a preset speed
For information on the BAS, ABS and ESP
driving systems, see “Driving safety sys-
tems” (
�page 72).
Cruise control
Cruise control automatically maintains the
speed you set for your vehicle.
Use of cruise control is recommended for
driving at a constant speed for extended
periods of time. You can set or resume
cruise control at any speed over 20 mph
(30 km/h).
The cruise control function is operated by
means of the cruise control lever.
The cruise control lever is the uppermost
lever found on the left-hand side of the
steering column (
�page 20).
Warning!
G
Cruise control is a convenience system de-
signed to assist the driver during vehicle op-
eration. The driver is and must remain at all
times responsible for the vehicle speed and
for safe brake operation.
Only use cruise control if the road, traffic
and weather conditions make it advisable to
travel at a steady speed.�
The use of cruise control can be danger-
ous on winding roads or in heavy traffic
because conditions do not allow safe
driving at a steady speed.
�
The use of cruise control can be danger-
ous on slippery roads. Rapid changes in
tire traction can result in wheel spin and
loss of control.
�
Deactivate cruise control when driving
in fog.
The “Resume” function should only be oper-
ated if the driver is fully aware of the previ-
ously set speed and wishes to resume this
particular preset speed.
Page 262 of 400

262 OperationTires and wheelsTire pressure changes by approx. 1.5 psi
(0.1 bar) per 18°F (10°C) of air tempera-
ture change. Keep this in mind when
checking tire pressure where the tempera-
ture is different from the outside tempera-
ture.
Tire temperature and tire pressure are also
increased while driving, depending on the
driving speed and the tire load.
Check the spare tire periodically for condi-
tion and inflation. Spare tires will age and
become worn over time even if never used,
and thus should be inspected and replaced
when necessary.
Rotating wheels
On vehicles with the same wheel size all
around, wheels can be rotated every 3 000
to 6 000 miles (5 000 to 10 000 km), or
sooner if necessary, according to the
degree of tire wear. The same direction of
tire rotation must be retained.Rotate the wheels before the characteris-
tic tire wear pattern becomes visible
(shoulder wear on front wheels and tread
center wear on rear wheels).
Thoroughly clean the inner side of the
wheels after each rotation. Check and
ensure proper tire inflation pressure.
Warning!
G
Follow recommended inflation pressures.
Do not overinflate tires. Overinflated tires
can result in sudden deflation (blowout)
because they are more likely to become
punctured or damaged by road debris,
potholes, etc.
Do not underinflate tires. Underinflated tires
wear unevenly, adversely affect handling
and fuel economy, and are more likely to fail
from being overheated.
Do not overload the tires by exceeding the
specified vehicle capacity weight (as indi-
cated by the label on the pillar in the driver’s
door opening). Overloading the tires can
overheat them, possibly causing a blowout.Warning!
G
Rotate front and rear wheels only if they are
of the same size.
Warning!
G
Have the tightening torque checked after
changing a wheel. Wheels could become
loose if not tightened with a torque of
80 lb-ft (110 Nm).
Only use genuine Mercedes-Benz wheel
bolts specified for your vehicle's rims.