Page 79 of 400
79 Safety and Security
Driving safety systems
Four wheel electronic traction system (4MATIC) with the ESP
Models with all-wheel-drive only.
The 4MATIC improves vehicle’s ability to
use available traction, e.g. during winter
operation in mountains under snowy
conditions, by applying power to all four
wheels.
Warning!
G
If you see the ESP warning lampv flash-
ing in the speedometer, proceed as follows:�
While driving off, apply as little throttle
as possible
�
While driving, ease up on the accelera-
tor
�
Adapt your speed and driving style to
the prevailing road conditions
Failure to observe these guidelines could
cause the vehicle to skid.
The ESP cannot prevent accidents resulting
from excessive speed.!Do not tow with one axle raised.
Otherwise the transfer case can be
damaged, which is not covered by the
Mercedes-Benz Limited Warranty.
!Performance testing must only be con-
ducted on a two-axle dynamometer.
Otherwise the transfer case can be
damaged, which is not covered by the
Mercedes-Benz Limited Warranty.!Because of the ESP’s automatic
operation, the engine must be shut off
(SmartKey in starter switch position0
or1) when the parking brake is being
tested on a brake test dynamometer
Active braking action through ESP may
otherwise seriously damage the front
or rear axle brake system.
Operational tests with the engine
running can only be conducted on a
two-axle dynamometer.
Page 88 of 400
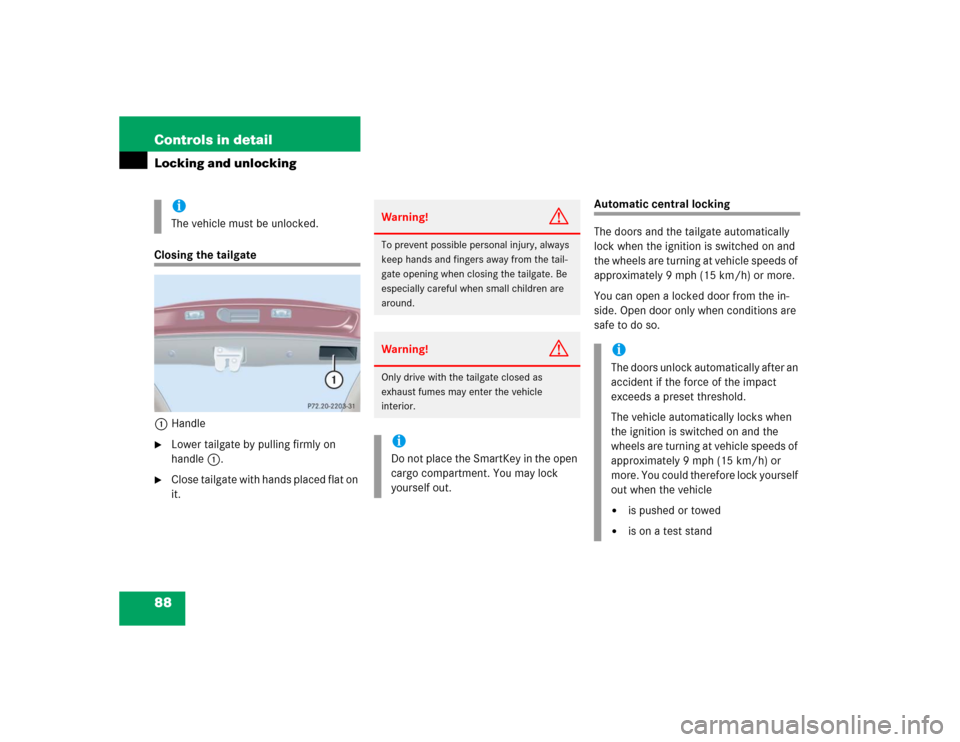
88 Controls in detailLocking and unlockingClosing the tailgate
1Handle�
Lower tailgate by pulling firmly on
handle1.
�
Close tailgate with hands placed flat on
it.
Automatic central locking
The doors and the tailgate automatically
lock when the ignition is switched on and
the wheels are turning at vehicle speeds of
approximately 9 mph (15 km/h) or more.
You can open a locked door from the in-
side. Open door only when conditions are
safe to do so.
iThe vehicle must be unlocked.
Warning!
G
To prevent possible personal injury, always
keep hands and fingers away from the tail-
gate opening when closing the tailgate. Be
especially careful when small children are
around.Warning!
G
Only drive with the tailgate closed as
exhaust fumes may enter the vehicle
interior.iDo not place the SmartKey in the open
cargo compartment. You may lock
yourself out.
iThe doors unlock automatically after an
accident if the force of the impact
exceeds a preset threshold.
The vehicle automatically locks when
the ignition is switched on and the
wheels are turning at vehicle speeds of
approximately 9 mph (15 km/h) or
more. You could therefore lock yourself
out when the vehicle�
is pushed or towed
�
is on a test stand
Page 90 of 400
90 Controls in detailSeats
�SeatsFor information on seat adjustment, see
“Seats” (
�page 32).
Easy-entry/exit feature*
With the easy-entry/exit feature activated,
the steering wheel tilts upwards and the
driver’s seat moves to the rear.
This allows easier entry into and exit from
the vehicle when the driver’s door is
opened. However, the engine must be
turned off.
When the SmartKey is inserted in the
starter switch and the driver’s door is
closed, the steering wheel and the driver’s
seat return to their last set positions.You can activate the following functions:
�
Steering column:
Only the steering column is adjusted.
�
Steering column and seat:
The steering column and the seat are
adjusted.
The easy-entry/exit feature can be
switched on or off in the convenience
submenu of the control system
(
�page 132).
Warning!
G
You must make sure no one can become
trapped or injured by the moving steering
wheel and the driver’s seat when the
easy-entry/exit feature* is activated, the
driver’s door is being opened and the engine
is turned off or the SmartKey is removed
from the starter switch.
Do not leave children unattended in the
vehicle, or with access to an unlocked
vehicle. Children could open the driver’s
door and unintentionally activate the
easy-entry/exit feature*, which could result
in an accident and/or serious personal
injury.
iTo cancel seat/steering wheel
movement, do one of the following:�
Press the seat adjustment switch*
(�page 28)
�
Move the steering column stalk*
(�page 37)
�
Press the memory button*
(�page 28)
Page 97 of 400

97 Controls in detail
Memory function*
�Memory function*
The memory button and stored position
switch are located on the door.
You can store up to three different settings
per SmartKey.
The following settings are saved for each
stored position:�
Driver’s seat and backrest position
�
Steering wheel position
�
Driver’s side exterior rear view mirror
position
�
Passenger side exterior rear view mir-
ror position
�
Front passenger seat position
These key-dependent memory settings
can be deactivated if desired
(
�page 133).The memory button and stored position
button are located on the door.
1Memory button
2Stored position button
�
Make sure the ignition is switched on
or the relevant door is open and the
SmartKey is inserted in the starter
switch.
!Prior to operating the vehicle, the driv-
er should check and adjust the seat
height, seat position fore and aft, and
seat backrest angle if necessary, to
ensure adequate control, reach and
comfort. The head restraint should also
be adjusted for proper height. See also
the section on airbags (
�page 57) for
proper seat positioning.
In addition, adjust the steering wheel to
ensure adequate control, reach, opera-
tion and comfort. Both the interior and
exterior rear view mirrors should be
adjusted for adequate rear vision.
Fasten seat belts. Infants and small
children should be seated in a properly
secured restraint system that complies
with U.S. Federal Motor Vehicle Safety
Standards 213 and 225 and Canadian
Motor Vehicle Safety Standards 213
and 210.2.
Warning!
G
Do not activate the memory function while
driving. Activating the memory function
while driving could cause the driver to lose
control of the vehicle.
Page 98 of 400
98 Controls in detailMemory function*Storing positions into memory�
Adjust the seats, steering wheel and
rear view mirrors to the desired posi-
tion (
�page 32).
�
Turn button2 to selected memory
position.
�
Press memory button1.
�
Release memory button and push
button2 within three seconds.
All the settings are stored at the
selected position.
Recalling positions from memory�
Turn button2 to selected memory
position.
�
Press and hold button2 until the seat,
steering wheel and rear view mirrors
have fully moved to the stored posi-
tions.iReleasing the button immediately
stops movement to the stored posi-
tions.
Warning!
G
Do not operate the power seats using the
memory button if the seat backrest is in an
excessively reclined position. Doing so
could cause damage to front or rear seats.
First move backrest to an upright position.
Page 99 of 400

99 Controls in detail
Memory function*
Storing exterior rear view mirror parking position
For easier parking, you can adjust the
passenger-side exterior rear view mirror so
that you can see the right rear wheel as
soon as you engage reverse gearR.
For information on activating the parking
position, see “Setting parking position for
exterior rear view mirror” (
�page 134).
1Memory button
2Adjustment button
3Passenger side exterior rear view
mirror button
�
Stop the vehicle.
�
Switch on ignition (if not already on).
�
Press button3.
The passenger-side exterior rear view
mirror is selected.
�
Adjust the exterior rear view mirror
with button2 so that you see the rear
wheel and the road curb.
�
Press memory button1.
�
Within three seconds, press bottom of
adjustment button2.
The parking position is stored if the
mirror does not move.
iYou can store a parking position for the
passenger-side exterior rear view
mirror for each SmartKey.
iIf the mirror does move, repeat the
above steps. After the setting is stored
you can move the mirror again.
Page 100 of 400
100 Controls in detailLighting
�LightingFor notes on how to switch on the head-
lamps and use the turn signals, see the
“Getting started” section (
�page 46).
Exterior lamp switch
The exterior lamp switch is located on the
dashboard to the left of the steering wheel.MOff
UAutomatic headlamp mode
CParking lamps (also side marker
lamps, tail lamps, license plate
lamps, instrument panel lamps)
Canada only:
When engine is running, the low
beam is also switched on.
BLow beam plus parking lamps or
high beam headlamps (combination
switch pushed forward).
ˆStanding lamps, right (turn left one
stop)
‚Standing lamps, left (turn left two
stops)
iIf you drive in countries where vehicles
drive on the other side of the road than
the country where the vehicle is regis-
tered, you must have the headlamps
modified for symmetrical low beams.
Relevant information can be obtained
at your authorized Mercedes-Benz
Center.
Page 108 of 400

108 Controls in detailInstrument clusterCoolant temperature display
Turn the SmartKey in the starter switch to
position1 or2.
�
Call up the trip odometer and main
odometer by pressing buttonè
orÿ on the multifunction steering
wheel (
�page 112).
�
Press buttonj ork until the
coolant temperature display appears.During severe operating conditions, e.g.
stop-and-go traffic, the coolant tempera-
ture may rise close to 248°F (120°C).
The engine should not be operated with
the coolant temperature above 248°F
(120°C). Doing so may cause serious en-
gine damage which is not covered by the
Mercedes-Benz Limited Warranty.
Warning!
G
�
Driving when your engine is badly
overheated can cause some fluids which
may have leaked into the engine
compartment to catch fire. You could be
seriously burned.
�
Steam from an overheated engine can
cause serious burns and can occur just
by opening the hood. Stay away from
the engine if you see or hear steam com-
ing from it.
Turn off the engine, get out of the vehicle
and do not stand near the vehicle until the
engine has cooled down.
iExcessive coolant temperature triggers
a warning in the multifunction display.

