Page 97 of 400
97 Controls in detail
Seats
Installing rear seat head restraints�
Insert head restraint and push it down
until it engages.
�
Push button1 and adjust head
restraint to desired position.
Multicontour seat*
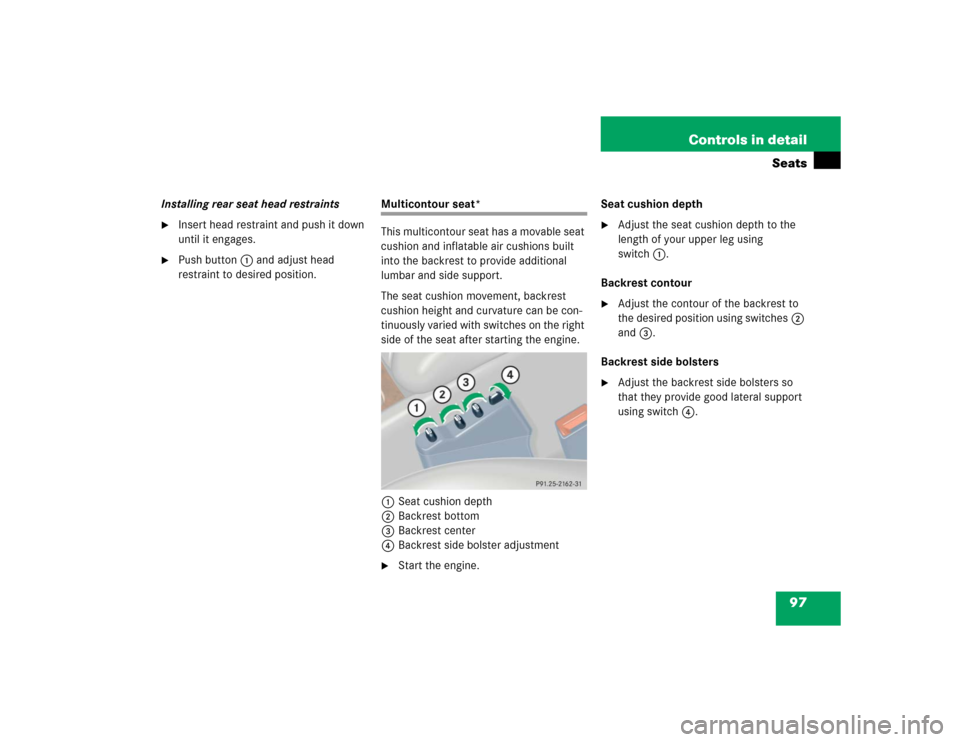
This multicontour seat has a movable seat
cushion and inflatable air cushions built
into the backrest to provide additional
lumbar and side support.
The seat cushion movement, backrest
cushion height and curvature can be con-
tinuously varied with switches on the right
side of the seat after starting the engine.
1Seat cushion depth
2Backrest bottom
3Backrest center
4Backrest side bolster adjustment�
Start the engine.Seat cushion depth
�
Adjust the seat cushion depth to the
length of your upper leg using
switch1.
Backrest contour
�
Adjust the contour of the backrest to
the desired position using switches2
and3.
Backrest side bolsters
�
Adjust the backrest side bolsters so
that they provide good lateral support
using switch4.
Page 99 of 400

99 Controls in detail
Memory function*
�Memory function*
The memory button and stored position
switch are located on the door.
You can store up to three different settings
per SmartKey.
The following settings are saved for each
stored position:�
Driver’s seat and backrest position
�
Steering wheel position
�
Driver’s side exterior rear view mirror
position
�
Passenger side exterior rear view mir-
ror position
�
Front passenger seat position
These key-dependent memory settings
can be deactivated if desired
(
�page 135).
!Prior to operating the vehicle, the driv-
er should check and adjust the seat
height, seat position fore and aft, and
seat backrest angle if necessary, to
ensure adequate control, reach and
comfort. The head restraint should also
be adjusted for proper height. See also
the section on airbags (
�page 55) for
proper seat positioning.
In addition, adjust the steering wheel to
ensure adequate control, reach, opera-
tion and comfort. Both the interior and
exterior rear view mirrors should be
adjusted for adequate rear vision.
Fasten seat belts. Infants and small
children should be seated in a properly
secured restraint system that complies
with U.S. Federal Motor Vehicle Safety
Standards 213 and 225 and Canadian
Motor Vehicle Safety Standards 213
and 210.2.
Warning!
G
Do not activate the memory function while
driving. Activating the memory function
while driving could cause the driver to lose
control of the vehicle.
Page 100 of 400

100 Controls in detailMemory function*The memory button and stored position
button are located on the door.
1Memory button
2Stored position button�
Make sure the ignition is switched on
or the relevant door is open and the
SmartKey is inserted in the starter
switch.
Storing positions into memory�
Adjust the seats, steering wheel and
rear view mirrors to the desired posi-
tion (
�page 32).
�
Turn button2 to selected memory
position.
�
Press memory button1.
�
Release memory button and push
button2 within three seconds.
All the settings are stored at the
selected position.
Recalling positions from memory�
Turn button2 to selected memory
position.
�
Press and hold button2 until the seat,
steering wheel and rear view mirrors
have fully moved to the stored posi-
tions.iReleasing the button immediately
stops movement to the stored posi-
tions.Warning!
G
Do not operate the power seats using the
memory button if the seat backrest is in an
excessively reclined position. Doing so
could cause damage to front or rear seats.
First move backrest to an upright position.
Page 155 of 400
155 Controls in detail
Climate control
Climate control panel
The storage compartment between the
front seats can be ventilated (
�page 160).
Item
1
Thumbwheel for air volume control
for left center air vent
2
Left center air vent, adjustable
3
Right center air vent, adjustable
4
Thumbwheel for air volume control
for right center air vent
5
Air volume control for side air vent
6
Side air vent, adjustable
7
Side defroster vent, fixed
8
Climate control paneliFor draft-free ventilation, move the
sliders for the center air vents2, 3
and6 to the middle position.
Item
1
Air volume control
2
Left-side temperature control
3
Right-side temperature control
4
Air distribution control
5
Rear window defroster
6
AC cooling on/off (AC
OFF
)
7
Air distribution and air volume
(automatic mode)
8
Air recirculation
9
Defrosting
Page 212 of 400
212 Controls in detailLoadingRemoving the ski sack
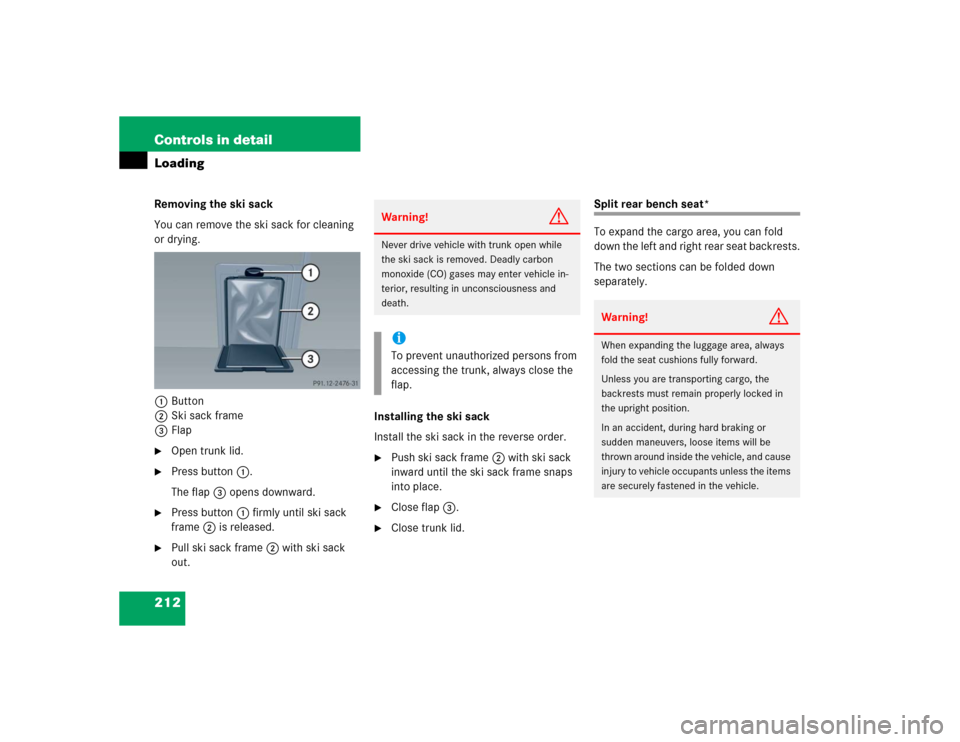
You can remove the ski sack for cleaning
or drying.
1Button
2Ski sack frame
3Flap�
Open trunk lid.
�
Press button1.
The flap3 opens downward.
�
Press button1 firmly until ski sack
frame2 is released.
�
Pull ski sack frame2 with ski sack
out.Installing the ski sack
Install the ski sack in the reverse order.
�
Push ski sack frame2 with ski sack
inward until the ski sack frame snaps
into place.
�
Close flap3.
�
Close trunk lid.
Split rear bench seat*
To expand the cargo area, you can fold
down the left and right rear seat backrests.
The two sections can be folded down
separately.
Warning!
G
Never drive vehicle with trunk open while
the ski sack is removed. Deadly carbon
monoxide (CO) gases may enter vehicle in-
terior, resulting in unconsciousness and
death.iTo prevent unauthorized persons from
accessing the trunk, always close the
flap.
Warning!
G
When expanding the luggage area, always
fold the seat cushions fully forward.
Unless you are transporting cargo, the
backrests must remain properly locked in
the upright position.
In an accident, during hard braking or
sudden maneuvers, loose items will be
thrown around inside the vehicle, and cause
injury to vehicle occupants unless the items
are securely fastened in the vehicle.
Page 213 of 400
213 Controls in detail
Loading
Folding the backrest forward
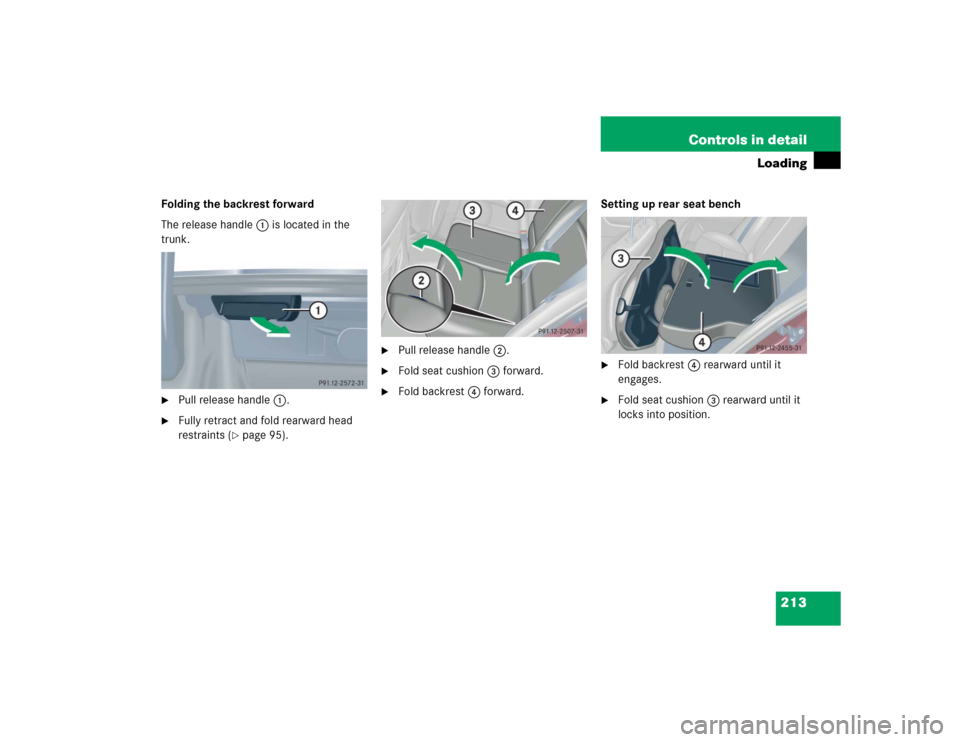
The release handle1 is located in the
trunk.�
Pull release handle1.
�
Fully retract and fold rearward head
restraints (
�page 95).
�
Pull release handle2.
�
Fold seat cushion3 forward.
�
Fold backrest4 forward.Setting up rear seat bench
�
Fold backrest4 rearward until it
engages.
�
Fold seat cushion3 rearward until it
locks into position.
Page 214 of 400

214 Controls in detailLoadingIf the backrest is not locked into position,
a red indicator5 will be visible.�
Check for secure locking by pushing
and pulling on the backrest.
Loading instructions
The total load weight including vehicle oc-
cupants and luggage/cargo should not ex-
ceed the vehicle capacity weight indicated
on the certification tag which can be found
on the left door pillar.
The handling characteristics of a fully load-
ed vehicle depend greatly on the load dis-
tribution. It is therefore recommended to
load the vehicle according to the illustra-
tions shown, with the heaviest items being
placed towards the front of the vehicle.
Warning!
G
If a red indicator is visible with the backrest
up, then the backrest is not properly locked
into position.
Always lock backrest in its upright position
when rear seat bench is occupied, cargo is
being carried in the trunk, or the extended
cargo compartment is not in use. Check for
secure locking by pushing and pulling on the
backrest.
In an accident, during hard braking or sud-
den maneuvers, loose items will be thrown
around inside the vehicle, and cause injury
to vehicle occupants unless the items are
securely fastened in the vehicle.
To help avoid personal injury during a
collision or sudden maneuver, exercise care
when transporting cargo.iTo prevent unauthorized persons from
access to the trunk, always lock
backrest in its upright position.
Page 215 of 400
215 Controls in detail
Loading
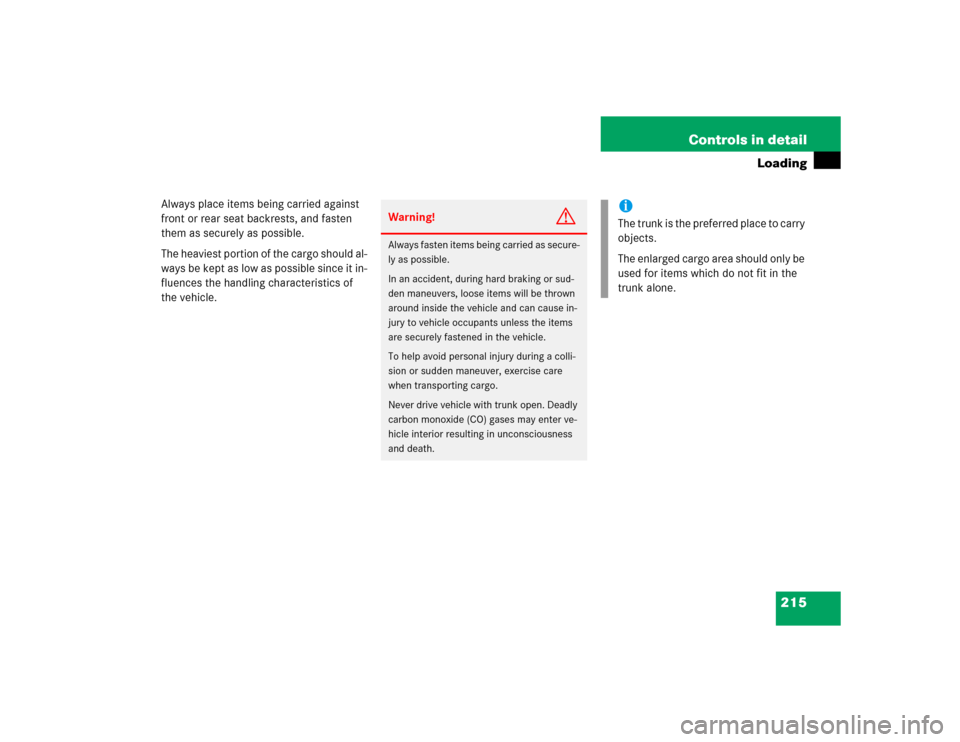
Always place items being carried against
front or rear seat backrests, and fasten
them as securely as possible.
The heaviest portion of the cargo should al-
ways be kept as low as possible since it in-
fluences the handling characteristics of
the vehicle.
Warning!
G
Always fasten items being carried as secure-
ly as possible.
In an accident, during hard braking or sud-
den maneuvers, loose items will be thrown
around inside the vehicle and can cause in-
jury to vehicle occupants unless the items
are securely fastened in the vehicle.
To help avoid personal injury during a colli-
sion or sudden maneuver, exercise care
when transporting cargo.
Never drive vehicle with trunk open. Deadly
carbon monoxide (CO) gases may enter ve-
hicle interior resulting in unconsciousness
and death.
iThe trunk is the preferred place to carry
objects.
The enlarged cargo area should only be
used for items which do not fit in the
trunk alone.