Page 108 of 400

108 Controls in detailLightingSwitching rear interior lights on and off�
Press buttonV.
The lights in the rear passenger
compartment come on.
�
Press buttonV again.
The lights in the rear passenger
compartment go out.
Switching right front reading lamp on
and off
�
Press right buttonX.
The right reading lamp comes on.
�
Press right buttonX again.
The right reading lamp goes out.
Switching left front reading lamp on and
off
�
Press left buttonX.
The left reading lamp comes on.
�
Press left buttonX again.
The left reading lamp goes out.
Door entry lamps
The appropriate door entry lamp switches
on if a door is opened in darkness and if
the interior lighting is switched to auto-
matic function.
The entry lamp switches off automatically
when the door is closed.
Trunk lamp
The trunk lamp switches on if the trunk lid
is opened.
If you leave the trunk open for an extended
period of time, the trunk lamp will switch
off automatically after approximately ten
minutes.
iIf you turn the SmartKey in the starter
switch to position0 and switch off the
exterior headlamps, the door entry
lamps will remain lit for approximately
five minutes.
Page 209 of 400
209 Controls in detail
Loading
�Loading
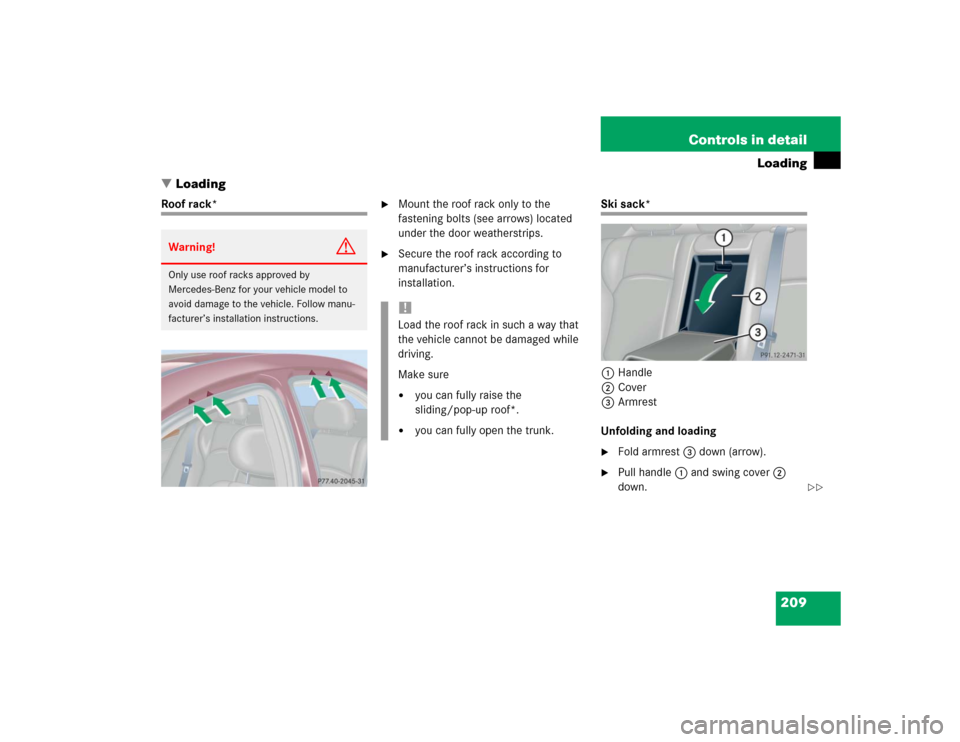
Roof rack*
�
Mount the roof rack only to the
fastening bolts (see arrows) located
under the door weatherstrips.
�
Secure the roof rack according to
manufacturer’s instructions for
installation.
Ski sack*
1Handle
2Cover
3Armrest
Unfolding and loading�
Fold armrest3 down (arrow).
�
Pull handle1 and swing cover2
down.
Warning!
G
Only use roof racks approved by
Mercedes-Benz for your vehicle model to
avoid damage to the vehicle. Follow manu-
facturer’s installation instructions.
!Load the roof rack in such a way that
the vehicle cannot be damaged while
driving.
Make sure�
you can fully raise the
sliding/pop-up roof*.
�
you can fully open the trunk.
��
Page 210 of 400
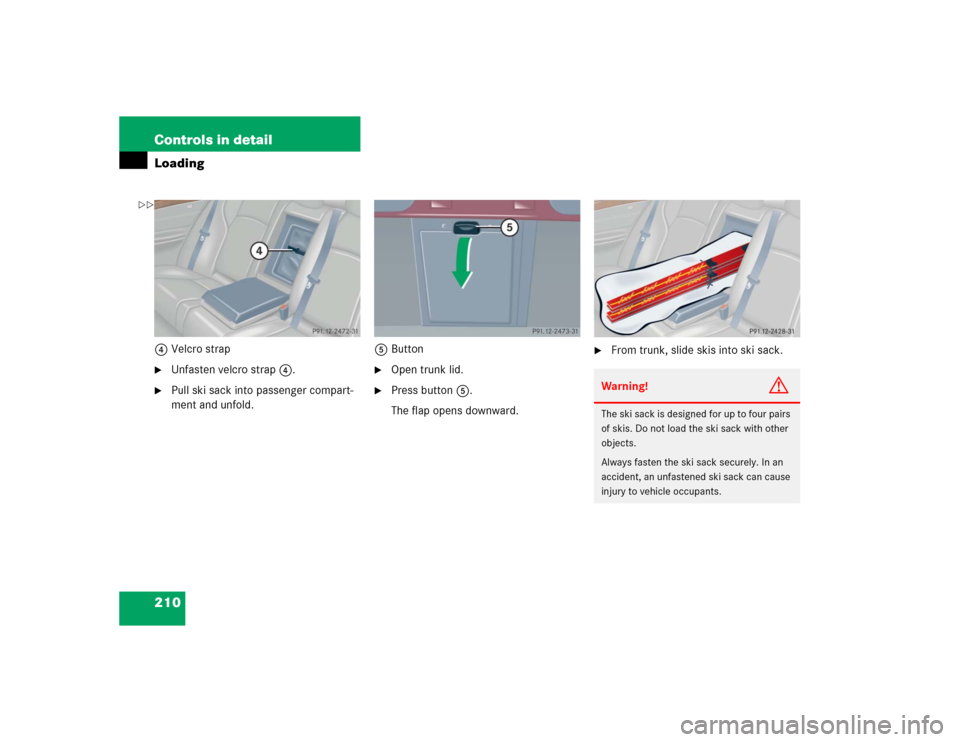
210 Controls in detailLoading4Velcro strap�
Unfasten velcro strap4.
�
Pull ski sack into passenger compart-
ment and unfold.5Button
�
Open trunk lid.
�
Press button5.
The flap opens downward.
�
From trunk, slide skis into ski sack.Warning!
G
The ski sack is designed for up to four pairs
of skis. Do not load the ski sack with other
objects.
Always fasten the ski sack securely. In an
accident, an unfastened ski sack can cause
injury to vehicle occupants.
��
Page 212 of 400

212 Controls in detailLoadingRemoving the ski sack
You can remove the ski sack for cleaning
or drying.
1Button
2Ski sack frame
3Flap�
Open trunk lid.
�
Press button1.
The flap3 opens downward.
�
Press button1 firmly until ski sack
frame2 is released.
�
Pull ski sack frame2 with ski sack
out.Installing the ski sack
Install the ski sack in the reverse order.
�
Push ski sack frame2 with ski sack
inward until the ski sack frame snaps
into place.
�
Close flap3.
�
Close trunk lid.
Split rear bench seat*
To expand the cargo area, you can fold
down the left and right rear seat backrests.
The two sections can be folded down
separately.
Warning!
G
Never drive vehicle with trunk open while
the ski sack is removed. Deadly carbon
monoxide (CO) gases may enter vehicle in-
terior, resulting in unconsciousness and
death.iTo prevent unauthorized persons from
accessing the trunk, always close the
flap.
Warning!
G
When expanding the luggage area, always
fold the seat cushions fully forward.
Unless you are transporting cargo, the
backrests must remain properly locked in
the upright position.
In an accident, during hard braking or
sudden maneuvers, loose items will be
thrown around inside the vehicle, and cause
injury to vehicle occupants unless the items
are securely fastened in the vehicle.
Page 215 of 400
215 Controls in detail
Loading
Always place items being carried against
front or rear seat backrests, and fasten
them as securely as possible.
The heaviest portion of the cargo should al-
ways be kept as low as possible since it in-
fluences the handling characteristics of
the vehicle.
Warning!
G
Always fasten items being carried as secure-
ly as possible.
In an accident, during hard braking or sud-
den maneuvers, loose items will be thrown
around inside the vehicle and can cause in-
jury to vehicle occupants unless the items
are securely fastened in the vehicle.
To help avoid personal injury during a colli-
sion or sudden maneuver, exercise care
when transporting cargo.
Never drive vehicle with trunk open. Deadly
carbon monoxide (CO) gases may enter ve-
hicle interior resulting in unconsciousness
and death.
iThe trunk is the preferred place to carry
objects.
The enlarged cargo area should only be
used for items which do not fit in the
trunk alone.
Page 299 of 400

299 Practical hints
What to do if …
Display symbol
Display message
Possible cause
Possible solution
K
CLOSE
SUNROOF!
You have opened the driver’s door with
the SmartKey removed from the starter
switch and the sliding/pop-up roof open.
�
Close the sliding/pop-up roof
(�page 203).
J
CLOSE
SUNROOF!
You have opened the driver’s door with
the SmartKey removed from the starter
switch and the sliding/pop-up roof open.
�
Close the sliding/pop-up roof
(�page 203).
L
TELE AID
DRIVE TO WORKSHOP!
One or more main functions of the Tele
Aid system* are malfunctioning.
�
Have the Tele Aid system* checked by
an authorized Mercedes-Benz Center.
ì
FUNCTION
NOT AVAILABLE!
This display appears if buttonì
orí on the multifunction steering
wheel is pressed and the vehicle is not
equipped with a telephone*.
Ê
TRUNK OPEN!
This message will appear whenever the
trunk lid is open.
�
Close the trunk lid.
W
WASHER FLUID
CHECK LEVEL!
The fluid level has dropped to
about
1/3of total reservoir capacity.
�
Add washer fluid (
�page 259).
Page 305 of 400
305 Practical hints
Unlocking/locking in an emergency
�Unlocking/locking in an emergency
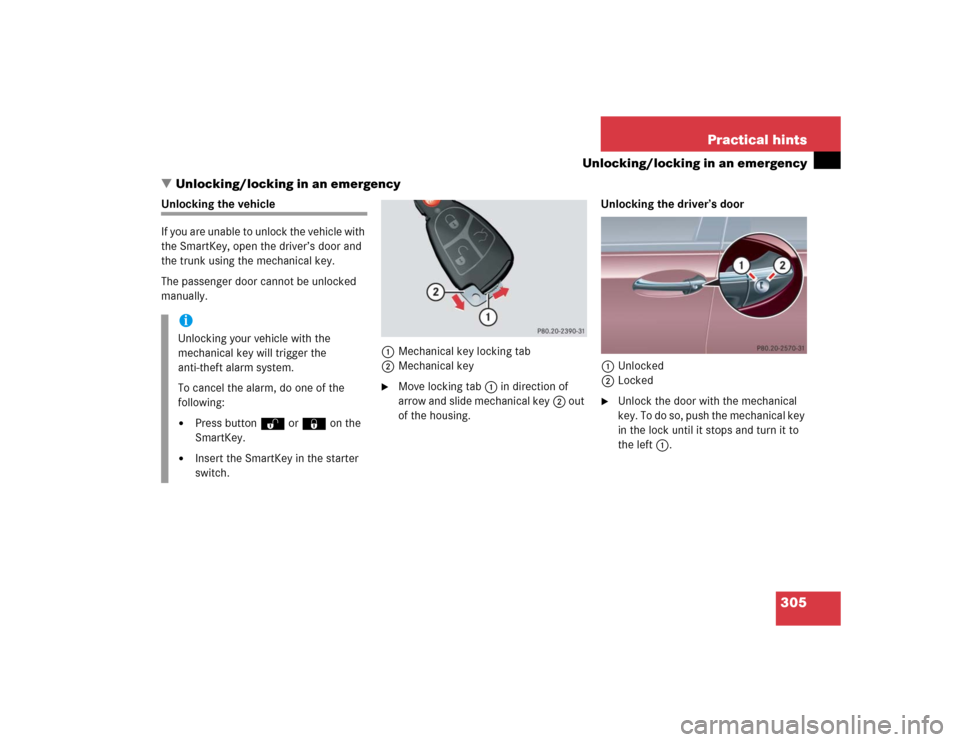
Unlocking the vehicle
If you are unable to unlock the vehicle with
the SmartKey, open the driver’s door and
the trunk using the mechanical key.
The passenger door cannot be unlocked
manually.
1Mechanical key locking tab
2Mechanical key
�
Move locking tab1 in direction of
arrow and slide mechanical key2 out
of the housing.Unlocking the driver’s door
1Unlocked
2Locked
�
Unlock the door with the mechanical
key. To do so, push the mechanical key
in the lock until it stops and turn it to
the left1.
iUnlocking your vehicle with the
mechanical key will trigger the
anti-theft alarm system.
To cancel the alarm, do one of the
following:�
Press buttonŒ or‹ on the
SmartKey.
�
Insert the SmartKey in the starter
switch.
Page 306 of 400
 is required to open the trunk lid.
The lock is located next to the recessed
han")
306 Practical hintsUnlocking/locking in an emergencyUnlocking the trunk
A minimum height clearance of 5.71 ft
(1.74 m) is required to open the trunk lid.
The lock is located next to the recessed
handle.
1Unlocking in an emergency
2Handle�
Slide mechanical key out of the
SmartKey (
�page 305).
�
Insert the mechanical key into the
trunk lid lock.
�
Turn the mechanical key counterclock-
wise completely to position1 and
hold it in this position.
�
Pull trunk lid handle2 and lift the
trunk lid.
Locking the vehicle
If you are unable to lock the vehicle with
the SmartKey, lock it with the mechanical
key as follows:�
Close the passenger doors and the
trunk.
�
Press the central locking switch in the
cockpit (
�page 91).
�
Check to see whether the locking
knobs on the passenger doors are
down. If necessary push them down
manually.
�
Slide mechanical key out of the
SmartKey (
�page 305).
�
Lock the driver’s door with the
mechanical key (
�page 305).
�
Check if the trunk is locked. If
necessary lock the trunk with the
mechanical key (
�page 89).
!Always make sure there is sufficient
overhead clearance.