Page 131 of 256

WARNING: Do not drive your vehicle until you verify that the
brakelamps are working. Failure to check the brakelights and
subsequent use of the brakes may result in a rear-end collision.
WARNING: Always set the parking brake fully and make sure
the gearshift is latched in P (Park). Turn the ignition to the
LOCK position and remove the key whenever you leave your
vehicle.
WARNING: If the parking brake is fully released, but the brake
warning lamp remains illuminated, the brakes may not be
working properly. See your authorized Mazda dealership.
Driving with an automatic overdrive transaxle
Your automatic transaxle electronically controls the shift feel by using an
adaptive learning strategy. This feature is designed to optimize shift
smoothness.NOTE:It is normal for your transaxle to shift firmly during
the first few hundred kilometers (miles) of operation until the adaptive
strategy has been learned. The adaptive learning strategy is maintained
by power from the battery. When the battery is disconnected or a new
battery is installed, the transaxle must relearn its adaptive strategy.
Optimal shifting will resume within a few hundred kilometers (miles) of
operation.
Your automatic overdrive transaxle
provides fully automatic operation in
either D (Overdrive) or with the
O/D OFF switch depressed. Driving
with the gearshift lever in D
(Overdrive) gives the best fuel economy for normal driving conditions.
For manual control, start in 1 (First) and then shift manually.
To put your vehicle in gear, start the
engine, depress the brake pedal,
then move gearshift lever out of P
(Park).
OFF/ON
R D 2 1ODO
Driving
131
Page 133 of 256

Overdrive Ð column mounted gearshift with O/D off switch
The Overdrive position with the O/D
OFF switchnotdepressed is the
normal driving position for this
automatic overdrive transaxle. When
your vehicle cruises at a constant
speed for any length of time, this
fourth gear will increase your fuel
economy.
Overdrive may not be appropriate
for certain terrains. If the transaxle
shifts back and forth between third
and fourth gears while you are
driving hilly roads or if your vehicle
requires additional power for climbing hills, press the O/D OFF switch.
Each time the vehicle is started, the transaxle will automatically return
to normal overdrive mode.
If the O/D OFF indicator light is flashing on and off repeatedly
when the vehicle is started or does not come on when the O/D
OFF control is pressed, there may be a transaxle electronic
system malfunction. You should contact your authorized Mazda
dealer as soon as possible or damage to the transaxle could occur.
When to use D (Drive) or press the O/D OFF switch
You will notice that there is only one
drive position on your gearshift
indicator (instead of Drive and
Overdrive). However, you will find a
control labeled OVERDRIVE located
on the gearshift lever. Push in the
switch and the O/D OFF light in the
instrument cluster will illuminate.
With the O/D OFF light illuminated,
the transaxle will operate in first,
second and third gears and will not
shift into fourth gear. Operating in D (O/D OFF) provides more engine
braking than Overdrive for descending hills or city driving.
To return the transaxle to the normal Overdrive operation, press the O/D
OFF control again. Use this control to select between Overdrive or D
(O/D OFF) whenever you drive your vehicle.
R D 2 1ODO
OFF/ON
R D 2 1ODO
OFF/ON
Driving
133
Page 136 of 256

4. Without depressing the
accelerator pedal, turn the
ignition to position 4 (START),
release the ignition as soon as
the engine starts.
5. Let the engine idle for a few
seconds.
6. Release the brake pedal, then
slowly release the clutch pedal
while pressing down slowly on
the accelerator pedal.
Do not drive with your foot resting on the clutch pedal and do
not use the clutch pedal to hold your vehicle at a standstill while
waiting on a hill. These actions will seriously reduce clutch life.
Recommended shift speeds
Upshift according to the following charts for best fuel economy:
Upshifts when accelerating (recommended for best fuel
economy)
1-2 22 km/h (14 mph)
2-3 40 km/h (25 mph)
3-4 55 km/h (34 mph)
4-5 70 km/h (44 mph)
Upshifts when cruising (recommended for best fuel economy)
1-2 19 km/h (12 mph)
2-3 31 km/h (19 mph)
3-4 46 km/h (29 mph)
4-5 61 km/h (38 mph)
Reverse
Make sure that your vehicle is at a complete stop before you shift
into R (Reverse). Failure to do so may damage the transaxle.
Driving
136
Page 148 of 256
and if the ignition system gets wet, your engine may stall. Water
may also enter your engine's air intake and severely damage your
engine.
If driving through deep or standing water is unavoidable, proceed very
slowly. Never drive through water that is higher than the bottom of the
hubs (for trucks) or the bottom of the wheel rims (for cars).
Once through the water, always try the brakes. Wet brakes do not stop
the vehicle as effectively as dry brakes. Drying can be improved by
moving your vehicle slowly while applying light pressure on the brake
pedal.
Driving through deep water where the transmission vent tube is
submerged may allow water into the transmission and cause
internal transmission damage. Have the fluid checked and, if
water is found, replace the fluid.
VEHICLE LOADING ± WITH AND WITHOUT A TRAILER
This section will guide you in the proper loading of your vehicle and/or
trailer, to keep your loaded vehicle weight within its design rating
capability, with or without a trailer. Properly loading your vehicle will
provide maximum return of vehicle design performance. Before loading
your vehicle, familiarize yourself with the following terms for determining
your vehicle's weight ratings, with or without a trailer, from the vehicle's
Safety Certification Label and Tire and Load Information Label:
Base Curb Weight± is the weight of the vehicle including a full tank of
fuel and all standard equipment. It does not include passengers, cargo, or
optional equipment.
Vehicle Curb Weight± is the weight of your new vehicle when you
picked it up from your dealer plus any aftermarket equipment.
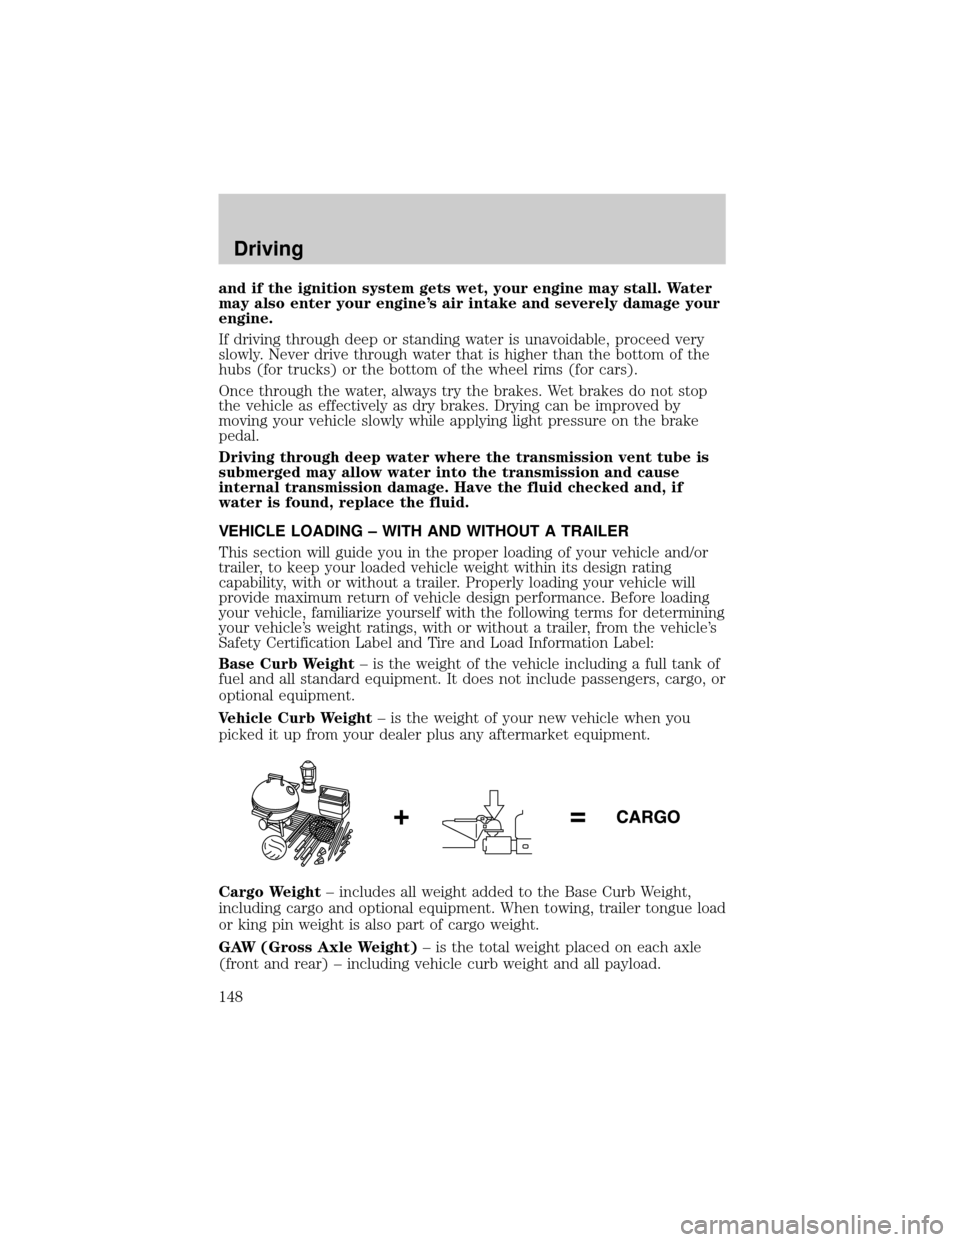
Cargo Weight± includes all weight added to the Base Curb Weight,
including cargo and optional equipment. When towing, trailer tongue load
or king pin weight is also part of cargo weight.
GAW (Gross Axle Weight)± is the total weight placed on each axle
(front and rear) ± including vehicle curb weight and all payload.
Driving
148
Page 157 of 256

HAZARD FLASHER CONTROL
The hazard flasher is located on the
instrument panel by the radio. The
hazard flashers will operate when
the ignition is off.
Push in the flasher control and all front and rear direction signals will
flash. Press the flasher control again to turn them off. Use it when your
vehicle is disabled and is creating a safety hazard for other motorists.
Note:With extended use, the flasher may run down your battery.
FUEL PUMP SHUT-OFF SWITCH
FUEL
RESET
This device stops the electric fuel pump from sending fuel to the engine
when your vehicle has had a substantial jolt.
After an accident, if the engine cranks but does not start, this switch
may have been activated.
This switch is located in the front
passenger's footwell, by the kick
panel access cover.
To reset the switch:
1. Turn the ignition OFF.
2. Check the fuel system for leaks.
3. Remove the kick panel access
cover, located in the front
passenger's footwell.
4. If no leaks are apparent, reset
the switch by pushing in on the
reset button.
5. Turn the ignition ON.
6. Wait a few seconds and return
the key to OFF.
7. Make another check of leaks.
Roadside Emergencies
Roadside Emergencies
157
Page 162 of 256

WARNING: To reduce risk of electrical shock, always replace
the cover to the Power Distribution Box before reconnecting
the battery or refilling fluid reservoirs.
If the battery has been disconnected and reconnected, refer to the
Batterysection of theMaintenance and specificationschapter.
The high-current fuses are coded as follows.
Fuse/Relay
LocationFuse Amp
RatingPower Distribution Box
Description
Horn 15A Horn
H/L LH 15A* Headlamp (high/low left, High
beams)
H/L RH 15A* Headlamp (high/low right, High
beams)
EEC 5A* EEC (KPWR)
HEGO 15A* HEGO 1,2, CMS 1,2, VMV
MAIN
120A
HEGO
15A (HORN)
15A
FUEL
20ADIODE DIODE H/L LH
15AH/L RH
15AEEC 5A
INJ
30A
HTR
40A
BTN 1
40ABTN 240AR DEF30AIG
MAIN
40A
H/L
RELAY
MICRO
MAIN
FAN(ABS)
60A
ST RELAY
ISO DEF RELAY
ISOADD FAN 2
ISO
A/C RELAY
MICRO FOG RELAY
MICRO
MAIN FAN
ISO
ADD FAN
ISO EEC MAIN
ISOFUEL PUMP
ISO
ALT 15A
FOG 20A(DRL) 15A
PWR 1
15A DRL2 15A
HLEV 10A
(ABS)
25APWR 2
15A A/C 15A
40/50AADD
FAN
40/50A
HTD
SEATS
30A
Roadside Emergencies
162
Page 163 of 256

Fuse/Relay
LocationFuse Amp
RatingPower Distribution Box
Description
FUEL 20A* Fuel pump, EEC (FPM)
DIODE Ð Ð
DIODE Ð Ð
H/L RELAY
MICROÐ Headlamp (high/low, right/left
relay)
HTD SEATS 30A Heated seats (if equipped)
INJ 30A** EEC (VPWR), EVR, MAF, IAC,
Bulkhead, HEGO fuse
MAIN 120A Main
ALT 15A* Alternator/ Regulator
(DRL) 15A* Daytime Running Lamps (DRL)
unit (feed), DRL relay
(DRL2) (HLEV)15A*(DRL2)
10A(HLEV)DRL module, HLEV
PWR 1 15A* Auxiliary power point
FOG 20A* Foglamps, Foglamp indicator
A/C 15A* A/C clutch
(ABS) 25A* Anti-Lock Brake System (ABS)
SOL, EVAC & FILL
PWR 2 15A* Auxiliary power point
IG MAIN 40A** Starter
HTR 40A** Blower motor, Blower motor relay
BTN 1 40A** JB - Accessory relay, Radio, TNS
relay, Cigar lighter, Cluster, Power
mirror, GEM, Accessory delay
relay, Power windows, Power
moonroof
(ABS) 60A** ABS motor, EVAC & FILL
BTN 2 40A** JB - Radio, CD changer, Cluster,
Dome lamps, Map lamps, Cargo
lamps, Horn relay, GEM, Power
locks, Speed control
Roadside Emergencies
163
Page 164 of 256

Fuse/Relay
LocationFuse Amp
RatingPower Distribution Box
Description
MAIN FAN 40A** (2.0 L)
50A(3.0 L)Main fan
R DEF 30A** Rear defroster
ADD FAN 40A**(2.0 L)
50A(3.0 L)Add fan
EEC MAIN ISO Ð EEC relay
FUEL PUMP ISO Ð Fuel pump relay
MAIN FAN ISO Ð Low-speed fan control relay (2.0L
engine)
High-speed fan control relay 1
(3.0L engine)
ADD FAN ISO Ð High-speed fan control relay 1
(2.0L engine)
Low-speed fan control relay (3.0L
engine)
DEF RELAY ISO Ð Rear defroster relay
ST RELAY ISO Ð Starter relay
ADD FAN 2 ISO Ð High-speed fan control relay 2
(3.0L engine)
Medium-speed fan control relay
(2.0L engine)
FOG RELAY
MICROÐ Foglamp relay
A/C RELAY
MICROÐ A/C clutch relay
OVERHEATING
If the temperature gauge indicates overheating and you experience
power loss, you hear a loud knocking or pinging noise, the engine is
probably too hot.
If this happens:
1. Drive safely to the side of the road and park off the right-of-way.
2. Shift the automatic transmission into P (Park) or the manual
transmission into the neutral position, and apply the parking brake.
Roadside Emergencies
164