Page 6 of 336

SPECIAL NOTICES
Emission warranty
The New Vehicle Limited Warranty includes Bumper-to-Bumper
Coverage, Safety Restraint Coverage, Corrosion Coverage, and 6.0L
Power Stroke Diesel Engine Coverage. In addition, your vehicle is eligible
for Emissions Defect and Emissions Performance Warranties. For a
detailed description of what is covered and what is not covered, refer to
theWarranty Guidethat is provided to you along with your Owner's
Guide.
Service Data Recording
Service date recorders in your vehicle are capable of collecting and
storing diagnostic information about your vehicle. This potentially
includes information about the performance or status of various systems
and modules in the vehicle, such as engine, throttle, steering or brake
systems. In order to properly diagnose and service your vehicle, Ford
Motor Company, Ford of Canada and service and repair facilities may
access vehicle diagnostic information through a direct connection to your
vehicle when diagnosing or servicing your vehicle.
Event Data Recording
Other modules in your vehicle Ð event data recorders Ð are capable of
collecting and storing data during a crash or near crash event. The
recorded information may assist in the investigation of such an event.
The modules may record information about both the vehicle and the
occupants, potentially including information such as:
²how various systems in your vehicle were operating;
²whether or not the driver and passenger seatbelts were buckled;
²how far (if at all) the driver was depressing the accelerator and/or the
brake pedal;
²how fast the vehicle was traveling; and
²where the driver was positioning the steering wheel.
To access this information, special equipment must be directly connected
to the recording modules. Ford Motor Company and Ford of Canada do
not access event data recorder information without obtaining consent,
unless pursuant to court order or where required by law enforcement,
other government authorities or other third parties acting with lawful
authority. Other parties may seek to access the information
independently of Ford Motor Company and Ford of Canada.
Introduction
6
Page 8 of 336
These are some of the symbols you may see on your vehicle.
Vehicle Symbol Glossary
Safety Alert
See Owner's Guide
Fasten Safety BeltAir Bag-Front
Air Bag-SideChild Seat
Child Seat Installation
WarningChild Seat Lower
Anchor
Child Seat Tether
AnchorBrake System
Anti-Lock Brake SystemBrake Fluid -
Non-Petroleum Based
Traction ControlAdvanceTracy
Master Lighting SwitchHazard Warning Flasher
Fog Lamps-FrontFuse Compartment
Fuel Pump ResetWindshield Wash/Wipe
Windshield
Defrost/DemistRear Window
Defrost/Demist
Introduction
8
Page 11 of 336

or by applying the parking brake when the ignition is turned to the ON
position. If the brake system warning light does not illuminate at this
time, seek service immediately from your dealership. Illumination after
releasing the parking brake indicates low brake fluid level and the brake
system should be inspected immediately by your servicing dealership.
Driving a vehicle with the brake system warning light on is
dangerous. A significant decrease in braking performance may
occur. It will take you longer to stop the vehicle. Have the vehicle
checked by your dealer immediately.
Anti-lock brake system:If the
ABS light stays illuminated or
continues to flash, a malfunction has
been detected, have the system
serviced immediately. Normal
braking is still functional unless the brake warning light also is
illuminated.
Air bag readiness:If this light fails
to illuminate when ignition is turned
to ON, continues to flash or remains
on, have the system serviced
immediately. A chime will also sound when a malfunction in the
supplemental restraint system has been detected.
Safety belt:Reminds you to fasten
your safety belt. A chime will also
sound to remind you to fasten your
safety belt.
Charging system:Illuminates when
the battery is not charging properly.
Engine oil pressure:Illuminates
when the oil pressure falls below the
normal range. Refer toEngine oil
in theMaintenance and
Specificationschapter.
ABS
Instrument Cluster
11
Page 154 of 336

Using the manual recline function
Never adjust the driver's seat or seatback when the vehicle is
moving.
Do not pile cargo higher than the seatbacks to avoid injuring
people in a collision or sudden stop.
The driver and passenger seat must be in the upright position
and the lap belt must be snug and low across the hips while the
vehicle is moving.
Reclining the seatback can cause an occupant to slide under the
seat's safety belt, resulting in severe personal injuries in the
event of a collision.
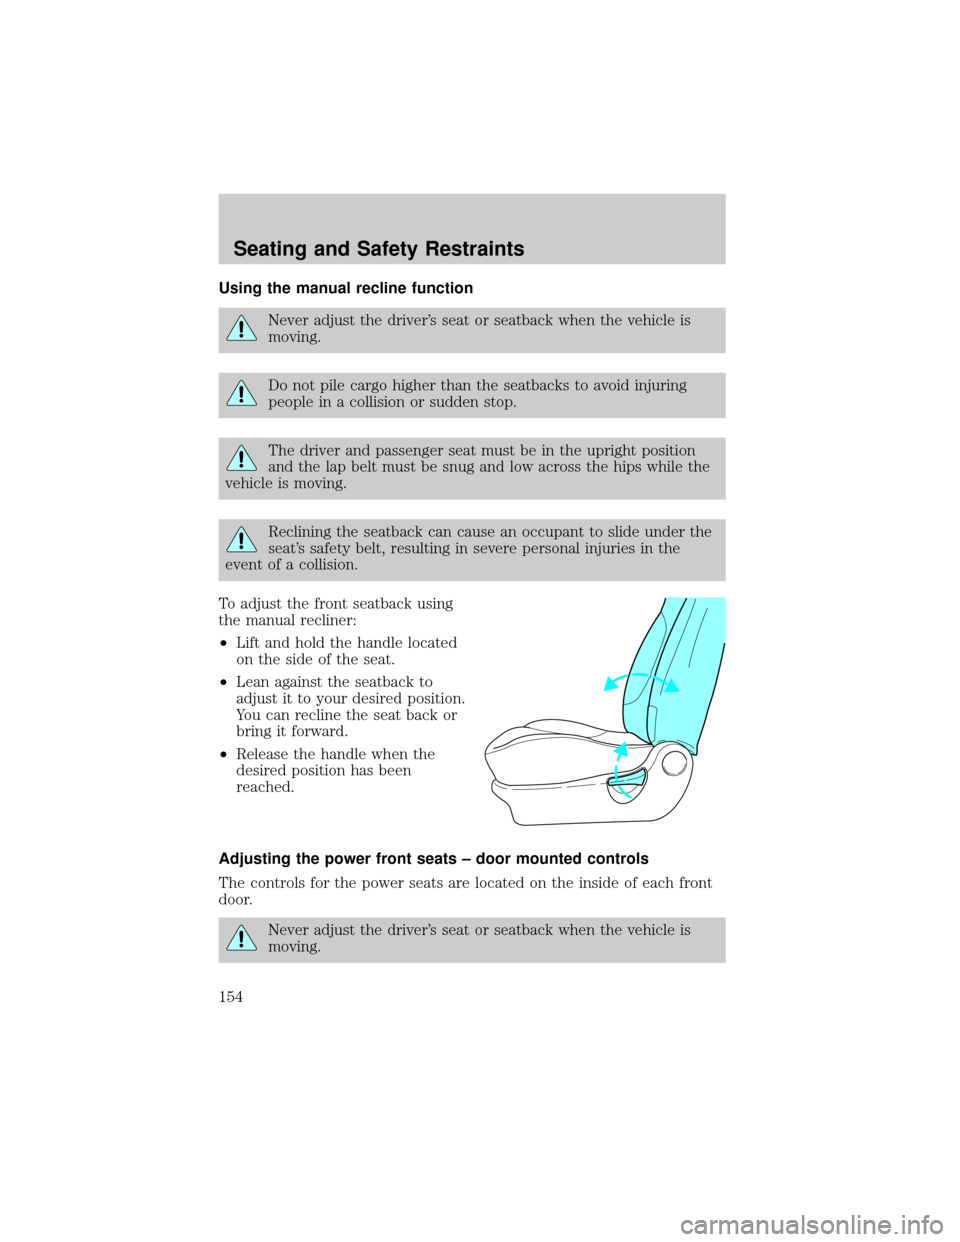
To adjust the front seatback using
the manual recliner:
²Lift and hold the handle located
on the side of the seat.
²Lean against the seatback to
adjust it to your desired position.
You can recline the seat back or
bring it forward.
²Release the handle when the
desired position has been
reached.
Adjusting the power front seats ± door mounted controls
The controls for the power seats are located on the inside of each front
door.
Never adjust the driver's seat or seatback when the vehicle is
moving.
Seating and Safety Restraints
154
Page 155 of 336
Do not pile cargo higher than the seatbacks to avoid injuring
people in a collision or sudden stop.
Always drive and ride with your seatback upright and the lap
belt snug and low across the hips.
Reclining the seatback can cause an occupant to slide under the
seat's safety belt, resulting in severe personal injuries in the
event of a collision.
Press to move the seat forward or
backward.
Press to move the front portion of
the seat cushion up or down.
Press to move the rear portion of
the seat cushion up or down.
Seating and Safety Restraints
155
Page 160 of 336

Folding down the 40/20/40 rear seats or bucket seats
Ensure that the headrest is in the down position and no objects such as
books, purses or briefcases are on the floor in front of the second row
seats before folding them down.
Move front passenger seat forward so that the second row seat headrest
clears the front seat.
For assistance, refer to the label located on the lower position of the
opening.
1. Locate handle on the side of the
seat cushion by the door.
2. Pull forward on the upper portion
of the release handle and push the
seatback toward the front of the
vehicle.
3. Press down on the top outboard
area of the seatback until a click is
heard.
Adjusting the 2nd row recline
The 2nd row reclines for additional comfort. To adjust the 2nd row
recline, pull the handle forward and push the seat back rearward.
Reclining the seatback can cause an occupant to slide under the
seat's safety belt, resulting in severe personal injuries in the
event of a collision.
Operating the 2nd row seat for E-Z Entry (if equipped)
The E-Z Entry seat allows for easier entry and exit to and from the 3rd
row seat.
Seating and Safety Restraints
160
Page 161 of 336

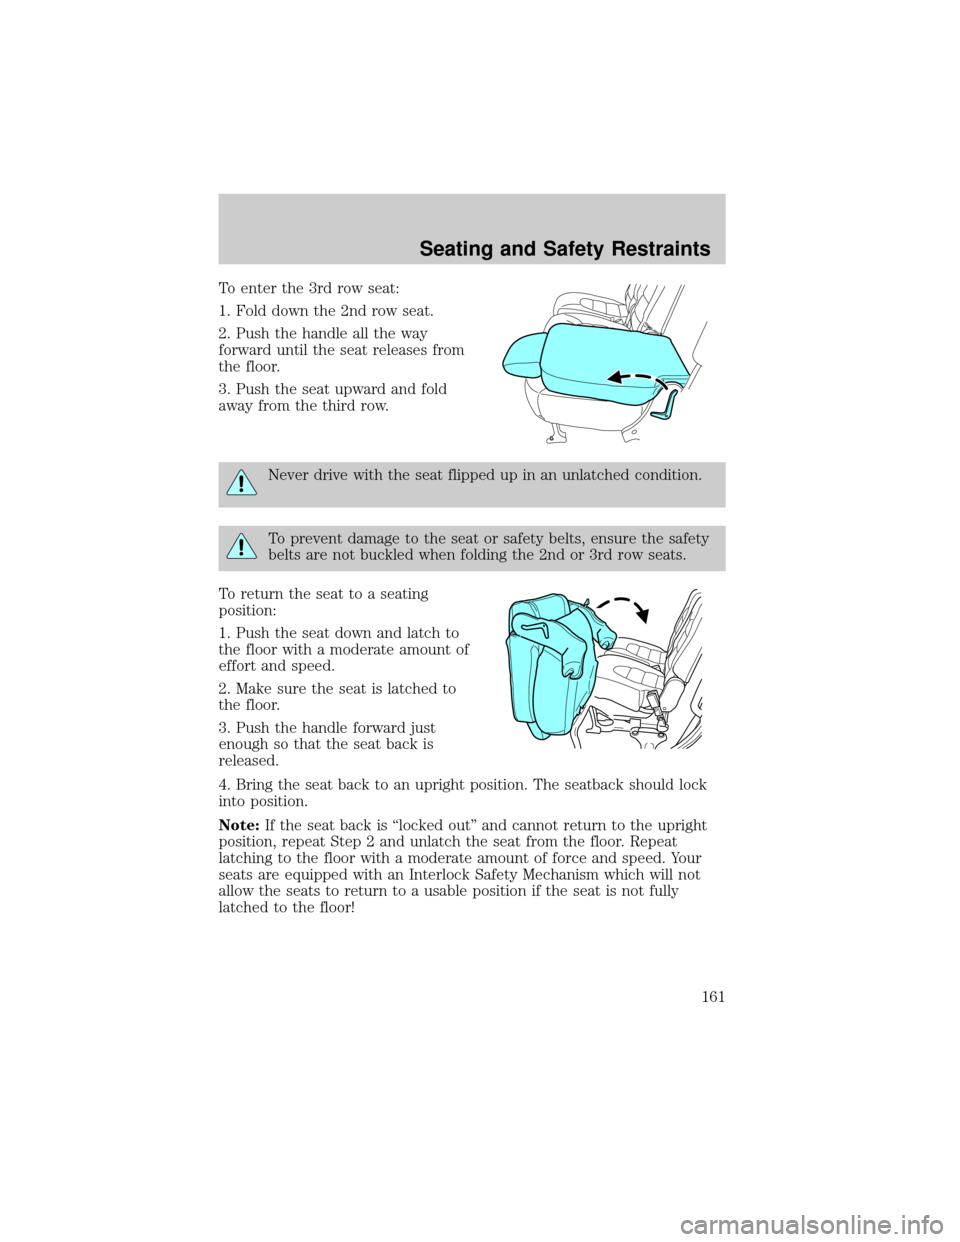
To enter the 3rd row seat:
1. Fold down the 2nd row seat.
2. Push the handle all the way
forward until the seat releases from
the floor.
3. Push the seat upward and fold
away from the third row.
Never drive with the seat flipped up in an unlatched condition.
To prevent damage to the seat or safety belts, ensure the safety
belts are not buckled when folding the 2nd or 3rd row seats.
To return the seat to a seating
position:
1. Push the seat down and latch to
the floor with a moderate amount of
effort and speed.
2. Make sure the seat is latched to
the floor.
3. Push the handle forward just
enough so that the seat back is
released.
4. Bring the seat back to an upright position. The seatback should lock
into position.
Note:If the seat back is ªlocked outº and cannot return to the upright
position, repeat Step 2 and unlatch the seat from the floor. Repeat
latching to the floor with a moderate amount of force and speed. Your
seats are equipped with an Interlock Safety Mechanism which will not
allow the seats to return to a usable position if the seat is not fully
latched to the floor!
Seating and Safety Restraints
161
Page 164 of 336
3. Push the closeout panel forward
over the space between the seats.
To put seat in upright position:
1. Pull back the slider panel on the
seatback to release the closeout
panel.
2. Pull the seat release lever located
on top of the seatback while lifting
the seatback into the upright
position.
3. The seatback will latch into place.
The third row seat is equipped with combination lap and shoulder belts
in both seating positions. For information on the proper operation of the
safety restraints, refer toSafety Restraintsin this chapter.
Seating and Safety Restraints
164