Page 229 of 656
OCCUPANT RESTRAINT SYSTEMS
201
�Both high-positioned lap belts and loose-fitting
belts could cause death or serious injuries due to
sliding under the lap belt during a collision or other
unintended event. Keep the lap belt positioned as
low on a child's hips as possible.
� For child's safety, do not place the shoulder belt
under child's arm.
� After inserting the tab, make sure the tab and buckle
are locked and that the lap and shoulder portions of
the belt are not twisted.
� Do not insert coins, clips, etc. in the buckle as this
may prevent your child from properly latching the tab
and buckle.
� If the seat belt does not function normally, it cannot
protect your child from death or serious injury.
Contact your Lexus dealer immediately. Do not
install the child restraint system on the seat until the
seat belt is fixed.
Page 235 of 656
OCCUPANT RESTRAINT SYSTEMS
207
CAUTION
�When using the lower anchorages for the child
restraint system, be sure that there are no irregular
objects around the anchorages or that the seat belt is
not caught.
� Push and pull the child restraint system in different
directions to be sure it is secure. Follow all the
installation instructions provided by its
manufacturer.
� Do not install a child restraint system on the second
seat if it interferes with the lock mechanism of the
front seats. This can cause death or serious injury to
the child and front passenger in case of sudden
braking or a collision.
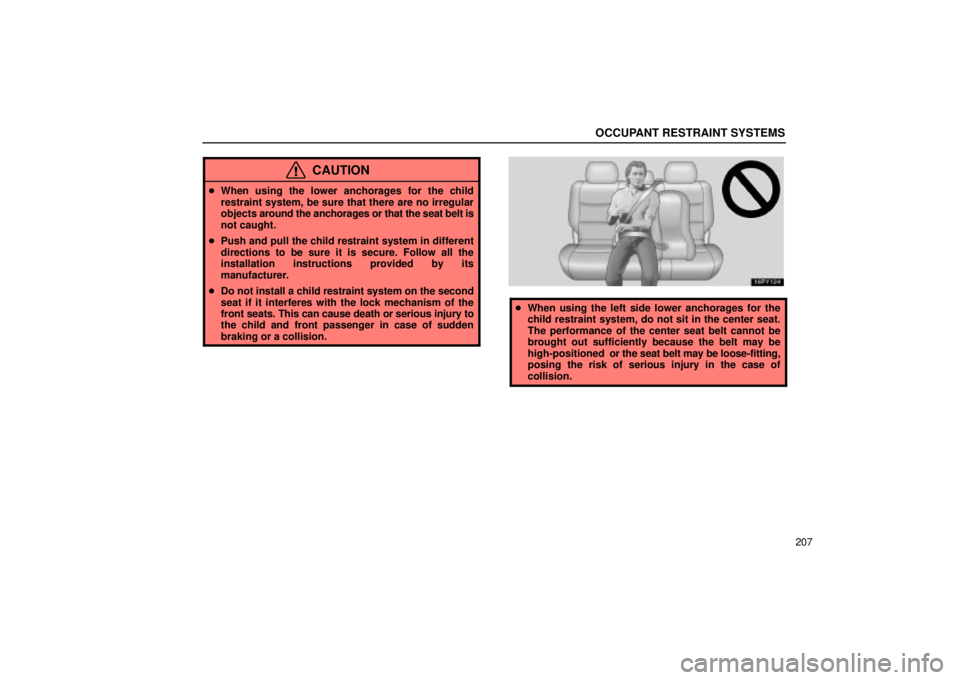
� When using the left side lower anchorages for the
child restraint system, do not sit in the center seat.
The performance of the center seat belt cannot be
brought out sufficiently because the belt may be
high-positioned or the seat belt may be loose-fitting,
posing the risk of serious injury in the case of
collision.
Page 250 of 656
![Lexus GX470 2004 Engine / LEXUS 2004 GX470 FROM JAN. 2004 THROUGH JUL. 2004 PROD. OWNERS MANUAL (OM60A87U) STEERING WHEEL AND MIRRORS
222
Drive the vehicle slowly (at 8 km/h [5 mph] or lower) in a circle
until the direction is displayed. If there is not enough space to
drive in a circle, drive around the](/manual-img/36/29626/w960_29626-249.png "Lexus GX470 2004 Engine / LEXUS 2004 GX470 FROM JAN. 2004 THROUGH JUL. 2004 PROD. OWNERS MANUAL (OM60A87U) STEERING WHEEL AND MIRRORS
222
Drive the vehicle slowly (at 8 km/h [5 mph] or lower) in a circle
until the direction is displayed. If there is not enough space to
drive in a circle, drive around the")
STEERING WHEEL AND MIRRORS
222
Drive the vehicle slowly (at 8 km/h [5 mph] or lower) in a circle
until the direction is displayed. If there is not enough space to
drive in a circle, drive around the block until the direction is
displayed.
After driving in 1 to 3 circles in the above method, calibration
is complete with the direction shown on the display. Perform
circling calibration just after you have purchased
your Lexus. And then always perform circling calibration
after the battery has been removed, replaced or
disconnected.
� Do not perform circling calibration of the compass in a place
where the earth's magnetic field is subject to interference by
artificial magnetic fields (underground parking, under a steel
tower, between buildings, roof parking, near a crossing,
near a large vehicle, etc.).
� During calibration, do not operate electric systems (moon
roof, power windows, etc.) as they may interfere with the
calibration.
CAUTION
�When doing the circling calibration, be sure to secure
a wide space, and watch out for people and vehicles
in the neighborhood. Do not violate any local traffic
rules while performing circling calibration.
� Do not adjust the display while the vehicle is moving.
Be sure to adjust the display only when the vehicle is
stopped.
Page 262 of 656
 AIR CONDITIONING
234This button allows the air intake to select the OUTSIDE AIR
mode automatically. This is to clean up the front view more
quickly. If you want to return the setting to the
RECIRCUL")
AIR CONDITIONING
234This button allows the air intake to select the OUTSIDE AIR
mode automatically. This is to clean up the front view more
quickly. If you want to return the setting to the
RECIRCULATED
AIR mode, push the air intake control button
once again.
Push the A/Cº button for dehumidified heating or cooling. This
setting clears the front view more quickly.
CAUTION
Do not use the windshield air flow button during cooled
air operation in extremely humid weather. The
difference between the temperature of the outside air
and that of the windshield could cause the outer surface
of the windshield to fog up blocking your vision.
(c) Operating tips
� To help cool down the interior after parking in the hot sun,
drive for the first few minutes with the windows open. After
the excess heat has blown away, close the windows.
� Make sure the air inlet grilles in front of the windshield are
not blocked by leaves or other obstructions.
� If air flow control is not satisfactory, check the side vents and
rear vents. (See (d) Center vents and side ventsº.)
� On humid days, do not blow cold air on the windshield. The
windshield could fog up because of the difference in air
temperature on the inside and outside of the windshield.
� Keep the area under the front seats clear to allow air to
circulate throughout the vehicle.
� On cold days, set the fan speed to high for a minute to help
clear the intake ducts of snow or moisture. This can reduce
the amount of fogging on the windows.
� When driving on dusty roads, close all windows. If dust
thrown up by the vehicle is still drawn into the vehicle after
closing the windows, it is recommended that the air intake
be set to the OUTSIDE AIR mode and the fan speed to any
setting except OFFº.
Page 298 of 656
 AUDIO
270
Car audio system operating hints
NOTICE
To ensure correct audio system operations:
�Be careful not to spill beverages over the audiosystem.
�Do not put anything other than a cassette tape or")
AUDIO
270
Car audio system operating hints
NOTICE
To ensure correct audio system operations:
�Be careful not to spill beverages over the audiosystem.
�Do not put anything other than a cassette tape orcompact disc into the cassette tape slot or compact
disc slot.
�The use of a cellular phone inside or near the vehiclemay cause a noise from the speakers of the audiosystem which you are listening to. However, thisdoes not indicate a malfunction.
Radio reception
Usually, a problem with radio reception does not mean there is
a problem with your radio Ð it is just the normal result of
conditions outside the vehicle.
For example, nearby buildings and terrain can interfere with
FM reception. Power lines or telephone wires can interfere
with AM signals. And of course, radio signals have a limited
range. The farther you are from a station, the weaker its signal
will be. In addition, reception conditions change constantly as
your vehicle moves.
Here are some common reception problems that probably do
not indicate a problem with your radio: FM
Fading
and drifting stations Ð Generally, the effective range
of FM is about 40 km (25 miles). Once outside this range, you
may notice fading and drifting, which increase with the distance
from the radio transmitter. They are often accompanied by
distortion.
Multi-path Ð FM signals are reflective, making it possible for
two signals to reach your antenna at the same time. If this
happens, the signals will cancel each other out, causing a
momentary flutter or loss of reception.
Static and fluttering Ð These occur when signals are
blocked by buildings, trees, or other large objects. Increasing
the bass level may reduce static and fluttering.
Page 306 of 656
AUDIO
278(a) Before using the controller (for new vehicle owners)
A battery is already set in the controller with an insulating
sheet, which prevents the battery from being discharged.
Before using the controller, remove the insulating sheet.
(b) Using the controller
To use the rear seat audio system controller, direct the
signal output portion of the controller to the signal
reception portion of the rear seat audio system display.
The rear seat audio system controller can be operated when
the ignition switch is in the ACCº or ONº position.
The controller does not operate properly when the signal
reception portion of the display is exposed to direct sunlight.
Block the display from direct sunlight.
NOTICE
Observe
the followings, otherwise the controller may be
damaged.
�Do not drop or strongly knock the controller against hard objects.
�Do not sit on or place heavy objects on the controller.
Page 317 of 656
AUDIO
289
1. Pull the case out while pushing the lock release button to the
side.2. Remove the discharged battery.
3. Put in a new battery with the positive (+) side up.
4. Put in the case securely.
NOTICE
�Make sure that the positive side of the controller
battery is facing correctly.
�Do not replace the battery with wet hands. Water may
cause rust.
�Do not touch or move any components inside of the controller, or it may interfere with proper operation.
�Be careful not to bend the electrode of the controllerbattery insertion and that dust or oil does not adhere
to the transmitter case.
�Close the battery case securely.
Page 321 of 656
AUDIO
293
Display
To use the display, push the lock release button and lower
the display until you hear a click.
You can adjust the display to your desired angle.
To close, push up the display until you hear a click.
The illumination of the screen is automatically turned off when
the display is closed. However, the rear seat entertainment
system is not turned off.
CAUTION
To reduce the chance of injury in case of an accident or
sudden stop while driving, close the display when it is
not in use.

 AUDIO
278(a) Before using the controller (for new vehicle owners)
A battery is already set in the controller with an insulating
sheet, which prevents the battery from being discharged.
Before using th")
 AUDIO
289
1. Pull the case out while pushing the lock release button to the
side.2. Remove the discharged battery.
3. Put in a new battery with the positive (+) side up.
4. Put in the case securely.
N")
 AUDIO
293
Display
To use the display, push the lock release button and lower
the display until you hear a click.
You can adjust the display to your desired angle.
To close, push up the display until y")