Page 172 of 315

Driving your vehicle
60
4
1 23456789
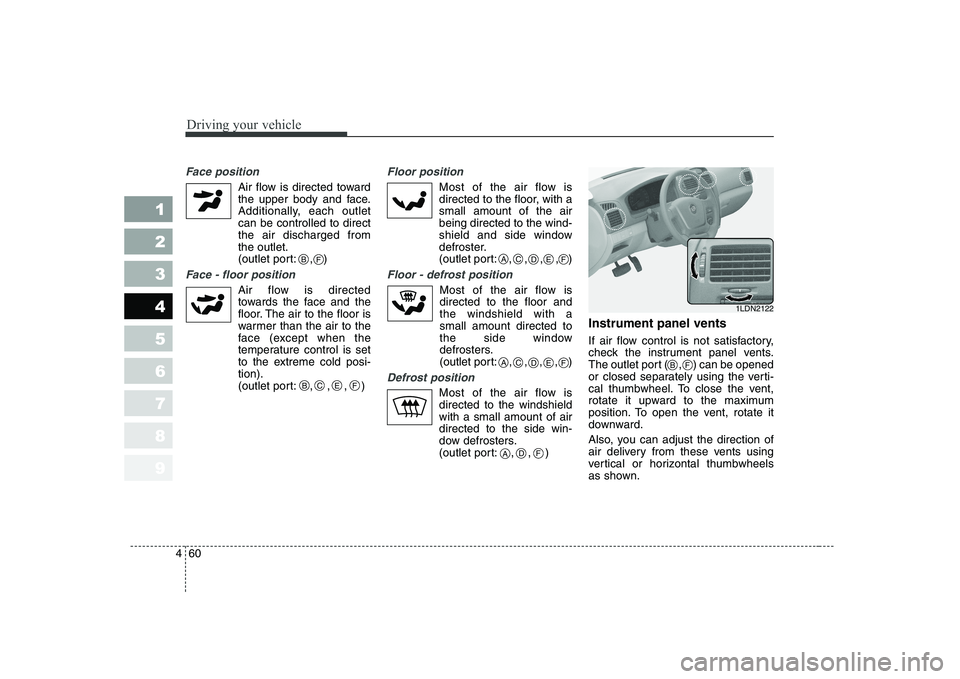
Face position
Air flow is directed toward
the upper body and face.
Additionally, each outletcan be controlled to directthe air discharged fromthe outlet.
(outlet port: , )
Face - floor position
Air flow is directedtowards the face and the
floor. The air to the floor is
warmer than the air to the
face (except when the
temperature control is set
to the extreme cold posi-tion).
(outlet port: , , , )
Floor position
Most of the air flow is
directed to the floor, with asmall amount of the airbeing directed to the wind-
shield and side window
defroster.
(outlet port: , , , , )
Floor - defrost position
Most of the air flow is directed to the floor andthe windshield with asmall amount directed to
the side window
defrosters.
(outlet port:
, , , ,)
Defrost position
Most of the air flow is directed to the windshieldwith a small amount of airdirected to the side win-
dow defrosters.
(outlet port: , , ) Instrument panel vents
If air flow control is not satisfactory,
check the instrument panel vents.
The outlet port ( , ) can be opened
or closed separately using the verti-
cal thumbwheel. To close the vent,
rotate it upward to the maximum
position. To open the vent, rotate it
downward.
Also, you can adjust the direction of
air delivery from these vents using
vertical or horizontal thumbwheels
as shown.
B
BCEF
CADEF
CADEF
F
ADF
1LDN2122
BF
Page 179 of 315

467
1 23456789
Driving your vehicle
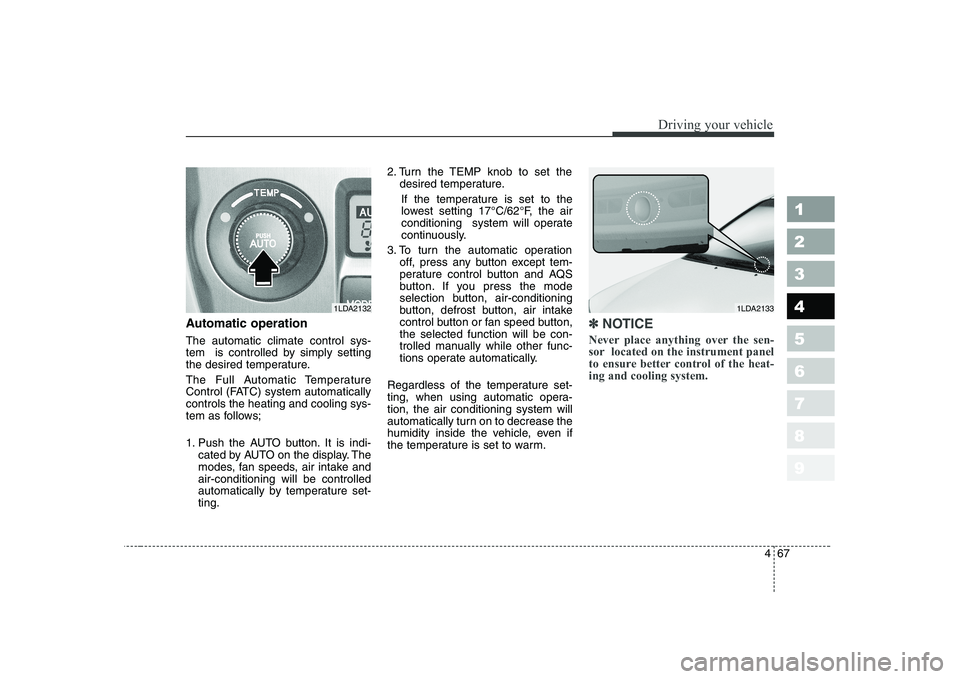
Automatic operation The automatic climate control sys-
tem is controlled by simply setting
the desired temperature.
The Full Automatic Temperature
Control (FATC) system automaticallycontrols the heating and cooling sys-
tem as follows;
1. Push the AUTO button. It is indi-cated by AUTO on the display. The
modes, fan speeds, air intake andair-conditioning will be controlled
automatically by temperature set-ting. 2. Turn the TEMP knob to set the
desired temperature.
If the temperature is set to the
lowest setting 17°C/62°F, the air
conditioning system will operate
continuously.
3. To turn the automatic operation off, press any button except tem-
perature control button and AQS
button. If you press the mode
selection button, air-conditioning
button, defrost button, air intake
control button or fan speed button,the selected function will be con-
trolled manually while other func-
tions operate automatically.
Regardless of the temperature set-
ting, when using automatic opera-tion, the air conditioning system will
automatically turn on to decrease the
humidity inside the vehicle, even if
the temperature is set to warm.✽✽ NOTICE
Never place anything over the sen-
sor located on the instrument panel
to ensure better control of the heat-ing and cooling system.
1LDA21321LDA2133
Page 186 of 315
Driving your vehicle
74
4
1 23456789
Instrument panel vents
If air flow control is not satisfactory,
check the instrument panel vents.
The outlet port ( , ) can be opened
or closed separately using the verti-
cal thumbwheel. To close the vent,
rotate it upward to the maximum
position. To open the vent, rotate it
downward.
Also, you can adjust the direction of
air delivery from these vents using
vertical or horizontal thumbwheels
as shown. Air conditioning button
Push the A/C button to turn the air conditioning system on (indicatorlight will illuminate).
Push the button again to turn the air
conditioning system off.
OFF button
Push the OFF button to turn off the
air climate control system. However
you can still operate the mode and
air intake buttons as long as the igni-
tion switch is ON.
1LDN21221LDA21411LDA2142
BF
Page 215 of 315

Driving tips
18
5
1 23456789
Following distance
Stay at least twice as far behind the
vehicle ahead as you would when
driving your vehicle without a trailer.
This can help you avoid situations
that require heavy braking and sud-
den turns.
Passing
You’ll need more passing distance
up ahead when you’re towing a trail-
er. And, because you’re a good deal
longer, you’ll need to go much farther
beyond the passed vehicle before
you can return to your lane.
Backing up
Hold the bottom of the steering
wheel with one hand. Then, to move
the trailer to the left, just move your
hand to the left. To move the trailer to
the right, move your hand to the
right. Always back up slowly and, if
possible, have someone guide you.
Making turns
When you’re turning with a trailer,
make wider turns than normal. Do
this so your trailer won’t strike soft
shoulders, curbs, road signs, trees,
or other objects. Avoid jerky or sud-
den maneuvers. Signal well in
advance.
Turn signals when towing a trailer
When you tow a trailer, your vehicle
has to have a different turn signal
flasher and extra wiring. The green
arrows on your instrument panel will
flash whenever you signal a turn or
lane change. Properly connected,
the trailer lights will also flash to alert
other drivers you’re about to turn,
change lanes, or stop.
When towing a trailer, the green
arrows on your instrument panel will
flash for turns even if the bulbs on
the trailer are burned out. Thus, you
may think drivers behind you are
seeing your signals when, in fact,
they are not. It’s important to check
occasionally to be sure the trailer
bulbs are still working. You must also
check the lights every time you dis-connect and then reconnect the
wires.
Page 314 of 315

93
1 23456789
Index
If you have a flat tire . . . . . . . . . . . . . . . . . . . . . . . . 6-19
Ignition switch . . . . . . . . . . . . . . . . . . . . . . . . . . . . . . 4-2
Immobilizer system . . . . . . . . . . . . . . . . . . . . . . . . . . 3-7
Instrument cluster . . . . . . . . . . . . . . . . . . . . . . . . . . 4-33
Instrument panel overview . . . . . . . . . . . . . . . . . . . . 2-5
Interior care . . . . . . . . . . . . . . . . . . . . . . . . . . . . . . . 7-62
Interior features . . . . . . . . . . . . . . . . . . . . . . . . . . . . 3-91
Interior lights . . . . . . . . . . . . . . . . . . . . . . . . . . . . . . 3-86
Interior overview . . . . . . . . . . . . . . . . . . . . . . . . . . . . 2-4
Keys . . . . . . . . . . . . . . . . . . . . . . . . . . . . . . . . . . . . . . 3-2
Label information . . . . . . . . . . . . . . . . . . . . . . . . . . 5-22
Lighting . . . . . . . . . . . . . . . . . . . . . . . . . . . . . . . . . . 4-46
Lubricant specifications . . . . . . . . . . . . . . . . . . . . . . 7-56
Lubricants and fluids . . . . . . . . . . . . . . . . . . . . . . . . 7-31
Luggage net . . . . . . . . . . . . . . . . . . . . . . . . . . . . . . . 3-99
Maintenance services . . . . . . . . . . . . . . . . . . . . . . . . . 7-3
Maintenance under severe usage conditions . . . . . . . 7-8Manual climate control system . . . . . . . . . . . . . . . . 4-57
Manual transaxle . . . . . . . . . . . . . . . . . . . . . . . 4-7, 7-26
Mirrors . . . . . . . . . . . . . . . . . . . . . . . . . . . . . . . . . . . 3-82
Normal maintenance schedule . . . . . . . . . . . . . . . . . . 7-5
Overheating . . . . . . . . . . . . . . . . . . . . . . . . . . . . . . . . 6-3
Overloading . . . . . . . . . . . . . . . . . . . . . . . . . . . . . . . 5-21
Owner maintenance . . . . . . . . . . . . . . . . . . . . . . . . . 7-10
Parking brake. . . . . . . . . . . . . . . . . . . . . . . . . . . . . . 7-23
Power steering . . . . . . . . . . . . . . . . . . . . . . . . . . . . . 7-25
Remote keyless entry . . . . . . . . . . . . . . . . . . . . . . . . . 3-4
Road warning . . . . . . . . . . . . . . . . . . . . . . . . . . . . . . . 6-2
Safety belts . . . . . . . . . . . . . . . . . . . . . . . . . . . . . . . . 3-30
Seat . . . . . . . . . . . . . . . . . . . . . . . . . . . . . . . . . . . . . . 3-16
I
K
L
M
N
O
P
R
S
Page:
< prev 1-8 9-16 17-24