2004 KIA CERATO warning lights
[x] Cancel search: warning lightsPage 214 of 315
517
Driving tips
1 23456789
Safety chains
You should always attach chains
between your vehicle and your trail-
er. Cross the safety chains under the
tongue of the trailer so that thetongue will not drop to the road if it
becomes separated from the hitch.
Instructions about safety chains may
be provided by the hitch manufactur-
er or by the trailer manufacturer.
Follow the manufacturer’s recom-
mendation for attaching safety
chains. Always leave just enough
slack so you can turn with your trail-
er. And, never allow safety chains to
drag on the ground.
Trailer brakes
If your trailer weighs more than 550
kg (1212 lbs.) loaded, then it needs
its own brakes and they must be ade-
quate. Be sure to read and follow the
instructions for the trailer brakes so
you’ll be able to install, adjust and
maintain them properly.
Don’t tap into your vehicle's brakesystem.
Driving with a trailer
Towing a trailer requires a certain
amount of experience. Before setting
out for the open road, you must get
to know your trailer. Acquaint your-
self with the feel of handling and
braking with the added weight of the
trailer. And always keep in mind that
the vehicle you are driving is now a
good deal longer and not nearly so
responsive as your vehicle is by
itself.
Before you start, check the trailer
hitch and platform, safety chains,
electrical connector(s), lights, tires
and mirror adjustment. If the trailer
has electric brakes, start your vehicle
and trailer moving and then apply the
trailer brake controller by hand to be
sure the brakes are working. This lets
you check your electrical connection
at the same time.
During your trip, check occasionally
to be sure that the load is secure,
and that the lights and any trailer
brakes are still working.
WARNING
Do not use a trailer with its own
brakes unless you are absolute-
ly certain that you have properly
set up the brake system. This is
not a task for amateurs. Use an
experienced, competent trailer
shop for this work.
Page 222 of 315
In case of an emergency
2
6
ROAD WARNING
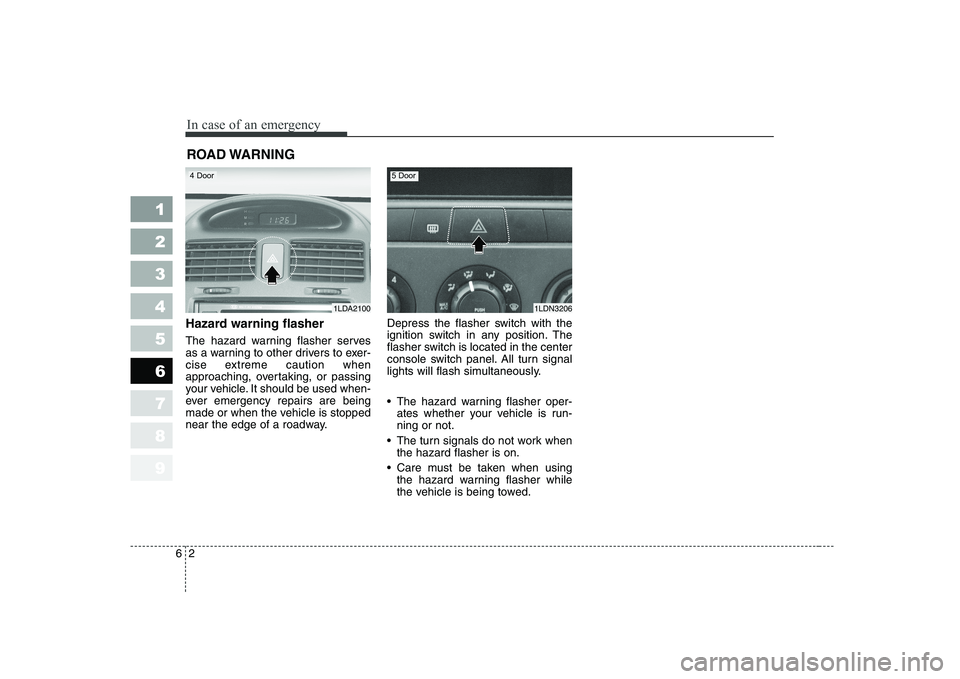
Hazard warning flasher
The hazard warning flasher serves
as a warning to other drivers to exer-
cise extreme caution when
approaching, overtaking, or passing
your vehicle. It should be used when-
ever emergency repairs are being
made or when the vehicle is stopped
near the edge of a roadway. Depress the flasher switch with the
ignition switch in any position. The
flasher switch is located in the center
console switch panel. All turn signal
lights will flash simultaneously.
• The hazard warning flasher oper-
ates whether your vehicle is run- ning or not.
The turn signals do not work when the hazard flasher is on.
Care must be taken when using the hazard warning flasher while
the vehicle is being towed.
1 23456789
1LDA21001LDN3206
4 Door5 Door
Page 228 of 315
In case of an emergency
8
6
Fuse replacement
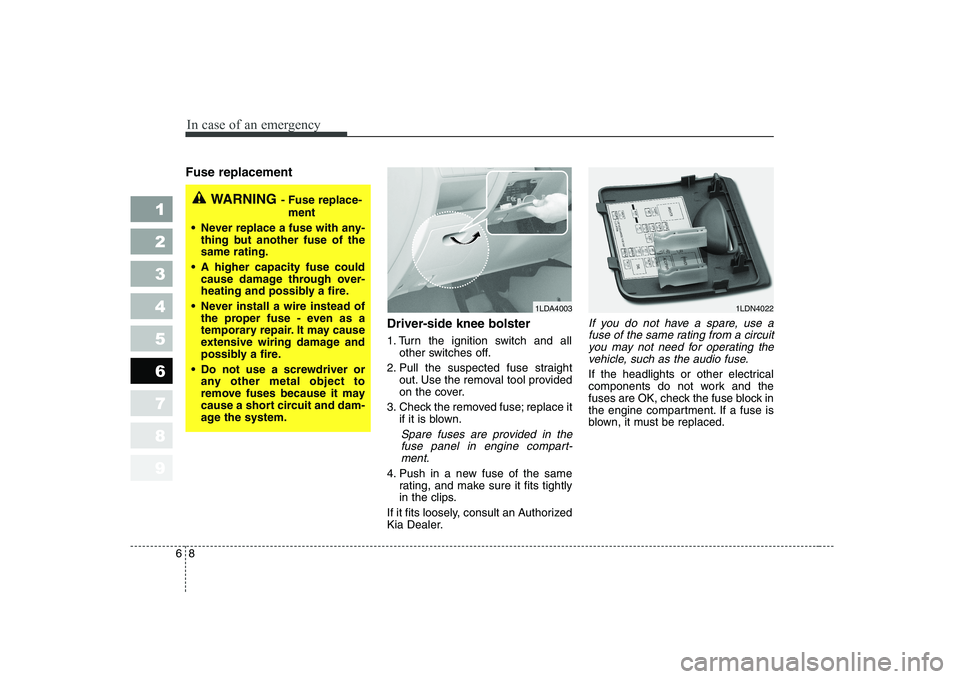
Driver-side knee bolster
1. Turn the ignition switch and allother switches off.
2. Pull the suspected fuse straight out. Use the removal tool provided
on the cover.
3. Check the removed fuse; replace it if it is blown.
Spare fuses are provided in the
fuse panel in engine compart-ment.
4. Push in a new fuse of the same rating, and make sure it fits tightly
in the clips.
If it fits loosely, consult an Authorized
Kia Dealer.
If you do not have a spare, use a fuse of the same rating from a circuityou may not need for operating thevehicle, such as the audio fuse.
If the headlights or other electrical
components do not work and the
fuses are OK, check the fuse block in
the engine compartment. If a fuse is
blown, it must be replaced.
1 23456789
1LDA40031LDN4022
WARNING - Fuse replace-
ment
Never replace a fuse with any- thing but another fuse of the same rating.
A higher capacity fuse could cause damage through over-
heating and possibly a fire.
Never install a wire instead of the proper fuse - even as a
temporary repair. It may cause
extensive wiring damage and
possibly a fire.
Do not use a screwdriver or any other metal object to
remove fuses because it may
cause a short circuit and dam-
age the system.
Page 256 of 315
711
Maintenance
1 23456789
At least monthly:
Check coolant level in the coolantrecovery reservoir.
Check the operation of all exterior lights, including the stoplights, turn
signals and hazard warning flash-
ers.
Check the inflation pressures of all tires including the spare.
At least twice a year
(i.e., every Spring and Fall) :
Check radiator, heater and air con- ditioning hoses for leaks or da-
mage.
Check windshield washer spray and wiper operation. Clean wiper
blades with clean cloth dampened
with washer fluid.
Check headlight alignment.
Check muffler, exhaust pipes, shields and clamps.
Check the lap/shoulder belts for wear and function.
Check for worn tires and loose wheel lug nuts.
At least once a year :
Clean body and door drain holes.
Lubricate door hinges and checks,and hood hinges.
Lubricate door and hood locks and latches.
Lubricate door rubber weather- strips.
Check the air conditioning system before the warm weather season.
Check the power steering fluid level.
Inspect and lubricate automatic transaxle linkage and controls.
Clean battery and terminals.
Check the brake fluid level.
Page 294 of 315
749
Maintenance
1 23456789
BULB REPLACEMENT
Use only the bulbs of the specifiedwattage.
✽✽ NOTICE
If you don’t have necessary tools,
the correct bulbs and the expertise,
consult an Authorized Kia Dealer. In
many cases, it is difficult to replacevehicle light bulbs because other
parts of the vehicle must be removed
before you can get to the bulb. Thisis especially true if you have to
remove the front bumper to get tothe bulb(s). Removing/installing the
front bumper or bumper hardware
can result in damage to the vehicle.
Headlight bulb replacement
✽✽ NOTICE
After heavy, driving rain or washing, headlight and taillight lenses could
appear frosty. This condition is
caused by the temperature differencebetween the lamp inside and outside.
This is similar to the condensation on
your windows inside your vehicleduring the rain and doesn’t indicate
a problem with your vehicle. If the
water leaks into the lamp bulb cir-
cuitry, have the vehicle checked by
an Authorized Kia Dealer.
WARNING - Working on
the lights
Prior to working on the light,
firmly apply the parking brake,
ensure that the ignition switch
is turned to the “LOCK” position
and turn off the lights to avoid
sudden movement of the vehi-
cle and burning your fingers or
receiving an electric shock.
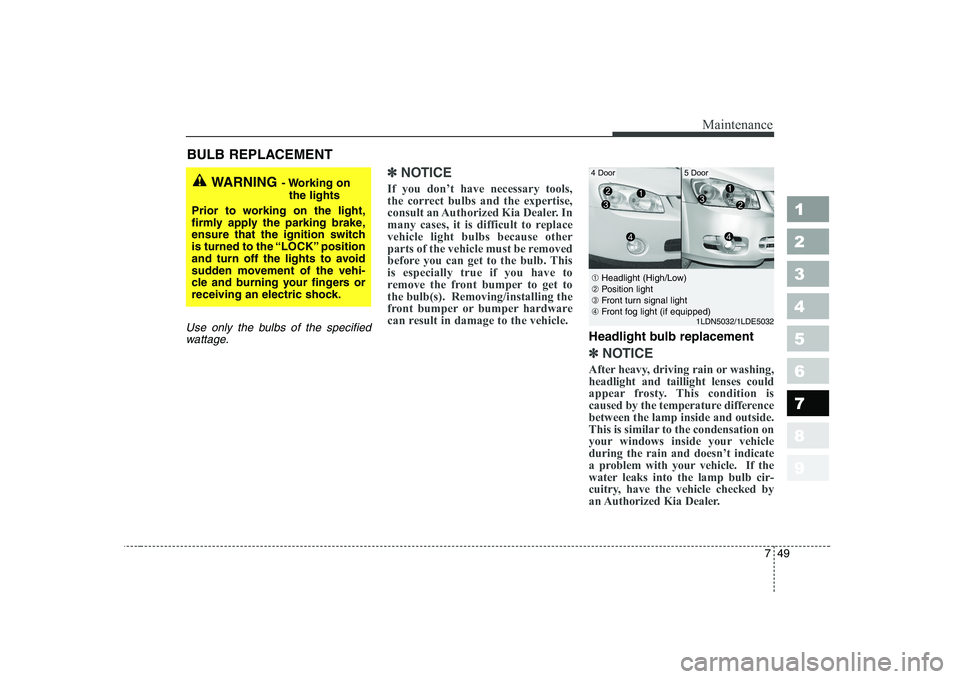
➀ Headlight (High/Low)
➁ Position light
➂ Front turn signal light
➃ Front fog light (if equipped)
1LDN5032/1LDE5032
4 Door5 Door
Page 314 of 315
93
1 23456789
Index
If you have a flat tire . . . . . . . . . . . . . . . . . . . . . . . . 6-19
Ignition switch . . . . . . . . . . . . . . . . . . . . . . . . . . . . . . 4-2
Immobilizer system . . . . . . . . . . . . . . . . . . . . . . . . . . 3-7
Instrument cluster . . . . . . . . . . . . . . . . . . . . . . . . . . 4-33
Instrument panel overview . . . . . . . . . . . . . . . . . . . . 2-5
Interior care . . . . . . . . . . . . . . . . . . . . . . . . . . . . . . . 7-62
Interior features . . . . . . . . . . . . . . . . . . . . . . . . . . . . 3-91
Interior lights . . . . . . . . . . . . . . . . . . . . . . . . . . . . . . 3-86
Interior overview . . . . . . . . . . . . . . . . . . . . . . . . . . . . 2-4
Keys . . . . . . . . . . . . . . . . . . . . . . . . . . . . . . . . . . . . . . 3-2
Label information . . . . . . . . . . . . . . . . . . . . . . . . . . 5-22
Lighting . . . . . . . . . . . . . . . . . . . . . . . . . . . . . . . . . . 4-46
Lubricant specifications . . . . . . . . . . . . . . . . . . . . . . 7-56
Lubricants and fluids . . . . . . . . . . . . . . . . . . . . . . . . 7-31
Luggage net . . . . . . . . . . . . . . . . . . . . . . . . . . . . . . . 3-99
Maintenance services . . . . . . . . . . . . . . . . . . . . . . . . . 7-3
Maintenance under severe usage conditions . . . . . . . 7-8Manual climate control system . . . . . . . . . . . . . . . . 4-57
Manual transaxle . . . . . . . . . . . . . . . . . . . . . . . 4-7, 7-26
Mirrors . . . . . . . . . . . . . . . . . . . . . . . . . . . . . . . . . . . 3-82
Normal maintenance schedule . . . . . . . . . . . . . . . . . . 7-5
Overheating . . . . . . . . . . . . . . . . . . . . . . . . . . . . . . . . 6-3
Overloading . . . . . . . . . . . . . . . . . . . . . . . . . . . . . . . 5-21
Owner maintenance . . . . . . . . . . . . . . . . . . . . . . . . . 7-10
Parking brake. . . . . . . . . . . . . . . . . . . . . . . . . . . . . . 7-23
Power steering . . . . . . . . . . . . . . . . . . . . . . . . . . . . . 7-25
Remote keyless entry . . . . . . . . . . . . . . . . . . . . . . . . . 3-4
Road warning . . . . . . . . . . . . . . . . . . . . . . . . . . . . . . . 6-2
Safety belts . . . . . . . . . . . . . . . . . . . . . . . . . . . . . . . . 3-30
Seat . . . . . . . . . . . . . . . . . . . . . . . . . . . . . . . . . . . . . . 3-16
I
K
L
M
N
O
P
R
S