Page 33 of 224

1FEATURES OF YOUR HYUNDAI
20
!!
o Always make sure that the shoulder belt
portion of the lap/shoulder belt is posi-
tioned midway over the shoulder, never
across the neck or behind the back.
Moving the child closer to the center of
the vehicle may help provide a good
shoulder belt fit. The lap belt portion of
the lap/shoulder belt or the center seat
lap belt must always be positioned as
low as possible on the child's hips and
as snug as possible.
o If the seat belt will not properly fit the
child, Hyundai recommends the use of
an approved booster seat in the rear seat
in order to raise the child's seating height
so that the seat belt will properly fit the
child. Before purchasing a booster seat,
make sure that it meets applicable Fed-
eral Motor Vehicle Safety Standards
(FMVSS) and that it is satisfactory for
use with this vehicle.
o Never allow a child to stand up or kneel
on the seat.
o Never use an infant carrier or child safety
seat that "hooks" over a seatback; it may
not provide adequate security in an ac-
cident.o Never allow a child to be held in a person's
arms while they are in a moving vehicle,
as this could result in serious injury to
the child in the event of an accident or a
sudden stop. Holding a child in a moving
vehicle does not provide the child with
any means of protection during an acci-
dent, even if the person holding the child
is wearing a seat belt.WARNING: WARNING:!WARNING:o A child restraint system must be placed
in the rear seat. Never install a child or
infant seat on the front passenger's seat.
Should an accident occur and cause the
passenger side airbag to deploy, it could
severely injure or kill an infant or child
seated in an infant or child seat. Thus,
only use a child restraint in the rear seat
of your vehicle.
o Since a safety belt or child restraint sys-
tem can become very hot if it is left in a
closed vehicle, be sure to check the seat
cover and buckles before placing a child
there.
o When the child restraint system is not in
use, store it in the trunk or fasten it with
a safety belt so that it will not be thrown
forward in the case of a sudden stop or
an accident.
o Children who are too large to be in a child
restraint should still sit in the rear seat
and be restrained with the available lap/
shoulder belts. Never allow children to
ride in the front passenger seat.
Page 62 of 224

1FEATURES OF YOUR HYUNDAI
49INTERIOR LIGHT
B480A01GK-GAT
Map Light
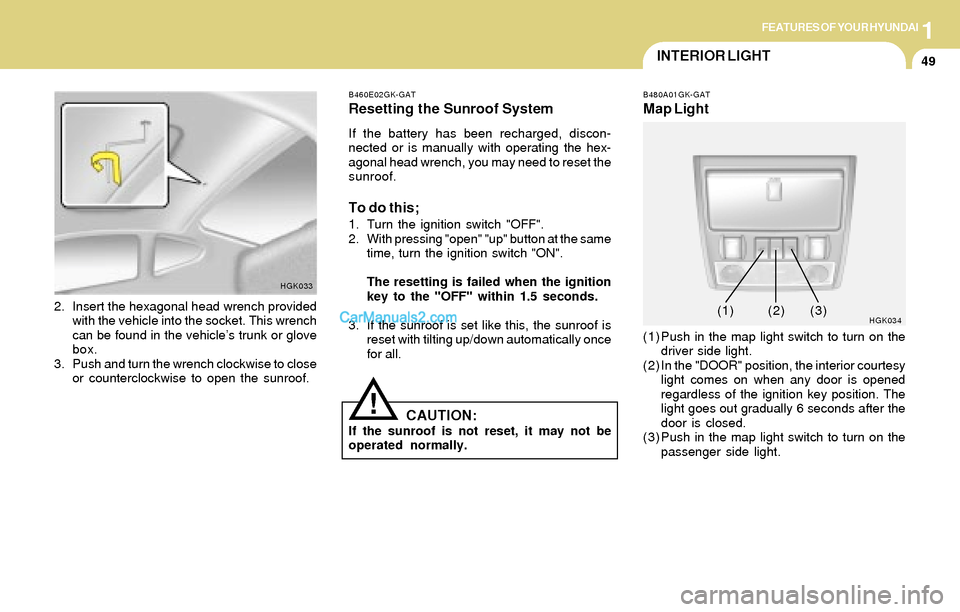
(1) Push in the map light switch to turn on the
driver side light.
(2) In the "DOOR" position, the interior courtesy
light comes on when any door is opened
regardless of the ignition key position. The
light goes out gradually 6 seconds after the
door is closed.
(3) Push in the map light switch to turn on the
passenger side light.
HGK0342. Insert the hexagonal head wrench provided
with the vehicle into the socket. This wrench
can be found in the vehicle’s trunk or glove
box.
3. Push and turn the wrench clockwise to close
or counterclockwise to open the sunroof.
HGK033B460E02GK-GAT
Resetting the Sunroof System
If the battery has been recharged, discon-
nected or is manually with operating the hex-
agonal head wrench, you may need to reset the
sunroof.
To do this;
1. Turn the ignition switch "OFF".
2. With pressing "open" "up" button at the same
time, turn the ignition switch "ON".
The resetting is failed when the ignition
key to the "OFF" within 1.5 seconds.
3. If the sunroof is set like this, the sunroof is
reset with tilting up/down automatically once
for all.
CAUTION:If the sunroof is not reset, it may not be
operated normally.
!
(1)(2) (3)
Page 137 of 224

2DRIVING YOUR HYUNDAI
20
2. The total gross vehicle weight with trailer
must not exceed the Gross Vehicle
Weight Rating (GVWR) shown on the
vehicle identification plate (see page 8-
1). The total gross vehicle weight is the
combined weight of the vehicle, driver,
all passengers and their luggage, cargo,
hitch, trailer tongue load and other op-
tional equipment.
3. The front or rear axle weight must not
exceed the Gross Axle Weight Rating
(GAWR) shown on the vehicle identifi-
cation plate (see page 8-2). It is possible
that your towing package does not ex-
ceed the GVWR but exceeds the GAWR.
C190E02L
CAUTION:The following specifications are recom-
mended when towing a trailer. The loaded
trailer weight cannot safely exceed the val-
ues in the chart below.
!
!WARNING:Improperly loading your car and trailer can
seriously affect its steering and braking
performance causing a crash which could
cause serious injury or death.Lbs. (kg)
Maximum Towable Weight
Trailer
1000 (453)Tongue
100 (45)
C190F01S-AAT
Trailer or Vehicle Towing Tips
1. Before towing, check hitch and safety chain
connections as well as proper operation of
the trailer running lights, brake lights, and
turn signals.
2. Always drive your vehicle at a moderate
speed. (Less than 60 mph)
3. Trailer towing requires more fuel than normal
conditions.
4. To maintain engine braking efficiency and
electrical charging performance, do not use
fifth gear (manual transaxle) or overdrive
(automatic transaxle).
5. Always secure items in the trailer to prevent
load shift while driving.
6. Check the condition and air pressure of all
tires on the trailer and your car. Low tire
pressure can seriously affect the handling.
Also check the spare tire.
7. The vehicle/trailer combination is more af-
fected by crosswind and buffeting.
When being passed by a large vehicle, keep
a constant speed and steer straight ahead.
If there is too much wind buffeting, slow down
to get out of the other vehicle's air turbulence.
8. When parking your car and trailer, especially
on a hill, be sure to follow all the normal
precautions. Turn your front wheel into the
curb, set the parking brake firmly, and put the
transaxle in 1st or Reverse (manual) or Park Gross axle weight Gross vehicle weightImproper trailer loading and/or too much
luggage in the trunk can overload the
rear axle. Redistribute the load and check
the axle weight again.
Page 145 of 224
3WHAT TO DO IN AN EMERGENCY
7
D060K01FC-AAT
Wheel Cap (If installed)
1. Wrap a piece of cloth around the tip of the
wrench bar to avoid scratching.
2. Insert the wrench bar into the groove of the
wheel cap and pry gently to remove the
wheel cap.
HGK2243. Change the flat tire.
4. Reinstall the wheel cap by fitting the boss of
the wheel cap in the groove of the wheel,
hitting the center of the wheel cap with your
hand.
HGK196D060B02GK-AAT
1. Obtain Spare Tire and Tool
Remove the spare tire and remove the jack and
tool bag from the trunk.
HGK189
GrooveGrooveBoss