2004 Hyundai Tiburon light
[x] Cancel search: lightPage 12 of 224

1. Traction Control System (If installed)
2. Panel Brightness Control Knob
(Rheostat Switch)
3. Multi-Function Light Switch
4. Windshield Wiper/Washer Switch
5. Front Fog Light switch (If installed)
6. Hazard Warning Switch
7. Digital Clock
8. Passenger's Air Bag
9. Glove Box
10.Hood Release Lever11.Fuse Box Relay
12.Steering Wheel Tilt Lever (If installed)
13.Horn and Driver's Airbag
14.Cruise Control Switch (If installed)
15.Heating and Cooling Controls
16.Ashtray
17.Cigarette Lighter
18.Shift Lever
19.Audio System
20.Parking Brake Lever
21.Center Console
CAUTION:When installing a container of liquid air freshener inside the vehicle, do not place it near the instrument cluster nor
on the instrument panel surface. If there is any leakage from the air freshener onto these areas (Instrument cluster,
instrument panel or air ventilator), it may damage these parts. If the liquid from the air freshener does leak onto
these areas, wash them with water immediately.
!
Page 13 of 224
YOUR VEHICLE AT A GLANCE
B255A01GK-AAT
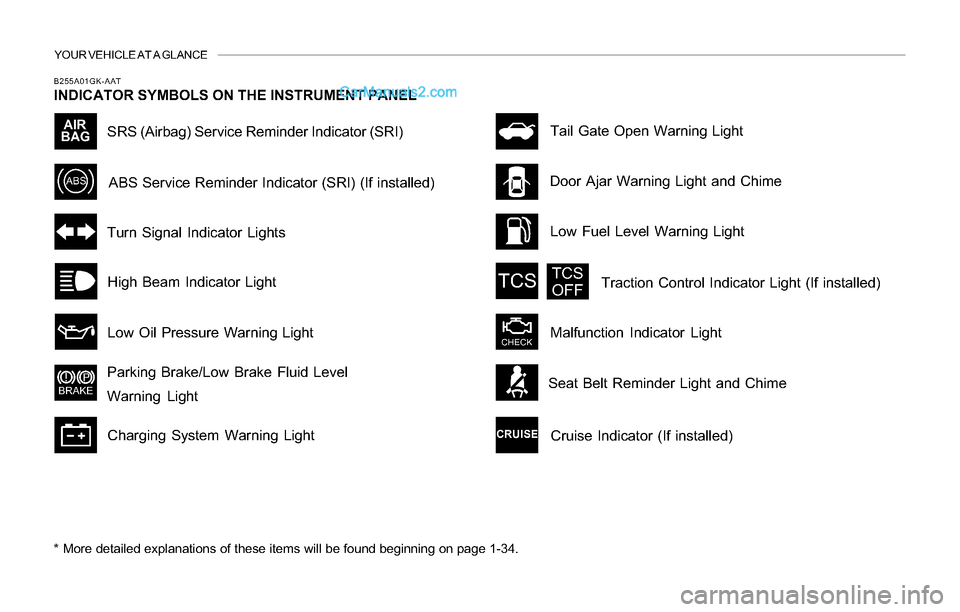
INDICATOR SYMBOLS ON THE INSTRUMENT PANEL
* More detailed explanations of these items will be found beginning on page 1-34.
SRS (Airbag) Service Reminder Indicator (SRI)
Door Ajar Warning Light and Chime
Turn Signal Indicator Lights
High Beam Indicator Light
Low Oil Pressure Warning Light
Parking Brake/Low Brake Fluid Level
Warning Light
Charging System Warning LightTail Gate Open Warning Light
ABS Service Reminder Indicator (SRI) (If installed)
Low Fuel Level Warning Light
Malfunction Indicator LightTraction Control Indicator Light (If installed)
Cruise Indicator (If installed)
Seat Belt Reminder Light and Chime
Page 14 of 224
FEATURES OF YOUR HYUNDAI
1
Fuel Recommendations ................................................ 1-2
Breaking in Your New Hyundai ..................................... 1-3
Keys.............................................................................. 1-3
Door.............................................................................. 1-4
Power Windows ............................................................ 1-8
Seats ............................................................................. 1-9
Seat Belts....................................................................1-14
Child Restraint System...............................................1-19
Supplemental Restraint (AIRBAG) system .................1-25
Instrument Cluster and Indicator Lights ...................... 1-32
Warning and Indicator Lights ......................................1-34
Multi-Function Light Switch.........................................1-41
Windshield Wiper/Washer Switch...............................1-43
Sunroof.......................................................................1-47
Mirror...........................................................................1-51
Hood Release.............................................................1-54
Cruise Control.............................................................1-59
Heating and Cooling Control .......................................1-62
Stereo Sound System.................................................1-79
Audio System..............................................................1-81
Antenna.....................................................................1-1041
Page 15 of 224
1FEATURES OF YOUR HYUNDAI
2FUEL RECOMMENDATIONS
CAUTION:
Your Hyundai's New Vehicle Limited War-
ranty may not cover damage to the fuel
system and any performance problems that
are caused by the use of fuels containing
methanol or fuels containing MTBE (Methyl
Tertiary Butyl Ether) over 15.0% vol. (Oxy-
gen Content 2.7% weight.)
B010B01A-AATWhat About Gasohol?
Gasohol (a mixture of 90% unleaded gasoline
and 10% ethanol or grain alcohol) may be used
in your Hyundai. However, if your engine devel-
ops driveability problems, the use of 100%
unleaded gasoline is recommended. Fuels with
unspecified quantities of alcohol, or alcohols
other than ethanol, should not be used.
B010A03A-AAT
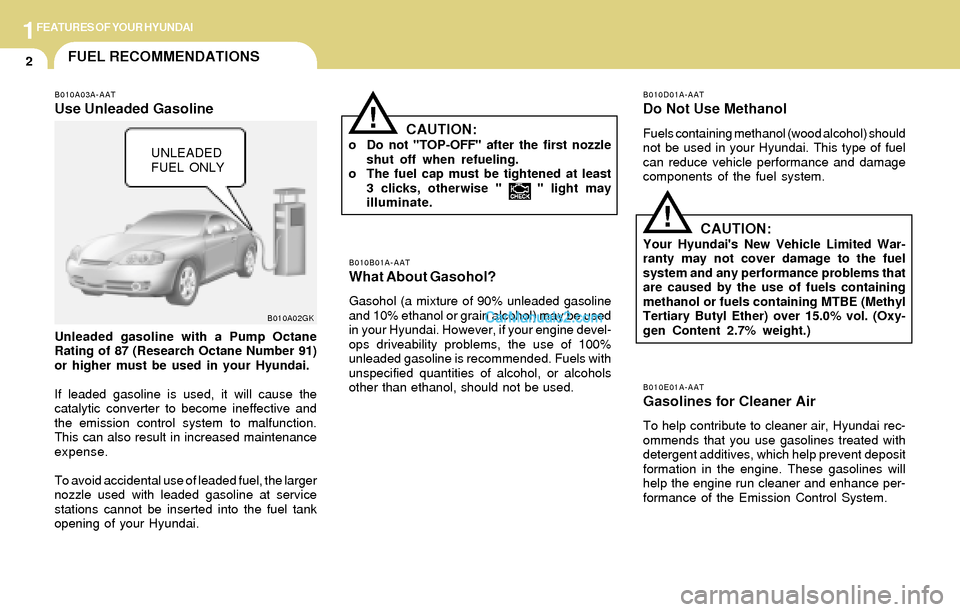
Use Unleaded Gasoline
Unleaded gasoline with a Pump Octane
Rating of 87 (Research Octane Number 91)
or higher must be used in your Hyundai.
If leaded gasoline is used, it will cause the
catalytic converter to become ineffective and
the emission control system to malfunction.
This can also result in increased maintenance
expense.
To avoid accidental use of leaded fuel, the larger
nozzle used with leaded gasoline at service
stations cannot be inserted into the fuel tank
opening of your Hyundai.
CAUTION:o Do not "TOP-OFF" after the first nozzle
shut off when refueling.
o The fuel cap must be tightened at least
3 clicks, otherwise " " light may
illuminate.
B010D01A-AAT
Do Not Use Methanol
Fuels containing methanol (wood alcohol) should
not be used in your Hyundai. This type of fuel
can reduce vehicle performance and damage
components of the fuel system.
!
B010A02GK
UNLEADED
FUEL ONLY
!
B010E01A-AATGasolines for Cleaner Air
To help contribute to cleaner air, Hyundai rec-
ommends that you use gasolines treated with
detergent additives, which help prevent deposit
formation in the engine. These gasolines will
help the engine run cleaner and enhance per-
formance of the Emission Control System.
Page 19 of 224

1FEATURES OF YOUR HYUNDAI
6THEFT-ALARM SYSTEM
B070A01A-AAT
(If Installed)
This system is designed to provide protection
from unauthorized entry into the car. This sys-
tem is operated in three stages: the first is the
"Armed" stage, the second is the "Alarm" stage,
and the third is the "Disarmed" stage. If trig-
gered, the system provides an audible alarm
with blinking of the turn signal light.
B070B02GK-AAT
Armed Stage
Park the car and stop the engine. Arm the
system as described below.
1) Remove the ignition key from the ignition
switch.
2) Make sure that the engine hood and tail gate
are closed and latched.
3) Lock the doors using the transmitter of the
keyless entry system.
After completion of the steps above, the turn
signal light will blink once to indicate that the
system is armed.
NOTE:1) If any door, tail gate or engine hood
remains open, the system will not be
armed.
2) If this happens, rearm the system as
described above.
3) Once the system is armed, only the tail
gate may be unlocked using the key
without disarming the system.
B070F01A-GAT
KEYLESS ENTRY SYSTEM (If installed)
Locking doors
1. Close all doors.
2. Push the "LOCK" button on the transmitter.
3. At the same time all doors lock, the turn signal
lights will blink once to indicate that the
system is armed.
Unlocking doors
1. Push the "UNLOCK" button on the transmit-
ter.
2. At the same time all doors unlock, the turn
signal lights will blink twice to indicate that the
system is disarmed.
Page 20 of 224
1FEATURES OF YOUR HYUNDAI
7
CAUTION:Do not arm the system until all passengers
have left the car. If the system is armed while
a passenger(s) remains in the car, the alarm
may be activated when the remaining
passenger(s) leaves the car.
B070C01GK-AAT
Alarm Stage
The alarm will be activated if any of the following
occur while the car is parked and the system is
armed.
1) A front door is unlocked and opened without
using the transmitter.
2) The tail gate is opened without using the key.
3) The engine hood is opened.
The siren will sound and the turn signal lamp will
blink continuously for 30 seconds. (This hap-
pens 3 times). To turn off the system, unlock the
door with the transmitter.
!
CAUTION:Avoid trying to start the engine while the
system is armed.
!
B070D03GK-AAT
Disarmed Stage
The system will be disarmed when either of the
following steps are taken:
1) The driver's or passenger's door is un-
locked by depressing the "UNLOCK" button
on the transmitter.
2) In the middle of alarming or after alarming, it
keeps for 30 seconds when the key is turned
to the "ON" position.
3) If after disarming the system with the trans-
mitter the doors are not opened within 30
seconds, the system will automatically re-
arm.
After completing one of steps above, the turn
signal light will blink twice to indicate that the
system is disarmed.
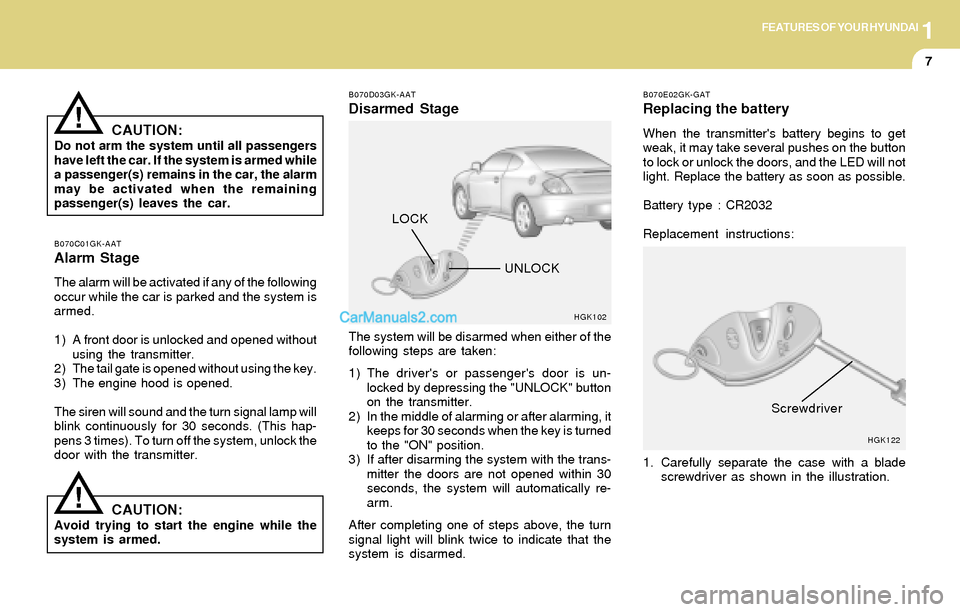
B070E02GK-GAT
Replacing the battery
When the transmitter's battery begins to get
weak, it may take several pushes on the button
to lock or unlock the doors, and the LED will not
light. Replace the battery as soon as possible.
Battery type : CR2032
Replacement instructions:
HGK102
1. Carefully separate the case with a blade
screwdriver as shown in the illustration.
HGK122
Screwdriver
LOCK
UNLOCK
Page 30 of 224

1FEATURES OF YOUR HYUNDAI
17
!
Release the button to lock the anchor into
position. Try sliding the height adjuster to make
sure that it has locked into the position.
WARNING:o The height adjuster must be in the locked
position when the vehicle is moving.
o The misadjustment of height of the
shoulder belt could reduce the effective-
ness of the seat belt in a crash.
B180A01A-AAT
SEAT BELT-Driver's 3-Point System with
Emergency Locking Retractor
To Fasten Your Belt
To fasten your seat belt, pull it out of the retractor
and insert the metal tab into the buckle. There
will be an audible "click" when the tab locks into
the buckle.
The seat belt automatically adjusts to the proper
length only after the lap belt portion is adjusted
manually so that it fits snugly around your hips.
If you lean forward in a slow, easy motion, the
belt will extend and let you move around. If there
is a sudden stop or impact, however, the belt will
lock into position. It will also lock if you try to lean
forward too quickly.
B180A01L
NOTE:If the driver's seat belt is not fastened when
the ignition key is in the "ON" position, the
seat belt warning light will flash and the
warning chime will sound for approximately
six seconds.
Page 37 of 224
1FEATURES OF YOUR HYUNDAI
24
NOTE:o Both the driver's and front passenger's
pre-tensioner seat belts will be activated
in certain frontal collisions. The pre-
tensioner seat belts can be activated
alone or, where the frontal collision is
severe enough, together with the
airbags.
o When the pre-tensioner seat belts are
activated, a loud noise may be heard and
fine dust, which may appear to be smoke,
may be visible in the passenger com-
partment. These are normal operating
conditions and are not hazardous.
o Although it is harmless, the fine dust
may cause skin irritation and should not
be breathed for prolonged periods. Wash
your hands and face thoroughly after an
accident in which the pre-tensioner seat
belts were activated.
!WARNING:To obtain maximum benefit from a pre-
tensioner seat belt:
1. The seat belt must be worn correctly.
2. The seat belt must be adjusted to the
correct position.
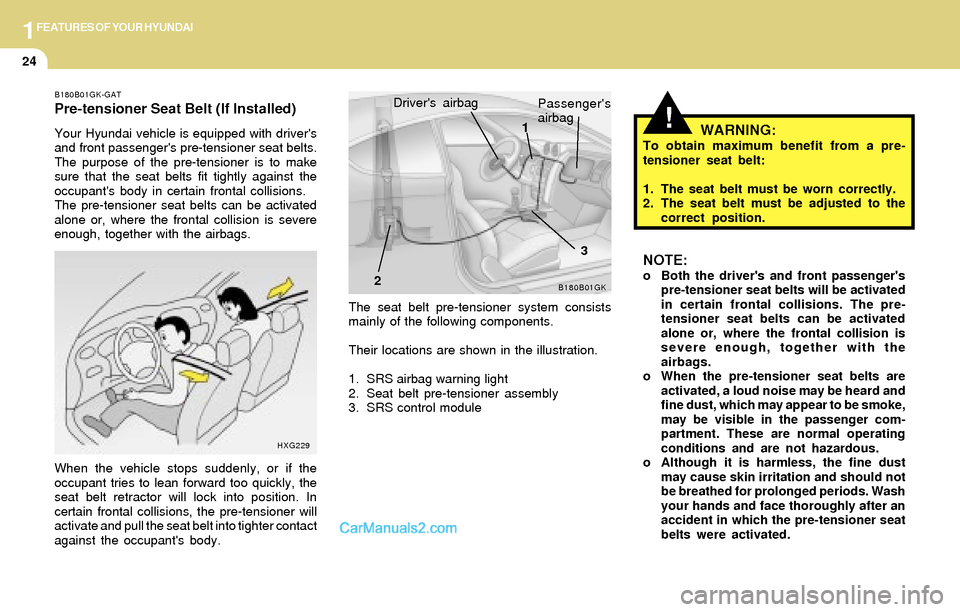
The seat belt pre-tensioner system consists
mainly of the following components.
Their locations are shown in the illustration.
1. SRS airbag warning light
2. Seat belt pre-tensioner assembly
3. SRS control moduleDriver's airbag
B180B01GK23 Passenger's
airbag
1
B180B01GK-GAT
Pre-tensioner Seat Belt (If Installed)
Your Hyundai vehicle is equipped with driver's
and front passenger's pre-tensioner seat belts.
The purpose of the pre-tensioner is to make
sure that the seat belts fit tightly against the
occupant's body in certain frontal collisions.
The pre-tensioner seat belts can be activated
alone or, where the frontal collision is severe
enough, together with the airbags.
When the vehicle stops suddenly, or if the
occupant tries to lean forward too quickly, the
seat belt retractor will lock into position. In
certain frontal collisions, the pre-tensioner will
activate and pull the seat belt into tighter contact
against the occupant's body.
HXG229