2004 Hyundai Terracan warning light
[x] Cancel search: warning lightPage 172 of 361
DO-IT-YOURSELF MAINTENANCE
6-20
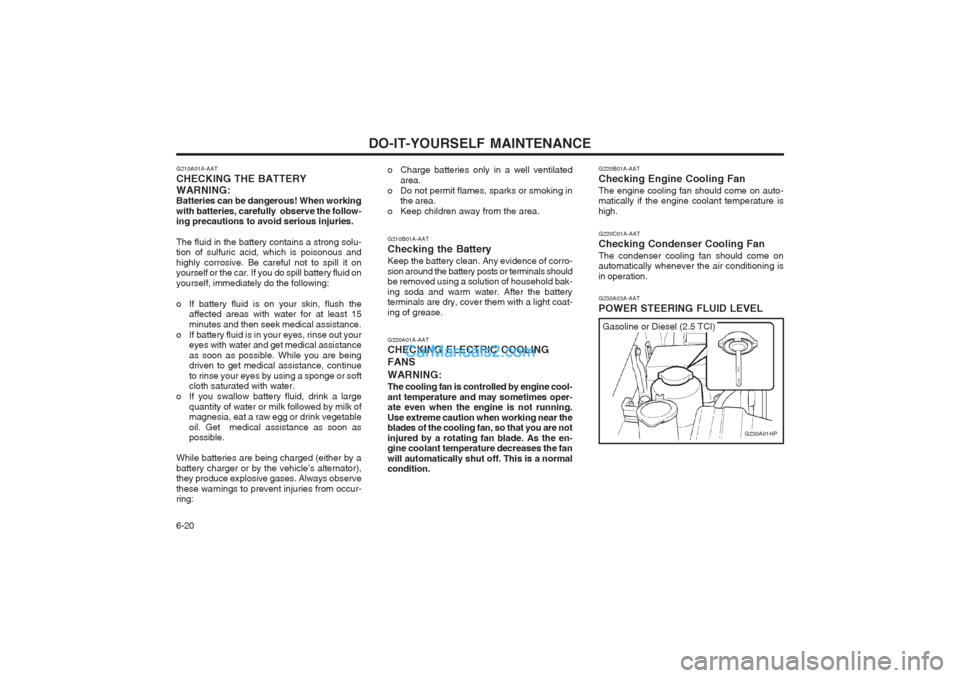
G220B01A-AAT Checking Engine Cooling FanThe engine cooling fan should come on auto- matically if the engine coolant temperature is high. G220C01A-AAT Checking Condenser Cooling FanThe condenser cooling fan should come on automatically whenever the air conditioning is in operation. G230A03A-AAT POWER STEERING FLUID LEVEL
G230A01HP
Gasoline or Diesel (2.5 TCI)
o Charge batteries only in a well ventilated
area.
o Do not permit flames, sparks or smoking in the area.
o Keep children away from the area. G210B01A-AAT Checking the BatteryKeep the battery clean. Any evidence of corro- sion around the battery posts or terminals should be removed using a solution of household bak- ing soda and warm water. After the battery terminals are dry, cover them with a light coat- ing of grease. G220A01A-AAT CHECKING ELECTRIC COOLING FANS WARNING: The cooling fan is controlled by engine cool- ant temperature and may sometimes oper- ate even when the engine is not running. Use extreme caution when working near the blades of the cooling fan, so that you are not injured by a rotating fan blade. As the en- gine coolant temperature decreases the fan will automatically shut off. This is a normal condition.
G210A01A-AAT CHECKING THE BATTERYWARNING: Batteries can be dangerous! When working with batteries, carefully observe the follow- ing precautions to avoid serious injuries. The fluid in the battery contains a strong solu- tion of sulfuric acid, which is poisonous and highly corrosive. Be careful not to spill it on yourself or the car. If you do spill battery fluid on yourself, immediately do the following:
o If battery fluid is on your skin, flush the
affected areas with water for at least 15 minutes and then seek medical assistance.
o If battery fluid is in your eyes, rinse out your eyes with water and get medical assistanceas soon as possible. While you are being driven to get medical assistance, continue to rinse your eyes by using a sponge or soft cloth saturated with water.
o If you swallow battery fluid, drink a large quantity of water or milk followed by milk ofmagnesia, eat a raw egg or drink vegetable oil. Get medical assistance as soon as possible.
While batteries are being charged (either by a battery charger or by the vehicle’s alternator), they produce explosive gases. Always observe these warnings to prevent injuries from occur- ring:
Page 175 of 361
DO-IT-YOURSELF MAINTENANCE 6-23
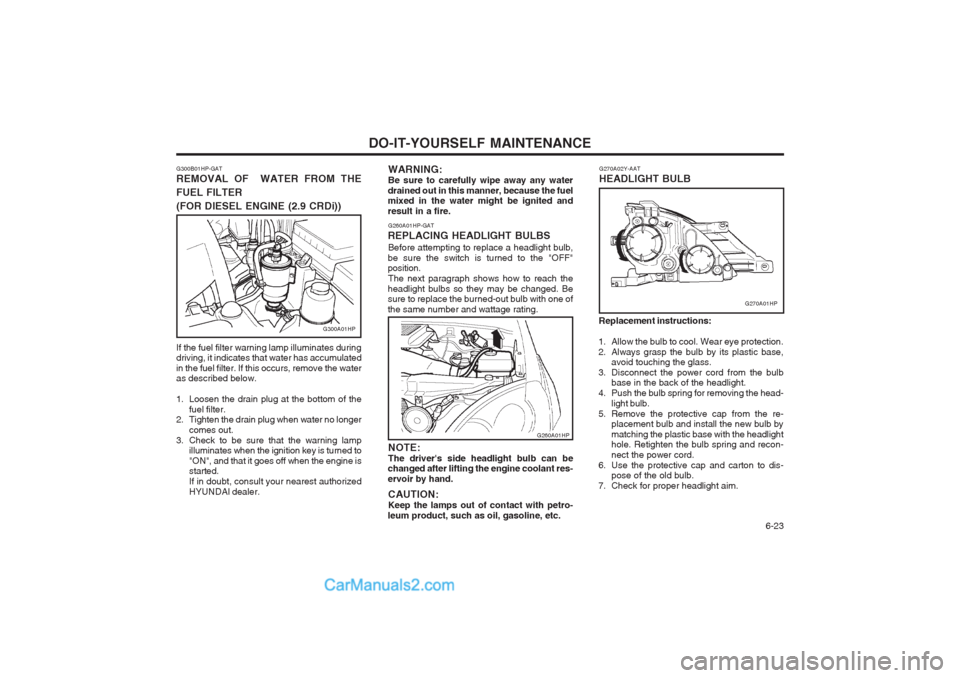
G260A01HP-GAT
REPLACING HEADLIGHT BULBS Before attempting to replace a headlight bulb,
be sure the switch is turned to the "OFF" position. The next paragraph shows how to reach the
headlight bulbs so they may be changed. Besure to replace the burned-out bulb with one of the same number and wattage rating. WARNING:Be sure to carefully wipe away any water
drained out in this manner, because the fuel mixed in the water might be ignited and result in a fire.
NOTE:The driver's side headlight bulb can be
changed after lifting the engine coolant res-ervoir by hand.
CAUTION:Keep the lamps out of contact with petro-
leum product, such as oil, gasoline, etc.
G260A01HP Replacement instructions:
1. Allow the bulb to cool. Wear eye protection.
2. Always grasp the bulb by its plastic base, avoid touching the glass.
3. Disconnect the power cord from the bulb base in the back of the headlight.
4. Push the bulb spring for removing the head-
light bulb.
5. Remove the protective cap from the re- placement bulb and install the new bulb bymatching the plastic base with the headlight hole. Retighten the bulb spring and recon- nect the power cord.
6. Use the protective cap and carton to dis- pose of the old bulb.
7. Check for proper headlight aim. G270A02Y-AAT HEADLIGHT BULB
G270A01HP
G300B01HP-GAT REMOVAL OF WATER FROM THE FUEL FILTER
(FOR DIESEL ENGINE (2.9 CRDi))
G300A01HP
If the fuel filter warning lamp illuminates during driving, it indicates that water has accumulated in the fuel filter. If this occurs, remove the water as described below.
1. Loosen the drain plug at the bottom of the fuel filter.
2. Tighten the drain plug when water no longer
comes out.
3. Check to be sure that the warning lamp illuminates when the ignition key is turned to "ON", and that it goes off when the engine is started. If in doubt, consult your nearest authorizedHYUNDAI dealer.
Page 176 of 361

DO-IT-YOURSELF MAINTENANCE
6-24 6. Draw the vertical line (through the center of
each headlight) and the horizontal line (through the center of each headlight) on the aiming screen.
(1) Horizontal line dimension from ground :Low Beam : 894 mm (35.1 in.)
High Beam : 839 mm (33 in.)
(2) Distance between each vertical line : Low Beam : 1,316 mm (51.8 in.)
High Beam : 1,076 mm (42.4 in.)
And then, draw a parallel line at 38 mm (1.50 in.) under the horizontal line in case of adjusting the low beam or at 21 mm (0.83 in.) under the horizontal line in case of adjusting the high beam.
7. Adjust each cut-off line of the low beam to the parallel line with a phillips screwdriver - VERTICAL AIMING.
8. Adjust each cut-off line of the low beam to
the each vertical line with a phillips screw-driver - HORIZONTAL AIMING.
G290A01HP-GAT
HEADLIGHT AIMING ADJUSTMENT
G290A01HP
Horizontal aiming (Low Beam)
Vertical aiming (Low Beam)
Before performing aiming adjustment, make sure of the following.
1. Keep all tires inflated to the correct pres- sure.
2. Place the vehicle on level ground and press the front bumper & rear bumper down sev-eral times. Place vehicle at a distance of 3m (118.1 in.) from the test wall.
3. See that the vehicle is unloaded (except for
full levels of coolant, engine oil and fuel, andspare tire, jack, and tools). Have the driver or equivalent weight placed in driver's seat.
4. Clean the headlight lens and turn on the headlight.
5. Open the hood. Vertical aiming (High Beam)
Horizontal aiming(High Beam)
G270A02HP
WARNING: The halogen bulb contains gas under pres- sure and if impacted could shatter, resulting in flying fragments. Always wear eye pro- tection when servicing the bulb. Protect the bulb against abrasions or scratches and against liquids when lighted. Turn the bulb on only when installing in a headlight. Re- place the headlight if damaged or cracked. Keep the bulb out of the reach of children and dispose of the used bulb with care.
Page 178 of 361

DO-IT-YOURSELF MAINTENANCE
6-26 No.
9
10 11 12 Wattage
16 40
21/5 2121 215
G280A01HP-GAT
No.
1 2 345 6 78 Part Name
Head Light (Low/High) Turn Signal Light
Front Position LightRoom LightMap Light Front Fog Light Side RepeaterFront Door Edge Warning Light (If installed) Part Name
High Mounted Rear Stop Light (If installed) Luggage Compartment Light Rear Combination LightStop/Tail LightTurn Signal Light Back-up Light Rear Fog Light (If installed)License Plate LightWattage 55/55 215
10
8
55 5 5
G280A01HP
532
87611
910
1
4
12
Page 189 of 361

INDEX
10-2 D Defrosting/Defogging
......................................................................... 1-71
Door Locking, unlocking front door with a key ........................................ 1-6
Drink Holder ...................................................................................... 1-53
Drive Belts ............................................................................... 6-15, 6-18
Driving Driving for economy ...................................................................... 2-14
Smooth cornering .......................................................................... 2-15
Winter driving ................................................................................ 2-15
E Emission Control System ................................................................... 7-1
Engine
Before starting the engine ............................................................... 2-2Compartment (3.5 V6) ..................................................................... 6-1
Compartment (2.5 TCI) ................................................................... 6-2
Compartment (2.9 CRDi) ................................................................ 6-3
Coolant ............................................................................................ 6-7
Coolant temperature gauge ........................................................... 1-43
If the engine overheats ................................................................... 3-2
Number ............................................................................................ 8-1
Oil .................................................................................................... 6-4Starting ............................................................................................ 2-3
Engine Exhaust Can Be Dangerous ................................................... 2-1
FFan Speed Con trol ................................................................... 1-66, 1-75Fog Light
Front .............................................................................................. 1-48
Rear .............................................................................................. 1-48
Front Seats
Adjustable front seats ................................................................... 1-11
Adjustable headrests ..................................................................... 1-12
Adjusting seat forward and rearward ............................................1-11
Adjusting seatback angle .............................................................. 1-11
Fuel Capacity .......................................................................................... 9-1
Gauge ............................................................................................ 1-43
Unleaded gasoline ........................................................................... 1-1
Fuel Filler Lid Remote release ............................................................................. 1-62
Full-time 4WD Operation .................... ................................... 2-10 ~ 2-13
Fuses ................................................................................................ 6-18
G General Checks .................................................................................. 6-4
Glove Box ......................................................................................... 1-56
H Hazard Warning System ................................................................... 1-51
Headlight Aiming Adjustment ............................................................ 6-24
Headlight Leveling Device System ................................................... 1-65
Heating and Ventilation
Air flow control ......................................................... 1-68 ~ 1-69, 1-77
Temperature control ...................................................................... 1-69
Page 192 of 361

INDEX 10-5
Towing
A trailer (or vehicle) ........................................................... 2-17 ~ 2-19
Emergency .................................................................................... 3-11
If your car must be towed ............................................................... 3-9
Transmission Automatic ............................................................................... 2-6 ~ 2-8
Automatic transmission fluid checking ..........................................6-12
Manual .................................................................................... 2-4 ~ 2-5
Manual transmission oil che cking ................................................. 6-11
Trip Odometer ................................................................................... 1-42
U Under Tray ........................................................................................ 1-14
VVehicle Identification Number ............................................................. 8-1
Vehicle Specifications ................................................................ 9-1 ~ 9-3
W
Warning Lights ....................................................................... 1-39 ~ 1-43
Windows
Power ............................................................................................ 1-10
Windshield Wiper and Washer ......................................................... 1-49
Rear Wiper and Washer Switch ................................................... 1-50
Windshield Wiper Blades ................ ..................................................6-11
Page 202 of 361

CONTROLS AND EQUIPMENT
1- 2 YB020A1-E BEFORE ENTERING THE VEHICLE
o Ensure that all windows, mirrors and lamps are clean.
o Check condition of all tyres.
o Ensure that no fluid leaks are evident.
o Ensure that the area around the vehicle is clear before driving off.
YB020B1-E AFTER ENTERING THE VEHICLE
o Ensure that all occupants fasten and cor- rectly adjust seat belts.
o Ensure that seat and headrestraint positions are adjusted for optimum safety, control and comfort.
o Adjust interior and exterior rear view mir- rors.
o Verify correct operation of lamps, horn and other electrical equipment.
o Ensure that warning lamps illuminate when ignition is turned on.
NOTE: Fluid levels such as engine oil, engine cool- ant, brake and windscreen washer fluidshould be checked daily or at each refuel-ling, whichever occurs sooner. B020A01FC-EAT RUNNING IN YOUR NEW HYUNDAIThe longevity and performance of the vehicle are greatly affected by the care exercised dur-ing the first 1000 miles of motoring. Because ofmodern manufacturing techniques, rigid guide-lines regarding maximum road speeds havebecome unnecessary. However, certain pre-cautions should be observed in order to obtainthe best possible performance and useful lifefrom the vehicle.
1) Do not race the engine without a load (i.e revving the engine in neutral).
2) During the first 500 miles the maximum engine speed should be restricted to 3000rpm and gradually increased thereafter.
3) Avoid prolonged constant speed operation. The internal components of the engine willbecome run-in more quickly if the operation
speed is varied during the running in period.
4) Never allow the engine to labour. Use the gearbox freely and avoid large throttle open-ings when the engine speed is below 1500rpm.
5) Avoid rapid acceleration and maximum throttle openings.
6) Avoid harsh braking during the first 100 miles of urban motoring or 1000 miles ofmotorway driving to allow the friction facingsof the brake pads and shoes to bed againstthe discs and drums properly.
7) No trailer towing should be undertaken dur- ing the running-in period. B880A01HP-EAT IMMOBILISER SYSTEM
- For Petrol Engine The immobiliser system is an anti-theft device, designed to deter automobile theft. B880B01HP-EAT Keys
B880B01HP
B880B02HP
Light Purple
ID key
ID key Master key
Master key
Type B
Black
Type A
Page 205 of 361

CONTROLS AND EQUIPMENT1- 5
B030C01Y-EAT ILLUMINATED IGNITION SWITCH (Not all models)
B030C01E
Whenever a door is opened, the ignition switch
will be illuminated for your convenience, provid- ed the ignition switch is not in the "ON" position.The light will go off approximately 10 secondsafter closing the door or when the ignition switchis turned on.
o The door can be locked or unlocked with a key.
o Lock the door by turning the key toward the front of the vehicle and unlock it by turning the key toward the rear.
B040A01A-EAT DOOR LOCKS WARNING:
o Before you drive away, be sure that all the doors are securely closed. It is also recommended that the child-protectorrear door locks are in the 'lock' positionso that children cannot open the reardoors from inside the vehicle acciden-tally.
o Before opening the door, always look for and avoid oncoming traffic. B040B01A-AAT Locking, Unlocking Front Doors With
a Key
B040B01HP.DAG
UNLOCK
LOCK
Hyundai dealer by quoting the relevant key number.
In the interest of security, the metal tag at-
tached to the keys which bears the key numbershould be removed from the key ring after youreceive your new vehicle. In addition, key num-bers cannot be provided by Hyundai for secu-rity reasons.
If you need additional keys or if you should lose
your keys, your authorized Hyundai dealer canmake new keys.