2004 Hyundai Santa Fe audio
[x] Cancel search: audioPage 127 of 253

1FEATURES OF YOUR HYUNDAI
114
D295B02O-AAT
1. POWER ONOFF Control Knob
Press this knob to turn the system on and off.
VOLUME Control
To increase volume, turn the knob clockwise.
Turn it counterclockwise to decrease volume.
2. BAND Select Button
Press this button to switch between AM, FM1
and FM2. Then Display shows your selection.
3. RADIO STATION Control Knob
Turn this knob to select radio stations.
4. SEEK/SCAN Button
SEEK
Press the up or down arrow to go to the next
higher or lower station and stay there. The
sound will mute while seeking.
SCAN
Press and hold either SEEK/SCAN arrow for
two seconds until SCAN appears on the display
and you hear a beep. Use SCAN to listen to
stations for a few seconds. The radio will go to
a station, stop for a few seconds, then go to the
next station. Press either SEEK/SCAN arrow
again to stop scanning. If you press SEEK/
SCAN for more than four seconds, the radio will
change to preset scan mode. Then sound will
mute while scanning.
5. PRESET STATION Select Button
The six numbered pushbuttons let you return to
your favorite stations. You can set up to 18
stations (six AM, six FM1 and six FM2) by
performing the following steps:
1. Turn the radio on.
2. Press AM · FM to select the band.
3. Tune in the desired station.
4. Press AUTO EQ to select the equalization
that best suited type of station selected.
5. Press and hold one of the six numbered
buttons until you hear a beep. Whenever you
press that numbered button, the station you
set will return and the equalization that you
selected will also be automatically selected
for that button.
6. Repeat the above steps for each pushbutton.
PRESET SCAN
Press and hold either SEEK/SCAN arrow for
more than four seconds, PRESET SCAN will
appear on the display. You will hear a double
beep. Use PERSET SCAN to listen to each of
your preset stations for a few seconds. The
radio will go to a preset station stored on your
pushbuttons, stop for a few seconds, then go on
to the next preset stations. Press either SEEK/
SCAN arrow again to stop scanning presets.
6. AUDIO Knob
BASS
Press the AUDIO knob until BASS appears on
the display. Turn the knob to increase or de-
crease bass. When you use this control, the
radio's tone setting will switch to custom mode.
To set the bass to the middle position, select
BASS and press and hold the AUDIO knob. The
radio will produce one beep and set the display
level to zero. To set all tone and speaker
controls to the middle position, press and hold
the AUDIO knob when no tone or speaker
control is active. The radio will produce one
beep and CENTERED will appear on the dis-
play.
Page 128 of 253

1FEATURES OF YOUR HYUNDAI
115
MID
Press the AUDIO knob until MID appears on the
display. Turn the knob to increase or decrease
mid. When you use this control, the radio's tone
setting will switch to custom mode.
To set the mid to the middle position, select MID
and press and hold the AUDIO knob. The radio
will produce one beep and set the display level
to zero. To set all tone and speaker controls to
the middle position, press and hold the AUDIO
knob when no tone or speaker control is active.
Then radio will produce one beep and CEN-
TERED will appear on the display.
TREB
Press the AUDIO knob until TREB appears on
the display. Turn the knob to increase to de-
crease treble. When you use this control, the
radio's tone setting will switch to custom mode.
If a station is weak or noisy, you may want to
decrease the treble.
To set treble to the middle position, select TREB
and press and hold the AUDIO knob. The radio
will produce one beep and set the display level
to zero. To set all tone and speaker controls to
the middle position, press and hold the AUDIO
knob when no tone or speaker control is active.
The radio will produce one beep and CEN-
TERED will appear on the display.
7. AUTO EQUALIZER Button
This feature allows you to choose preset bass,
mid and treble equalization settings designed
for country, jazz, talk, pop, rock and classical
stations. The last setting will appear on the
display when you first press AUTO EQ. Each
time you press AUTO EQ, another setting will
appear on the display. Press AUTO EQ again
country disappear and CUSTOM will appear.
Tone control will return to the BASS, MID and
TREB. Also, if you alter BASS, MID, or TREB
while in an auto EQ setting, the radio will return
to CUSTOM. CUSTOM will appear on the dis-
play.
8. Adjusting the Speakers
BAL-FADE
The AUDIO knob adjusts balance and fade. To
adjust balance, press the AUDIO knob until BAL
appears on the display. Turn the knob to adjust
the sound to the left or right speakers. The
middle position balances the sound between the
speakers. To adjust fade, press and hold the
AUDIO knob until FAD appears on the display.
Turn the knob to adjust the sound to the front or
rear speakers. The middle position balances
the sound between the speakers.To set the balance and fade to the middle
position, select balance or fade and press and
hold the AUDIO knob.
The radio will beep once and will set the display
level to the middle position, To set all tone and
speaker controls to the middle position, press
and hold the AUDIO knob when tone or speaker
controls are not active. The radio will produce
one beep and CENTERED will appear on the
display.
!CAUTION:o Do not place beverages close to the
audio system. The audio system mecha-
nism may be damaged if you spill them.
o Do not impact on the audio system, or
the audio system mechanism could be
damaged.
Page 133 of 253

1FEATURES OF YOUR HYUNDAI
120
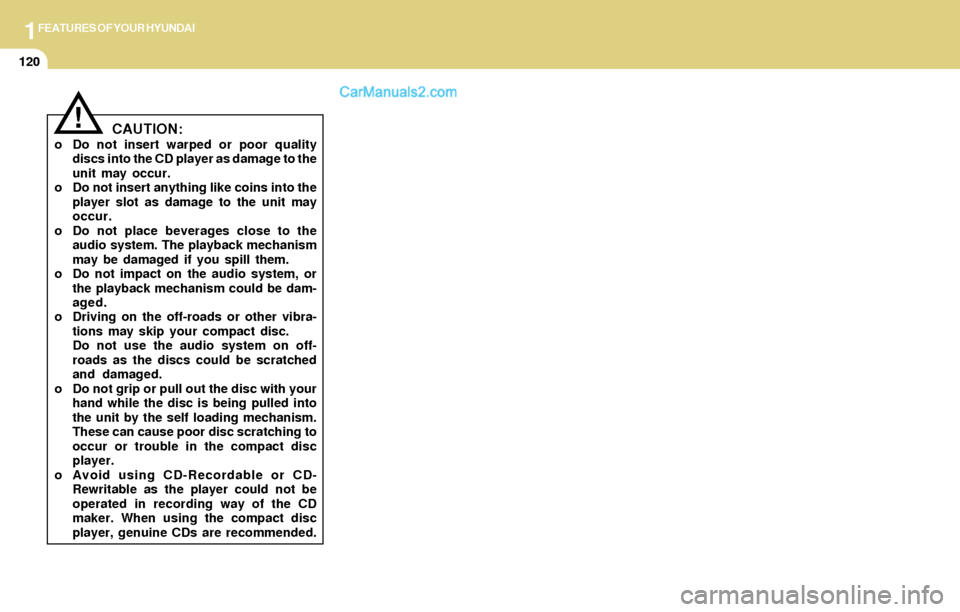
!CAUTION:o Do not insert warped or poor quality
discs into the CD player as damage to the
unit may occur.
o Do not insert anything like coins into the
player slot as damage to the unit may
occur.
o Do not place beverages close to the
audio system. The playback mechanism
may be damaged if you spill them.
o Do not impact on the audio system, or
the playback mechanism could be dam-
aged.
o Driving on the off-roads or other vibra-
tions may skip your compact disc.
Do not use the audio system on off-
roads as the discs could be scratched
and damaged.
o Do not grip or pull out the disc with your
hand while the disc is being pulled into
the unit by the self loading mechanism.
These can cause poor disc scratching to
occur or trouble in the compact disc
player.
o Avoid using CD-Recordable or CD-
Rewritable as the player could not be
operated in recording way of the CD
maker. When using the compact disc
player, genuine CDs are recommended.
Page 135 of 253

1FEATURES OF YOUR HYUNDAI
122
o Be sure that the cassette label is not loose
or peeling off or tape ejection may be difficult.
o Never touch or soil the actual audio tape
surfaces.
o Keep all magnetized objects, such as elec-
tric motors, speakers or transformers away
from your cassette tapes and tape player
unit.
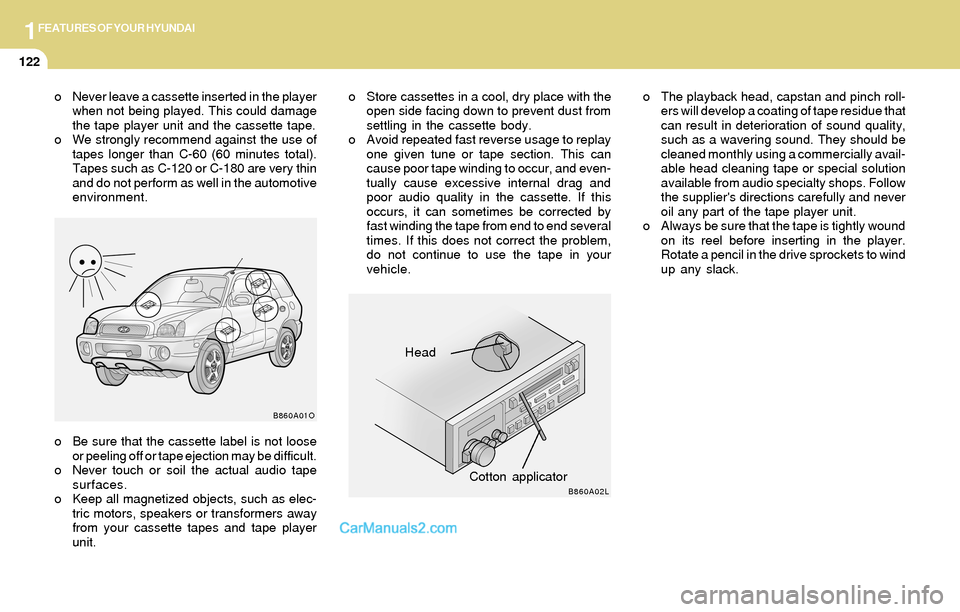
Head
Cotton applicator
B860A01O
B860A02L
o The playback head, capstan and pinch roll-
ers will develop a coating of tape residue that
can result in deterioration of sound quality,
such as a wavering sound. They should be
cleaned monthly using a commercially avail-
able head cleaning tape or special solution
available from audio specialty shops. Follow
the supplier's directions carefully and never
oil any part of the tape player unit.
o Always be sure that the tape is tightly wound
on its reel before inserting in the player.
Rotate a pencil in the drive sprockets to wind
up any slack. o Never leave a cassette inserted in the player
when not being played. This could damage
the tape player unit and the cassette tape.
o We strongly recommend against the use of
tapes longer than C-60 (60 minutes total).
Tapes such as C-120 or C-180 are very thin
and do not perform as well in the automotive
environment.o Store cassettes in a cool, dry place with the
open side facing down to prevent dust from
settling in the cassette body.
o Avoid repeated fast reverse usage to replay
one given tune or tape section. This can
cause poor tape winding to occur, and even-
tually cause excessive internal drag and
poor audio quality in the cassette. If this
occurs, it can sometimes be corrected by
fast winding the tape from end to end several
times. If this does not correct the problem,
do not continue to use the tape in your
vehicle.
Page 229 of 253

6DO-IT-YOURSELF MAINTENANCE
35
G200E01O-AAT
Inner Panel
G200E01O-A
PROTECTED COMPONENTS
Cigarette lighter & Power outlet
Audio, Power outside mirror
Digital clock, Rear power outlet
Cruise control
Head lamp relay
Seat warmer
Rear wiper motor control
Rear window defogger, Power outside mirror
A/C control, Sunroof controller, Electrical chrome mirror
(Not used)
Room lamp, Door warning switch, Door lamp, Manual A/C control, Homelink controller
Digatal clock, ETACM, Audio, Siren
AMP speakers
Stop lamp, Data link connector, Multipurpose check connector
Hazard lamp
Power seat, Rear wiper motor control
Sunroof controller
Defogger relay
Instrument cluster, Pre-excitation resistor, ETACM, Auto light sensor,
DRL control module, Generator
SRS control module
ECM (V6 2.7L), PCM (I4 with A/T), ECM (I4 with M/T)
Instrument cluster (Air bag IND)
ABS control module, G-Sensor, Air bledding connector, 4WD control module
Turn signal lamp
Back-up lamps, TCM, Vehicle speed secsor, ETS control module, Ignition failure sensor
Door lock/unlock relay, Key lock/unlock relay
Tail & parking lamp (LH), Turn signal lamp, License lamp
Tail & parking lamp (RH), Fog lamp relay, Switch illumination
ETS control module (V6 3.5L), Fail safety relay
Radiator fan relay, Condenser fan relay
Front wiper motor, Wiper relay, Washer motorFUSE
RATING
20A
10A
15A
10A
10A
25A
10A
10A
10A
10A
10A
15A
20A
10A
10A
25A
20A
30A
10A
15A
10A
10A
10A
10A
10A
20A
10A
10A
15A
10A
20A FUSE
F1
F2
F3
F4
F5
F6
F7
F8
F9
F10
F11
F12
F13
F14
F15
F16
F17
F18
F19
F20
F21
F22
F23
F24
F25
F26
F27
F28
F29
F30
F31
Page 248 of 253

10INDEX
2
A
Air bag ...............................................................................................1-31
Air Cleaner Filter ...............................................................................6-12
Air Conditioning
Care..............................................................................................6-18
Operation............................................................................ 1-85, 6-18
Switch...........................................................................................1-84
Antenna ..........................................................................................1-123
Ashtray..............................................................................................1-55
Audio System
Cassete tape player operation (D-285) ...................................1-106
Compact disc player operation (H260) .......................................1-99
Compact disc player operation (D-285) ...................................1-110
Compact disc player operation (D-295) ...................................1-116
Stereo radio operation (H260) .....................................................1-96
Stereo radio operation (D-285) ................................................1-103
Stereo radio operation (D-295) ................................................1-113
B
Battery..................................................................................... 2-23, 6-22
Brake
Anti-lock brake system ................................................................2-15
Brake traction control system (BTCS) ........................................2-15
Checking the brakes ....................................................................6-16
Fluid ..............................................................................................6-16
Pedal clearance ...........................................................................6-20
Pedal free-play .............................................................................6-19
Practices......................................................................................2-21
Breaking-In your New Hyundai .......................................................... 1-3C
Calendar ............................................................................................1-53
Care of Cassette Tapes ................................................................1-121
Care of Disc ...................................................................................1-121
Cargo Security Screen .....................................................................1-69
Catalytic Converter............................................................................. 7-3
Child-Protector Rear Door Lock ......................................................... 1-7
Child Restraint System .....................................................................1-24
Installing a Child Restraint Seat with the
"Tether Anchorage" System .....................................................1-26
Securing the Child Restraint Seat with the "ISOFIX" System ....1-27
Cigarette Lighter ................................................................................1-54
Clock.................................................................................................1-53
Clutch
Checking fluid ...............................................................................6-17
Pedal free-play .............................................................................6-19
Combination Light
Auto light .......................................................................................1-50
Headlight flasher ..........................................................................1-49
Headlight switch ...........................................................................1-49
High-beam switch ........................................................................1-49
Lane change signal ......................................................................1-49
Parking light auto off .....................................................................1-49
Turn signal operation ...................................................................1-48
Consumer Information ........................................................................ 8-6
Cooling Fans .....................................................................................6-23