2004 Hyundai Grandeur bulb
[x] Cancel search: bulbPage 59 of 235

1- 46 FEATURES OF YOUR HYUNDAI
B260N02FC-GAT
MALFUNCTION INDICATOR LIGHT(If installed)
This light illuminates when there is a malfunction of an exhaust gas related component, and the system is not functioning properly so that the ex-haust gas regulation values are not satisfied. This light will also illuminate when the ignition key is turned to the"ON" position, and will go out in a few seconds. If it illuminates while driving, or does not illuminate when the ignitionkey is turned to the "ON" position, take your car to your nearest authorized Hyundai dealer and have the systemchecked. B270B01L-AAT
STOP/TAIL LIGHT FAIL URE WARNINGLIGHT
If the Stop/Tail Light Failure warning light comes on when the parking brake is applied or the tail light is turned on,check the brake lines or the tail light bulb.
B260Q01HP-DAT
CRUISE INDICATOR LIGHT (If installed)
The cruise indicator light in the instru- ment cluster is illuminated only when the vehicle cruising speed has beenset using the control switch on the steering wheel. The indicator light does not illuminatewhen the main cruise control switch is activated. Information on the use of cruise con-trol may be found on page 1-76.
tinuously comes on again when you turned the ignition key to the "ON" position or started the engine, or if itcomes on while driving, have the SRS inspected by an authorized Hyundai Dealer.
B270A01A-AAT BRAKE PAD WEAR WARNING SOUND The front disc brake pads have wear indicators that should make a high- pitched squealing or scraping noisewhen new pads are needed. The sound may come and go or be heard all the time when the vehicle is moving. Itmay also be heard when the brake pedal is pushed down firmly. Exces- sive rotor damage will result if the wornpads are not replaced. See your Hyundai dealer immediately.
Page 63 of 235
1- 50 FEATURES OF YOUR HYUNDAI
To turn on the rear fog lights, push the switch. They will come on when the headlight switch is in the second posi-tion and the key is in the "ON" position.
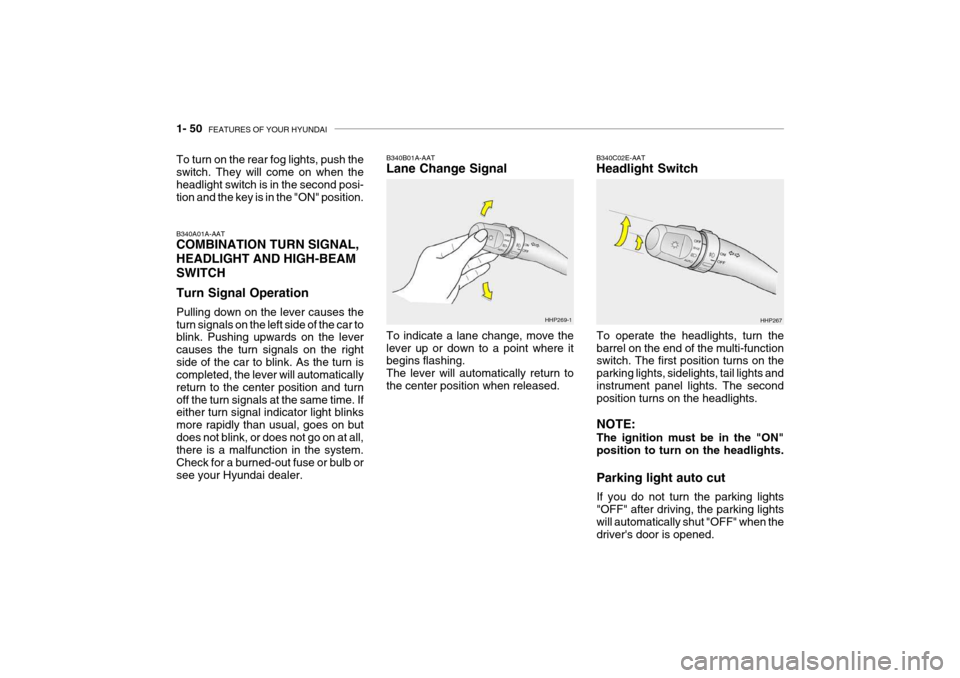
B340A01A-AAT COMBINATION TURN SIGNAL, HEADLIGHT AND HIGH-BEAM SWITCH Turn Signal Operation Pulling down on the lever causes the turn signals on the left side of the car to blink. Pushing upwards on the lever causes the turn signals on the rightside of the car to blink. As the turn is completed, the lever will automatically return to the center position and turnoff the turn signals at the same time. If either turn signal indicator light blinks more rapidly than usual, goes on butdoes not blink, or does not go on at all, there is a malfunction in the system. Check for a burned-out fuse or bulb orsee your Hyundai dealer. B340B01A-AAT Lane Change Signal To indicate a lane change, move the lever up or down to a point where it begins flashing. The lever will automatically return tothe center position when released.
HHP269-1
B340C02E-AAT Headlight Switch
To operate the headlights, turn the barrel on the end of the multi-function switch. The first position turns on the parking lights, sidelights, tail lights andinstrument panel lights. The second position turns on the headlights. NOTE: The ignition must be in the "ON" position to turn on the headlights. Parking light auto cut If you do not turn the parking lights "OFF" after driving, the parking lightswill automatically shut "OFF" when the driver's door is opened. HHP267
Page 136 of 235
DRIVING YOUR HYUNDAI 2- 3
C020A01A-AAT BEFORE STARTING THE EN- GINE Before you start the engine, you should always:
1. Look around the vehicle to be sure
there are no flat tires, puddles of oil, water or other indications of pos-sible trouble.
2. After entering the car, check to be
sure the parking brake is engaged.
3. Check that all windows, and lights are clean.
4. Check that the interior and exterior mirrors are clean and in position.
5. Check your seat, seatback and
headrest to be sure they are in theirproper positions.
6. Lock all the doors.
7. Fasten your seat belt and be sure
that all other occupants have fas- tened theirs.
8. Turn off all lights and accessories that are not needed.
9. When you turn the ignition switch to
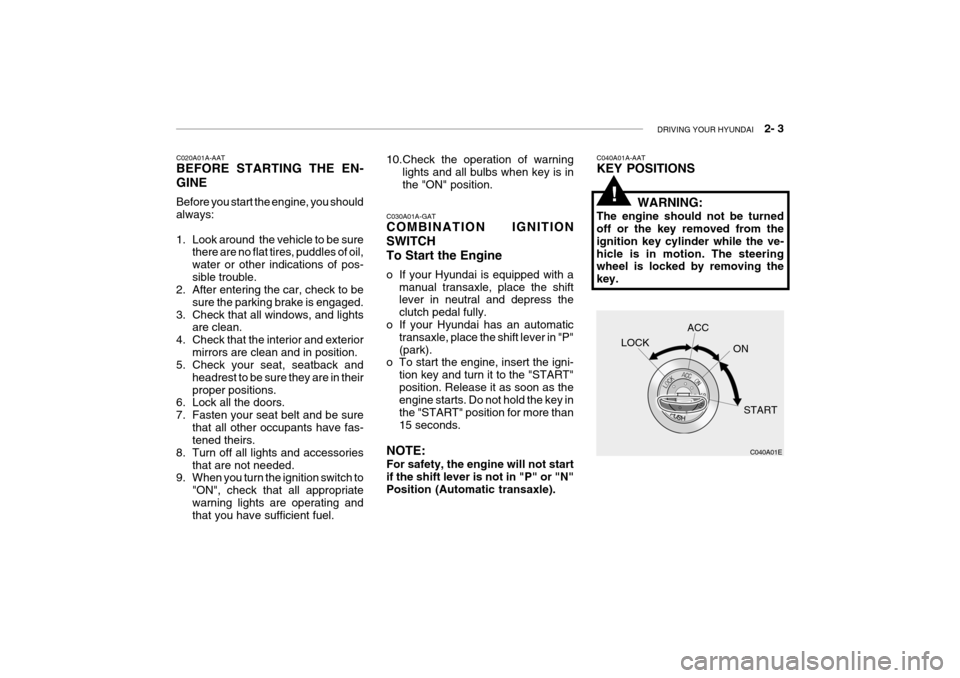
"ON", check that all appropriate warning lights are operating and that you have sufficient fuel. C030A01A-GAT COMBINATION IGNITION SWITCHTo Start the Engine
o If your Hyundai is equipped with a
manual transaxle, place the shift lever in neutral and depress the clutch pedal fully.
o If your Hyundai has an automatic transaxle, place the shift lever in "P"(park).
o To start the engine, insert the igni-
tion key and turn it to the "START"position. Release it as soon as the engine starts. Do not hold the key in the "START" position for more than15 seconds.
NOTE: For safety, the engine will not start if the shift lever is not in "P" or "N"Position (Automatic transaxle).
10.Check the operation of warning
lights and all bulbs when key is inthe "ON" position.C040A01A-AAT KEY POSITIONS
WARNING:
The engine should not be turned off or the key removed from the ignition key cylinder while the ve-hicle is in motion. The steering wheel is locked by removing the key.
C040A01E
LOCK
ACC
ON
START
!
Page 183 of 235

6. Do-It-Yourself Maintenance
Engine Compartment ..................................................................... 6-2
General Checks .............................................................................. 6-5
Checking the Engine Oil ................................................................ 6-6
Changing the Oil and Filter ........................................................... 6-7
Checking and Changing the Engine Coolant ............................... 6-8
Spark Plugs ..................................................................................6-10
Changing the Air Cleaner Filter ................................................... 6-11
Checking the Transaxle Oil (Manual) .......................................... 6-13
Checking the Transaxle Fluid (Automatic) .................................. 6-14
Checking the Brakes .................................................................... 6-15
Checking the Clutch Fluid ............................................................ 6-16
Air Conditioning Care ................................................................... 6-17
Changing the Air Filter (For Evaporator and Blower Unit) ......... 6-18
Checking Drive Belts .................................................................... 6-21
Checking and Replacing Fuses ................................................... 6-21
Power Steering Fluid Level .......................................................... 6-24
Headlight Aiming Adjustment ....................................................... 6-24
Replacement of Light Bulbs ......................................................... 6-26
Bulb Wattage ................................................................................ 6-33
Junction Box Description ............................................................. 6-34
6
Page 206 of 235
6- 24 DO-IT-YOURSELF MAINTENANCE
G240A01A-AAT
POWER STEERING HOSES
It is suggested that you check the power steering hose connections forfluid leakage at regular intervals.The power steering hoses should bereplaced if there is severe surface cracking, scuffing or worn spots. De- terioration of the hose could causepremature failure.
G230A03A-GAT POWER STEERING FLUID LEVEL
HXG2006
The power steering fluid level should be checked regularly. To check the power steering fluid level, be sure the ignition is "OFF", then check to make certain that the power steering fluid level is betweenthe "MAX" and "MIN" level markings on the fluid reservoir. NOTE: Grinding noise from the power steering pump may be heard im-mediately after the engine is started in extremely cold conditions (be- low - 20°C). In this case, if the noise stops during warm up, there is no abnormal function in the sys- tem. This is due to a power steer-ing fluid characteristic in extremely cold conditions.
Recommended Fluid Use PSF-3 type fluid. NOTE: Do not start the engine when the
power steering oil reservoir is empty.
G290A02L-GAT
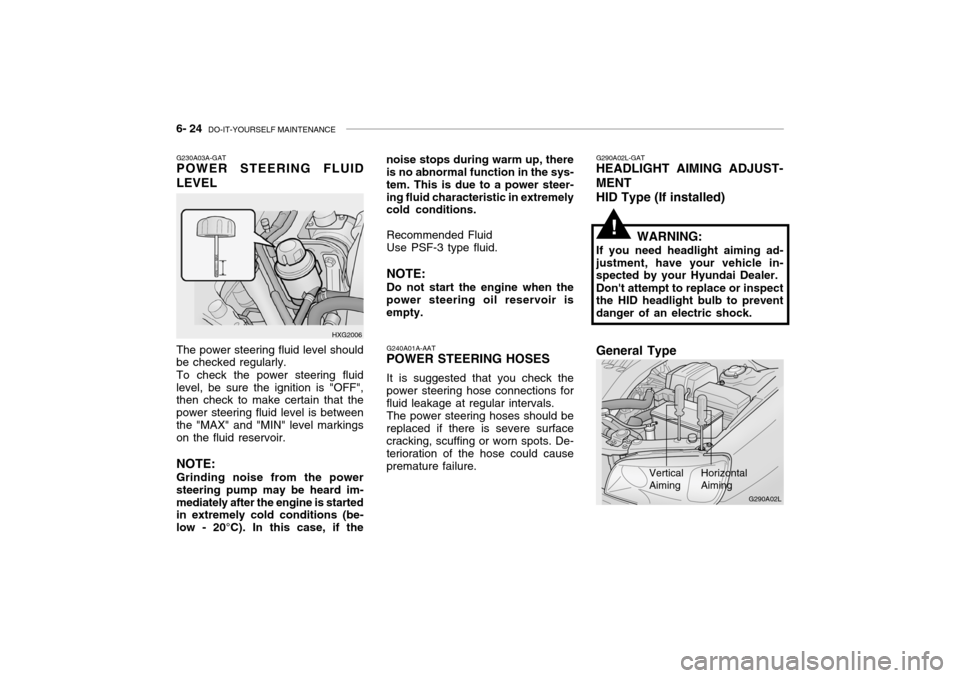
HEADLIGHT AIMING ADJUST- MENT
HID Type (If installed)
WARNING:
If you need headlight aiming ad- justment, have your vehicle in- spected by your Hyundai Dealer. Don't attempt to replace or inspect the HID headlight bulb to prevent danger of an electric shock.
Vertical Aiming HorizontalAiming
!
G290A02L
General Type
Page 208 of 235
6- 26 DO-IT-YOURSELF MAINTENANCE
G260A01L-GAT
REPLACEMENT OF LIGHT BULBS
Before attempting to replace a light bulb, be sure the switch is turned tothe "OFF" position.The next paragraph shows how toreach the light bulbs so they may be changed. Be sure to replace the burned-out bulb with one of the samenumber and wattage rating.See page 6-33 for the wattage de-scriptions.
! CAUTION:
o Keep the lights out of contact with petroleum products, such as oil, gasoline, etc.
o Be sure to replace the LED type equipped bulbs with an assem-bly.Replacement instructions:
1. Allow the bulb to cool. Wear eye protection.
2. Open the engine hood.
3. Always grasp the bulb by its plastic base, avoid touching the glass. G270A03L
G270A02L-GAT
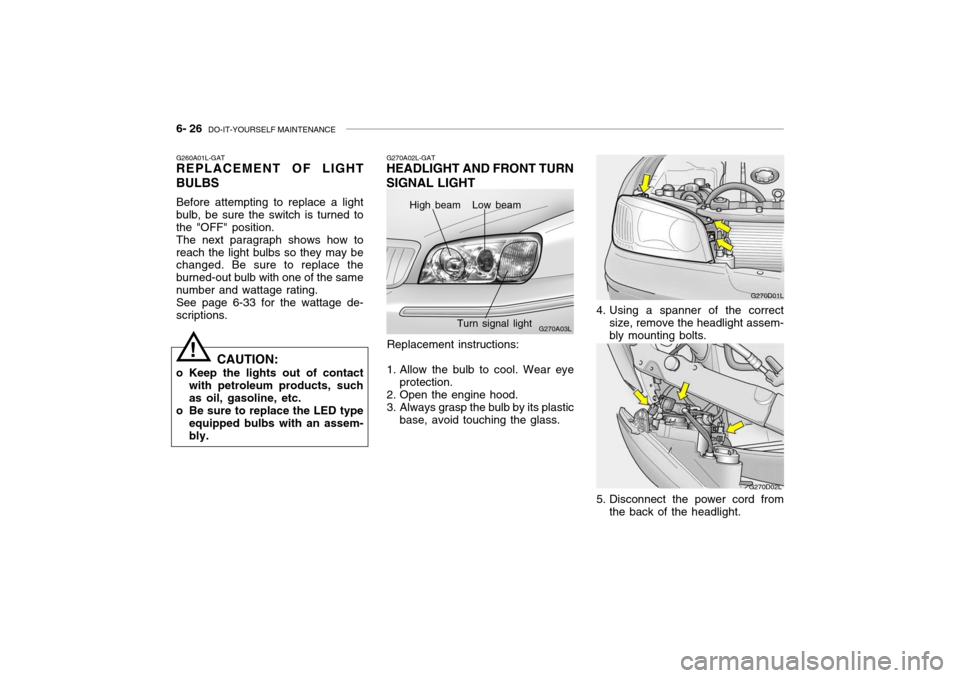
HEADLIGHT AND FRONT TURN SIGNAL LIGHT
High beam Low beam
Turn signal light
G270D01L
4. Using a spanner of the correct size, remove the headlight assem- bly mounting bolts.
G270D02L
5. Disconnect the power cord from the back of the headlight.
Page 209 of 235
DO-IT-YOURSELF MAINTENANCE 6- 27
G270A04L
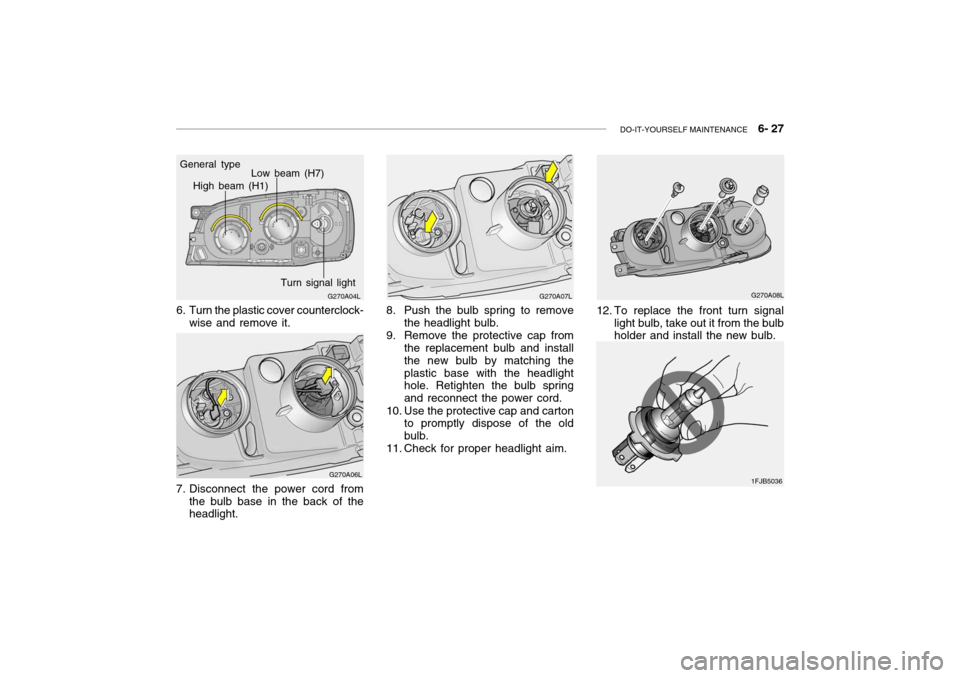
General type
High beam (H1)
Low beam (H7)
Turn signal light
6. Turn the plastic cover counterclock- wise and remove it.
G270A06L
7. Disconnect the power cord from the bulb base in the back of the headlight.
G270A07L
8. Push the bulb spring to remove the headlight bulb.
9. Remove the protective cap from the replacement bulb and install the new bulb by matching theplastic base with the headlight hole. Retighten the bulb spring and reconnect the power cord.
10. Use the protective cap and carton to promptly dispose of the oldbulb.
11. Check for proper headlight aim.
12. To replace the front turn signal light bulb, take out it from the bulb holder and install the new bulb. G270A08L
1FJB5036
Page 210 of 235
6- 28 DO-IT-YOURSELF MAINTENANCE
G270I01L-GAT
FRONT FOG LIGHT
G270D01L
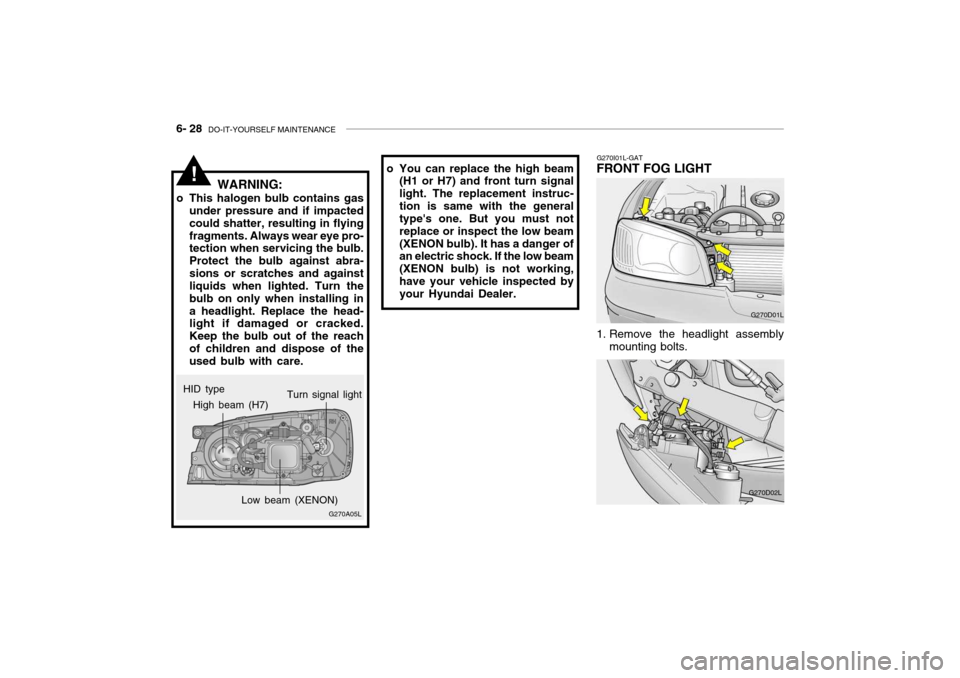
1. Remove the headlight assembly mounting bolts.
G270D02L
HID type
!
G270A05L
High beam (H7)
Low beam (XENON)Turn signal light
WARNING:
o This halogen bulb contains gas under pressure and if impacted could shatter, resulting in flyingfragments. Always wear eye pro- tection when servicing the bulb. Protect the bulb against abra-sions or scratches and against liquids when lighted. Turn the bulb on only when installing ina headlight. Replace the head- light if damaged or cracked. Keep the bulb out of the reachof children and dispose of the used bulb with care. o You can replace the high beam
(H1 or H7) and front turn signal light. The replacement instruc-tion is same with the general type's one. But you must not replace or inspect the low beam(XENON bulb). It has a danger of an electric shock. If the low beam (XENON bulb) is not working,have your vehicle inspected by your Hyundai Dealer.