Page 82 of 296
The childproof door locks are
designed to prevent children seated
in the rear f rom accidentally opening
the rear sliding doors. Each door has
a lock lever near the edge. With the
lever in the LOCK position, the door
cannot be opened f rom the inside
regardless of the position of the lock
knob. To open the door, slide the
lock knob forward, and use the
outside door handle.With the childproof door locks on,
automatic operation with the inside
door handle is disabled.
Use your key to lock and unlock the
tailgate.
You can also lock and unlock the
tailgate with the remote transmitter
(see page ).81
CONT INUED
On EX and EX-L models
On EX and EX-L models
Door L ocks
Inst rument s and Cont rols
Childproof Door L ocks T ailgate
79
Unlock
LOCK
LEVER Lock
Page 83 of 296
The tailgate also has a lock tab on
the inside.
To lock the tailgate without the key
or the remote transmitter, push the
lock tab down and close the tailgate.Keep the tailgate closed at all times
while driving to avoid damaging the
tailgate and to prevent exhaust gas
f rom getting into the interior. See
on page
.
To open the tailgate, pull the handle,
then lif t up. To close the tailgate, use
the inner handle to pull it down, then
press down on the back edge. 54
Door L ocks
Inst rument s and Cont rols
Carbon Monoxide Hazard
80
HANDLE
LOCK
TAB
Page 84 of 296

�µ�µ�µ
Pressthisbuttontolock
all doors and the tailgate. Some
exterior and interior lights will f lash.
This button does not work if any
door or the tailgate is not f ully closed
or key is in the ignition switch. Press this button once
to unlock the driver’s door. Push it
twice to unlock the other doors and
the tailgate. Some exterior and
interior lights will f lash twice when
you push the button the f irst time. If
you do not open any door or the
tailgate within 30 seconds, they will
automatically relock.
When you press the UNLOCK
button, the f ront and rear individual
map lights and the cargo area light,
depending on their switch positions,
will come on (see page ). If you
do not open any door or the tailgate,
the lights stay on for about 10
seconds, then go out. If you relock
thedoorsandthetailgatewiththe
remote transmitter before 10
seconds have elapsed, the lights will
go of f immediately. Pressthisbuttonfor
about 1 second to attract attention;
thehornwillsoundandtheexterior
lights will f lash f or about 30 seconds.
To cancel panic mode, press any
other button on the remote
transmitter or turn the ignition
switch to ON (II).
113
CONT INUED
On EX and EX-L models
Remote Transmitter
Inst rument s and Cont rols
LOCK UNL OCK
PA NIC
81
LED
UNLOCK
BUTTON LOCK
BUTTON
PANIC
BUTTON
Page 86 of 296

�´
�Ü �Õ
If it takes several pushes on the
button to lock or unlock the doors
and the tailgate, replace the battery
as soon as possible.
To replace the battery, move the
round cover on the back of the
transmitter by turning it
counterclockwise with a coin. Insert
a new battery with the side facing
up. Reinstall the cushion ring. Align
the mark on the cover with
the mark on the transmitter.
Setthecoverinplaceandturnit
clockwise.
Battery type: CR2025
As required by the FCC:
This device complies with Part 15 of theFCC rules. Operation is subject to thef ollowing two conditions: (1) This devicemay not cause harmf ul interf erence, and(2) this device must accept anyinterf erence received, includinginterf erence that may cause undesiredoperation.
Changes or modif ications not expresslyapproved by the party responsible f orcompliance could void the user’sauthority to operate the equipment.
This device complies with IndustryCanada Standard RSS-210.Operation is subject to the f ollowing twoconditions: (1) this device may not causeinterf erence, and (2) this device mustaccept any interf erence that may causeundesired operation of the device.
Remote Transmitter
Inst rument s and Cont rols
Replacing the Transmitter Battery
83
Open
Close ROUND
COVER
CUSHION
RING
BATTERY
Page 87 of 296

To open, pull the inside or outside
door handle, and slide the door back.
It will latch in the f ully open position.
When opening f rom the inside, the
childproof door lock must be
unlocked.
To close, pull either handle, and slide
the door closed. Make sure the door
is closed and latched securely bef ore
driving, and all passengers are clear
of the sliding doors bef ore closing
them.The doors on EX and EX-L models
are electrically powered and can be
operated with the remote transmitter,
the door handles, or the dashboard
switches. To operate the doors:
TheshiftlevermustbeinPark.
The MAIN switch must be in the
ON position.
The doors must be unlocked.
If you shif t out of Park while a door
is closing, you will hear a beep until
the door closes. Make sure both
door are closed bef ore you start
driving.
If you shif t out of Park while a door
is opening, you will hear a
continuous tone and the door will
stop moving. If you keep driving, the
tone will continue until you stop and
close the door. To open and close the power doors,
pull and release the inside or outside
door handles. They will close
automatically.
Each power sliding door has an auto-
reverse f eature. If a door meets
resistance while closing, it will beep
three times and reverse direction.
However, the door may not reverse
immediately and may cause some
bruising or discomf ort. Always make
sure passengers and objects are
clear of the doors bef ore closing
them.
Also check that passengers,
especially children, do not have their
hands on the edge of the sliding door
or on the door pillar. The auto-
reverse motor stops working when
the door is about to latch so the
motor can pull the door shut.
LX models
Sliding Doors
Inst rument s and Cont rols
Opening and Closing Manual
Sliding Doors
Power Sliding Doors
A ut o-Reverse
84
Page 88 of 296

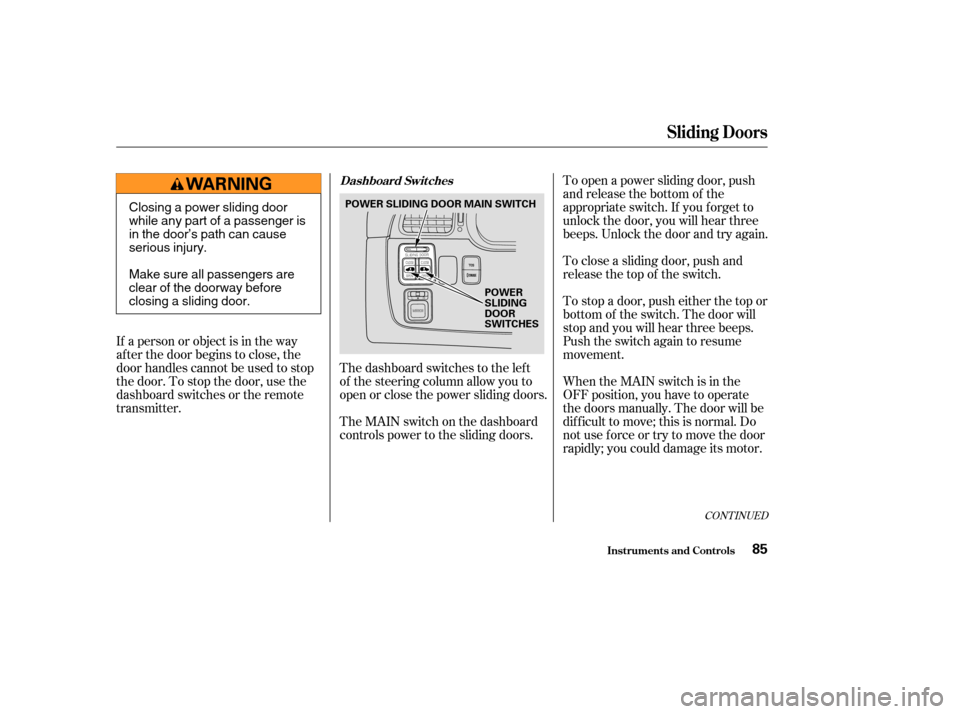
The dashboard switches to the lef t
of the steering column allow you to
open or close the power sliding doors.
The MAIN switch on the dashboard
controls power to the sliding doors.To open a power sliding door, push
and release the bottom of the
appropriate switch. If you f orget to
unlock the door, you will hear three
beeps. Unlock the door and try again.
To close a sliding door, push and
release the top of the switch.
To stop a door, push either the top or
bottom of the switch. The door will
stop and you will hear three beeps.
Push the switch again to resume
movement.
When the MAIN switch is in the
OFF position, you have to operate
the doors manually. The door will be
dif f icult to move; this is normal. Do
not use f orce or try to move the door
rapidly; you could damage its motor.
If a person or object is in the way
af ter the door begins to close, the
door handles cannot be used to stop
the door. To stop the door, use the
dashboard switches or the remote
transmitter.
CONT INUED
Sliding Doors
Inst rument s and Cont rols
Dashboard Switches
85
POWER
SLIDING
DOOR
SWITCHES
POWER SLIDING DOOR MAIN SWITCH
Closing a power sliding door
while any part of a passenger is
in the door’s path can cause
serious injury.
Make sure all passengers are
clear of the doorway before
closing a sliding door.
Page 89 of 296

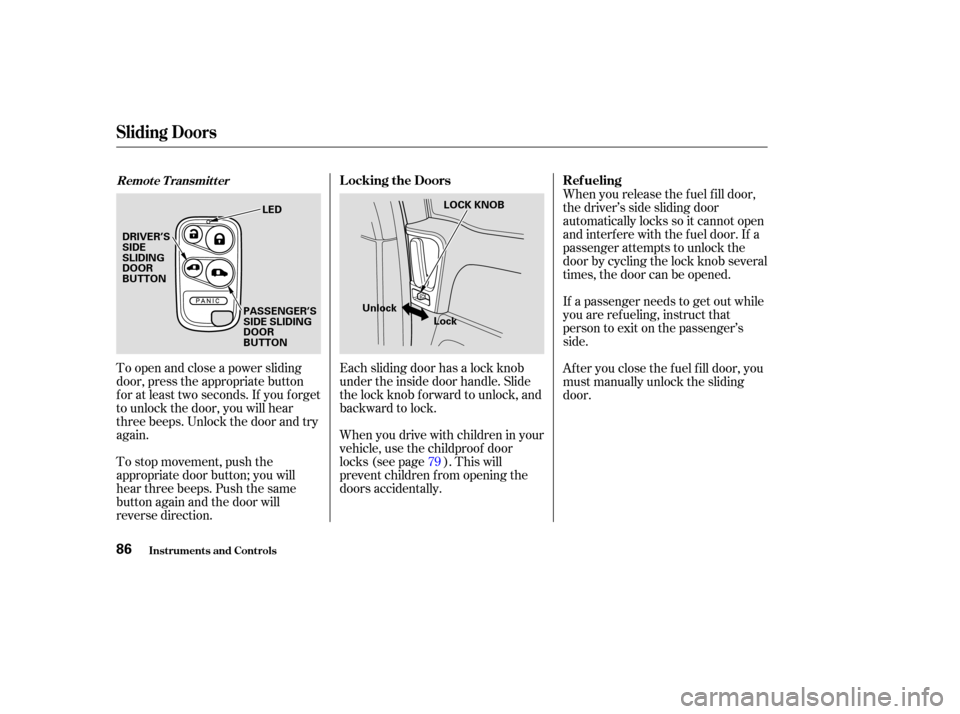
To open and close a power sliding
door, press the appropriate button
f or at least two seconds. If you f orget
to unlock the door, you will hear
three beeps. Unlock the door and try
again.
To stop movement, push the
appropriate door button; you will
hear three beeps. Push the same
button again and the door will
reverse direction.Each sliding door has a lock knob
under the inside door handle. Slide
the lock knob f orward to unlock, and
backward to lock.
Whenyoudrivewithchildreninyour
vehicle, use the childproof door
locks (see page ). This will
prevent children f rom opening the
doors accidentally.When you release the f uel f ill door,
the driver’s side sliding door
automatically locks so it cannot open
and interfere with the fuel door. If a
passenger attempts to unlock the
door by cycling the lock knob several
times, the door can be opened.
If a passenger needs to get out while
you are ref ueling, instruct that
person to exit on the passenger’s
side.
Af ter you close the f uel f ill door, you
must manually unlock the sliding
door.
79
Remote Transmitter
Sliding Doors
Inst rument s and Cont rols
L ocking the Doors Ref ueling
86
LOCK KNOB
Unlock Lock
DRIVER’S
SIDE
SLIDING
DOOR
BUTTON
LED
PASSENGER’S
SIDE SLIDING
DOOR
BUTTON
Page 116 of 296
The lights go out about six seconds
after all the doors and the tailgate
are closed.
With the light control switch in the
Door Activated position, all the
individual map lights and the cargo
area light (with its switch in the
center position) come on when you
unlock the door with the remote
transmitter (see page ).
Withanydoororthetailgateleft
open, the lights stay on about 3
minutes, then go out.Turn on the f ront individual map
lights by pushing the button next to
each light. Push the button again to
turn it off. You can also operate
these lights with the light control
switch (see page ).Turn on each rear individual map
light by pushing the lens when the
ignition switch is in the
ACCESSORY (I) or ON (II) position.
Push the lens again to turn it off.
You can also operate these lights
with the light control switch (see
page ).
112
81
112
On EX and EX-L models
Interior Lights
Inst rument s and Cont rols
Individual Map L ights
113
FRONTREAR