Page 216 of 301

Install a new oil f ilter according to
the instructions that come with it.Refill the engine with the recom-
mended oil.
Engine oil change capacity
(including f ilter):
(4-cylinder models)
(6-cylinder models)Replace the engine oil f ill cap.
Start the engine. The oil pressure
indicator should go out within 5
seconds. If it does not, turn of f the
engine and check your work.
Let the engine run f or several
minutes, then check the drain bolt
and oil f ilter f or leaks.
Turn of f the engine, let it sit f or
several minutes, then check the oil
level on the dipstick. If necessary,
add more oil.
(6-cylinder models)
(4-cylinder models)
Put a new washer on the drain bolt,
then reinstall the drain bolt.
Tighten it to:
Make sure to clean of f any dirt
and dust on the connecting
surf ace of a new oil f ilter. 9.
8.
7.
6.
4. 5.
Changing the Oil and Filter
Maint enance217
OIL FILTER
6-cylinder models
OIL FILTER
4-cylinder models
4.4 US qt (4.2)
4.5 US qt (4.3
)
29 lbf·ft (39 N·m , 4.0 kgf·m)
33 lbf·ft (45 N·m , 4.6 kgf·m) Improper disposal of engine oil can be
harmf ul to the environment. If you
change your own oil, please dispose of
the used oil properly. Put it in a sealed
container and take it to a recycling
center. Do not discard it in a trash bin
or dump it on the ground.
�����—�����—�����y�
������
����
�y���
�(�������
���y���������y
Page 218 of 301

If the coolant level in the reserve
tank is at or below the MIN line, add
coolant to bring it up to the MAX line.
Inspect the cooling system f or leaks.
Always use Honda All Season
Antif reeze/Coolant Type 2. This
coolant is pre-mixed with 50 percent
antif reeze and 50 percent water.
Never add straight antifreeze or
plain water.If Honda antif reeze/coolant is not
available, you may use another
major-brand non-silicate coolant as a
temporaryreplacement.Makesureit
is a high-quality coolant
recommended f or aluminum engines.
Continued use of any non-Honda
coolant can result in corrosion,
causing the cooling system to
malf unction or f ail. Have the cooling
system f lushed and ref illed with
Honda antif reeze/coolant as soon as
possible.
If the reserve tank is completely
empty, you should also check the
coolant level in the radiator.
A dding Engine Coolant
Engine Coolant
Maint enance219
6-cylinder models RESERVE TANK
RESERVE TANK
4-cylinder models
Removing the radiator cap
while the engine is hot can
cause the coolant to spray out,
seriously scalding you.
Always let the engine and
radiator cool down before
removing the radiator cap.
�����—�����—�����y�
�������������y���
�(�������
���y���������y
Page 219 of 301
When the radiator and engine are
cool, relieve any pressure in the
cooling system by turning the
radiator cap counterclockwise,
without pressing down.
Remove the radiator cap by
pushing down and turning
counterclockwise.The coolant level should be up to
the base of the f iller neck. Add
coolant if it is low.
Pourthecoolantslowlyand
caref ully so you do not spill. Clean
up any spill immediately; it could
damage components in the engine
compartment.
Put the radiator cap back on and
tighten it.Pour coolant into the reserve tank.
Fill it to half way between the MAX
and MIN marks. Put the cap back
on the reserve tank.
Do not add any rust inhibitors or
other additives to your vehicle’s
cooling system. They may not be
compatible with the coolant or
engine components.
4. 5.
1. 2. 3.
Engine Coolant
Maint enance220
6-cylinder models RADIATOR CAP
RADIATOR CAP
4-cylinder models
�����—�����—�����y�
���������
���y���
�(�������
���y���������y
Page 221 of 301
To thoroughly f lush the transmission,
the technician should drain and ref ill
it with Honda ATF-Z1 (Automatic
Transmission Fluid), then drive the
vehicle f or a short distance. Do this
three times. Then drain and ref ill the
transmission a f inal time.Check the f luid level with the engine
at normal operating temperature.Park the vehicle on level ground.
Shut of f the engine.
Remove the dipstick (yellow loop)
f rom the transmission, and wipe it
with a clean cloth.
Insert the dipstick all the way back
into the transmission securely as
shown in the illustration.
The transmission should be drained
and ref illed with new f luid according
to the time and distance recommen-
dations in the maintenance schedule.
If you are not sure how to add f luid,
contact your Honda dealer.
1. 2.
6.
6-cylinder models
T ransmission Fluid
Maint enance
Automatic Transmission
222
DIPSTICK
�����—�����—�����y�
�������������y���
�(�������
���y���������y
Page 224 of 301

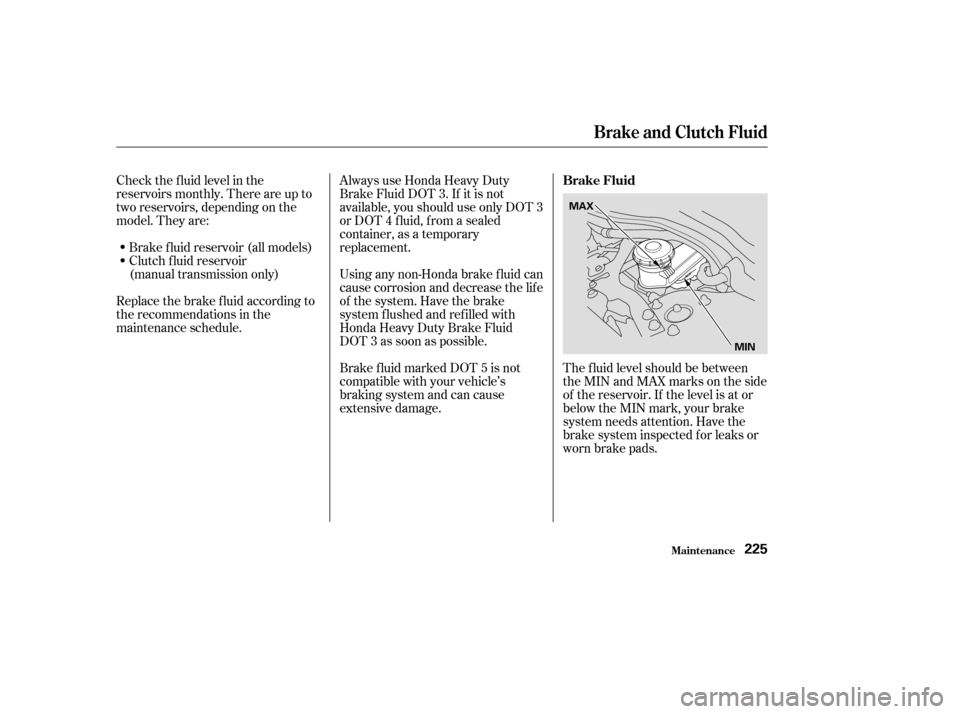
Check the f luid level in the
reservoirs monthly. There are up to
two reservoirs, depending on the
model. They are:Brake f luid reservoir (all models)
Clutch f luid reservoir
(manual transmission only) Always use Honda Heavy Duty
Brake Fluid DOT 3. If it is not
available, you should use only DOT 3
or DOT 4 f luid, f rom a sealed
container, as a temporary
replacement.
Using any non-Honda brake f luid can
cause corrosion and decrease the lif e
of the system. Have the brake
system f lushed and ref illed with
Honda Heavy Duty Brake Fluid
DOT 3 as soon as possible.
The f luid level should be between
theMINandMAXmarksontheside
of the reservoir. If the level is at or
below the MIN mark, your brake
system needs attention. Have the
brake system inspected f or leaks or
worn brake pads.
Replace the brake f luid according to
the recommendations in the
maintenance schedule.
Brake f luid marked DOT 5 is not
compatible with your vehicle’s
braking system and can cause
extensive damage.
Brake and Clutch Fluid
Maint enance
Brake Fluid
225
MAX
MIN
�����—�����—�����y�
�������������y���
�(�������
���y���������y
Page 226 of 301

�µ�µ
Always use Honda Power Steering
Fluid. You may use another power
steering f luid as an emergency
replacement, but have the power
steering system f lushed and ref illed
with Honda PSF as soon as possible.
A low power steering f luid level can
indicate a leak in the system. Check
the f luid level f requently, and have
the system inspected as soon as
possible.
The timing belt should be replaced
at the intervals shown in the
maintenance schedule.
Replace these belts at 60,000 miles
(U.S.) or 100,000 km (Canada) if you
regularly drive your vehicle in one or
more of these conditions:
In very high temperatures
(over 110°F, 43°C).
In very low temperatures
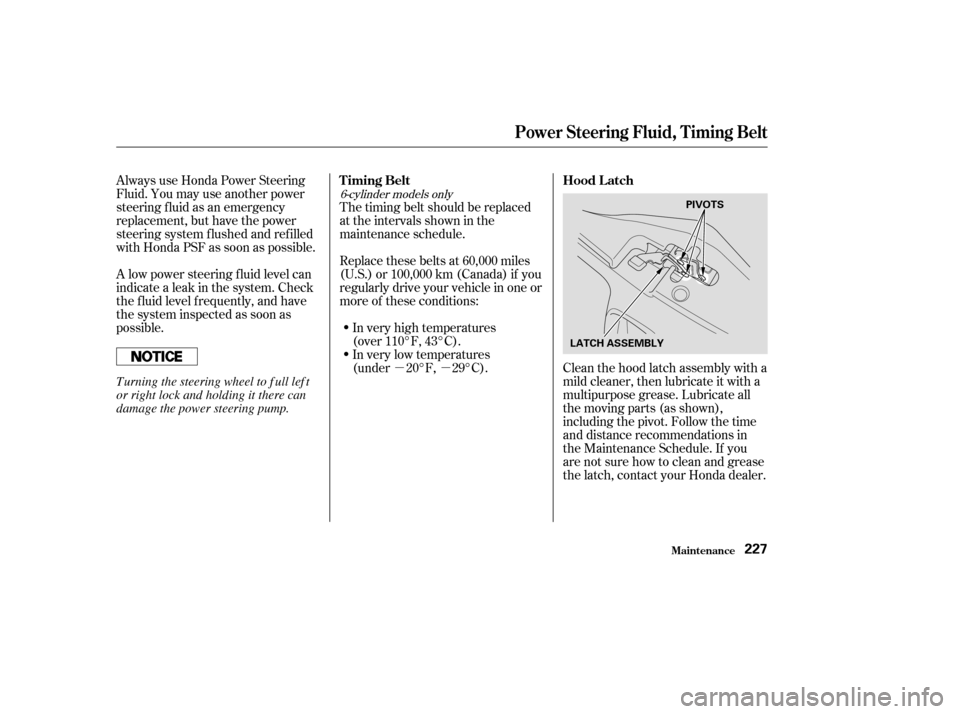
(under 20°F, 29°C). Clean the hood latch assembly with a mild cleaner, then lubricate it with a
multipurpose grease. Lubricate all
the moving parts (as shown),
including the pivot. Follow the time
and distance recommendations in
the Maintenance Schedule. If you
are not sure how to clean and grease
the latch, contact your Honda dealer.
6-cylinder models only
Power Steering Fluid, Timing Belt
Maint enance
T iming Belt Hood L atch
227
LATCH ASSEMBLYPIVOTS
T urning the steering wheel to f ull lef t
or right lock and holding it there can
damage the power steering pump.
�����—�����—�����y�
�������������y���
�(�������
���y���������y
Page 238 of 301

�Î �Î
�Î�Î
Check the pressure in the tires when
they are cold. This means the vehicle
has been parked f or at least three
hours, or driven less than 1 mile (1.6
km).
Add or release air, if needed, to
match the recommended cold tire
pressuresonthispage.
If you check the pressure when the
tires are hot (driven f or several
miles), you will see readings 4 to 6
psi (30 to 40 kPa, 0.3 to 0.4 kgf /cm )
higher than the cold reading. This is
normal; do not release air to match
the cold pressure.Tubeless tires have some ability to
self -seal if they are punctured. You
should look closely f or punctures if a
tire starts losing pressure.
Youshouldgetyourowntire
pressure gauge and use it whenever
you check your tire pressures. This
will make it easier f or you to tell if a
pressure loss is due to a tire problem
and not due to a variation between
gauges.
Thecompactsparetirepressureis:
All models except LX
LX modelTire Size Cold Tire Pressure
for Normal Driving
Tire Size Cold Tire Pressure for Normal Driving
1 2 Front:
Rear:
EX and V6 models
DX model
Front:
Rear:
1 2
Tires
Maint enance239
60 psi (420 kPa , 4.2 kgf/cm)
P195/65R15 89HP205/60R16 91V 32 psi (220 kPa ,
2.2 kgf/cm
)
30 psi (210 kPa , 2.1 kgf/cm
)
P205/65R15 92H 30 psi (210 kPa ,2.1 kgf/cm
)
29 psi (200 kPa , 2.0 kgf/cm
)
�����—�����—�����y�
�������������y���
�(�������
���y���������y
Page 239 of 301

Every time you check inf lation, you
should also examine the tires f or
damage, f oreign objects, and wear.
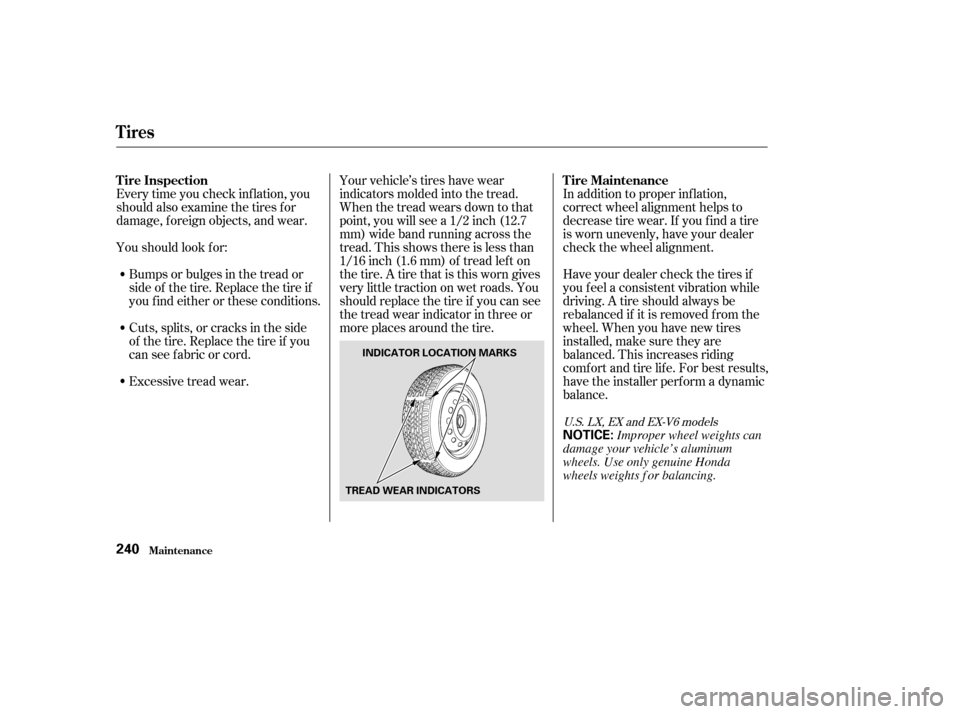
Youshouldlookfor:Your vehicle’s tires have wear
indicators molded into the tread.
When the tread wears down to that
point, you will see a 1/2 inch (12.7
mm) wide band running across the
tread. This shows there is less than
1/16 inch (1.6 mm) of tread lef t on
the tire. A tire that is this worn gives
very little traction on wet roads. You
should replace the tire if you can see
the tread wear indicator in three or
more places around the tire.
Have your dealer check the tires if
you f eel a consistent vibration while
driving. A tire should always be
rebalanced if it is removed f rom the
wheel. When you have new tires
installed, make sure they are
balanced. This increases riding
comf ort and tire lif e. For best results,
have the installer perform a dynamic
balance.
In addition to proper inf lation,
correct wheel alignment helps to
decrease tire wear. If you f ind a tire
is worn unevenly, have your dealer
check the wheel alignment.
Excessive tread wear.
Cuts, splits, or cracks in the side
of the tire. Replace the tire if you
can see f abric or cord.
Bumps or bulges in the tread or
side of the tire. Replace the tire if
youfindeitherortheseconditions.
U.S. LX, EX and EX-V6 models
Tires
Maint enance
Tire Inspection
Tire Maintenance
240
NOTICE:
INDICATOR LOCATION MARKS
TREAD WEAR INDICATORS
Improper wheel weights can
damage your vehicle’s aluminum
wheels. Use only genuine Honda
wheels weights f or balancing.
�����—�����—�����y�
�������������y���
�(�������
���y���������y