2004 GMC YUKON XL DENALI towing
[x] Cancel search: towingPage 305 of 468

When You Are Ready to Leave After
Parking on a Hill
1. Apply your regular brakes and hold the pedal down
while you:
·start your engine,
·shift into a gear, and
·release the parking brake.
2. Let up on the brake pedal.
3. Drive slowly until the trailer is clear of the chocks.
4. Stop and have someone pick up and store the
chocks.
Maintenance When Trailer Towing
Your vehicle will need service more often when you're
pulling a trailer. See the Maintenance Schedule for more
on this. Things that are especially important in trailer
operation are automatic transmission ¯uid (don't over®ll),
engine oil, axle lubricant, belts, cooling system and
brake system. Each of these is covered in this manual,
and the Index will help you ®nd them quickly. If
you're trailering, it's a good idea to review these sections
before you start your trip.
Check periodically to see that all hitch nuts and bolts
are tight.
4-61
Page 306 of 468
Trailer Wiring Harness
Heavy-Duty Trailer Wiring Package
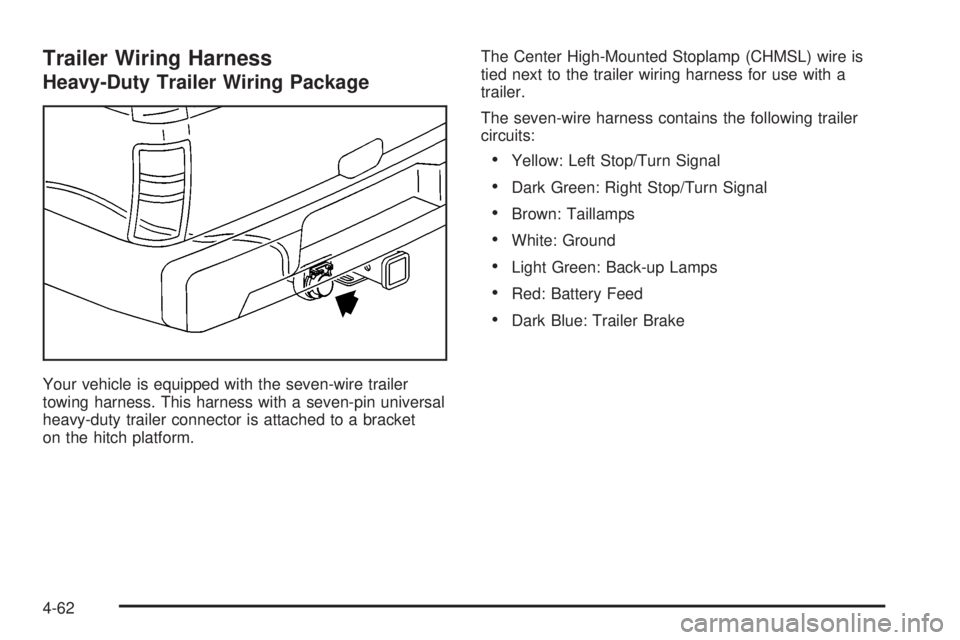
Your vehicle is equipped with the seven-wire trailer
towing harness. This harness with a seven-pin universal
heavy-duty trailer connector is attached to a bracket
on the hitch platform.The Center High-Mounted Stoplamp (CHMSL) wire is
tied next to the trailer wiring harness for use with a
trailer.
The seven-wire harness contains the following trailer
circuits:
·Yellow: Left Stop/Turn Signal
·Dark Green: Right Stop/Turn Signal
·Brown: Taillamps
·White: Ground
·Light Green: Back-up Lamps
·Red: Battery Feed
·Dark Blue: Trailer Brake
4-62
Page 328 of 468

Automatic Transmission Fluid
When to Check and Change
A good time to check your automatic transmission ¯uid
level is when the engine oil is changed.
Change both the ¯uid and ®lter every 50,000 miles
(83 000 km) if the vehicle's GVWR is over 8,600 or if
the vehicle is mainly driven under one or more of these
conditions:
·In heavy city traffic where the outside temperature
regularly reaches 90ÉF (32ÉC) or higher.
·In hilly or mountainous terrain.
·When doing frequent trailer towing.
·Uses such as found in taxi, police or delivery
service.
If your vehicle's GVWR is not over 8,600 and you do
not use your vehicle under any of these conditions,
change the ¯uid and ®lter every 100,000 miles
(166 000 km).
See
Scheduled Maintenance on page 6-4.
How to Check
Because this operation can be a little difficult, you may
choose to have this done at the dealership service
department.
If you do it yourself, be sure to follow all the instructions
here, or you could get a false reading on the dipstick.
Notice:Too much or too little ¯uid can damage
your transmission. Too much can mean that some
of the ¯uid could come out and fall on hot engine
part or exhaust system parts, starting a ®re.
Too little ¯uid could cause the transmission to
overheat. Be sure to get an accurate reading if you
check your transmission ¯uid.
Wait at least 30 minutes before checking the
transmission ¯uid level if you have been driving:
·When outside temperatures are above 90ÉF (32ÉC).
·At high speed for quite a while.
·In heavy traffic ± especially in hot weather.
·While pulling a trailer.
To get the right reading, the ¯uid should be at
normal operating temperature, which is 180ÉF to 200ÉF
(82ÉC to 93ÉC).
5-20
Page 333 of 468

Adding Coolant
If you need more coolant, add the proper DEX-COOLž
coolant mixtureat the surge tank, but only when the
engine is cool.
{CAUTION:
You can be burned if you spill coolant on hot
engine parts. Coolant contains ethylene glycol,
and it will burn if the engine parts are hot
enough. Do not spill coolant on a hot engine.
When replacing the pressure cap, make sure it is
hand-tight.
Coolant Surge Tank Pressure Cap
The coolant surge tank pressure cap must be fully
installed on the coolant surge tank. SeeEngine
Compartment Overview on page 5-12for more
information on location.
Notice:If the pressure cap is not tightly installed,
coolant loss and possible engine damage may
occur. Be sure the cap is properly and tightly
secured.
Engine Overheating
You will ®nd a coolant temperature gage on your
vehicle's instrument panel. SeeEngine Coolant
Temperature Gage on page 3-38. In addition, you will
®nd an ENGINE COOLANT HOT, ENGINE
OVERHEATED and a REDUCED ENGINE POWER
message in the DIC on the instrument panel. See
DIC
Warnings and Messages on page 3-57.
Overheated Engine Protection
Operating Mode
If an overheated engine condition exists and the
REDUCED ENGINE POWER message is displayed, an
overheat protection mode which alternates ®ring
groups of cylinders helps prevent engine damage. In
this mode, you will notice a loss in power and engine
performance. This operating mode allows your vehicle to
be driven to a safe place in an emergency. Driving
extended miles (km) and/or towing a trailer in the
overheat protection mode should be avoided.
Notice:After driving in the overheated engine
protection operating mode, to avoid engine damage,
allow the engine to cool before attempting any
repair. The engine oil will be severely degraded.
Repair the cause of coolant loss, change the oil and
reset the oil life system. See
Engine Oil on
page 5-13.
5-25
Page 335 of 468
If No Steam Is Coming From Your
Engine
An overheat warning, along with a low coolant condition,
can indicate a serious problem. For more information
see
Driver Information Center (DIC) on page 3-46.
If you get an engine overheat warning, and don't have a
low coolant condition, but see or hear no steam, the
problem may not be too serious. Sometimes the engine
can get a little too hot when you:
·Climb a long hill on a hot day.
·Stop after high-speed driving.
·Idle for long periods in traffic.
·Tow a trailer. SeeTowing a Trailer on page 4-51.
If you get the overheat warning with no sign of steam, try
this for a minute or so:
1. Turn on your heater to full hot at the highest fan
speed and open the window as necessary.
2. If you're in a traffic jam, shift to NEUTRAL (N);
otherwise, shift to the highest gear while
driving ± DRIVE (D).If you no longer have the overheat warning, you can
drive. Just to be safe, drive slower for about 10 minutes.
If the warning doesn't come back on, you can drive
normally.
If the warning continues, pull over, stop, and park your
vehicle right away.
If there's still no sign of steam, push down the
accelerator until the engine speed is about twice as fast
as normal idle speed for at least three minutes while
you're parked. If you still have the warning,
turn off the
engine and get everyone out of the vehicleuntil it
cools down. Also, see ªOverheated Engine Protection
Operating Modeº listed previously in this section.
You may decide not to lift the hood but to get service
help right away.
5-27
Page 341 of 468
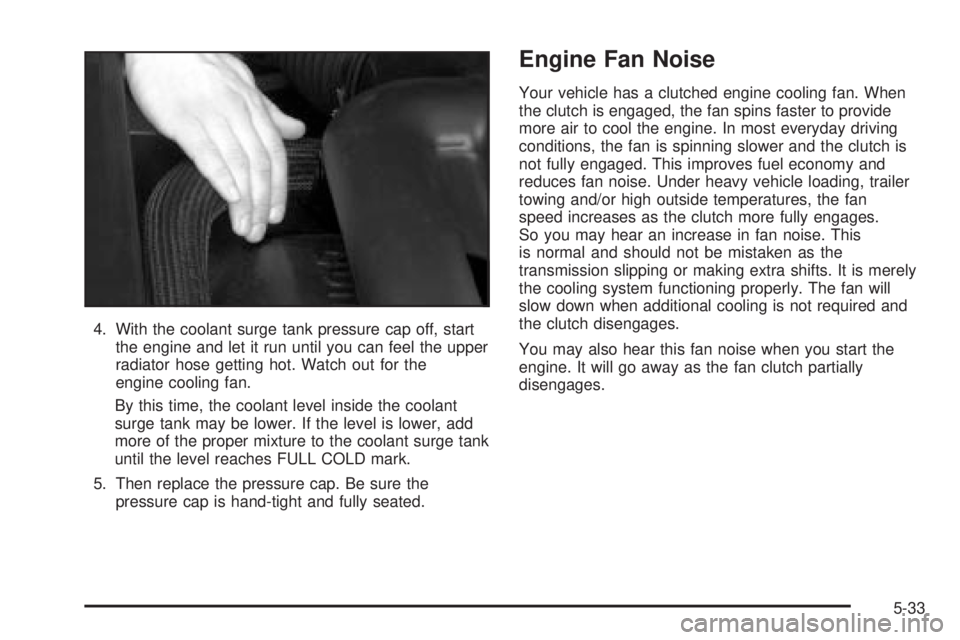
4. With the coolant surge tank pressure cap off, start
the engine and let it run until you can feel the upper
radiator hose getting hot. Watch out for the
engine cooling fan.
By this time, the coolant level inside the coolant
surge tank may be lower. If the level is lower, add
more of the proper mixture to the coolant surge tank
until the level reaches FULL COLD mark.
5. Then replace the pressure cap. Be sure the
pressure cap is hand-tight and fully seated.
Engine Fan Noise
Your vehicle has a clutched engine cooling fan. When
the clutch is engaged, the fan spins faster to provide
more air to cool the engine. In most everyday driving
conditions, the fan is spinning slower and the clutch is
not fully engaged. This improves fuel economy and
reduces fan noise. Under heavy vehicle loading, trailer
towing and/or high outside temperatures, the fan
speed increases as the clutch more fully engages.
So you may hear an increase in fan noise. This
is normal and should not be mistaken as the
transmission slipping or making extra shifts. It is merely
the cooling system functioning properly. The fan will
slow down when additional cooling is not required and
the clutch disengages.
You may also hear this fan noise when you start the
engine. It will go away as the fan clutch partially
disengages.
5-33
Page 431 of 468

(g)Inspect system. Check all fuel and vapor lines and
hoses for proper hook-up, routing and condition.
Check that the purge valve works properly (if equipped).
Replace as needed.
(h)Change automatic transmission ¯uid and ®lter if the
vehicle is mainly driven under one or more of these
conditions:
þIn heavy city traffic where the outside temperature
regularly reaches 90ÉF (32ÉC) or higher.
þIn hilly or mountainous terrain.
þWhen doing frequent trailer towing.
þUses such as found in taxi, police or delivery
service.
(i)Drain, ¯ush and re®ll cooling system. See Engine
Coolant on page 5-23for what to use. Inspect hoses.
Clean radiator, condenser, pressure cap and ®ller neck.
Pressure test the cooling system and pressure cap.
(j)
A ¯uid loss in any vehicle system could indicate a
problem. Have the system inspected and repaired and
the ¯uid level checked. Add ¯uid if needed.
Owner Checks and Services
These owner checks and services should be performed
at the intervals speci®ed to help ensure the safety,
dependability and emission control performance of your
vehicle. Your GM Goodwrench dealer can assist you
with these checks and services.
Be sure any necessary repairs are completed at once.
Whenever any ¯uids or lubricants are added to your
vehicle, make sure they are the proper ones, as shown
in
Recommended Fluids and Lubricants on page 6-13.
At Each Fuel Fill
It is important to perform these underhood checks at
each fuel ®ll.
Engine Oil Level Check
Check the engine oil level and add the proper oil if
necessary. SeeEngine Oil on page 5-13for further
details.
Notice:It is important to check your oil regularly
and keep it at the proper level. Failure to keep your
engine oil at the proper level can cause damage
to your engine not covered by your warranty.
6-9
Page 461 of 468

Locks
Delayed Locking........................................... 2-9
Door........................................................... 2-8
Lockout Protection.......................................2-13
Power Door.................................................. 2-9
Programmable Automatic Door Locks.............2-10
Rear Door Security Locks.............................2-12
Loss of Control...............................................4-15
LOW COOLANT LEVEL..................................3-59
Low Fuel Warning Light...................................3-45
Luggage Carrier..............................................2-44
Lumbar
Power Controls............................................. 1-4
M
Maintenance Schedule
Additional Required Services........................... 6-6
At Each Fuel Fill........................................... 6-9
At Least Once a Month................................6-10
At Least Once a Year..................................6-10
Introduction.................................................. 6-2
Maintenance Footnotes.................................. 6-8
Maintenance Record....................................6-16
Maintenance Requirements............................. 6-2
Normal Maintenance Replacement Parts.........6-15
Owner Checks and Services........................... 6-9
Recommended Fluids and Lubricants.............6-13
Scheduled Maintenance................................. 6-4Maintenance Schedule (cont.)
Using Your................................................... 6-3
Your Vehicle and the Environment................... 6-2
Maintenance When Trailer Towing.....................4-61
Making Turns.................................................4-59
Malfunction Indicator Light................................3-40
Matching Transmitter(s) to Your Vehicle............... 2-6
Memory Seat.................................................2-48
Message
DIC Warnings and Messages........................3-57
Mexico, Central America and Caribbean Islands/
Countries (Except Puerto Rico and U.S. Virgin
Islands)....................................................... 7-4
Mirrors
Automatic Dimming Rearview with OnStar
ž,
Compass and Temperature Display.............2-32
Outside Automatic Dimming Mirror with Curb
View Assist.............................................2-37
Outside Convex Mirror.................................2-36
Outside Heated Mirrors................................2-36
Outside Power Mirrors..................................2-35
MyGMLink.com................................................ 7-3
N
Navigation/Radio System..................................3-80
New Vehicle Break-In......................................2-18
Normal Maintenance Replacement Parts............6-15
9