Page 349 of 468

Notice:If you leave your radio or other accessories
on during the jump starting procedure, they could
be damaged. The repairs would not be covered
by your warranty. Always turn off your radio and
other accessories when jump starting your vehicle.
3. Turn off the ignition on both vehicles. Unplug
unnecessary accessories plugged into the cigarette
lighter or accessory power outlets. Turn off the
radio and all lamps that aren't needed. This
will avoid sparks and help save both batteries. And
it could save your radio!
4. Open the hoods and locate the positive (+) and
negative (-) terminal locations of the other vehicle.
Your vehicle has a remote positive (+) jump
starting terminal and a remote negative (-) jump
starting terminal. You should always use these
remote terminals instead of the terminals on the
battery.
The remote positive (+) terminal is located under a
red plastic cover, if equipped, near the engine
accessory drive bracket. To access the remote
positive (+) terminal, open the red plastic cover, if
equipped.
The remote negative (-) terminal is located on the
engine accessory drive bracket and is marked GND.
See
Engine Compartment Overview on page 5-12for more information on location.
{CAUTION:
Using a match near a battery can cause battery
gas to explode. People have been hurt doing
this, and some have been blinded. Use a
¯ashlight if you need more light.
Be sure the battery has enough water. You do
not need to add water to the ACDelco
žbattery
installed in your new vehicle. But if a battery
has ®ller caps, be sure the right amount of
¯uid is there. If it is low, add water to take care
of that ®rst. If you do not, explosive gas could
be present.
Battery ¯uid contains acid that can burn you.
Do not get it on you. If you accidentally get it
in your eyes or on your skin, ¯ush the place
with water and get medical help immediately.
5-41
Page 350 of 468

5. Check that the jumper cables don't have loose or
missing insulation. If they do, you could get a
shock. The vehicles could be damaged too.
Before you connect the cables, here are some
basic things you should know. Positive (+) will go to
positive (+) or to a remote positive terminal (+) if
the vehicle has one. Negative (-) will go to a heavy,
unpainted metal engine part or to a remote
negative (-) terminal, if the vehicle has one.
Don't connect positive (+) to negative (-) or you'll
get a short that would damage the battery and
maybe other parts too.
{CAUTION:
Fans or other moving engine parts can injure
you badly. Keep your hands away from moving
parts once the engine is running.6. Connect the red
positive (+) cable to the
positive (+) terminal
of the dead battery.
Use a remote
positive (+) terminal
if the vehicle has one.
7. Don't let the other end
touch metal. Connect it
to the positive (+)
terminal of the good
battery. Use a remote
positive (+) terminal
if the vehicle has one.
5-42
Page 351 of 468

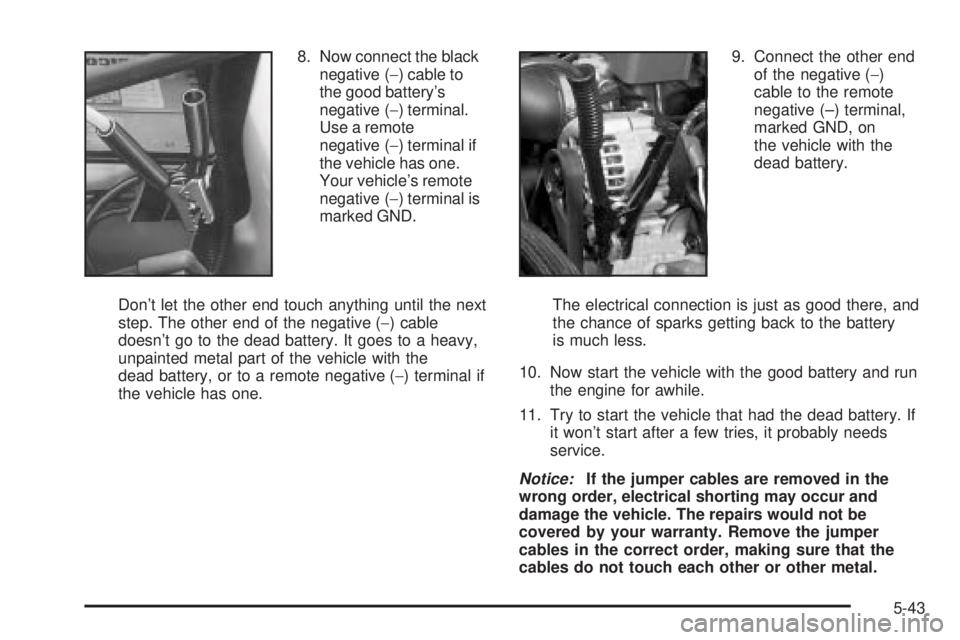
8. Now connect the black
negative (-) cable to
the good battery's
negative (-) terminal.
Use a remote
negative (-) terminal if
the vehicle has one.
Your vehicle's remote
negative (-) terminal is
marked GND.
Don't let the other end touch anything until the next
step. The other end of the negative (-) cable
doesn't go to the dead battery. It goes to a heavy,
unpainted metal part of the vehicle with the
dead battery, or to a remote negative (-) terminal if
the vehicle has one.9. Connect the other end
of the negative (-)
cable to the remote
negative (±) terminal,
marked GND, on
the vehicle with the
dead battery.
The electrical connection is just as good there, and
the chance of sparks getting back to the battery
is much less.
10. Now start the vehicle with the good battery and run
the engine for awhile.
11. Try to start the vehicle that had the dead battery. If
it won't start after a few tries, it probably needs
service.
Notice:If the jumper cables are removed in the
wrong order, electrical shorting may occur and
damage the vehicle. The repairs would not be
covered by your warranty. Remove the jumper
cables in the correct order, making sure that the
cables do not touch each other or other metal.
5-43
Page 352 of 468
A. Heavy, Unpainted Metal Engine Part or Remote
Negative (-) Terminal.
B. Good Battery or Remote Positive (+) and
Negative (-) Terminals.
C. Dead Battery or Remote Positive (+) Terminal.To disconnect the jumper cables from both vehicles do
the following:
1. Disconnect the black negative (-) cable from the
vehicle that had the dead battery.
2. Disconnect the black negative (-) cable from the
vehicle with the good battery.
3. Disconnect the red positive (+) cable from the
vehicle with the good battery.
4. Disconnect the red positive (+) cable from the
other vehicle.
5. Return the positive (+) remote terminal cover to its
original position.
Jumper Cable Removal
5-44
Page 413 of 468

Fuses Usage
RR Wiper Rear Window Wiper Switch
SEO ACCYSpecial Equipment Option
Accessory
WS WPR Windshield Wipers
TBC ACCYTruck Body Controller
Accessory
IGN 3 Ignition, Heated Seats
4WDFour-Wheel Drive System,
Auxiliary Battery
HTR A/C Climate Control System
LOCKPower Door Lock Relay
(Lock Function)
HVAC 1Inside Rearview Mirror,
Climate Control System
L DOORDriver's Door Harness
Connection
CRUISE Cruise Control
UNLOCKPower Door Lock Relay
(Unlock Function)
RR FOG LP Rear Fog Lamp (Export Only)
BRAKE Anti-Lock Brake System
DRIVER UNLOCKPower Door Lock Relay
(Driver's Door Unlock
Function)
IGN 0 PCM, TCM
TBC IGN 0 Truck Body ControllerFuses Usage
VEH CHMSLVehicle and Trailer High
Mounted Stoplamp
LT TRLR ST/TRN Left Turn Signal/Stop Trailer
LT TRNLeft Turn Signals and
Sidemarkers
VEH STOPVehicle Stoplamps, Brake
Module, Electronic Throttle
Control Module
RT TRLR ST/TRN Right Turn Signal/Stop Trailer
RT TRNRight Turn Signals and
Sidemarkers
BODY Harness Connector
DDM Driver Door Module
AUX PWR 2Rear Cargo Area Power
Outlets
LOCKS Power Door Lock System
ECCRear Electronic Climate
Control, Liftgate
TBC 2C Truck Body Controller
FLASH Flasher Module
CB LT DOORSLeft Power Window Circuit
Breaker
TBC 2B Truck Body Controller
TBC 2A Truck Body Controller
5-105
Page 415 of 468
Underhood Fuse BlockThe underhood fuse block in the engine compartment
on the driver's side of the vehicle near the battery.
Lift the cover for access to the fuse/relay block.
To remove fuses, hold the end of the fuse between your
thumb and index ®nger and pull straight out.
See
Engine Compartment Overview on page 5-12for
more information on its location.
5-107
Page 417 of 468

*1Ð Gasoline Engine and Fuel Injection Rail #2.
*2Ð Gasoline Engine and Fuel Injection Rail #1.
*3Ð Gasoline Engine; Oxygen Sensors.
*4Ð Gasoline Engine; Oxygen Sensors.
*5Ð PCM Ignition
Fuses Usage
GLOW PLUG Not Used
CUST FEED Gasoline Accessory Power
STUD #1Auxiliary Power (Single
Battery and Diesels
Only)/Dual Battery (TP2)
Do not install fuse.
MBECMid Bussed Electrical Center
Power Feed, Front Seats,
Right Doors
BLOWER Front Climate Control Fan
LBECLeft Bussed Electrical Center,
Door Modules, Door Locks,
Auxiliary Power OutletÐRear
Cargo Area and Instrument
Panel
STUD 2Accessory Power/Trailer
Wiring Brake Feed
Fuses Usage
ABS Anti-Lock Brakes
VSES/ECAS Vehicle Stability
IGN A Ignition Power
IGN B Ignition Power
LBEC 1Left Bussed Electrical Center,
Left Doors, Truck Body
Controller, Flasher Module
TRL PARK Parking Lamps Trailer Wiring
RR PARKRight Rear Parking and
Sidemarker Lamps
LR PARKLeft Rear Parking and
Sidemarker Lamps
PARK LP Parking Lamps Relay
STARTER Starter Relay
INTPARK Interior Lamps
STOP LP Stoplamps
TBC BATTTruck Body Controller Battery
Feed
SUNROOF Sunroof
SEO B2 Off-Road Lamps
4WSVent Solenoid
Canister/Quadrasteer Module
Power
5-109
Page 446 of 468

·Emergency Tow:Tow to the nearest dealership for
warranty service or in the event of a
vehicle-disabling accident. Assistance when the
vehicle is mired in sand, mud or snow.
·Flat Tire Change:Installation of a spare tire will be
covered at no charge. (The customer is responsible
for the repair or replacement of the tire if not
covered by a warrantable failure.)
·Jump Start:No-start occurrences which require a
battery jump start will be covered at no charge.
·Dealer Locator Service
·Trip Routing:Your Roadside Assistance
Representative can provide you with speci®c
information regarding this feature.
·Trip Interruption Expense Bene®ts:Your
Roadside Assistance Representative can provide
you with speci®c information regarding this feature.
In many instances, mechanical failures are covered
under GMC's Bumper-to-Bumper warranty. However,
when other services are utilized, our Roadside
Assistance Representatives will explain any payment
obligations you might incur.For prompt and efficient assistance when calling, please
provide the following to the Roadside Assistance
Representative:
·Your name, home address, and home telephone
number
·Telephone number of your location
·Location of the vehicle
·Model, year, color, and license plate number
·Mileage, Vehicle Identi®cation Number, and delivery
date of the vehicle
·Description of the problem
While we hope you never have the occasion to use our
service, it is added security while traveling for you
and your family. Remember, we are only a phone call
away. GMC Roadside Assistance: 1-800-462-8782, text
telephone (TTY) users, call 1-888-889-2438.
GMC reserves the right to limit services or
reimbursement to an owner or driver when, in GMC's
judgement, the claims become excessive in frequency or
type of occurrence.
Roadside Assistance is not part of or included in the
coverage provided by the New Vehicle Limited Warranty.
GMC reserves the right to make any changes or
discontinue the Roadside Assistance program at any
time without noti®cation.
7-6