2004 GMC YUKON XL DENALI door lock
[x] Cancel search: door lockPage 111 of 468

off to save the battery power. You can choose different
feedback options for the alarm. SeeDriver Information
Center (DIC) on page 3-46.
Remember, the theft-deterrent system won't activate if
you lock the doors with a key or use the manual
door lock. It activates only if you use a power door lock
switch with the door open, or with the remote keyless
entry transmitter. You should also remember that
you can start your vehicle with the correct ignition key if
the alarm has been set off.
Here's how to avoid setting off the alarm by accident:
·If you don't want to activate the theft-deterrent
system, the vehicle should be locked with the door
key
afterthe doors are closed.
·Always unlock a door with a key, or use the remote
keyless entry transmitter. Unlocking a door any
other way will set off the alarm.
If you set off the alarm by accident, unlock any door with
the key. You can also turn off the alarm by pressing
unlock on the remote keyless entry transmitter. The alarm
won't stop if you try to unlock a door any other way.
Testing the Alarm
The alarm can be tested by following these steps:
1. From inside the vehicle, lower the driver's window
and open the driver's door.
2. Activate the system by locking the doors with the
power door lock switch while the door is open, or
with the remote keyless entry transmitter.
3. Get out of the vehicle, close the door and wait for
the security light to go out.
4. Then reach in through the window, unlock the door
with the manual door lock and open the door. This
should set off the alarm.
While the alarm is set, the power door unlock switch is
not operational.
If the alarm does not sound when it should but the
headlamps ¯ash, check to see if the horn works. The
horn fuse may be blown. To replace the fuse, see
Fuses
and Circuit Breakers on page 5-103.
If the alarm does not sound or the headlamps do not
¯ash, the vehicle should be serviced by your dealer.
2-17
Page 132 of 468

OnStaržServices
One of the following plans is normally included for a
speci®c duration with each vehicle equipped with
OnStar
ž. You can upgrade or extend your OnStarž
service plan to meet your needs.
Safe and Sound Plan
·
Automatic Noti®cation of Air Bag Deployment
·Emergency Services
·Roadside Assistance
·Stolen Vehicle Assistance
·AccidentAssist
·Remote Door Unlock
·Remote Diagnostics
·Online Concierge
Directions and Connections Plan
·
All Safe and Sound Plan services
·Route Support
·RideAssist
·Information and Convenience Services
Luxury and Leisure Plan
·
All Directions and Connections Plan services
·Personal Concierge
OnStaržPersonal Calling
With OnStaržPersonal Calling, you have a safer way to
stay connected while driving. It's a hands-free wireless
phone that's integrated into your vehicle. You can place
calls nationwide using voice-activated dialing with no
contracts and no additional roaming charges. To ®nd out
more about OnStar
žPersonal Calling, refer to the
OnStaržowner's guide in your vehicle's glove box, or
call OnStaržat 1-888-4-ONSTAR (1-888-466-7827).
OnStaržVirtual Advisor
With OnStaržVirtual Advisor you can listen to your
favorite news, entertainment and information topics,
such as traffic and weather reports, stock quotes
and sports scores. You listen to your e-mail through
your vehicle's speakers, and reply with your hands on
the wheel and your eyes on the road.
2-38
Page 133 of 468

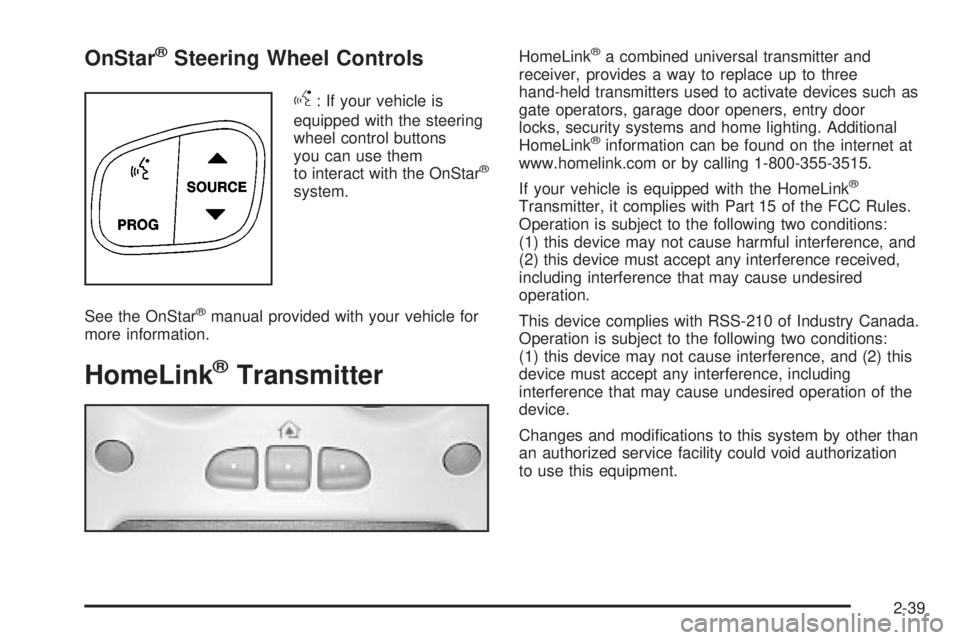
OnStaržSteering Wheel Controls
g
: If your vehicle is
equipped with the steering
wheel control buttons
you can use them
to interact with the OnStar
ž
system.
See the OnStar
žmanual provided with your vehicle for
more information.
HomeLinkžTransmitter
HomeLinkža combined universal transmitter and
receiver, provides a way to replace up to three
hand-held transmitters used to activate devices such as
gate operators, garage door openers, entry door
locks, security systems and home lighting. Additional
HomeLink
žinformation can be found on the internet at
www.homelink.com or by calling 1-800-355-3515.
If your vehicle is equipped with the HomeLink
ž
Transmitter, it complies with Part 15 of the FCC Rules.
Operation is subject to the following two conditions:
(1) this device may not cause harmful interference, and
(2) this device must accept any interference received,
including interference that may cause undesired
operation.
This device complies with RSS-210 of Industry Canada.
Operation is subject to the following two conditions:
(1) this device may not cause interference, and (2) this
device must accept any interference, including
interference that may cause undesired operation of the
device.
Changes and modi®cations to this system by other than
an authorized service facility could void authorization
to use this equipment.
2-39
Page 139 of 468

·If you need to carry long items, move the crossrails
as far apart as they will go. Tie the load to the
crossrails and the siderails or siderail supports. Also
tie the load to the bumpers. Do not tie the load
so tightly that the crossrails or siderails are
damaged.
·For the purpose of wind noise reduction, locate the
front crossrail approximately 18 to 24 inches
(46 to 58 cm) rearward of the front supports.
·After moving a crossrail, be sure it is securely
locked into the siderail.
Your vehicle has a Center High-Mounted Stoplamp
(CHMSL) located above the rear glass.
If items are loaded on the roof of the vehicle, care
should be taken not to block or damage the CHMSL unit.
Rear Storage Area
Your vehicle has a storage compartment located in the
rear cargo area of the vehicle in the driver's side
trim panel.
To open the compartment on standard models, press
in on the release latch and swing the compartment
door open.
To open the compartment on extended models, pull the
latch to access the compartment.
Convenience Net
The convenience net (if equipped) in the rear of your
vehicle helps to keep small loads, like grocery bags, in
place during sharp turns or quick stops and starts.
The net is not designed for larger, heavier items.
To install the net, attach the hooks to the raised cargo
tie downs. Then, attach the cord loops to the button
retainers in the side trim.
You can unhook the net so that it will lie ¯at when
you're not using it.
2-45
Page 142 of 468

If a hand, arm, or other object is blocking the sunroof
glass panel as it is closing, the glass panel will stop
at the obstruction. After the obstruction is removed, the
glass panel can be closed or opened.
Use care not to leave the sunroof open for long periods
of time as debris may collect in the tracks.
If the battery has been recharged, disconnected or is
not working, you may need to reprogram the sunroof. To
do this, start the vehicle and press the forward side of
the sunroof button until the glass panel moves to a fully
closed position. Release, and press again to move to
the vent position which occurs when the sunroof is fully
tilted rearward. This will reset the memory and enable
the sunroof to function properly.Vehicle Personalization
Memory Seat
If your vehicle has this
feature, then the controls
for the memory function
are located on the driver's
door.
These buttons are used to program and recall memory
settings for the driver's seat, throttle and brake
pedals, both the driver's and passenger's outside mirror,
and the radio station presets. The settings for these
features can be personalized for both driver 1 and
driver 2. Driver 1 or driver 2 corresponds to the memory
buttons labeled 1and 2 on the driver's door.
2-48
Page 159 of 468

Automatic Headlamp System
When it is dark enough outside and the headlamp
switch is in AUTO, your automatic headlamp system will
turn on your headlamps at the normal brightness
along with other lamps such as the taillamps,
sidemarker, parking lamps, roof marker lamps and the
instrument panel lights. The radio lights will also be dim.
To turn off the automatic headlamp system, turn the
exterior lamps switch to the off position and then
release.
Your vehicle has a light sensor located on the top of the
instrument panel. Be sure it is not covered, or the
system will be on whenever the ignition is on.
The system may also turn on your headlamps when
driving through a parking garage, heavy overcast
weather or a tunnel. This is normal.
There is a delay in the transition between the daytime
and nighttime operation of the Daytime Running
Lamps (DRL) and the automatic headlamp systems so
that driving under bridges or bright overhead street
lights does not affect the system. The DRL and
automatic headlamp system will only be affected when
the light sensor sees a change in lighting lasting
longer than the delay.If you start your vehicle in a dark garage, the automatic
headlamp system will come on immediately. Once
you leave the garage, it will take approximately
one minute for the automatic headlamp system to
change to DRL if it is light outside. During that delay,
your instrument panel cluster may not be as bright
as usual. Make sure your instrument panel brightness
control is in the full bright position. See ªInstrument
Panel Brightnessº under
Interior Lamps on page 3-17.
Lamps On Reminder
If a door is open, a reminder chime will sound when
your headlamps or parking lamps are manually turned
on and your key is out of the ignition. To turn off
the chime, turn the headlamp switch to off or AUTO and
then back on. In the automatic mode, the headlamps
turn off once the ignition is in LOCK and the headlamps
on at exit delay ends (if enabled in the DIC).
3-15
Page 162 of 468

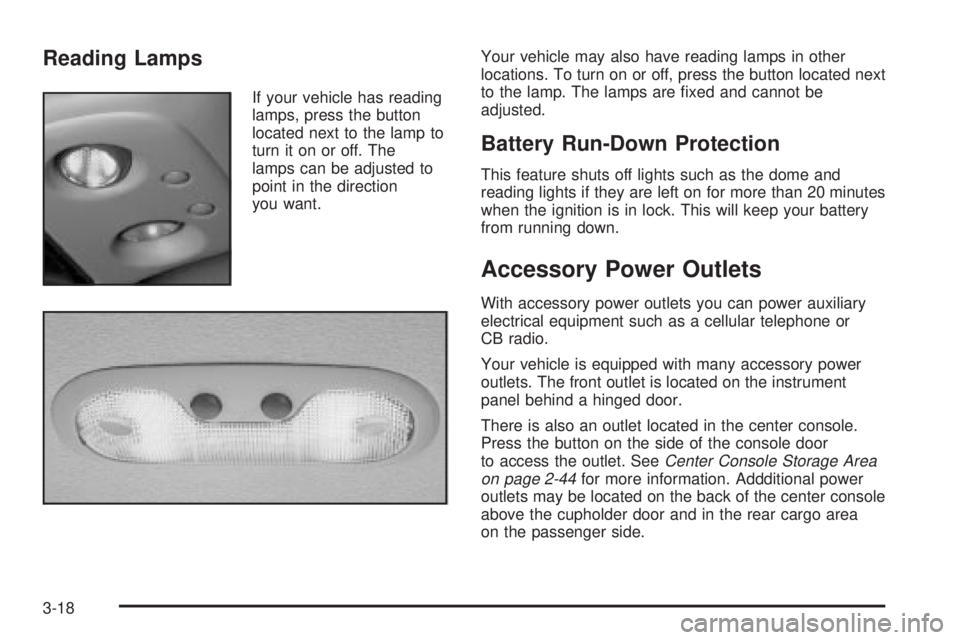
Reading Lamps
If your vehicle has reading
lamps, press the button
located next to the lamp to
turn it on or off. The
lamps can be adjusted to
point in the direction
you want.Your vehicle may also have reading lamps in other
locations. To turn on or off, press the button located next
to the lamp. The lamps are ®xed and cannot be
adjusted.
Battery Run-Down Protection
This feature shuts off lights such as the dome and
reading lights if they are left on for more than 20 minutes
when the ignition is in lock. This will keep your battery
from running down.
Accessory Power Outlets
With accessory power outlets you can power auxiliary
electrical equipment such as a cellular telephone or
CB radio.
Your vehicle is equipped with many accessory power
outlets. The front outlet is located on the instrument
panel behind a hinged door.
There is also an outlet located in the center console.
Press the button on the side of the console door
to access the outlet. See
Center Console Storage Area
on page 2-44for more information. Addditional power
outlets may be located on the back of the center console
above the cupholder door and in the rear cargo area
on the passenger side.
3-18
Page 173 of 468

b(Temperature):Press this button up or down to
increase or decrease the temperature setting.
w9x(Fan):Press this button up or down to adjust
the fan speed. Choose AUTO if you want the system
to automatically choose the fan speed to maintain
a selected temperature. See ªAuto Modeº later in this
section for more information on using this feature.
AUTO Mode
When using the system in auto mode, ®nd your comfort
setting by placing the temperature control to 74ÉF
(23ÉC) and allowing about 20 minutes for the system to
regulate. Then adjust the temperature setting as
necessary. If you choose full cold 60É F (15ÉC), the
system will remain at the maximum cooling setting.
If you choose full hot 90 F (32ÉC), the system will remain
at the maximum heat setting.
Climate Controls Personalization
You can store and recall the climate control settings for
temperature, air delivery mode and fan speed for
two different drivers. The personal choice settings
recalled are determined by the transmitter used to enter
the vehicle.
After the button with the unlock symbol on a remote
keyless entry transmitter is pressed, the climate control
will adjust to the last settings of the identi®ed driver.
The settings can also be changed by pressing one of the
memory buttons (1 or 2) located on the driver's door.
When adjustments are made, the new settings are
automatically saved for that driver.
3-29