Page 119 of 588

Engine Coolant Heater
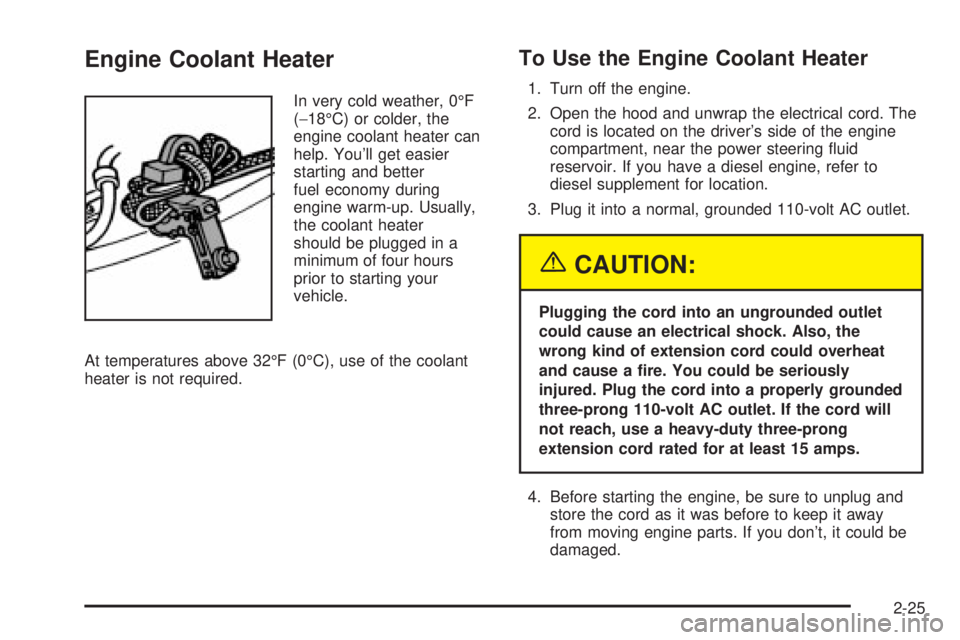
In very cold weather, 0ÉF
(-18ÉC) or colder, the
engine coolant heater can
help. You'll get easier
starting and better
fuel economy during
engine warm-up. Usually,
the coolant heater
should be plugged in a
minimum of four hours
prior to starting your
vehicle.
At temperatures above 32ÉF (0ÉC), use of the coolant
heater is not required.
To Use the Engine Coolant Heater
1. Turn off the engine.
2. Open the hood and unwrap the electrical cord. The
cord is located on the driver's side of the engine
compartment, near the power steering ¯uid
reservoir. If you have a diesel engine, refer to
diesel supplement for location.
3. Plug it into a normal, grounded 110-volt AC outlet.
{CAUTION:
Plugging the cord into an ungrounded outlet
could cause an electrical shock. Also, the
wrong kind of extension cord could overheat
and cause a ®re. You could be seriously
injured. Plug the cord into a properly grounded
three-prong 110-volt AC outlet. If the cord will
not reach, use a heavy-duty three-prong
extension cord rated for at least 15 amps.
4. Before starting the engine, be sure to unplug and
store the cord as it was before to keep it away
from moving engine parts. If you don't, it could be
damaged.
2-25
Page 384 of 588

Fifth wheel or gooseneck kingpin weight should be 15 to
25 percent of the trailer weight up to the maximum
amount speci®ed in the trailering chart for your vehicle.
See ªWeight of theTrailerº, and ªFifth-Wheel and
Gooseneck Traileringº in this section.
Do not exceed the maximum allowable tongue weight
for your vehicle. Choose the shortest hitch extension
that will position the hitch ball closest to the vehicle. This
will help reduce the effect of trailer tongue weight on
the rear axle.
After you have loaded the trailer, weigh the trailer and
then the tongue separately, to see if the weights
are proper. If they are not, you may be able to get them
right by moving some items around in the trailer.Total Weight on Your Vehicle's Tires
Be sure your vehicle's tires are in¯ated to the upper limit
for cold tires. You'll ®nd these numbers on the
Certi®cation label at the rear edge of the driver's door or
see Loading Your Vehicle for more information. Then
be sure you don't go over the GVW limit for your vehicle,
or the GAWR, including the weight of the trailer
tongue. If you use a weight distributing hitch, make sure
you don't go over the rear axle limit before you apply
the weight distribution spring bars.
Hitches
It's important to have the correct hitch equipment.
Crosswinds, large trucks going by and rough roads are
a few reasons why you'll need the right hitch.
4-88
Page 386 of 588

Fifth Wheel and Gooseneck Trailering
Fifth wheel and gooseneck trailers can be used with
many pickup models. These trailers place a larger
percentage of the weight (kingpin weight) on the tow
vehicle than conventional trailers. Make sure this weight
does not cause the vehicle to exceed GAWR or GVWR.
Fifth wheel or gooseneck kingpin weight should be 15 to
25 percent of the trailer weight up to the maximum
amount speci®ed in the trailering chart for your vehicle.
See ªWeight of the Trailerº in this section for more
information.
The hitch should be located in the pickup bed so that
it's centerline is over or slightly in front of the rear axle.
Take care that it is not so far forward that it will
contact the back of the cab in sharp turns. This is
especially important for short box pickups. Trailer pin
box extensions and sliding ®fth wheel hitch assemblies
can help this condition. There should be at least six
inches of clearance between the top of the pickup box
and the bottom of the trailer shelf that extends over
the box.
Make sure the hitch is attached to the tow vehicle frame
rails. Do not use the pickup box for support.
Safety Chains
You should always attach chains between your vehicle
and your trailer. Cross the safety chains under the
tongue of the trailer to help prevent the tongue from
contacting the road if it becomes separated from
the hitch. Instructions about safety chains may be
provided by the hitch manufacturer or by the trailer
manufacturer. If you are towing a trailer up to 5,000 lbs.
(2 271 kg) with a factory-installed step bumper, you
may attach the safety chains to the attaching points on
the bumper. If you are towing a trailer up to your
vehicle's trailer rating limit you may attach the safety
chains to the attaching point on the hitch platform. If you
are towing with an aftermarket hitch follow the trailer
or hitch manufacturer's recommendation for attaching
safety chains. Always leave just enough slack so
you can turn with your rig. Never allow safety chains to
drag on the ground.
4-90
Page 498 of 588
For regular cab models, the equipment you'll need is
behind the passenger's seat. For Extended and
crew cab models, the equipment is on the shelf behind
the passenger's side second row seat.
1. If there is a cover, move the seats forward and turn
the wing nut on the cover counterclockwise to
remove it. For crew cab models, pull up the second
row seat with the loop at the base of the seat
cushion to access the tools.
2. To release the bottle jack from its holder, turn the
knob on the bottle jack counterclockwise to lower
the jack head.
3. The wheel blocks and the wheel block retainer can
be removed by turning the wing nut
counterclockwise.
4. There is also a wing nut used to retain the storage
bag and tools. To remove it, turn the wing nut
counterclockwise.
You'll use the jack handle extensions and the wheel
wrench to remove the underbody-mounted spare tire. 1500 Crew Cab
5-98
Page 499 of 588
A. Spare Tire (Valve
Stem Pointed
Down)
B. Hoist Assembly
C. Hoist Cable
D. Tire Retainer
E. Hoist Shaft
F. Hoist End of
Extension ToolG. Hoist Shaft Access
Hole
H. Wheel Wrench
I. Jack Handle
Extensions
J. Hoist Lock (If
Equipped)1. If your vehicle is equipped with a hoist lock (J),
open the spare tire lock cover on the bumper
and use the ignition key to remove the lock.
2. Assemble the wheel wrench (H) and the two jack
handle extensions (I) as shown.
5-99
Page 500 of 588
3. Insert the hoist end
(open end) (F) of the
extension through
the hole (G) in the rear
bumper.
Be sure the hoist end of the extension connects to
the hoist shaft (E). The ribbed square end of the
extension is used to lower the spare tire.
4. Turn the wheel wrench (H) counterclockwise to
lower the spare tire to the ground. Continue to
turn the wheel wrench until the spare tire can be
pulled out from under the vehicle.
If the spare tire does not lower to the ground, the
secondary latch is engaged causing the tire
not to lower. See ªSecondary Latch Systemº later in
this section.5. The wheel wrench has
a hook that allows you
to pull the hoist
cable towards you to
assist in reaching
the spare tire.
6. When the tire has been
lowered, tilt the
retainer (D) at the end
of the cable so it
can be pulled up
through the wheel
opening.
7. Put the spare tire near the ¯at tire.
5-100
Page 501 of 588
Removing the Flat Tire and Installing
the Spare Tire
Use the following pictures and instructions to remove
the ¯at tire and raise the vehicle.
The tools you'll be using include the bottle jack (A), the
wheel blocks (B), the jack handle (C), the jack handle
extensions (D), and the wheel wrench (E).1. Remove the center cap by placing the chisel end of
the wheel wrench in the slot on the wheel and
gently prying the cap out.
5-101
Page 509 of 588
Storing a Flat or Spare Tire, Jack and
Tools
{CAUTION:
Storing a jack, a tire, or other equipment in the
passenger compartment of the vehicle could
cause injury. In a sudden stop or collision,
loose equipment could strike someone. Store
all these in the proper place.
Notice:Storing an aluminum wheel with a ¯at tire
under your vehicle for an extended period of time or
with the valve stem pointing up may damage the
wheel. Always stow the wheel with the valve
stem pointing down and have the wheel/tire repaired
as soon as possible.
Return the bottle jack, wheel blocks, wheel wrench
and jack extensions to their location behind the
passenger's seat.A. Wing Nut
B. Wheel Blocks
C. Retaining Bracket
and Wingnut
D. Gloves
E. Wheel Wrench and
ExtensionsF. Storage Bag
G. Mounting Bracket
H. Bottle Jack
I. Retaining Hook
5-109