2004 GMC SIERRA four wheel drive
[x] Cancel search: four wheel drivePage 351 of 588
Four-Wheel-Drive Vehicles Equipped with
Transfer Case (NP1, NP2 and NP8)
Use the following procedure to tow your vehicle:
1. Shift an automatic transmission to PARK (P), or a
manual transmission to FIRST (1).
2. Turn the engine off, but leave the ignition on.
3. Firmly set the parking brake.
4. Securely attach the vehicle being towed to the tow
vehicle.
{CAUTION:
Shifting a four-wheel-drive vehicle's transfer
case into NEUTRAL can cause your vehicle to
roll even if the transmission is in Park (P) for
an automatic transmission, or if your vehicle is
in gear, for a manual transmission. You or
others could be injured. Make sure the parking
brake is ®rmly set before you shift the transfer
case to NEUTRAL.5. Shift the transfer case to NEUTRAL. See
Four-Wheel Drive on page 2-35for the proper
procedure to select the neutral position for
your vehicle.
6. Release the parking brake only after the vehicle
being towed is ®rmly attached to the towing
vehicle.
7. Turn the ignition off and leave the steering column
unlocked.
4-55
Page 352 of 588
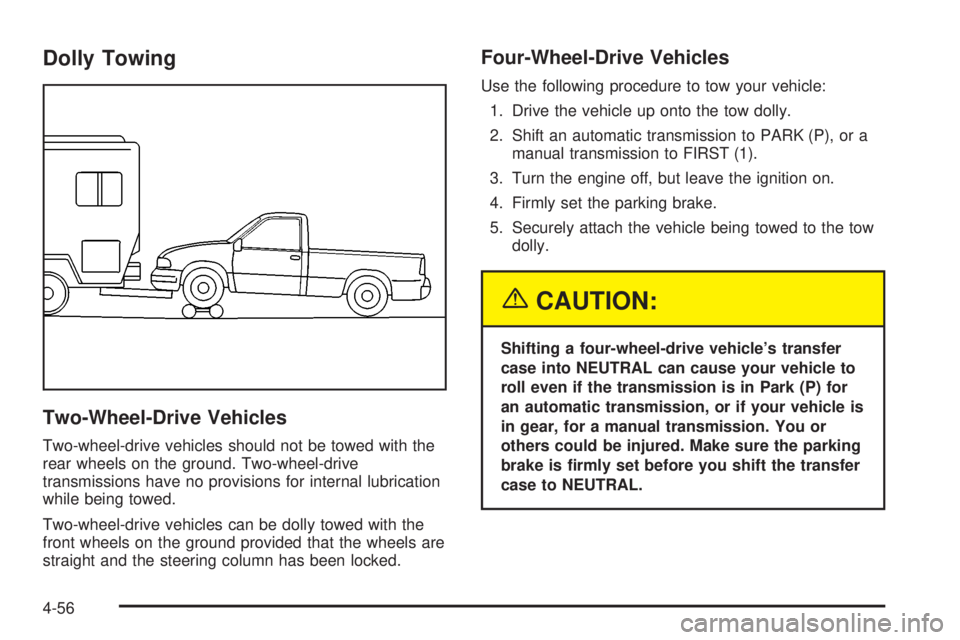
Dolly Towing
Two-Wheel-Drive Vehicles
Two-wheel-drive vehicles should not be towed with the
rear wheels on the ground. Two-wheel-drive
transmissions have no provisions for internal lubrication
while being towed.
Two-wheel-drive vehicles can be dolly towed with the
front wheels on the ground provided that the wheels are
straight and the steering column has been locked.
Four-Wheel-Drive Vehicles
Use the following procedure to tow your vehicle:
1. Drive the vehicle up onto the tow dolly.
2. Shift an automatic transmission to PARK (P), or a
manual transmission to FIRST (1).
3. Turn the engine off, but leave the ignition on.
4. Firmly set the parking brake.
5. Securely attach the vehicle being towed to the tow
dolly.
{CAUTION:
Shifting a four-wheel-drive vehicle's transfer
case into NEUTRAL can cause your vehicle to
roll even if the transmission is in Park (P) for
an automatic transmission, or if your vehicle is
in gear, for a manual transmission. You or
others could be injured. Make sure the parking
brake is ®rmly set before you shift the transfer
case to NEUTRAL.
4-56
Page 353 of 588
6. Shift the transfer case to NEUTRAL. SeeFour-Wheel Drive on page 2-35for the proper
procedure to select the neutral position for
your vehicle.
7. Release the parking brake only after the vehicle
being towed is ®rmly attached to the towing
vehicle.
8. Turn the ignition off and lock the steering column.
Loading Your Vehicle
It is very important to know how much weight your
vehicle can carry. This weight is called the vehicle
capacity weight and includes the weight of all occupants,
cargo and all nonfactory-installed options. Two labels
on your vehicle show how much weight it may properly
carry, the Tire and Loading Information label and the
Certi®cation/Tire label.
{CAUTION:
Do not load your vehicle any heavier than the
GVWR, or either the maximum front or rear
GAWR. If you do, parts on your vehicle can
break, and it can change the way your vehicle
handles. These could cause you to lose
control and crash. Also, overloading can
shorten the life of your vehicle.
4-57
Page 358 of 588
{CAUTION:
Do not load your vehicle any heavier than the
GVWR, or either the maximum front or rear
GAWR. If you do, parts on your vehicle can
break, and it can change the way your vehicle
handles. These could cause you to lose
control and crash. Also, overloading can
shorten the life of your vehicle.
Notice:Overloading your vehicle may cause
damage. Repairs would not be covered by your
warranty. Do not overload your vehicle.
This will help you decide how much cargo and installed
equipment your truck can carry.
Using heavier suspension components to get added
durability might not change your weight ratings. Ask your
dealer to help you load your vehicle the right way.
If you put things inside your vehicle ± like suitcases,
tools, packages, or anything else ± they go as fast
as the vehicle goes. If you have to stop or turn quickly,
or if there is a crash, they'll keep going.
{CAUTION:
Things you put inside your vehicle can strike
and injure people in a sudden stop or turn, or
in a crash.
·Put things in the cargo area of your
vehicle. Try to spread the weight evenly.
·Never stack heavier things, like suitcases,
inside the vehicle so that some of them
are above the tops of the seats.
·Do not leave an unsecured child restraint
in your vehicle.
·When you carry something inside the
vehicle, secure it whenever you can.
·Do not leave a seat folded down unless
you need to.
There's also important loading information for off-road
driving in this manual. See ªLoading Your Vehicle
for Off-Road Drivingª under
Off-Road Driving with Your
Four-Wheel-Drive Vehicle on page 4-20.
4-62
Page 390 of 588
Parking on Hills
{CAUTION:
You really should not park your vehicle, with a
trailer attached, on a hill. If something goes
wrong, your rig could start to move. People
can be injured, and both your vehicle and the
trailer can be damaged.
But if you ever have to park your rig on a hill, here's
how to do it:
1. Apply your regular brakes, but don't shift into
PARK (P) yet for an automatic transmission, or into
gear for a manual transmission.
2. Have someone place chocks under the trailer
wheels.
3. When the wheel chocks are in place, release the
regular brakes until the chocks absorb the load.
4. Reapply the regular brakes. Then apply your
parking brake and shift into PARK (P) for an
automatic transmission, or REVERSE (R) for a
manual transmission.5. If you have a four-wheel-drive vehicle, be sure the
transfer case is in a drive gear and not in
NEUTRAL.
6. Release the regular brakes.{CAUTION:
It can be dangerous to get out of your vehicle
if the shift lever is not fully in PARK (P) with
the parking brake ®rmly set. Your vehicle
can roll.
If you have left the engine running, the vehicle
can move suddenly. You or others could be
injured. To be sure your vehicle will not move,
even when you are on fairly level ground, use
the steps that follow.
Always put the shift lever fully in PARK (P)
with the parking brake ®rmly set.
If the transfer case on four-wheel-drive vehicles
is in NEUTRAL, your vehicle will be free to roll,
even if your shift lever is in PARK (P). So, be
sure the transfer case is in a drive gear Ð not in
NEUTRAL.
4-94
Page 393 of 588
The eight-wire harness contains the following trailer
circuits:
·Yellow: Left Stop/Turn Signal
·Dark Green: Right Stop/Turn Signal
·Brown: Taillamps
·White: Ground
·Light Green: Back-up Lamps
·Light Blue: CHMSL
·Red: Battery Feed
·Dark Blue: Trailer Brake
If your trailer is equipped with electric brakes, you can
get a jumper harness (electric trailer brake control)
with a trailer battery feed fuse from your dealer.
If you need to tow a light-duty trailer with a standard
four-way round pin connector you can also get an
adapter from your dealer.
Camper/Fifth-Wheel Trailer Wiring Package
The eight-wire camper harness is located under the
front edge of the pickup box on the driver's side of the
vehicle, attached to the frame bracket. A connector
will have to be added to the wiring harness which
connects to the camper.
The eight-wire harness contains the following
camper/trailer circuits:
·Yellow: Left Stop/Turn Signal
·Dark Green: Right Stop/Turn Signal
·Brown: Taillamps
·White: Ground
·Light Green: Back-up Lamps
·Light Blue: Center High-Mounted Stoplamp
(CHMSL)
·Red: Battery Feed
·Dark Blue: Trailer Brake
4-97
Page 401 of 588

Service............................................................5-3
Doing Your Own Service Work.........................5-3
Adding Equipment to the Outside of Your
Vehicle......................................................5-4
Fuel................................................................5-4
Gasoline Octane............................................5-4
Gasoline Speci®cations....................................5-5
California Fuel...............................................5-5
Additives.......................................................5-6
Fuels in Foreign Countries...............................5-6
Filling Your Tank............................................5-7
Filling a Portable Fuel Container.......................5-9
Checking Things Under the Hood....................5-10
Hood Release..............................................5-10
Engine Compartment Overview.......................5-12
Engine Oil...................................................5-18
Engine Air Cleaner/Filter................................5-23
Automatic Transmission Fluid (Except Allison
Transmission
ž) ..........................................5-25
Automatic Transmission Fluid (Allison
Transmission
ž) ..........................................5-28
Manual Transmission Fluid.............................5-31
Hydraulic Clutch...........................................5-32
Engine Coolant.............................................5-33
Coolant Surge Tank Pressure Cap..................5-36
Engine Overheating.......................................5-36Cooling System............................................5-39
Engine Fan Noise.........................................5-44
Power Steering Fluid.....................................5-45
Windshield Washer Fluid................................5-46
Brakes........................................................5-48
Battery........................................................5-52
Jump Starting...............................................5-53
Rear Axle.......................................................5-59
Four-Wheel Drive............................................5-60
Noise Control System.....................................5-62
Tampering with Noise Control System
Prohibited.................................................5-62
Bulb Replacement..........................................5-64
Halogen Bulbs..............................................5-64
Headlamps..................................................5-64
Front Turn Signal, Sidemarker and Daytime
Running Lamps.........................................5-66
Roof Marker Lamps......................................5-67
Center High-Mounted Stoplamp (CHMSL) and
Cargo Lamp.............................................5-69
Pickup Box Identi®cation and Fender Marker
Lamps.....................................................5-70
Taillamps.....................................................5-71
Replacement Bulbs.......................................5-74
Section 5 Service and Appearance Care
5-1
Page 451 of 588
Brake Wear
Your vehicle has four-wheel disc brakes.
Disc brake pads have built-in wear indicators that make
a high-pitched warning sound when the brake pads
are worn and new pads are needed. The sound
may come and go or be heard all the time your vehicle
is moving (except when you are pushing on the
brake pedal ®rmly).
{CAUTION:
The brake wear warning sound means that
soon your brakes will not work well. That
could lead to an accident. When you hear the
brake wear warning sound, have your vehicle
serviced.
Notice:Continuing to drive with worn-out brake
pads could result in costly brake repair.
Some driving conditions or climates may cause a brake
squeal when the brakes are ®rst applied or lightly
applied. This does not mean something is wrong with
your brakes.
Properly torqued wheel nuts are necessary to help
prevent brake pulsation. When tires are rotated, inspect
brake pads for wear and evenly tighten wheel nuts in
the proper sequence to GM torque speci®cations.
Brake linings should always be replaced as complete
axle sets.
Brake Pedal Travel
See your dealer if the brake pedal does not return to
normal height, or if there is a rapid increase in
pedal travel. This could be a sign of brake trouble.
Brake Adjustment
Every time you make a brake stop, your disc brakes
adjust for wear.
5-51