Page 498 of 588
For regular cab models, the equipment you'll need is
behind the passenger's seat. For Extended and
crew cab models, the equipment is on the shelf behind
the passenger's side second row seat.
1. If there is a cover, move the seats forward and turn
the wing nut on the cover counterclockwise to
remove it. For crew cab models, pull up the second
row seat with the loop at the base of the seat
cushion to access the tools.
2. To release the bottle jack from its holder, turn the
knob on the bottle jack counterclockwise to lower
the jack head.
3. The wheel blocks and the wheel block retainer can
be removed by turning the wing nut
counterclockwise.
4. There is also a wing nut used to retain the storage
bag and tools. To remove it, turn the wing nut
counterclockwise.
You'll use the jack handle extensions and the wheel
wrench to remove the underbody-mounted spare tire. 1500 Crew Cab
5-98
Page 499 of 588
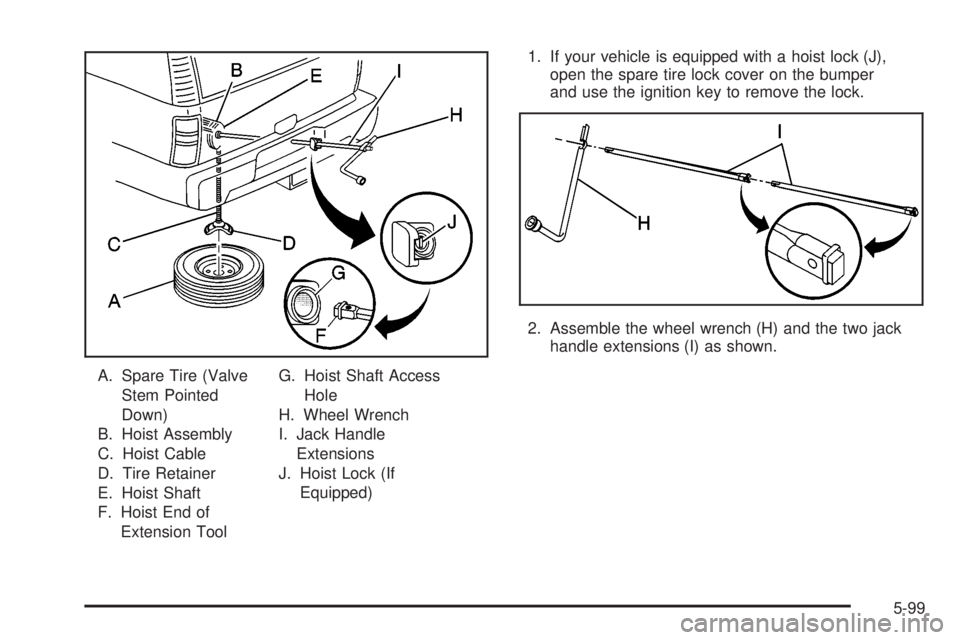
A. Spare Tire (Valve
Stem Pointed
Down)
B. Hoist Assembly
C. Hoist Cable
D. Tire Retainer
E. Hoist Shaft
F. Hoist End of
Extension ToolG. Hoist Shaft Access
Hole
H. Wheel Wrench
I. Jack Handle
Extensions
J. Hoist Lock (If
Equipped)1. If your vehicle is equipped with a hoist lock (J),
open the spare tire lock cover on the bumper
and use the ignition key to remove the lock.
2. Assemble the wheel wrench (H) and the two jack
handle extensions (I) as shown.
5-99
Page 500 of 588
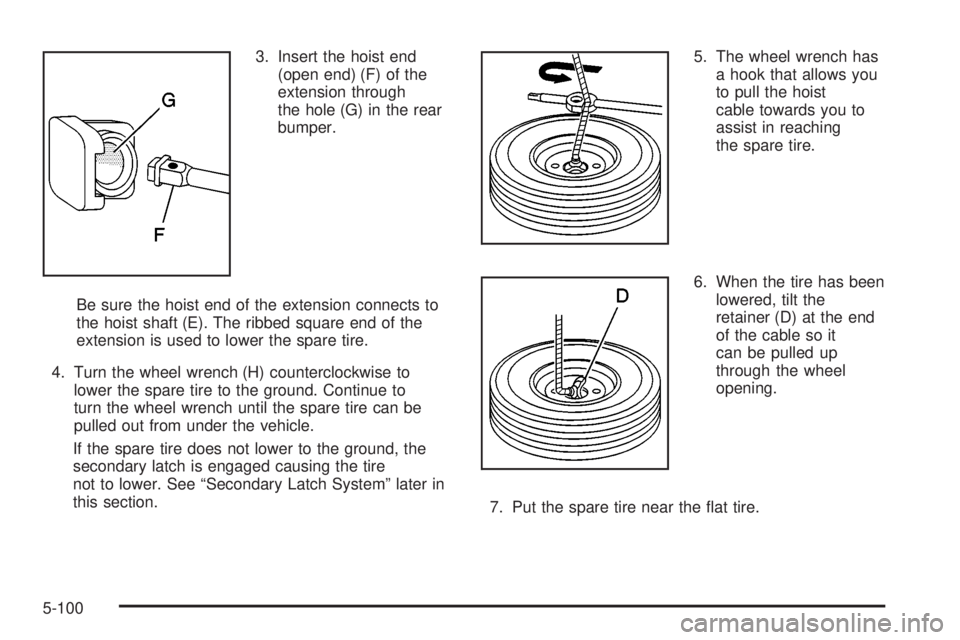
3. Insert the hoist end
(open end) (F) of the
extension through
the hole (G) in the rear
bumper.
Be sure the hoist end of the extension connects to
the hoist shaft (E). The ribbed square end of the
extension is used to lower the spare tire.
4. Turn the wheel wrench (H) counterclockwise to
lower the spare tire to the ground. Continue to
turn the wheel wrench until the spare tire can be
pulled out from under the vehicle.
If the spare tire does not lower to the ground, the
secondary latch is engaged causing the tire
not to lower. See ªSecondary Latch Systemº later in
this section.5. The wheel wrench has
a hook that allows you
to pull the hoist
cable towards you to
assist in reaching
the spare tire.
6. When the tire has been
lowered, tilt the
retainer (D) at the end
of the cable so it
can be pulled up
through the wheel
opening.
7. Put the spare tire near the ¯at tire.
5-100
Page 501 of 588
Removing the Flat Tire and Installing
the Spare Tire
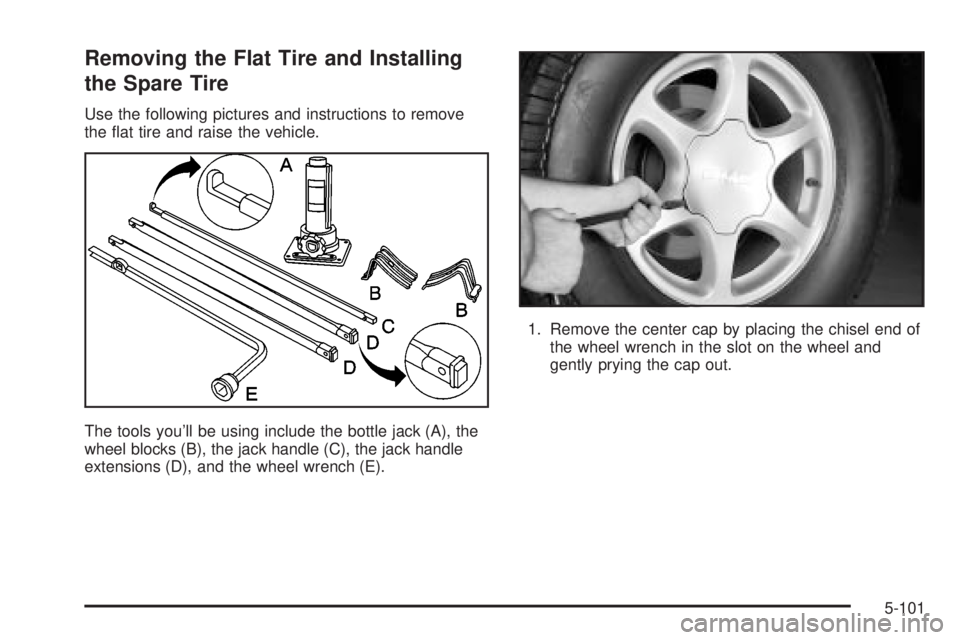
Use the following pictures and instructions to remove
the ¯at tire and raise the vehicle.
The tools you'll be using include the bottle jack (A), the
wheel blocks (B), the jack handle (C), the jack handle
extensions (D), and the wheel wrench (E).1. Remove the center cap by placing the chisel end of
the wheel wrench in the slot on the wheel and
gently prying the cap out.
5-101
Page 504 of 588
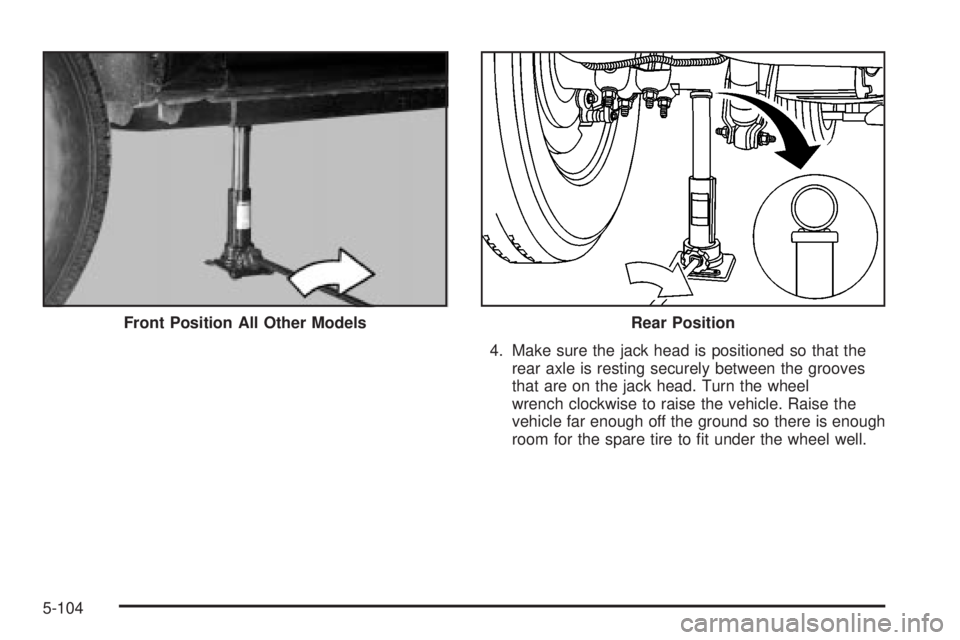
4. Make sure the jack head is positioned so that the
rear axle is resting securely between the grooves
that are on the jack head. Turn the wheel
wrench clockwise to raise the vehicle. Raise the
vehicle far enough off the ground so there is enough
room for the spare tire to ®t under the wheel well. Front Position All Other Models
Rear Position
5-104
Page 505 of 588
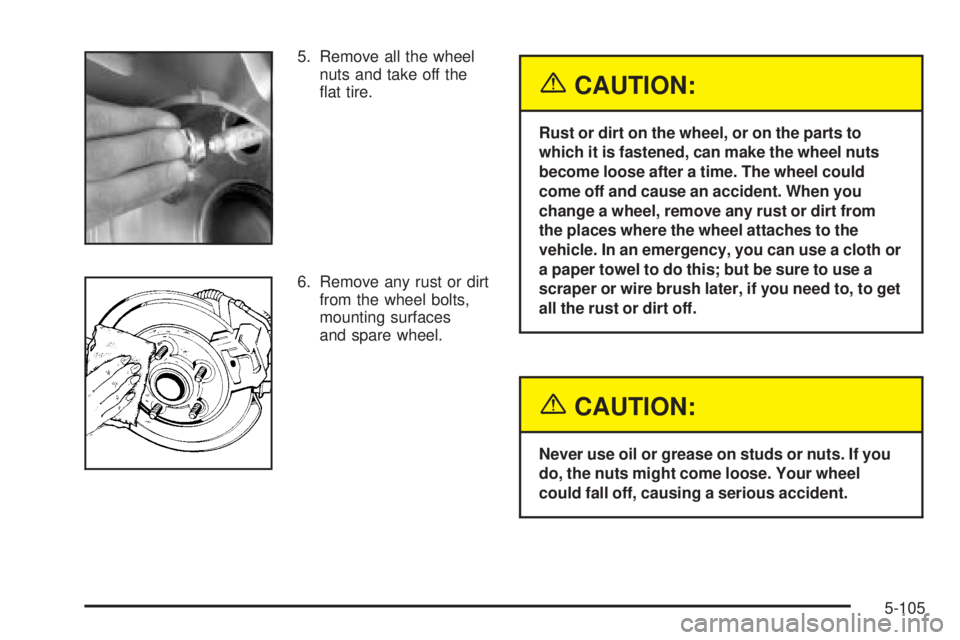
5. Remove all the wheel
nuts and take off the
¯at tire.
6. Remove any rust or dirt
from the wheel bolts,
mounting surfaces
and spare wheel.
{CAUTION:
Rust or dirt on the wheel, or on the parts to
which it is fastened, can make the wheel nuts
become loose after a time. The wheel could
come off and cause an accident. When you
change a wheel, remove any rust or dirt from
the places where the wheel attaches to the
vehicle. In an emergency, you can use a cloth or
a paper towel to do this; but be sure to use a
scraper or wire brush later, if you need to, to get
all the rust or dirt off.
{CAUTION:
Never use oil or grease on studs or nuts. If you
do, the nuts might come loose. Your wheel
could fall off, causing a serious accident.
5-105
Page 509 of 588
Storing a Flat or Spare Tire, Jack and
Tools
{CAUTION:
Storing a jack, a tire, or other equipment in the
passenger compartment of the vehicle could
cause injury. In a sudden stop or collision,
loose equipment could strike someone. Store
all these in the proper place.
Notice:Storing an aluminum wheel with a ¯at tire
under your vehicle for an extended period of time or
with the valve stem pointing up may damage the
wheel. Always stow the wheel with the valve
stem pointing down and have the wheel/tire repaired
as soon as possible.
Return the bottle jack, wheel blocks, wheel wrench
and jack extensions to their location behind the
passenger's seat.A. Wing Nut
B. Wheel Blocks
C. Retaining Bracket
and Wingnut
D. Gloves
E. Wheel Wrench and
ExtensionsF. Storage Bag
G. Mounting Bracket
H. Bottle Jack
I. Retaining Hook
5-109
Page 510 of 588
To store the jack and jack tools do the following:
1. Put the jack tools and gloves in the tool bag and
place in the retaining bracket. Tighten down the
wing nut.
2. Assemble the wheel blocks and bottle jack together
with the wing nut and retaining hook.
3. Position the jack in the mounting bracket. Position
the holes in the base of the jack onto the pin in the
mounting bracket.Store the tire under the rear of the vehicle in the spare tire
carrier. Use the art and text following to help you:
A. Spare Tire (Valve
Stem Pointed
Down)
B. Hoist Assembly
C. Hoist Cable
D. Tire Retainer
E. Hoist Shaft
F. Hoist End of
Extension ToolG. Hoist Shaft Access
Hole
H. Wheel Wrench
I. Jack Handle
Extensions
J. Hoist Lock
(If Equipped)
5-110