2004 GMC SIERRA rear view mirror
[x] Cancel search: rear view mirrorPage 148 of 588

{CAUTION:
It can be dangerous to get out of your vehicle
if the shift lever is not fully in PARK (P) with
the parking brake ®rmly set. Your vehicle can
roll. Do not leave your vehicle when the engine
is running unless you have to. If you have left
the engine running, the vehicle can move
suddenly. You or others could be injured. To
be sure your vehicle will not move, even when
you are on fairly level ground, always set your
parking brake and move the shift lever to
PARK (P).
{CAUTION:
Four-wheel drive vehicles with the transfer
case in NEUTRAL will allow the vehicle to roll,
even if your shift lever is in PARK (P). So, be
sure the transfer case is in a drive gear Ð not
in NEUTRAL. Always set your parking brake.
Follow the proper steps to be sure your vehicle will not
move. See
Shifting Into Park (P) on page 2-49.
If you are pulling a trailer, see
Towing a Trailer on
page 4-70.
Mirrors
Manual Rearview Mirror
Pull the tab under the mirror toward you to reduce glare
from headlamps behind you after dark. Push the tab
away from you for normal daytime operation.
2-54
Page 149 of 588

Automatic Dimming Rearview Mirror
with OnStar
ž, Compass and
Temperature Display
Your vehicle may have this feature. When on, an
automatic dimming mirror automatically dims to the
proper level to minimize glare from lights behind
you after dark.
The mirror also includes a dual display in the upper
right corner of the mirror face. The compass reading and
the outside temperature will both appear in the display
at the same time.
P(On/Off):This is the on/off button.
Temperature and Compass Display
Press the on/off button, located to the far left, brie¯y to
turn the compass/temperature display on or off.
If the display reads CAL, you will need to calibrate the
compass. For more information on calibration, see
below.
To adjust between Fahrenheit and Celsius do the
following:
1. Press and hold the on/off button for approximately
four seconds until either a ¯ashing ÉF, or ÉC
appears.
2. Press the button again to change the display to the
desired unit of measurement. After approximately
four seconds of inactivity, the new unit will be locked
in and the compass/temperature display will return.
If an abnormal temperature reading is displayed for an
extended period of time, please consult your dealer.
Under certain circumstances, a delay in updating
the temperature is normal.
2-55
Page 151 of 588

3. Keep pressing the on/off button until the desired
zone number appears in the display. Release the
button. After approximately four seconds of
inactivity, the new zone number will be locked in
and the compass/temperature display will return.
4. Calibrate the compass as described below.
Compass Calibration
The compass may need calibration if one of the
following occurs:
·After approximately ®ve seconds, the display does
not show a compass heading (N for North, for
example), there may be a strong magnetic ®eld
interfering with the compass. Such interference may
be caused by a magnetic antenna mount, magnetic
note pad holder or a similar magnetic item.
·The compass does not display the correct heading
and the compass zone variance is set correctly.
In order to calibrate, CAL must be displayed in the
mirror compass windows. If CAL is not displayed, push
the on/off button for approximately 12 seconds or
until CAL is displayed.
The compass can be calibrated by driving the vehicle in
circles at 5 mph (8 km/h) or less until the display
reads a direction.
Passenger Air Bag Indicator
Your vehicle may be equipped with a passenger air bag
indicator, on the mirror glass, just above the buttons.
If your vehicle has this feature, the mirror will display the
word ON, or an air bag symbol in Canada, when the
passenger air bag is enabled. For more information, see
Passenger Sensing System on page 1-81.
Cleaning the Mirror
When cleaning the mirror, use a paper towel or similar
material dampened with glass cleaner. Do not spray
glass cleaner directly on the mirror as that may cause
the liquid cleaner to enter the mirror housing.
Automatic Dimming Rearview Mirror
with Compass and Temperature
Display
If your vehicle is equipped with an automatic mirror, it
will, when on, automatically dim to the proper level
to minimize glare from lights behind you after dark.
The mirror also includes a display in the upper
right corner of the mirror face. The compass reading
and the outside temperature will both appear in
the display at the same time. The dual display can be
turned on or off by brie¯y pressing either the TEMP
or the COMP button.
2-57
Page 157 of 588

Resetting the Power Foldaway Mirrors
You will need to reset the power foldaway mirrors if the
following occurs:
·They are accidentally manually folded/unfolded.
·The mirrors will not stay in the unfolded position.
·The mirrors shake and ¯utter at normal driving
speeds.
To reset the power foldaway mirrors, fold and unfold
then at least three times using the mirror controls. This
will reset them to their normal detent position.
Outside Automatic Dimming Mirror
If your vehicle is equipped with this feature, the
driver's outside mirror will adjust for the glare of
headlamps behind you. This feature is controlled by the
on and off settings found on the electrochromic
mirror. See
Automatic Dimming Rearview Mirror with
Compass and Temperature Display on page 2-57.
Outside Curb View Assist Mirrors
If your vehicle has the optional memory package
you may have this feature.
The vehicle's mirrors are capable of performing the curb
view assist mirror function. This feature will cause the
passenger's and/or driver's mirror to tilt to a preselected
position when the vehicle is in REVERSE (R). This
feature may be useful in allowing you to view the curb
when you are parallel parking. When the vehicle is
shifted out of REVERSE (R) and a short delay
has occurred, the passenger's and/or driver's mirror will
return to its original position.
To change the preselected tilt position, adjust the
mirrors to the desired position while the vehicle is in
REVERSE (R). When the vehicle is shifted out of
REVERSE (R), this new position is saved in memory as
the tilt position.
You may be able to enable/disable this feature through
the Driver Information Center. See
Driver Information
Center (DIC) on page 3-55.
2-63
Page 158 of 588

Outside Convex Mirror
Your passenger's side mirror is convex. A convex
mirror's surface is curved so you can see more from the
driver's seat.
{CAUTION:
A convex mirror can make things (like other
vehicles) look farther away than they really are.
If you cut too sharply into the right lane, you
could hit a vehicle on your right. Check your
inside mirror or glance over your shoulder
before changing lanes.
Outside Heated Mirrors
The outside rearview mirrors with this option have a
defrost mode.
To turn on the defrost feature, press the rear window
defogger button. See ªRear Window Defoggerº under
Dual Automatic Climate Control System on page 3-26for
further information.
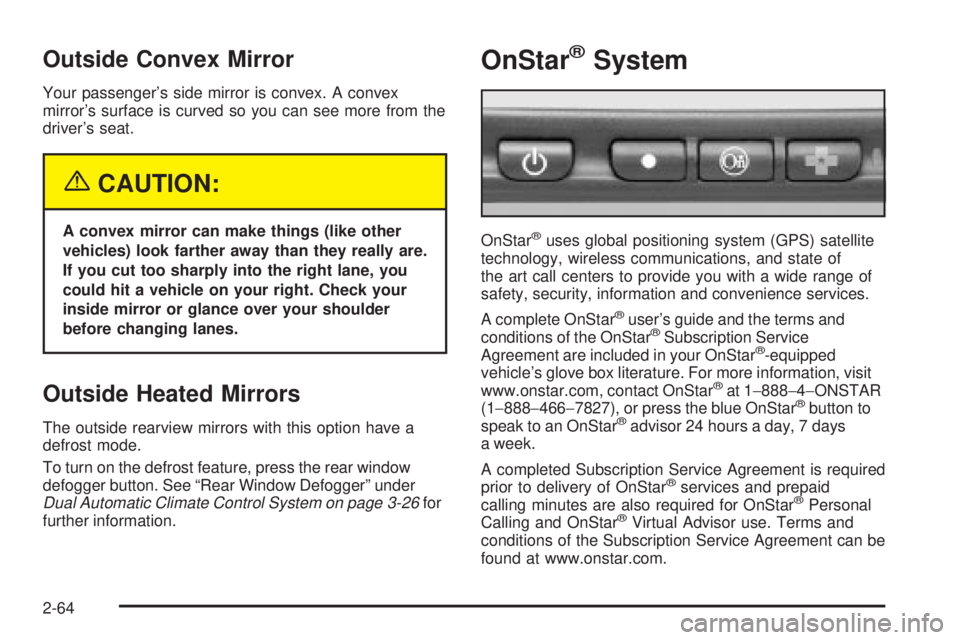
OnStaržSystem
OnStaržuses global positioning system (GPS) satellite
technology, wireless communications, and state of
the art call centers to provide you with a wide range of
safety, security, information and convenience services.
A complete OnStar
žuser's guide and the terms and
conditions of the OnStaržSubscription Service
Agreement are included in your OnStarž-equipped
vehicle's glove box literature. For more information, visit
www.onstar.com, contact OnStar
žat 1-888-4-ONSTAR
(1-888-466-7827), or press the blue OnStaržbutton to
speak to an OnStaržadvisor 24 hours a day, 7 days
a week.
A completed Subscription Service Agreement is required
prior to delivery of OnStar
žservices and prepaid
calling minutes are also required for OnStaržPersonal
Calling and OnStaržVirtual Advisor use. Terms and
conditions of the Subscription Service Agreement can be
found at www.onstar.com.
2-64
Page 204 of 588

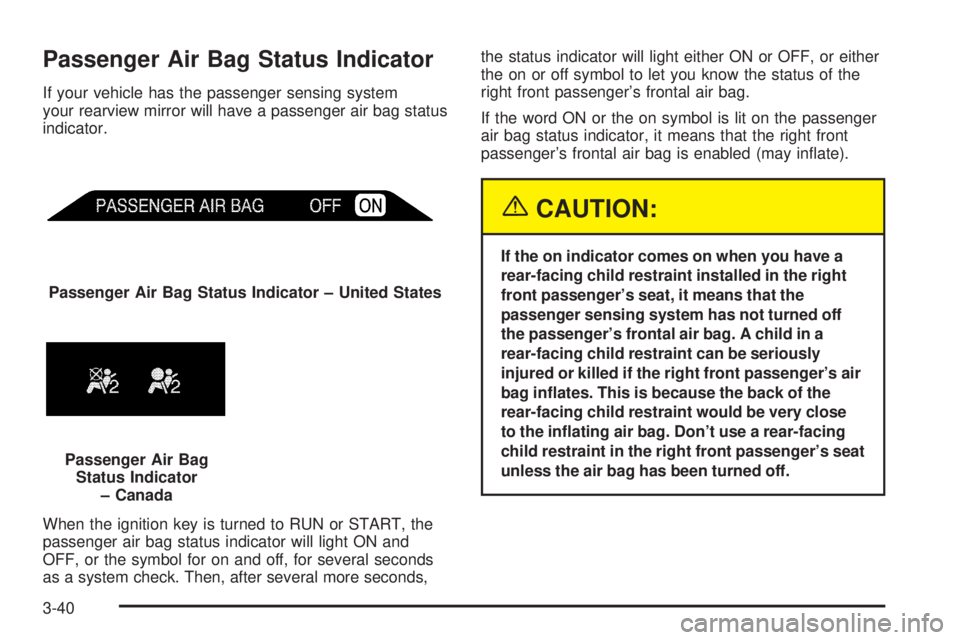
Passenger Air Bag Status Indicator
If your vehicle has the passenger sensing system
your rearview mirror will have a passenger air bag status
indicator.
When the ignition key is turned to RUN or START, the
passenger air bag status indicator will light ON and
OFF, or the symbol for on and off, for several seconds
as a system check. Then, after several more seconds,the status indicator will light either ON or OFF, or either
the on or off symbol to let you know the status of the
right front passenger's frontal air bag.
If the word ON or the on symbol is lit on the passenger
air bag status indicator, it means that the right front
passenger's frontal air bag is enabled (may in¯ate).
{CAUTION:
If the on indicator comes on when you have a
rear-facing child restraint installed in the right
front passenger's seat, it means that the
passenger sensing system has not turned off
the passenger's frontal air bag. A child in a
rear-facing child restraint can be seriously
injured or killed if the right front passenger's air
bag in¯ates. This is because the back of the
rear-facing child restraint would be very close
to the in¯ating air bag. Don't use a rear-facing
child restraint in the right front passenger's seat
unless the air bag has been turned off. Passenger Air Bag Status Indicator ± United States
Passenger Air Bag
Status Indicator
± Canada
3-40
Page 334 of 588

Here are some tips on night driving.
·Drive defensively.
·Do not drink and drive.
·Adjust your inside rearview mirror to reduce the
glare from headlamps behind you.
·Since you can not see as well, you may need to
slow down and keep more space between you
and other vehicles.
·Slow down, especially on higher speed roads. Your
headlamps can light up only so much road ahead.
·In remote areas, watch for animals.
·If you are tired, pull off the road in a safe place
and rest.
No one can see as well at night as in the daytime. But
as we get older these differences increase. A
50-year-old driver may require at least twice as much
light to see the same thing at night as a 20-year-old.
What you do in the daytime can also affect your
night vision. For example, if you spend the day in bright
sunshine you are wise to wear sunglasses. Your
eyes will have less trouble adjusting to night. But if you
are driving, do not wear sunglasses at night. They
may cut down on glare from headlamps, but they also
make a lot of things invisible.You can be temporarily blinded by approaching
headlamps. It can take a second or two, or even several
seconds, for your eyes to re-adjust to the dark. When
you are faced with severe glare (as from a driver
who does not lower the high beams, or a vehicle with
misaimed headlamps), slow down a little. Avoid
staring directly into the approaching headlamps.
Keep your windshield and all the glass on your vehicle
clean Ð inside and out. Glare at night is made much
worse by dirt on the glass. Even the inside of the glass
can build up a ®lm caused by dust. Dirty glass makes
lights dazzle and ¯ash more than clean glass would,
making the pupils of your eyes contract repeatedly.
Remember that your headlamps light up far less of a
roadway when you are in a turn or curve. Keep
your eyes moving; that way, it is easier to pick out dimly
lighted objects. Just as your headlamps should be
checked regularly for proper aim, so should your eyes
be examined regularly. Some drivers suffer from
night blindness Ð the inability to see in dim light Ð and
are not even aware of it.
4-38
Page 580 of 588

M
Maintenance Schedule
Additional Required Services........................... 6-6
At Each Fuel Fill.........................................6-11
At Least Once a Month................................6-11
At Least Once a Year..................................6-12
At the First 100, 1,000 and 6,000 Miles
(160, 1 600 and 10 000km).......................6-11
Introduction.................................................. 6-2
Maintenance Footnotes.................................. 6-8
Maintenance Record....................................6-19
Maintenance Requirements............................. 6-2
Normal Maintenance Replacement Parts.........6-17
Owner Checks and Services.........................6-10
Recommended Fluids and Lubricants.............6-14
Scheduled Maintenance................................. 6-4
Using Your................................................... 6-3
Your Vehicle and the Environment................... 6-2
Maintenance When Trailer Towing.....................4-95
Making Turns.................................................4-92
Malfunction Indicator Light................................3-49
Manual Seats................................................... 1-3
Manual Selectable Ride...................................4-11
Manual Transfer Case.....................................2-36
Manual Transmission.......................................2-24
Fluid..........................................................5-31
Operation...................................................2-30Manual Transmission (cont.)
Manual Windows............................................2-16
Matching Transmitter(s) to Your Vehicle............... 2-6
Memory Seat.................................................2-69
Message
DIC Warnings and Messages........................3-66
Mexico, Central America and Caribbean Islands/
Countries (Except Puerto Rico and U.S. Virgin
Islands)....................................................... 7-5
Mirrors
Automatic Dimming Rearview with Compass
and Temperature Display...........................2-57
Automatic Dimming Rearview with OnStar
ž,
Compass and Temperature Display.............2-55
Manual Rearview Mirror................................2-54
Outside Automatic Dimming Mirror.................2-63
Outside Camper-Type Mirrors........................2-60
Outside Convex Mirror.................................2-64
Outside Curb View Assist Mirrors...................2-63
Outside Heated Mirrors................................2-64
Outside Manual Mirrors................................2-60
Outside Power Camper-Type.........................2-62
Outside Power Foldaway Mirrors....................2-62
Outside Power Mirrors..................................2-61
Outside West Coast-Type Mirrors...................2-61
Model Reference................................................ vi
MyGMLink.com................................................ 7-3
10