2004 GMC SIERRA coolant level
[x] Cancel search: coolant levelPage 440 of 588
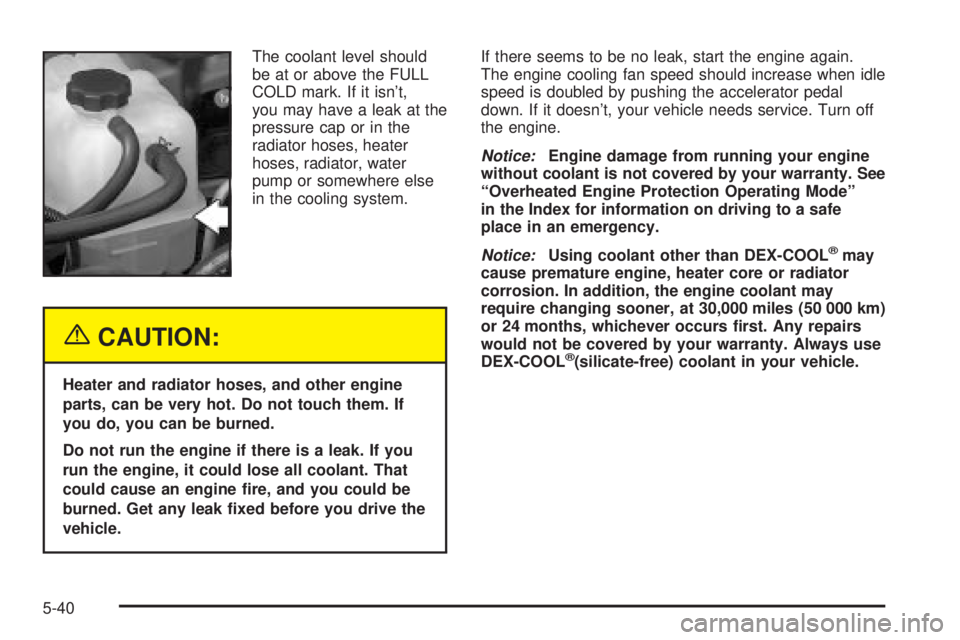
The coolant level should
be at or above the FULL
COLD mark. If it isn't,
you may have a leak at the
pressure cap or in the
radiator hoses, heater
hoses, radiator, water
pump or somewhere else
in the cooling system.
{CAUTION:
Heater and radiator hoses, and other engine
parts, can be very hot. Do not touch them. If
you do, you can be burned.
Do not run the engine if there is a leak. If you
run the engine, it could lose all coolant. That
could cause an engine ®re, and you could be
burned. Get any leak ®xed before you drive the
vehicle.If there seems to be no leak, start the engine again.
The engine cooling fan speed should increase when idle
speed is doubled by pushing the accelerator pedal
down. If it doesn't, your vehicle needs service. Turn off
the engine.
Notice:Engine damage from running your engine
without coolant is not covered by your warranty. See
ªOverheated Engine Protection Operating Modeº
in the Index for information on driving to a safe
place in an emergency.
Notice:Using coolant other than DEX-COOLžmay
cause premature engine, heater core or radiator
corrosion. In addition, the engine coolant may
require changing sooner, at 30,000 miles (50 000 km)
or 24 months, whichever occurs ®rst. Any repairs
would not be covered by your warranty. Always use
DEX-COOL
ž(silicate-free) coolant in your vehicle.
5-40
Page 441 of 588
How to Add Coolant to the Coolant
Surge Tank for Gasoline Engines
If you haven't found a problem yet, check to see if
coolant is visible in the surge tank. If coolant is visible
but the coolant level isn't at or above the FULL
COLD mark, add a 50/50 mixture of
clean, drinkable
waterand DEX-COOLžcoolant at the coolant
surge tank, but be sure the cooling system, including
the coolant surge tank pressure cap, is cool before you
do it. See
Engine Coolant on page 5-33for more
information.If no coolant is visible in the surge tank, add coolant as
follows:
{CAUTION:
Steam and scalding liquids from a hot cooling
system can blow out and burn you badly. They
are under pressure, and if you turn the coolant
surge tank pressure cap Ð even a little Ð they
can come out at high speed. Never turn the
cap when the cooling system, including the
coolant surge tank pressure cap, is hot. Wait
for the cooling system and coolant surge tank
pressure cap to cool if you ever have to turn
the pressure cap.
5-41
Page 443 of 588
1. Park the vehicle on a
level surface. You can
remove the coolant
surge tank pressure
cap when the cooling
system, including
the coolant surge tank
pressure cap and
upper radiator hose, is
no longer hot.
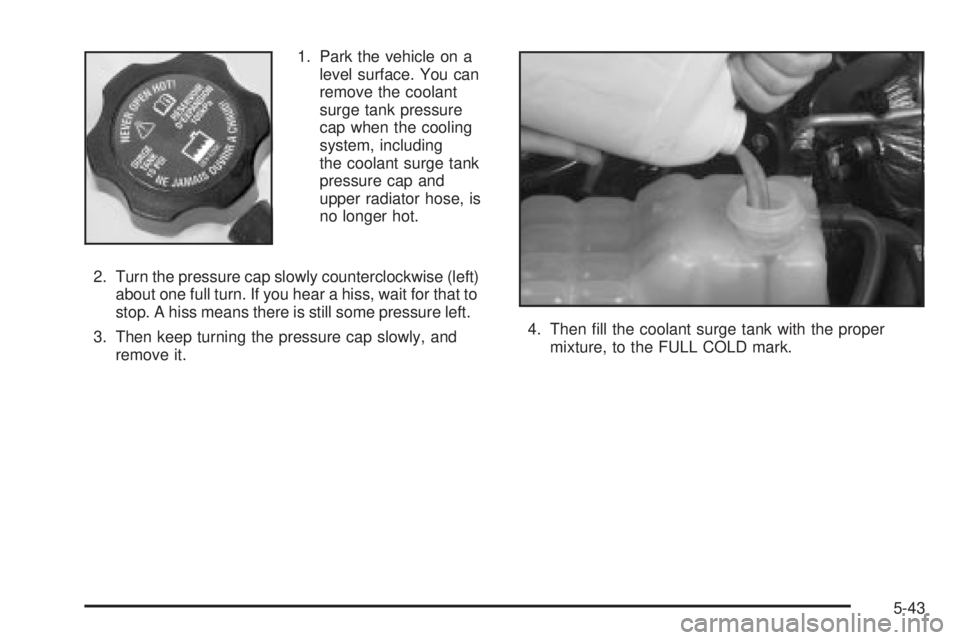
2. Turn the pressure cap slowly counterclockwise (left)
about one full turn. If you hear a hiss, wait for that to
stop. A hiss means there is still some pressure left.
3. Then keep turning the pressure cap slowly, and
remove it.4. Then ®ll the coolant surge tank with the proper
mixture, to the FULL COLD mark.
5-43
Page 444 of 588
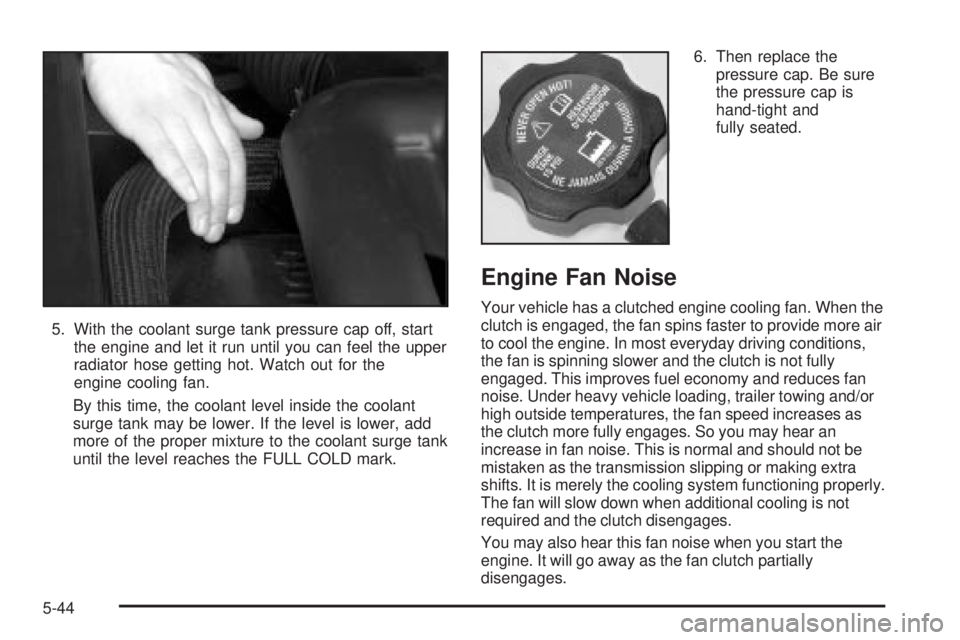
5. With the coolant surge tank pressure cap off, start
the engine and let it run until you can feel the upper
radiator hose getting hot. Watch out for the
engine cooling fan.
By this time, the coolant level inside the coolant
surge tank may be lower. If the level is lower, add
more of the proper mixture to the coolant surge tank
until the level reaches the FULL COLD mark.6. Then replace the
pressure cap. Be sure
the pressure cap is
hand-tight and
fully seated.
Engine Fan Noise
Your vehicle has a clutched engine cooling fan. When the
clutch is engaged, the fan spins faster to provide more air
to cool the engine. In most everyday driving conditions,
the fan is spinning slower and the clutch is not fully
engaged. This improves fuel economy and reduces fan
noise. Under heavy vehicle loading, trailer towing and/or
high outside temperatures, the fan speed increases as
the clutch more fully engages. So you may hear an
increase in fan noise. This is normal and should not be
mistaken as the transmission slipping or making extra
shifts. It is merely the cooling system functioning properly.
The fan will slow down when additional cooling is not
required and the clutch disengages.
You may also hear this fan noise when you start the
engine. It will go away as the fan clutch partially
disengages.
5-44
Page 541 of 588

Scheduled Maintenance
Service MaintenanceIMaintenanceII
Change engine oil and ®lter. Reset oil life system. See
Engine Oil on
page 5-18.An Emission Control Service.··
Lubricate chassis components.
See footnote #.··
Visually check for any leaks or damage.
See footnote (j).··
Inspect engine air cleaner ®lter or change indicator (if equipped). If necessary,
replace ®lter. See
Engine Air Cleaner/Filter on page 5-23.An Emission Control
Service. See footnote ².··
Rotate tires and check in¯ation pressures and wear. See
Tires on page 5-76.··
Inspect brake system.
See footnote (a).··
Check engine coolant and windshield washer ¯uid levels and add ¯uid as
needed.··
Perform any needed additional services. See ªAdditional Required Servicesº in
this section.··
Inspect suspension and steering components.
See footnote (b).·
Inspect engine cooling system.
See footnote (c).·
Inspect wiper blades.
See footnote (d).·
Inspect restraint system components.
See footnote (e).·
Lubricate body components.
See footnote (f).·
Check transmission ¯uid level and add ¯uid as needed.·
6-5
Page 547 of 588

At the First 100, 1,000 and 6,000
Miles (160, 1 600 and 10 000km)
Check dual wheel nut torque. For proper torque, seeCapacities and Speci®cations on page 5-134.
At Each Fuel Fill
It is important to perform these underhood checks at
each fuel ®ll.
Engine Oil Level Check
Check the engine oil level and add the proper oil if
necessary. SeeEngine Oil on page 5-18for further
details.
Notice:It is important to check your oil regularly
and keep it at the proper level. Failure to keep your
engine oil at the proper level can cause damage
to your engine not covered by your warranty.
Engine Coolant Level Check
Check the engine coolant level and add
DEX-COOLžcoolant mixture if necessary. SeeEngine
Coolant on page 5-33for further details.
Windshield Washer Fluid Level Check
Check the windshield washer ¯uid level in the windshield
washer tank and add the proper ¯uid if necessary.
At Least Once a Month
Tire In¯ation Check
Visually inspect your tires and make sure tires are
in¯ated to the correct pressures. Do not forget to check
your spare tire. See
Tires on page 5-76for further
details. Check to make sure the spare tire is stored
securely. Push, pull and then try to rotate or turn
the spare tire. If it moves, tighten it. See
Changing a
Flat Tire on page 5-96.
6-11
Page 573 of 588

Bulb Replacement (cont.)
Roof Marker Lamps.....................................5-67
Taillamps....................................................5-71
Buying New Tires...........................................5-89
C
California Fuel.................................................. 5-5
Canada........................................................... 7-5
Canadian Owners................................................ ii
Canadian Roadside Assistance........................... 7-7
Capacities and Speci®cations..........................5-134
Car Washes for QUADRASTEERŸ Equipped
Vehicles.....................................................4-16
Carbon Monoxide...................4-47, 4-70, 2-14, 2-53
Care of
Safety Belts..............................................5-119
Your Cassette Tape Player..........................3-129
Your CD and DVD Player...........................3-131
Your CDs and DVDs..................................3-130
Cargo Lamp...................................................3-18
CARGO LAMP ON.........................................3-67
Cassette Tape Messages.................................3-98
CD Adapter Kits.............................................3-99
CD Messages.............................3-87, 3-101, 3-115
Center Console Storage Area...........................2-67
Center High-Mounted Stoplamp (CHMSL) and
Cargo Lamp...............................................5-69
Center Instrument Panel Fuse Block................5-128Center Passenger Position, Safety Belts.............1-25
Chains, Tires..................................................5-94
CHANGE ENGINE OIL....................................3-68
Check
Engine Light...............................................3-49
Check Engine Light.........................................3-49
CHECK OIL LEVEL.........................................3-67
CHECK WASHER FLUID.................................3-67
Checking Brake Fluid......................................5-49
Checking Coolant............................................5-35
Checking Engine Oil........................................5-18
Checking Things Under the Hood......................5-10
Checking Your Restraint Systems......................1-87
Chemical Paint Spotting.................................5-123
Child Restraints
Child Restraint Systems...............................1-39
Infants and Young Children...........................1-35
Lower Anchorages and Top Tethers for
Children (LATCH System)..........................1-48
Older Children.............................................1-33
Securing a Child Restraint Designed
for the LATCH System......................1-50, 1-51
Securing a Child Restraint in a Center Rear
Seat Position...........................................1-58
Securing a Child Restraint in a Rear Outside
Seat Position...........................................1-55
Securing a Child Restraint in the Center Front
Seat Position...........................................1-60
Top Strap...................................................1-43
3
Page 574 of 588
Child Restraints (cont.)
Top Strap Anchor Location............................1-45
Where to Put the Restraint...........................1-42
Chime Level Adjustment.................................3-131
Cigarette Lighter.............................................3-21
Cleaning
Inside of Your Vehicle.................................5-117
Outside of Your Vehicle..............................5-120
Underbody Maintenance.............................5-123
Video Screen............................................3-131
Weatherstrips............................................5-119
Cleaning Aluminum or Chrome-Plated Wheels . . . 5-122
Cleaning Exterior Lamps/Lenses......................5-120
Cleaning Fabric/Carpet...................................5-117
Cleaning Glass Surfaces................................5-119
Cleaning Interior Plastic Components...............5-119
Cleaning Leather...........................................5-118
Cleaning the Mirror.................................2-57, 2-60
Cleaning the Top of the Instrument Panel.........5-119
Cleaning the Windshield and Wiper Blades.......5-121
Cleaning Tires..............................................5-122
Cleaning Vinyl..............................................5-118
Climate Control System...................................3-21
Dual..........................................................3-22
Dual Automatic............................................3-26
Clutch, Hydraulic.............................................5-32
Compass Calibration...............................2-57, 2-58
Compass Operation.........................................2-58Compass Variance..................................2-56, 2-59
Content Theft-Deferrent....................................2-19
Control of a Vehicle.......................................... 4-5
Coolant
Engine Temperature Gage............................3-46
Heater, Engine............................................2-25
Surge Tank Pressure Cap.............................5-36
Cooling System..............................................5-39
Crew Cab......................................................1-58
Cruise Control................................................3-11
Cruise Control Light........................................3-53
Cupholder(s)..................................................2-66
Current and Past Model Order Forms................7-13
Customer Assistance Information
Courtesy Transportation.................................. 7-7
Customer Assistance for Text Telephone (TTY)
Users....................................................... 7-4
Customer Assistance Offices........................... 7-4
Customer Satisfaction Procedure..................... 7-2
GM Mobility Program for Persons with
Disabilities................................................ 7-5
Reporting Safety Defects to General Motors....7-11
Reporting Safety Defects to the Canadian
Government............................................7-11
Reporting Safety Defects to the United States
Government............................................7-11
Roadside Assistance Program......................... 7-6
Service Publications Ordering Information........7-12
4