Page 261 of 394

Vehicle Storage
If you are not going to drive your vehicle for 25 days or
more, remove the black, negative (−) cable from the
battery. This will help keep your battery from
running down.
{CAUTION:
Batteries have acid that can burn you and gas
that can explode. You can be badly hurt if you
are not careful. SeeJump Starting on
page 5-45for tips on working around a battery
without getting hurt.
Contact your dealer to learn how to prepare your
vehicle for longer storage periods.
Also, for your audio system, seeTheft-Deterrent
Feature on page 3-47.
Jump Starting
If your battery has run down, you may want to use
another vehicle and some jumper cables to start your
vehicle. But please follow the numbered steps to
do it safely.
{CAUTION:
Batteries can hurt you. They can be dangerous
because:
They contain acid that can burn you.
They contain gas that can explode
or ignite.
They contain enough electricity to
burn you.
If you do not follow these steps exactly, some
or all of these things can hurt you.
Notice:Ignoring these steps could result in costly
damage to your vehicle that would not be covered
by your warranty.
Trying to start your vehicle by pushing or pulling it
will not work, and it could damage your vehicle.
5-45
Page 262 of 394

1. Check the other vehicle. It must have a 12–-volt
battery with a negative ground system.
Notice:If the other vehicle’s system is not a 12-volt
system with a negative ground, both vehicles can
be damaged. Only use vehicles with 12-volt systems
with negative grounds to jump start your vehicle.
2. Get the vehicles close enough so the jumper cables
can reach, but be sure the vehicles aren’t touching
each other. If they are, it could cause a ground
connection you don’t want. You wouldn’t be able to
start your vehicle, and the bad grounding could
damage the electrical systems.
To avoid the possibility of the vehicles rolling, set
the parking brake rmly on both vehicles involved in
the jump start procedure. Put an automatic
transmission in PARK (P) and a manual
transmission in NEUTRAL.
3. Turn off the ignition on both vehicles. Unplug
unnecessary accessories plugged into the cigarette
lighter or accessory power outlets. Turn off all
lamps that aren’t needed as well as radios. This will
avoid sparks and help save both batteries. In
addition, it could save your radio!
Notice:If you leave your radio or other accessories
on during the jump starting procedure, they could
be damaged. The repairs would not be covered
by your warranty. Always turn off your radio and
other accessories when jump starting your vehicle.4. Open the hoods and locate the batteries. Find the
positive (+) and negative (−) terminals on each
battery.
{CAUTION:
Using a match near a battery can cause battery
gas to explode. People have been hurt doing
this, and some have been blinded. Use a
ashlight if you need more light.
Be sure the battery has enough water. You do
not need to add water to the ACDelco
®battery
installed in your new vehicle. But if a battery
has ller caps, be sure the right amount of
uid is there. If it is low, add water to take care
of that rst. If you do not, explosive gas could
be present.
Battery uid contains acid that can burn you.
Do not get it on you. If you accidentally get it
in your eyes or on your skin, ush the place
with water and get medical help immediately.
5-46
Page 265 of 394
A. Heavy, Unpainted Metal Engine Part
B. Good Battery
C. Dead BatteryTo disconnect the jumper cables from both vehicles, do
the following:
1. Disconnect the black negative (−) cable from the
vehicle that had the dead battery.
2. Disconnect the black negative (−) cable from the
vehicle with the good battery.
3. Disconnect the red positive (+) cable from the
vehicle with the good battery.
4. Disconnect the red positive (+) cable from the other
vehicle.
Jumper Cable Removal
5-49
Page 266 of 394
All-Wheel Drive
Lubricant checks in this section also apply to these
vehicles. However, there are two additional systems that
need lubrication.
Transfer Case
When to Check Lubricant
Refer to the Maintenance Schedule to determine how
often to check the lubricant. SeePart C: Periodic
Maintenance Inspections on page 6-30.
How to Check Lubricant
To get an accurate reading, the vehicle should be on a
level surface.
If the level is below the bottom of the ller plug hole,
you’ll need to add some lubricant. Add enough lubricant
to raise the level to the bottom of the ller plug hole.
Use care not to overtighten the plug.
What to Use
Refer to the Maintenance Schedule to determine what
kind of lubricant to use. SeePart D: Recommended
Fluids and Lubricants on page 6-32.
5-50
Page 267 of 394
Rear Axle
When to Check Lubricant
Refer to the Maintenance Schedule to determine how
often to check the lubricant. SeePart A: Scheduled
Maintenance Services on page 6-4.
How to Check Lubricant
To get an accurate reading, the vehicle should be on a
level surface.
If the level is below the bottom of the ller plug hole,
you’ll need to add some lubricant. Add enough lubricant
to raise the level to the bottom of the ller plug hole.
What to Use
Refer to the Maintenance Schedule to determine what
kind of lubricant to use. SeePart D: Recommended
Fluids and Lubricants on page 6-32.
5-51
Page 268 of 394
Front Axle
When to Check and Change Lubricant
Refer to the Maintenance Schedule to determine how
often to check the lubricant and when to change it. See
Part A: Scheduled Maintenance Services on page 6-4.
How to Check Lubricant
To get an accurate reading, the vehicle should be on a
level surface.If the level is below the
bottom of the ller plug
hole, you may need to add
some lubricant.
When the differential is cold, add enough lubricant to
raise the level to 1/2 inch (12 mm) below the ller plug
hole.
When the differential is at operating temperature
(warm), add enough lubricant to raise the level to the
bottom of the ller plug hole.
What to Use
Refer to the Maintenance Schedule to determine what
kind of lubricant to use. SeePart D: Recommended
Fluids and Lubricants on page 6-32.
5-52
Page 269 of 394
Bulb Replacement
For any bulb changing procedure not listed in this
section, contact your dealer.
For the type of bulbs, seeReplacement Bulbs on
page 5-59.
Halogen Bulbs
{CAUTION:
Halogen bulbs have pressurized gas inside
and can burst if you drop or scratch the bulb.
You or others could be injured. Be sure to read
and follow the instructions on the bulb
package.
Headlamps
Sealed Beam Headlamp
1. Remove the four
retainer screws and the
retainer.
5-53
Page 275 of 394
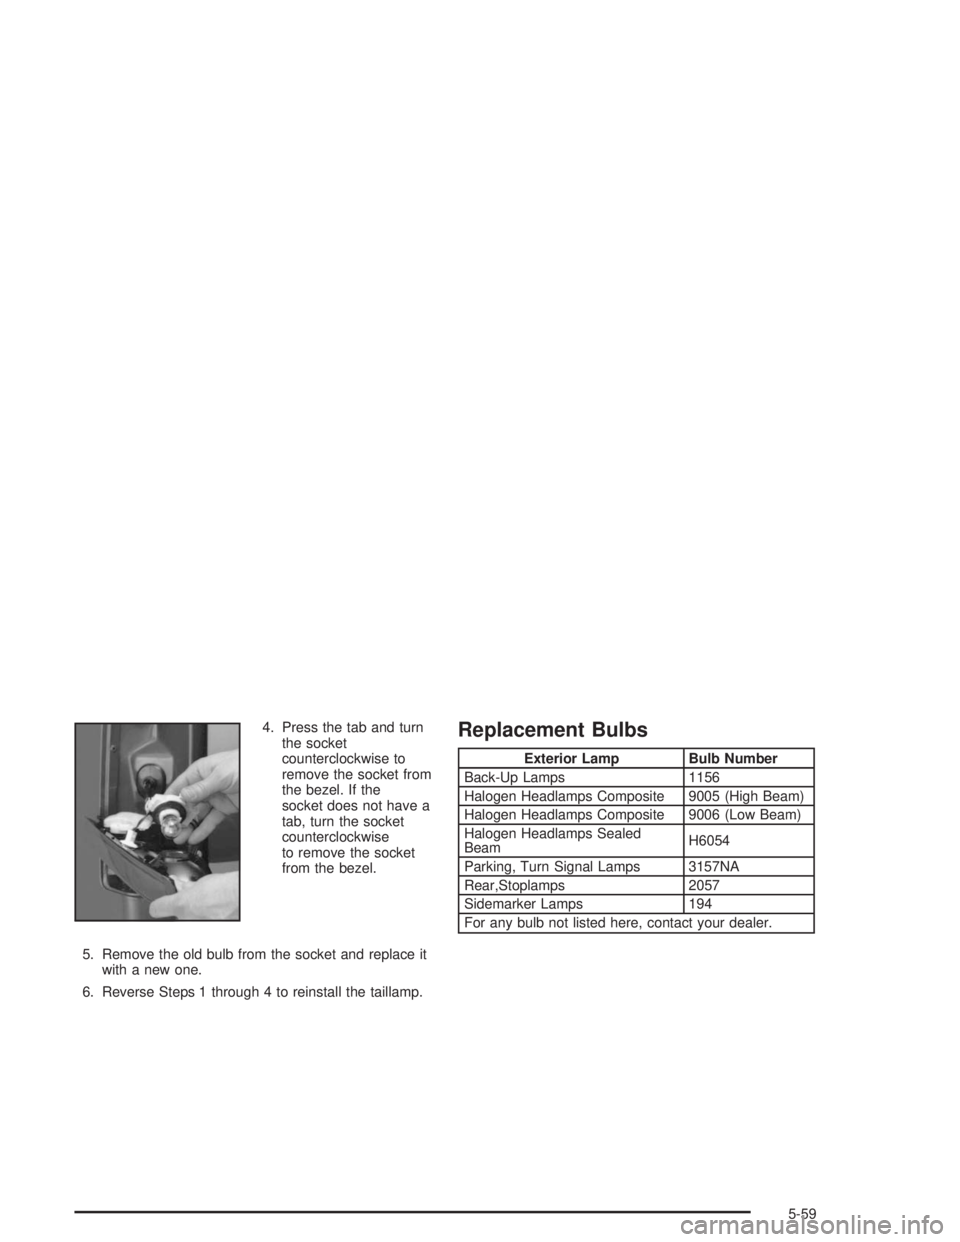
4. Press the tab and turn
the socket
counterclockwise to
remove the socket from
the bezel. If the
socket does not have a
tab, turn the socket
counterclockwise
to remove the socket
from the bezel.
5. Remove the old bulb from the socket and replace it
with a new one.
6. Reverse Steps 1 through 4 to reinstall the taillamp.Replacement Bulbs
Exterior Lamp Bulb Number
Back-Up Lamps 1156
Halogen Headlamps Composite 9005 (High Beam)
Halogen Headlamps Composite 9006 (Low Beam)
Halogen Headlamps Sealed
BeamH6054
Parking, Turn Signal Lamps 3157NA
Rear,Stoplamps 2057
Sidemarker Lamps 194
For any bulb not listed here, contact your dealer.
5-59