2004 GMC ENVOY XUV phone
[x] Cancel search: phonePage 114 of 460

Luxury and Leisure Plan
·
All Directions and Connections Plan services
·Personal Concierge
OnStaržPersonal Calling
With OnStaržPersonal Calling, you have a safer way to
stay connected while driving. It's a hands-free wireless
phone that's integrated into your vehicle. You can place
calls nationwide using voice-activated dialing with no
contracts and no additional roaming charges. To ®nd out
more about OnStar
žPersonal Calling, refer to the
OnStaržowner's guide in your vehicle's glove box, or
call OnStaržat 1-888-4-ONSTAR (1-888-466-7827).
OnStaržVirtual Advisor
With OnStaržVirtual Advisor you can listen to your
favorite news, entertainment and information topics,
such as traffic and weather reports, stock quotes
and sports scores. You listen to your e-mail through
your vehicle's speakers, and reply with your hands on
the wheel and your eyes on the road.
2-46
Page 143 of 460

Accessory Power Outlets
Your vehicle may have accessory power outlets. With
the accessory power outlets, you can plug in auxiliary
electrical equipment such as a cellular telephone or
CB radio.
The ®rst outlet is located to the right of the cigarette
lighter on the instrument panel. The second outlet
is located on the rear of the center console.
Remove the cover from the outlet to use the outlet.
Be sure to put the cover back on when not using the
accessory power outlet.
Certain electrical accessories may not be compatible
with the accessory power outlet and could result
in blown vehicle or adaptor fuses. If you experience a
problem, see your dealer for additional information
on the accessory power outlets.
Notice:Adding any electrical equipment to your
vehicle may damage it or keep other components
from working as they should. The repairs would not
be covered by your warranty. Check with your
dealer before adding electrical equipment.When adding electrical equipment, be sure to follow the
proper installation instructions included with the
equipment.
Notice:Improper use of the power outlet can cause
damage not covered by your warranty. Do not
hang any type of accessory or accessory bracket
from the plug because the power outlets are
designed for accessory power plugs only.
Ashtrays and Cigarette Lighter
Your vehicle may have this feature. The ashtray is
removable and ®ts into the front cupholder.
Notice:If you put papers or other ¯ammable items
in the ashtray, hot cigarettes or other smoking
materials could ignite them and possibly damage
your vehicle. Never put ¯ammable items in the
ashtray.
To remove the ashtray, pull the covered bin out of the
cupholder.
To use the lighter, press it in all the way, and let go.
When it's ready, it will pop back out by itself.
Notice:Holding a cigarette lighter in while it is
heating will not allow the lighter to back away from
the heating element when it is hot. Damage from
overheating may occur to the lighter or heating
element, or a fuse could be blown. Do not hold a
cigarette lighter in while it is heating.
3-19
Page 185 of 460
Audio System(s)
Notice:Before you add any sound equipment to
your vehicle ± like a tape player, CB radio, mobile
telephone or two-way radio ± be sure you can
add what you want. If you can, it's very important to
do it properly. Added sound equipment may
interfere with the operation of your vehicle's engine,
radio or other systems, and even damage them.
Your vehicle's systems may interfere with the
operation of sound equipment that has been added
improperly.
So, before adding sound equipment, check with
your dealer and be sure to check federal rules
covering mobile radio and telephone units.
Your audio system has been designed to operate easily
and to give years of listening pleasure. You will get
the most enjoyment out of it if you acquaint yourself with
it ®rst. Figure out which radio you have in your vehicle,
®nd out what your audio system can do and how to
operate all of its controls to be sure you're getting the
most out of the advanced engineering that went into it.
Your vehicle has a feature called Retained Accessory
Power (RAP). With RAP, you can play your audio
system even after the ignition is turned off. See
ªRetained Accessory Power (RAP)º under
Ignition
Positions on page 2-24.
Setting the Time
Your radio may have a button marked with an H or HR
to represent hours and an M or MN to represent
minutes.
Press and hold the hour button until the correct hour
appears on the display. AM or PM will appear on
the display for morning or evening hours. Press and
hold the minute button until the correct minute appears
on the display. The time may be set with the ignition
on or off.
To synchronize the time with an FM station broadcasting
Radio Data System (RDS) information, press and
hold the hour and minute buttons at the same time for
two seconds until UPDATED and the clock symbol
appear on the display. If the time is not available from
the station, NO UPDAT will appear on the display.
RDS time is broadcast once a minute. Once you have
tuned to an RDS broadcast station, it may take a
few minutes for your time to update.
3-61
Page 191 of 460
Setting Preset PTYs (RDS Only)
The six numbered pushbuttons let you return to your
favorite PTYs. These buttons have factory PTY presets.
You can set up to 12 PTYs (six FM1 and six FM2) by
performing the following steps:
1. Press BAND to select FM1 or FM2.
2. Turn the P-TYPE knob to activate program type
select mode. TYPE and a PTY will appear on the
display.
3. Turn the P-TYPE knob to select a PTY.
4. Press and hold one of the six numbered
pushbuttons until you hear a beep. Whenever you
press that numbered pushbutton, the PTY you
set will return.
5. Repeat the steps for each pushbutton.
RDS Messages
ALERT!:Alert warns of local or national emergencies.
When an alert announcement comes on the current
radio station, ALERT! will appear on the display. You will
hear the announcement, even if the volume is muted
or a CD is playing. If a CD is playing, play will stop
during the announcement. You will not be able to turn
off alert announcements.ALERT! will not be affected by tests of the emergency
broadcast system. This feature is not supported by
all RDS stations.
INFO (Information):If the current station has a
message, the information symbol will appear on the
display. Press this button to see the message. The
message may display the artist, song title, call in phone
numbers, etc.
If the whole message is not displayed, parts of the
message will appear every three seconds. To scroll
through the message at your own speed, press
the INFO button repeatedly. A new group of words will
appear on the display with each press. Once the
complete message has been displayed, the information
symbol will disappear from the display until another
new message is received. The old message can
be displayed by pressing the INFO button. You can
view an old message until a new message is received
or a different station is tuned to.
When a message is not available from a station,
NO INFO will appear on the display.
3-67
Page 203 of 460
Setting Preset PTYs (RDS Only)
The six numbered pushbuttons let you return to your
favorite PTYs. These buttons have factory PTY presets.
You can set up to 12 PTYs (six FM1 and six FM2) by
performing the following steps:
1. Press BAND to select FM1 or FM2.
2. Turn the P-TYPE knob to activate program type
select mode. TYPE and a PTY will appear on the
display.
3. Turn the P-TYPE knob to select a PTY.
4. Press and hold one of the six numbered
pushbuttons until you hear a beep. Whenever you
press that numbered pushbutton, the PTY you
set will return.
5. Repeat the steps for each pushbutton.
RDS Messages
ALERT!:Alert warns of local or national emergencies.
When an alert announcement comes on the current
radio station, ALERT! will appear on the display. You will
hear the announcement, even if the volume is muted
or a cassette tape or CD is playing. If a cassette tape or
CD is playing, play will stop during the announcement.
You will not be able to turn off alert announcements.ALERT! will not be affected by tests of the emergency
broadcast system. This feature is not supported by
all RDS stations.
INFO (Information):If the current station has a
message, the information symbol will appear on the
display. Press this button to see the message. The
message may display the artist, song title, call in phone
numbers, etc.
If the whole message is not displayed, parts of the
message will appear every three seconds. To scroll
through the message at your own speed, press
the INFO button repeatedly. A new group of words will
appear on the display with each press. Once the
complete message has been displayed, the information
symbol will disappear from the display until another
new message is received. The old message can
be displayed by pressing the INFO button. You can
view an old message until a new message is received
or a different station is tuned to.
When a message is not available from a station, NO
INFO will appear on the display.
3-79
Page 219 of 460
RDS Messages
ALERT!:Alert warns of local or national emergencies.
When an alert announcement comes on the current
radio station, ALERT! will appear on the display. You will
hear the announcement, even if the volume is muted
or a CD is playing. If the CD player is playing, play will
stop during the announcement. You will not be able
to turn off alert announcements.
ALERT! will not be affected by tests of the emergency
broadcast system. This feature is not supported by
all RDS stations.
INFO (Information):If the current station has a
message, INFO will appear on the display. Press this
button to see the message. The message may display
the artist, song title, call in phone numbers, etc.
If the whole message is not displayed, parts of the
message will appear every three seconds. To scroll
through the message at your own speed, press
the INFO button repeatedly. A new group of words will
appear on the display with each press. Once the
complete message has been displayed, INFO will
disappear from the display until another new message
is received. The old message can be displayed by
pressing the INFO button. You can view an old message
until a new message is received or a different station
is tuned to.TRAF (Traffic):If TRAF appears on the display, the
tuned station broadcasts traffic announcements.
To receive the traffic announcement from the tuned
station, press this button. Brackets will be displayed
around TRAF and when a traffic announcement comes
on the tuned radio station you will hear it.
If the current tuned station does not broadcast traffic
announcements, press this button and the radio
will seek to a station that does. When the radio ®nds a
station that broadcasts traffic announcements, the
radio will stop and brackets will be displayed around
TRAF. When a traffic announcement comes on
the tuned radio station you will hear it. If no station is
found, NO TRAFFIC will appear on the display.
If the brackets are on the display and TRAF is not, you
can then press the TRAF button to remove the
brackets or use the TUNE knob or the SEEK arrows to
go to a station that supports traffic announcements.
If no station is found, NO TRAFFIC will appear on the
display.
Your radio will play the traffic announcement even if the
volume is low. Your radio will interrupt the play of a
CD if the last tuned station broadcasts traffic
announcements.
This function does not apply to XMŸ Satellite Radio
Service.
3-95
Page 228 of 460
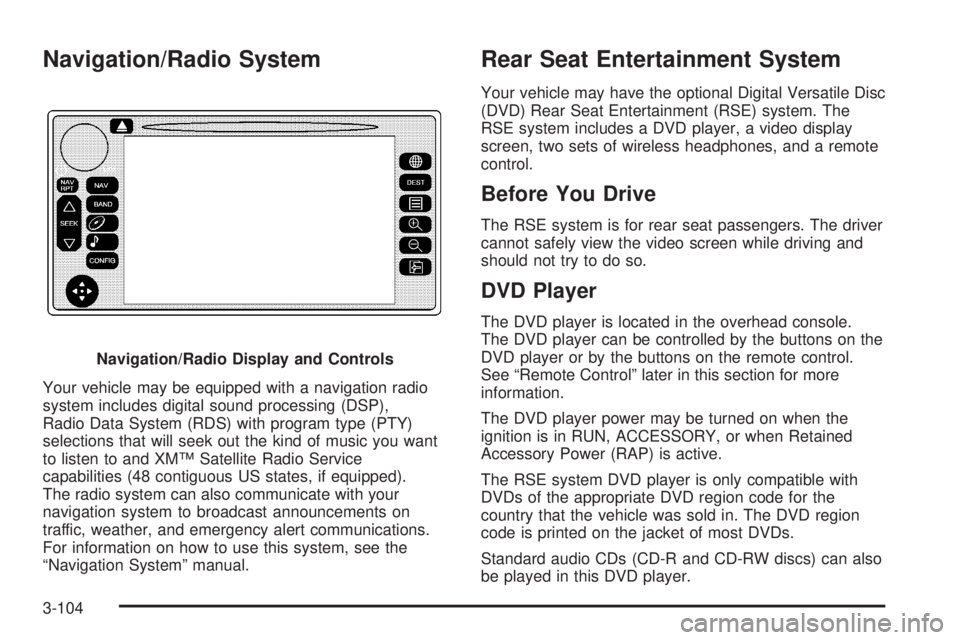
Navigation/Radio System
Your vehicle may be equipped with a navigation radio
system includes digital sound processing (DSP),
Radio Data System (RDS) with program type (PTY)
selections that will seek out the kind of music you want
to listen to and XMŸ Satellite Radio Service
capabilities (48 contiguous US states, if equipped).
The radio system can also communicate with your
navigation system to broadcast announcements on
traffic, weather, and emergency alert communications.
For information on how to use this system, see the
ªNavigation Systemº manual.
Rear Seat Entertainment System
Your vehicle may have the optional Digital Versatile Disc
(DVD) Rear Seat Entertainment (RSE) system. The
RSE system includes a DVD player, a video display
screen, two sets of wireless headphones, and a remote
control.
Before You Drive
The RSE system is for rear seat passengers. The driver
cannot safely view the video screen while driving and
should not try to do so.
DVD Player
The DVD player is located in the overhead console.
The DVD player can be controlled by the buttons on the
DVD player or by the buttons on the remote control.
See ªRemote Controlº later in this section for more
information.
The DVD player power may be turned on when the
ignition is in RUN, ACCESSORY, or when Retained
Accessory Power (RAP) is active.
The RSE system DVD player is only compatible with
DVDs of the appropriate DVD region code for the
country that the vehicle was sold in. The DVD region
code is printed on the jacket of most DVDs.
Standard audio CDs (CD-R and CD-RW discs) can also
be played in this DVD player. Navigation/Radio Display and Controls
3-104
Page 229 of 460
When using the wired headphones, if the front seat
passengers play a CD in the Radio with Six-Disc CD
(if equipped) or use XMŸ Satellite Radio Service
(48 contiguous US states, if equipped), you will hear the
audio for these sources, instead of the DVD or CD
that is currently playing through the RSE.
If an error message appears on the video screen, see
ªDVD Messagesº later in this section.
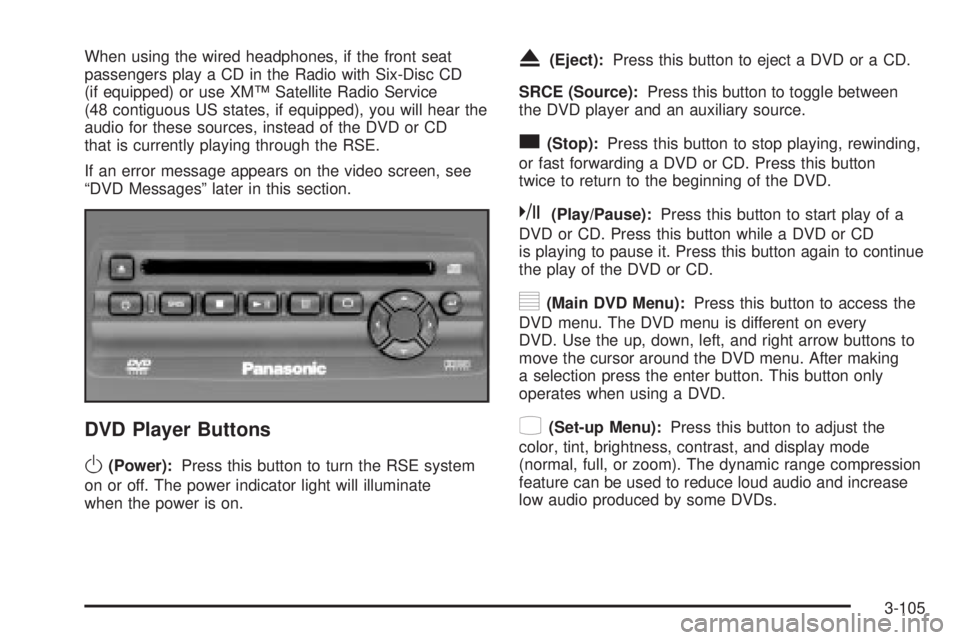
DVD Player Buttons
O(Power):Press this button to turn the RSE system
on or off. The power indicator light will illuminate
when the power is on.
X(Eject):Press this button to eject a DVD or a CD.
SRCE (Source):Press this button to toggle between
the DVD player and an auxiliary source.
c(Stop):Press this button to stop playing, rewinding,
or fast forwarding a DVD or CD. Press this button
twice to return to the beginning of the DVD.
k(Play/Pause):Press this button to start play of a
DVD or CD. Press this button while a DVD or CD
is playing to pause it. Press this button again to continue
the play of the DVD or CD.
y(Main DVD Menu):Press this button to access the
DVD menu. The DVD menu is different on every
DVD. Use the up, down, left, and right arrow buttons to
move the cursor around the DVD menu. After making
a selection press the enter button. This button only
operates when using a DVD.
z(Set-up Menu):Press this button to adjust the
color, tint, brightness, contrast, and display mode
(normal, full, or zoom). The dynamic range compression
feature can be used to reduce loud audio and increase
low audio produced by some DVDs.
3-105