Page 109 of 460

Mirrors
Automatic Dimming Rearview Mirror
with OnStar
žand Compass
Your vehicle may have an automatic-dimming rearview
mirror with a compass and the OnStaržsystem.
There are three additional buttons for the OnStar
ž
system. See your dealer for more information on the
system and how to subscribe to OnStarž. SeeOnStarž
System on page 2-45for more information about the
services OnStaržprovides.
Mirror Operation
When turned on, this mirror automatically dims to the
proper level to minimize glare from any headlamps
behind you after dark.
O(On/Off): This is the on/off button for the automatic
dimming feature and compass. Press the far left button,
located below the the mirror face, for up to three
seconds to turn the feature on and off. A light on the
mirror will be lit while the feature is turned on.
Compass Operation
Press the on/off button once to turn the compass
on or off.
There is a compass display in the window in the upper
right corner of the mirror face. The compass displays
a maximum of two characters. For example, ªNEº
is displayed for north-east.
Compass Calibration
Press and hold the on/off button down for nine seconds
to activate the compass calibration mode. CAL will
be displayed in the compass window on the mirror.
The compass can be calibrated by driving the vehicle in
circles at 5 mph (8 km/h) or less until the display
reads a direction.
2-41
Page 110 of 460

Compass Variance
Compass variance is the difference between earth's
magnetic north and true geographic north. The mirror is
set to zone eight upon leaving the factory. It will be
necessary to adjust the compass to compensate
for compass variance if you live outside zone eight.
Under certain circumstances, such as during a
long distance cross-country trip, it will be necessary to
adjust for compass variance. If not adjusted to
account for compass variance, your compass could give
false readings.
To adjust for compass variance, do the following:
1. Find your current location and variance zone
number on the map.
2. Press and hold the on/off button for six seconds.
Release the button when ZONE is displayed.
The number shown is the current zone number.
3. Scroll through the zone numbers that appear in the
compass/temperature window on the mirror by
pressing the on/off button. Once you ®nd your zone
number, release the button. After about four
seconds, the mirror will return to the compass
display, and the new zone number will be set.
2-42
Page 112 of 460

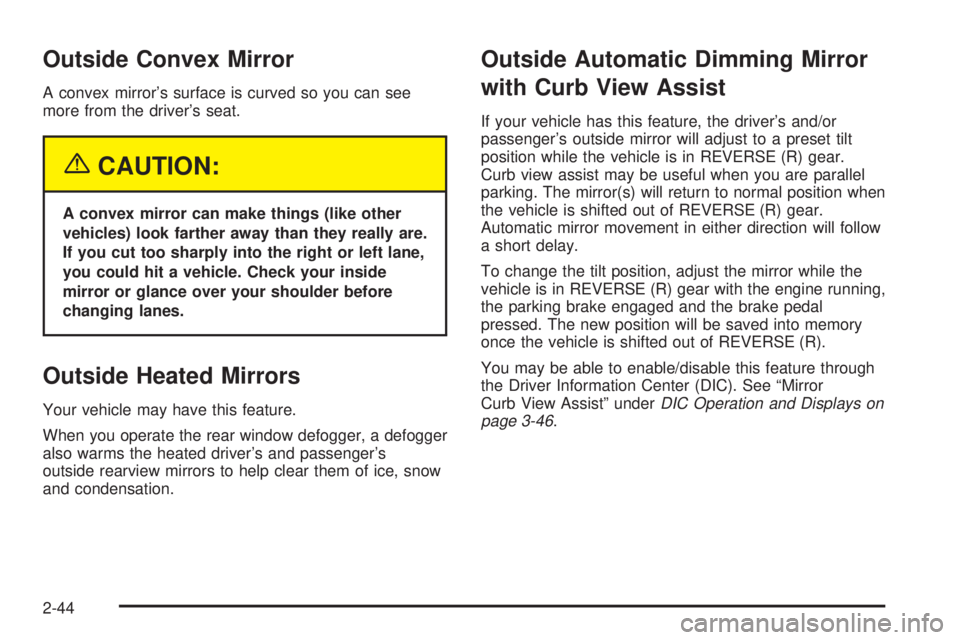
Outside Convex Mirror
A convex mirror's surface is curved so you can see
more from the driver's seat.
{CAUTION:
A convex mirror can make things (like other
vehicles) look farther away than they really are.
If you cut too sharply into the right or left lane,
you could hit a vehicle. Check your inside
mirror or glance over your shoulder before
changing lanes.
Outside Heated Mirrors
Your vehicle may have this feature.
When you operate the rear window defogger, a defogger
also warms the heated driver's and passenger's
outside rearview mirrors to help clear them of ice, snow
and condensation.
Outside Automatic Dimming Mirror
with Curb View Assist
If your vehicle has this feature, the driver's and/or
passenger's outside mirror will adjust to a preset tilt
position while the vehicle is in REVERSE (R) gear.
Curb view assist may be useful when you are parallel
parking. The mirror(s) will return to normal position when
the vehicle is shifted out of REVERSE (R) gear.
Automatic mirror movement in either direction will follow
a short delay.
To change the tilt position, adjust the mirror while the
vehicle is in REVERSE (R) gear with the engine running,
the parking brake engaged and the brake pedal
pressed. The new position will be saved into memory
once the vehicle is shifted out of REVERSE (R).
You may be able to enable/disable this feature through
the Driver Information Center (DIC). See ªMirror
Curb View Assistº under
DIC Operation and Displays on
page 3-46.
2-44
Page 119 of 460

Storage Areas
Glove Box
To open your glove box, pull the handle on the front of
the glove box and lower the door.
Overhead Console
The overhead console includes sunglasses storage and
a HomeLinkžtransmitter.The midgate window (B), power roof (C) and rear
tailgate window (D) switches are located in the overhead
console. See
Midgate on page 2-12,Power Roof on
page 2-17andTailgate on page 2-13for more
information. The sunroof switch (A) (if equipped) is also
located in the overhead console.
Front Storage Area
If your vehicle has this console compartment, squeeze
the front lever while lifting the top to open it. You
can store cassettes and compact discs in the slots in
front of the compartment.
Your vehicle's console will be equipped with cupholders
located on the front and rear of the storage
compartment.
The console may also contain one or more of the
following components:
·Rear Seat Audio Controls
·Rear Seat Accessory Power Outlets
·Rear Climate Control
If your vehicle has the center armrest compartment, lift
the cover to expose the storage area which includes
slots for cassettes or compact discs.
2-51
Page 121 of 460

Rear Cargo Mat
If the cargo area is extremely dirty, you can lift up the
cargo ¯oor mat or take the whole mat out and ¯ush the
drains with water.
To lift or remove the rear cargo mat, do the following:
1. Remove the two push pins found in the top surface
of the cargo mat.
2. Push the cargo mat forward as far as it will go.
3. With either a ®nger tip or ¯at tool, lift up on the tab
along the rear of the cargo mat to lift the mat out of
the vehicle.
4. Pull on the cargo mat to remove it from the vehicle.
Install the rear cargo mat by reversing this process.
Cargo Tie Downs
There are four moveable
cargo tie downs that can
be moved up to 12
different locations in the
rear of your vehicle.
They are located on the sides of the vehicle between
the window and the ¯oor.
The tie-downs may be moved from their original
positions by using a 10 mm socket wrench. These allow
you to restrain cargo from sliding around during
normal driving. The other cargo tie-down positions that
are not being used are covered by plastic plugs.
Unscrew these plugs by hand and then reinstall them
into the vacant holes.
There are also four cargo tie-downs located outside the
vehicle in the top of the metal rails that carry the
moveable roof. These allow you to carry tall objects in
the cargo area.
2-53
Page 129 of 460

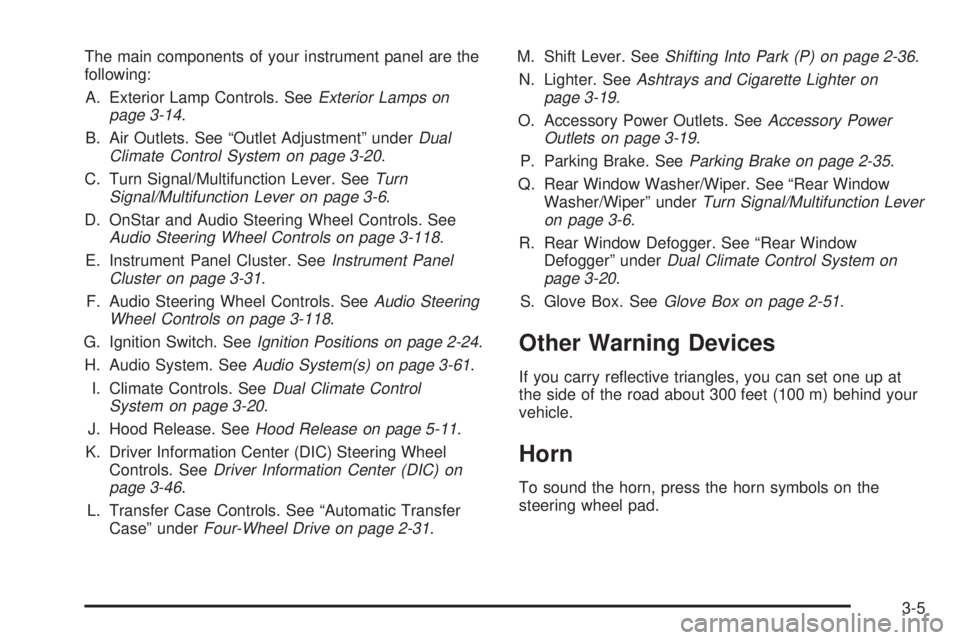
The main components of your instrument panel are the
following:
A. Exterior Lamp Controls. See
Exterior Lamps on
page 3-14.
B. Air Outlets. See ªOutlet Adjustmentº under
Dual
Climate Control System on page 3-20.
C. Turn Signal/Multifunction Lever. See
Turn
Signal/Multifunction Lever on page 3-6.
D. OnStar and Audio Steering Wheel Controls. See
Audio Steering Wheel Controls on page 3-118.
E. Instrument Panel Cluster. See
Instrument Panel
Cluster on page 3-31.
F. Audio Steering Wheel Controls. See
Audio Steering
Wheel Controls on page 3-118.
G. Ignition Switch. See
Ignition Positions on page 2-24.
H. Audio System. See
Audio System(s) on page 3-61.
I. Climate Controls. See
Dual Climate Control
System on page 3-20.
J. Hood Release. See
Hood Release on page 5-11.
K. Driver Information Center (DIC) Steering Wheel
Controls. See
Driver Information Center (DIC) on
page 3-46.
L. Transfer Case Controls. See ªAutomatic Transfer
Caseº under
Four-Wheel Drive on page 2-31.M. Shift Lever. See
Shifting Into Park (P) on page 2-36.
N. Lighter. See
Ashtrays and Cigarette Lighter on
page 3-19.
O. Accessory Power Outlets. See
Accessory Power
Outlets on page 3-19.
P. Parking Brake. See
Parking Brake on page 2-35.
Q. Rear Window Washer/Wiper. See ªRear Window
Washer/Wiperº under
Turn Signal/Multifunction Lever
on page 3-6.
R. Rear Window Defogger. See ªRear Window
Defoggerº under
Dual Climate Control System on
page 3-20.
S. Glove Box. See
Glove Box on page 2-51.
Other Warning Devices
If you carry re¯ective triangles, you can set one up at
the side of the road about 300 feet (100 m) behind your
vehicle.
Horn
To sound the horn, press the horn symbols on the
steering wheel pad.
3-5
Page 133 of 460

RainsenseŸ Wipers
Your vehicle is equipped with RainsenseŸ windshield
wipers. When active, these wipers are able to detect
moisture on the windshield and automatically turn on the
wipers.
The moisture sensor is located next to the inside
rearview mirror and is mounted on the windshield.
To turn on the RainsenseŸ feature, the wipers must be
set to one of the ®ve delay settings on the multifunction
lever. Each of the ®ve settings adjusts the sensitivity
of the rainsensor. For more wipes, select the higher
settings; for fewer wipes, select the lower settings
located closer to off on the multifunction lever.
The rainsensor will automatically control the frequency
of the wipes from off to high speed according to the
weather conditions. The wipers can be left in a
rainsense mode even when it is not raining.
Notice:If you do not turn off the windshield wipers
when driving through an automatic car wash, you
could damage the wipers. Always turn off the
windshield wipers before entering an automatic
car wash.
Windshield Washer
L
(Windshield Washer):To spray washer ¯uid on
the windshield, press the windshield washer paddle.
The wipers will clear the window and then either stop or
return to your preset speed.
{CAUTION:
In freezing weather, do not use your washer
until the windshield is warmed. Otherwise the
washer ¯uid can form ice on the windshield,
blocking your vision.
3-9
Page 134 of 460

Rear Window Washer/Wiper
This control is located to
the right of the steering
wheel on the instrument
panel.
To turn the rear wiper on, turn the control to either 1, 2,
or 3. For delayed wiping, turn the control to 1 or 2.
For steady wiping, turn the control to 3. To turn the wiper
off, turn the control to 0.
To wash the rear window, press the washer symbol
located in the center of the control.
The rear window washer/ wiper can only be activated if
the tailgate window is fully closed. The Driver
Information Center will display ªTailgate Glass Downº to
indicate that the rear window washer/wiper has been
disabled because the window is not fully closed.
The rear window washer uses the same ¯uid bottle as
the windshield washer. However, the rear window
washer will run out of ¯uid before the windshield washer.
If you can wash your windshield but not your rear
window, check the ¯uid level.
Headlamp Washer
Your vehicle may be
equipped with a headlamp
washer system. The
button to operate this
feature is located on the
instrument panel and
functions separately from
your other washer
systems.
To wash your headlamps, press the headlamp
washer button brie¯y and release to activate the
system. Two pressurized bursts of washer ¯uid will
then be applied to the headlamps.
3-10