2004 GMC ENVOY XUV section 5
[x] Cancel search: section 5Page 225 of 460
AUTO EQ (Automatic Equalization):Press AUTO EQ
to select the desired equalization setting while playing
a CD. The equalization will be automatically set
whenever you play a CD. For more information on
AUTO EQ, see ªAUTO EQº listed previously in
this section.
sSEEKt:Press the left arrow to go to the start of
the current track, if more than ten seconds have passed.
Press the right arrow to go to the next track. If you
press either arrow more than once, the player will
continue moving backward or forward through the CD.
sSCANt:To scan one CD, press and hold
either SCAN arrow for more than two seconds until
SCAN appears on the display and you hear a beep.
Use this feature to listen to 10 seconds of each track of
the currently selected CD. Press either SCAN arrow
again, to stop scanning.
To scan all loaded CDs, press and hold either SCAN
arrow for more than four seconds until CD SCAN
appears on the display and you hear a beep. Use this
feature to listen to 10 seconds of the ®rst track of
each CD loaded. Press either SCAN arrow again, to
stop scanning.RCL (Recall):Press this knob to see how long the
current track has been playing. To change the default
on the display (track or elapsed time), press the
knob until you see the display you want, then hold the
knob until the display ¯ashes. The selected display
will now be the default.
BAND:Press this button to play the radio when a
CD(s) is in the player.
Using Song List Mode
The six-disc CD changer has a feature called song list.
This feature is capable of saving 20 track selections.
To save tracks into the song list feature, perform
the following steps:
1. Turn the CD player on and load it with at least one
CD. See ªLOAD CDº listed previously in this section
for more information.
2. Check to see that the CD changer is not in song list
mode. S-LIST should not appear in the display. If
S-LIST is present, press the SONG LIST button
to turn it off.
3. Select the desired CD by pressing the numbered
pushbutton and then use the SEEK SCAN right
arrow to locate the track that you want to save.
The track will begin to play.
3-101
Page 228 of 460
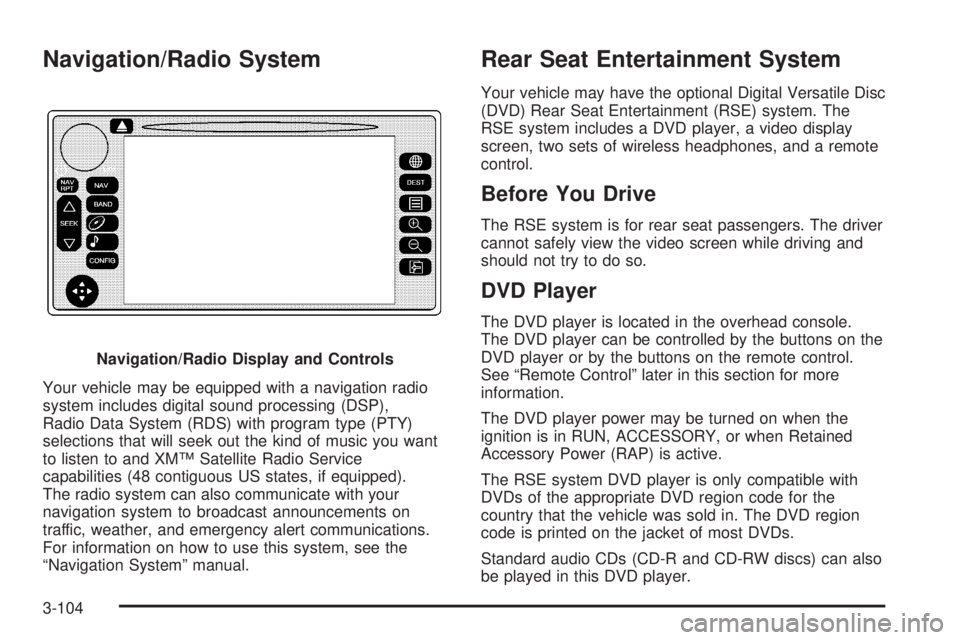
Navigation/Radio System
Your vehicle may be equipped with a navigation radio
system includes digital sound processing (DSP),
Radio Data System (RDS) with program type (PTY)
selections that will seek out the kind of music you want
to listen to and XMŸ Satellite Radio Service
capabilities (48 contiguous US states, if equipped).
The radio system can also communicate with your
navigation system to broadcast announcements on
traffic, weather, and emergency alert communications.
For information on how to use this system, see the
ªNavigation Systemº manual.
Rear Seat Entertainment System
Your vehicle may have the optional Digital Versatile Disc
(DVD) Rear Seat Entertainment (RSE) system. The
RSE system includes a DVD player, a video display
screen, two sets of wireless headphones, and a remote
control.
Before You Drive
The RSE system is for rear seat passengers. The driver
cannot safely view the video screen while driving and
should not try to do so.
DVD Player
The DVD player is located in the overhead console.
The DVD player can be controlled by the buttons on the
DVD player or by the buttons on the remote control.
See ªRemote Controlº later in this section for more
information.
The DVD player power may be turned on when the
ignition is in RUN, ACCESSORY, or when Retained
Accessory Power (RAP) is active.
The RSE system DVD player is only compatible with
DVDs of the appropriate DVD region code for the
country that the vehicle was sold in. The DVD region
code is printed on the jacket of most DVDs.
Standard audio CDs (CD-R and CD-RW discs) can also
be played in this DVD player. Navigation/Radio Display and Controls
3-104
Page 229 of 460
When using the wired headphones, if the front seat
passengers play a CD in the Radio with Six-Disc CD
(if equipped) or use XMŸ Satellite Radio Service
(48 contiguous US states, if equipped), you will hear the
audio for these sources, instead of the DVD or CD
that is currently playing through the RSE.
If an error message appears on the video screen, see
ªDVD Messagesº later in this section.
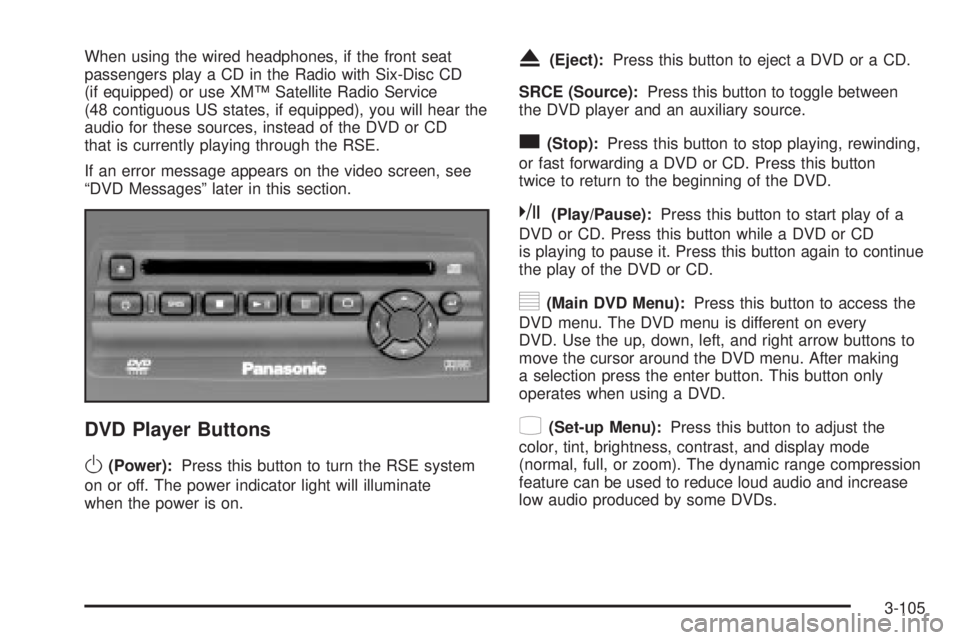
DVD Player Buttons
O(Power):Press this button to turn the RSE system
on or off. The power indicator light will illuminate
when the power is on.
X(Eject):Press this button to eject a DVD or a CD.
SRCE (Source):Press this button to toggle between
the DVD player and an auxiliary source.
c(Stop):Press this button to stop playing, rewinding,
or fast forwarding a DVD or CD. Press this button
twice to return to the beginning of the DVD.
k(Play/Pause):Press this button to start play of a
DVD or CD. Press this button while a DVD or CD
is playing to pause it. Press this button again to continue
the play of the DVD or CD.
y(Main DVD Menu):Press this button to access the
DVD menu. The DVD menu is different on every
DVD. Use the up, down, left, and right arrow buttons to
move the cursor around the DVD menu. After making
a selection press the enter button. This button only
operates when using a DVD.
z(Set-up Menu):Press this button to adjust the
color, tint, brightness, contrast, and display mode
(normal, full, or zoom). The dynamic range compression
feature can be used to reduce loud audio and increase
low audio produced by some DVDs.
3-105
Page 232 of 460
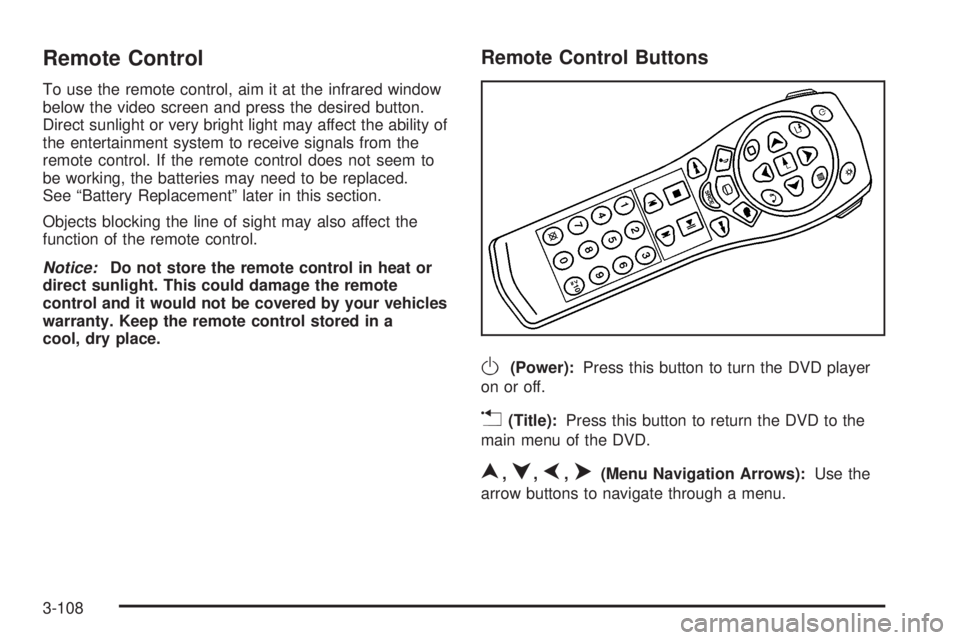
Remote Control
To use the remote control, aim it at the infrared window
below the video screen and press the desired button.
Direct sunlight or very bright light may affect the ability of
the entertainment system to receive signals from the
remote control. If the remote control does not seem to
be working, the batteries may need to be replaced.
See ªBattery Replacementº later in this section.
Objects blocking the line of sight may also affect the
function of the remote control.
Notice:Do not store the remote control in heat or
direct sunlight. This could damage the remote
control and it would not be covered by your vehicles
warranty. Keep the remote control stored in a
cool, dry place.
Remote Control Buttons
O(Power):Press this button to turn the DVD player
on or off.
v(Title):Press this button to return the DVD to the
main menu of the DVD.
n,q,p,o(Menu Navigation Arrows):Use the
arrow buttons to navigate through a menu.
3-108
Page 247 of 460

Your Driving, the Road, and Your Vehicle..........4-2
Defensive Driving...........................................4-2
Drunken Driving.............................................4-2
Control of a Vehicle........................................4-5
Braking.........................................................4-5
Traction Assist System (TAS)...........................4-8
Locking Rear Axle........................................4-10
Steering......................................................4-10
Off-Road Recovery.......................................4-12
Passing.......................................................4-12
Loss of Control.............................................4-14
Off-Road Driving with Your Four-Wheel-Drive
Vehicle....................................................4-15
Driving at Night............................................4-28Driving in Rain and on Wet Roads..................4-30
City Driving..................................................4-33
Freeway Driving...........................................4-34
Before Leaving on a Long Trip.......................4-35
Highway Hypnosis........................................4-36
Hill and Mountain Roads................................4-37
Winter Driving..............................................4-39
If You Are Stuck: In Sand, Mud, Ice or Snow........4-44
Towing..........................................................4-45
Towing Your Vehicle.....................................4-45
Recreational Vehicle Towing...........................4-45
Loading Your Vehicle....................................4-49
Adding a Snow Plow or Similar Equipment.......4-56
Towing a Trailer...........................................4-56
Section 4 Driving Your Vehicle
4-1
Page 258 of 460
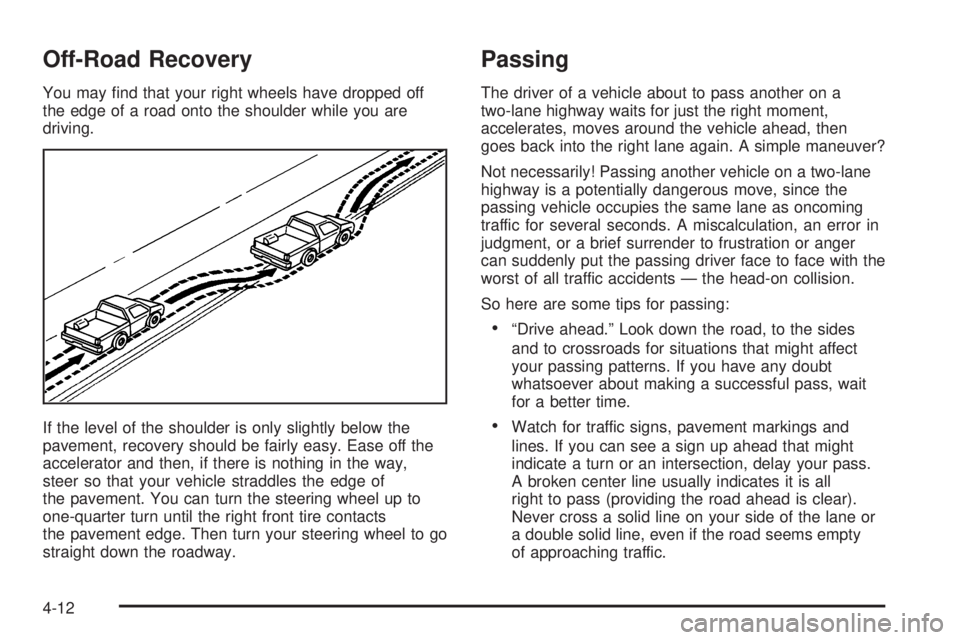
Off-Road Recovery
You may ®nd that your right wheels have dropped off
the edge of a road onto the shoulder while you are
driving.
If the level of the shoulder is only slightly below the
pavement, recovery should be fairly easy. Ease off the
accelerator and then, if there is nothing in the way,
steer so that your vehicle straddles the edge of
the pavement. You can turn the steering wheel up to
one-quarter turn until the right front tire contacts
the pavement edge. Then turn your steering wheel to go
straight down the roadway.
Passing
The driver of a vehicle about to pass another on a
two-lane highway waits for just the right moment,
accelerates, moves around the vehicle ahead, then
goes back into the right lane again. A simple maneuver?
Not necessarily! Passing another vehicle on a two-lane
highway is a potentially dangerous move, since the
passing vehicle occupies the same lane as oncoming
traffic for several seconds. A miscalculation, an error in
judgment, or a brief surrender to frustration or anger
can suddenly put the passing driver face to face with the
worst of all traffic accidents Ð the head-on collision.
So here are some tips for passing:
·ªDrive ahead.º Look down the road, to the sides
and to crossroads for situations that might affect
your passing patterns. If you have any doubt
whatsoever about making a successful pass, wait
for a better time.
·Watch for traffic signs, pavement markings and
lines. If you can see a sign up ahead that might
indicate a turn or an intersection, delay your pass.
A broken center line usually indicates it is all
right to pass (providing the road ahead is clear).
Never cross a solid line on your side of the lane or
a double solid line, even if the road seems empty
of approaching traffic.
4-12
Page 279 of 460

City DrivingOne of the biggest problems with city streets is the
amount of traffic on them. You will want to watch out for
what the other drivers are doing and pay attention to
traffic signals.
Here are ways to increase your safety in city driving:
·Know the best way to get to where you are
going. Get a city map and plan your trip into
an unknown part of the city just as you would for a
cross-country trip.
·Try to use the freeways that rim and crisscross
most large cities. You will save time and energy.
See
Freeway Driving on page 4-34.
·Treat a green light as a warning signal. A traffic
light is there because the corner is busy enough
to need it. When a light turns green, and just before
you start to move, check both ways for vehicles
that have not cleared the intersection or may
be running the red light.
4-33
Page 296 of 460

The Tire and Loading Information label also tells you
the size and recommended in¯ation pressure for
the original equipment tires on your vehicle. For more
information on tires and in¯ation see
Tires on page 5-52andIn¯ation - Tire Pressure on page 5-60.
If your vehicle does not have the Tire and Loading
Information label, the Certi®cation/Tire label shows the
tire size and recommended in¯ation pressures
needed to obtain the Gross Vehicle Weight Rating
(GVWR) and the Gross Axle Weight Rating (GAWR) for
the front and rear axles. See ªCerti®cation/Tire Labelº
later in this section.
Steps for Determining Correct Load Limit
1. Locate the statement ªThe combined weight of
occupants and cargo should never exceed XXX
poundsº on your vehicle placard.
2. Determine the combined weight of the driver and
passengers that will be riding in your vehicle.
3. Subtract the combined weight of the driver and
passengers from XXX kilograms or XXX pounds.4. The resulting ®gure equals the available amount of
cargo and luggage load capacity. For example, if the
ªXXXº amount equals 1400 lbs. and there will be ®ve
150 lb. passengers in your vehicle, the amount of
available cargo and luggage load capacity is 650 lbs.
(1400-750 (5 x 150) = 650 lbs.).
5. Determine the combined weight of luggage and
cargo being loaded on the vehicle. That weight
may not safely exceed the available cargo
and luggage load capacity calculated in Step 4.
6. If your vehicle will be towing a trailer, the load from
your trailer will be transferred to your vehicle.
Consult this manual to determine how this reduces
the available cargo and luggage load capacity of
your vehicle.
See
Towing a Trailer on page 4-56for important
information on towing a trailer, towing safety rules and
trailering tips.
4-50