2004 FORD SUPER DUTY light
[x] Cancel search: lightPage 70 of 304
Compass
The compass display is contained in the overhead console. The vehicle
heading is displayed as one of N, NE, E, SE, S, SW, W and NW.
The compass heading is displayed in average fuel economy modes, fuel
range modes and temperature modes.
The compass reading may be affected when you drive near large
buildings, bridges, power lines and powerful broadcast antennas.
Magnetic or metallic objects placed in or on the vehicle may also affect
compass accuracy. Adjustments may need to be made to the zone and
calibration of the compass.
Compass zone adjustment
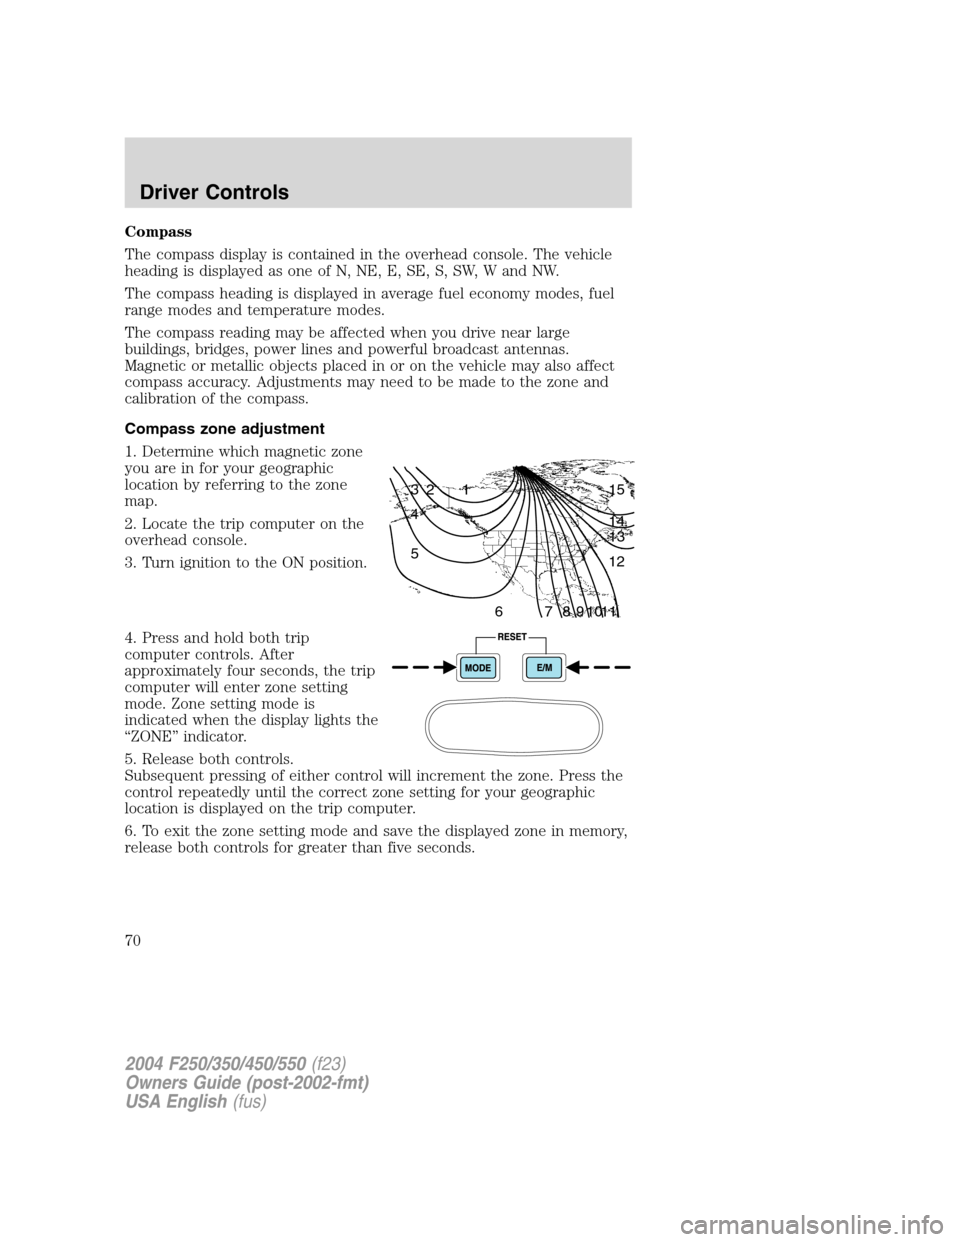
1. Determine which magnetic zone
you are in for your geographic
location by referring to the zone
map.
2. Locate the trip computer on the
overhead console.
3. Turn ignition to the ON position.
4. Press and hold both trip
computer controls. After
approximately four seconds, the trip
computer will enter zone setting
mode. Zone setting mode is
indicated when the display lights the
“ZONE”indicator.
5. Release both controls.
Subsequent pressing of either control will increment the zone. Press the
control repeatedly until the correct zone setting for your geographic
location is displayed on the trip computer.
6. To exit the zone setting mode and save the displayed zone in memory,
release both controls for greater than five seconds.
1 2 3
4
5
6 7 8 9 101112 13 14 15
2004 F250/350/450/550(f23)
Owners Guide (post-2002-fmt)
USA English(fus)
Driver Controls
70
Page 71 of 304
Compass calibration adjustment
Perform this adjustment in an open area free from steel structures and
high voltage lines.
For optimum calibration, turn off all electrical accessories (heater/air
conditioning, wipers, etc.) and make sure all vehicle doors are shut.
1. Locate the trip computer located in the overhead console.
2. Start the vehicle.
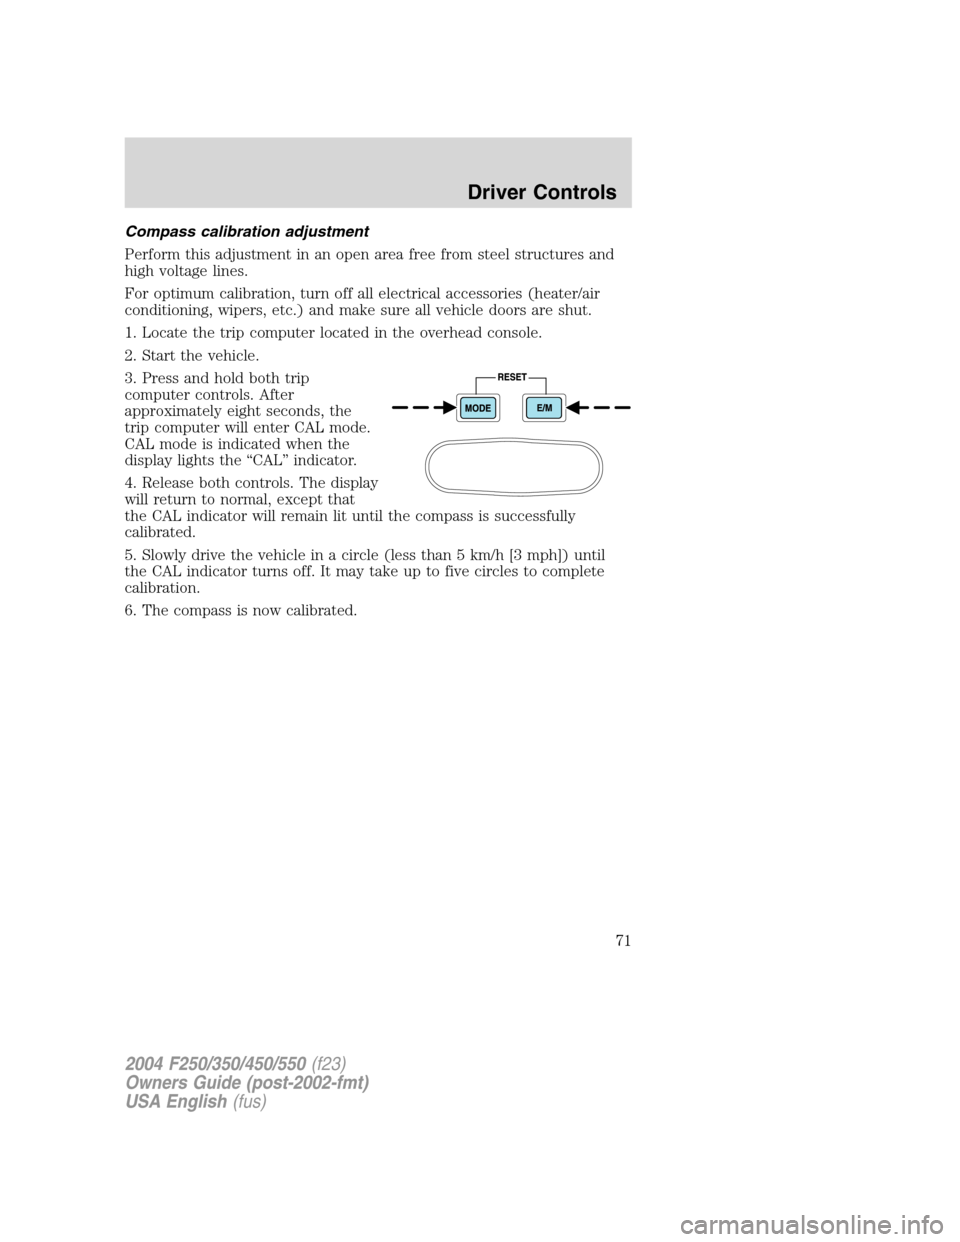
3. Press and hold both trip
computer controls. After
approximately eight seconds, the
trip computer will enter CAL mode.
CAL mode is indicated when the
display lights the“CAL”indicator.
4. Release both controls. The display
will return to normal, except that
the CAL indicator will remain lit until the compass is successfully
calibrated.
5. Slowly drive the vehicle in a circle (less than 5 km/h [3 mph]) until
the CAL indicator turns off. It may take up to five circles to complete
calibration.
6. The compass is now calibrated.
2004 F250/350/450/550(f23)
Owners Guide (post-2002-fmt)
USA English(fus)
Driver Controls
71
Page 78 of 304
To program the keyless entry
keypads remote entry transmitters
yourself:
1. Ensure the vehicle is
electronically unlocked.
2. Put the key in the ignition.
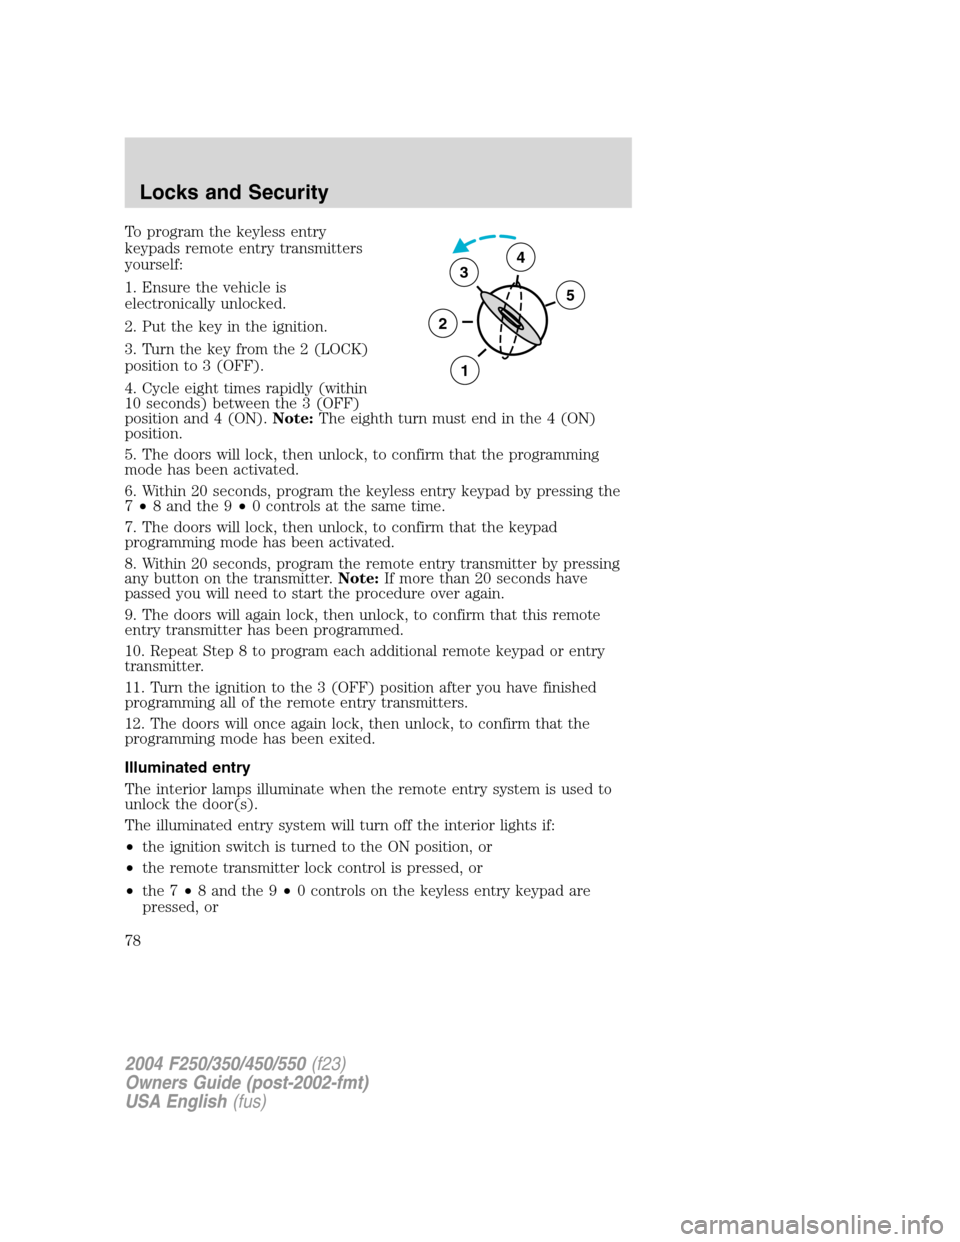
3. Turn the key from the 2 (LOCK)
position to 3 (OFF).
4. Cycle eight times rapidly (within
10 seconds) between the 3 (OFF)
position and 4 (ON).Note:The eighth turn must end in the 4 (ON)
position.
5. The doors will lock, then unlock, to confirm that the programming
mode has been activated.
6. Within 20 seconds, program the keyless entry keypad by pressing the
7•8 and the 9•0 controls at the same time.
7. The doors will lock, then unlock, to confirm that the keypad
programming mode has been activated.
8. Within 20 seconds, program the remote entry transmitter by pressing
any button on the transmitter.Note:If more than 20 seconds have
passed you will need to start the procedure over again.
9. The doors will again lock, then unlock, to confirm that this remote
entry transmitter has been programmed.
10. Repeat Step 8 to program each additional remote keypad or entry
transmitter.
11. Turn the ignition to the 3 (OFF) position after you have finished
programming all of the remote entry transmitters.
12. The doors will once again lock, then unlock, to confirm that the
programming mode has been exited.
Illuminated entry
The interior lamps illuminate when the remote entry system is used to
unlock the door(s).
The illuminated entry system will turn off the interior lights if:
•the ignition switch is turned to the ON position, or
•the remote transmitter lock control is pressed, or
•the 7•8 and the 9•0 controls on the keyless entry keypad are
pressed, or
3
2
1
5
4
2004 F250/350/450/550(f23)
Owners Guide (post-2002-fmt)
USA English(fus)
Locks and Security
78
Page 79 of 304
•after 25 seconds of illumination.
The dome lamp control (if equipped) mustnotbe set to the OFF
position for the illuminated entry system to operate.
The inside lights will not turn off if:
•they have been turned on with the dimmer control, or
•any door is open.
The battery saver will shut off the interior lamps 30 minutes after the
ignition has been turned to the OFF position, 10 minutes after if the
dome lamp is off, and 30 minutes after if the dome lamp switch is left
on.
Autolock (if equipped)
This feature automatically locks all vehicle doors when the following
conditions are met:
•the ignition is in the ON position,
•all doors are closed,
•the brake is pressed before reaching 8 km/h (5 mph) and
•the vehicle is traveling more than 8 km/h (5 mph).
Relock
The autolock feature repeats when the following conditions are met:
•the vehicle’s speed is less than 8 km/h (5 mph), and
•any door is opened then closed while the ignition is in the RUN
position, and
•the brake is pressed before reaching 8 km/h (5 mph), and
•the vehicle is traveling more than 8 km/h (5 mph).
Deactivating/activating the autolock feature
Before following the procedure, make sure that the ignition is OFF and
all vehicle doors are closed.
You must complete steps 1-7 within 30 seconds or the procedure will
have to be repeated. If the procedure needs to be repeated, you must
wait 30 seconds.
1. Turn the ignition key to ON.
2. Press the power door unlock control three times.
3. Turn the ignition key from ON to OFF.
2004 F250/350/450/550(f23)
Owners Guide (post-2002-fmt)
USA English(fus)
Locks and Security
79
Page 80 of 304
4. Press the power door unlock control three times.
5. Turn the ignition back to ON. The horn will chirp.
6. Press the unlock control, then press the lock control. The horn will
chirp once if autolock was deactivated or twice (one short and one long
chirp) if autolock was activated.Note:Pressing the power door
lock/unlock control again will toggle between activating and deactivating
the autolock feature.
7. Turn the ignition to OFF. The horn will chirp once to confirm the
procedure is complete.
REMOTE KEYLESS ENTRY SYSTEM (IF EQUIPPED)
This device complies with part 15 of the FCC rules and with RS-210 of
Industry Canada. Operation is subject to the following two conditions:
(1) This device may not cause harmful interference, and (2) This device
must accept any interference received, including interference that may
cause undesired operation.
Changes or modifications not expressly approved by the party
responsible for compliance could void the user’s authority to
operate the equipment.
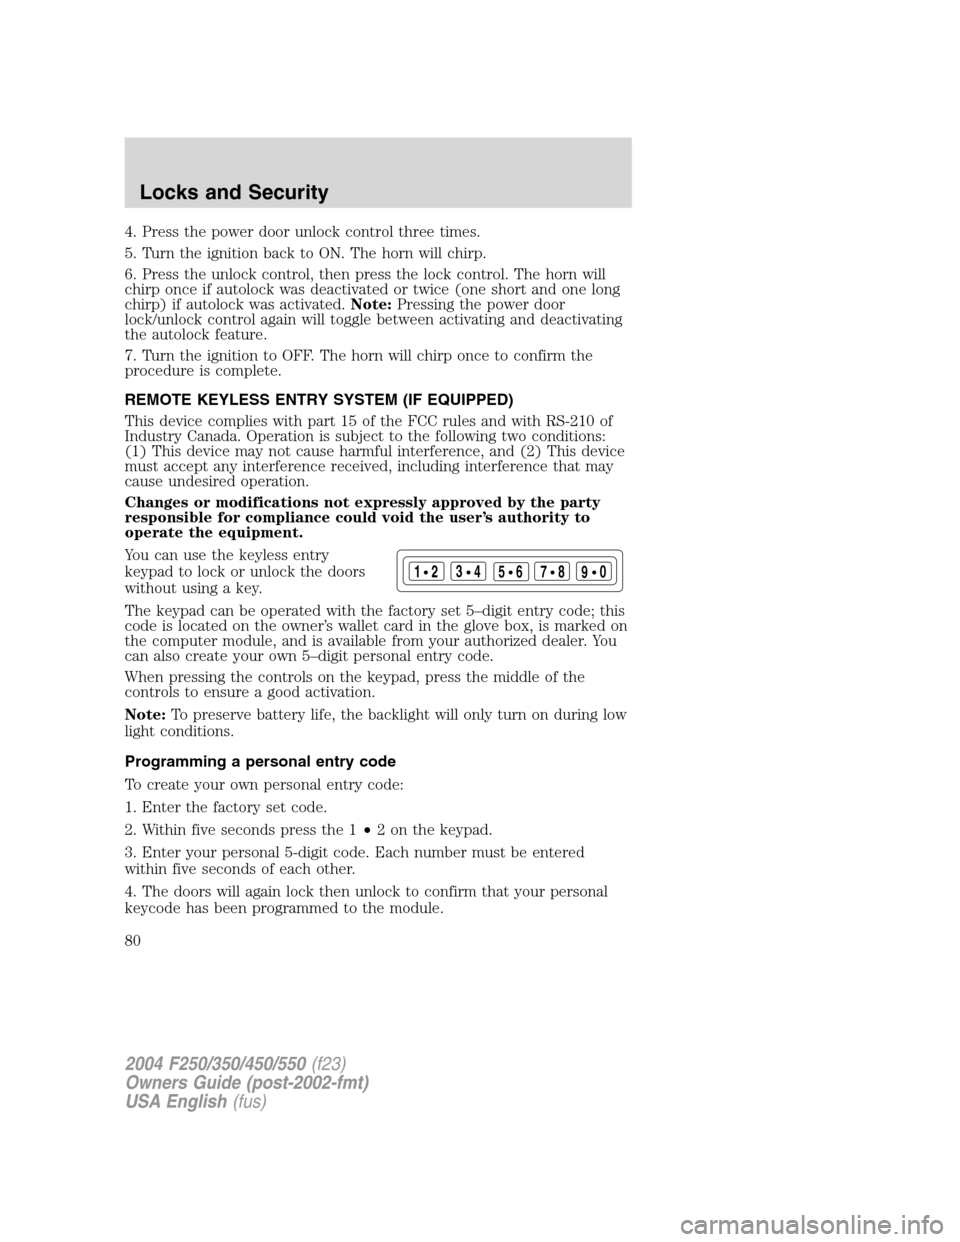
You can use the keyless entry
keypad to lock or unlock the doors
without using a key.
The keypad can be operated with the factory set 5–digit entry code; this
code is located on the owner’s wallet card in the glove box, is marked on
the computer module, and is available from your authorized dealer. You
can also create your own 5–digit personal entry code.
When pressing the controls on the keypad, press the middle of the
controls to ensure a good activation.
Note:To preserve battery life, the backlight will only turn on during low
light conditions.
Programming a personal entry code
To create your own personal entry code:
1. Enter the factory set code.
2. Within five seconds press the 1•2 on the keypad.
3. Enter your personal 5-digit code. Each number must be entered
within five seconds of each other.
4. The doors will again lock then unlock to confirm that your personal
keycode has been programmed to the module.
123
45678
90
2004 F250/350/450/550(f23)
Owners Guide (post-2002-fmt)
USA English(fus)
Locks and Security
80
Page 88 of 304
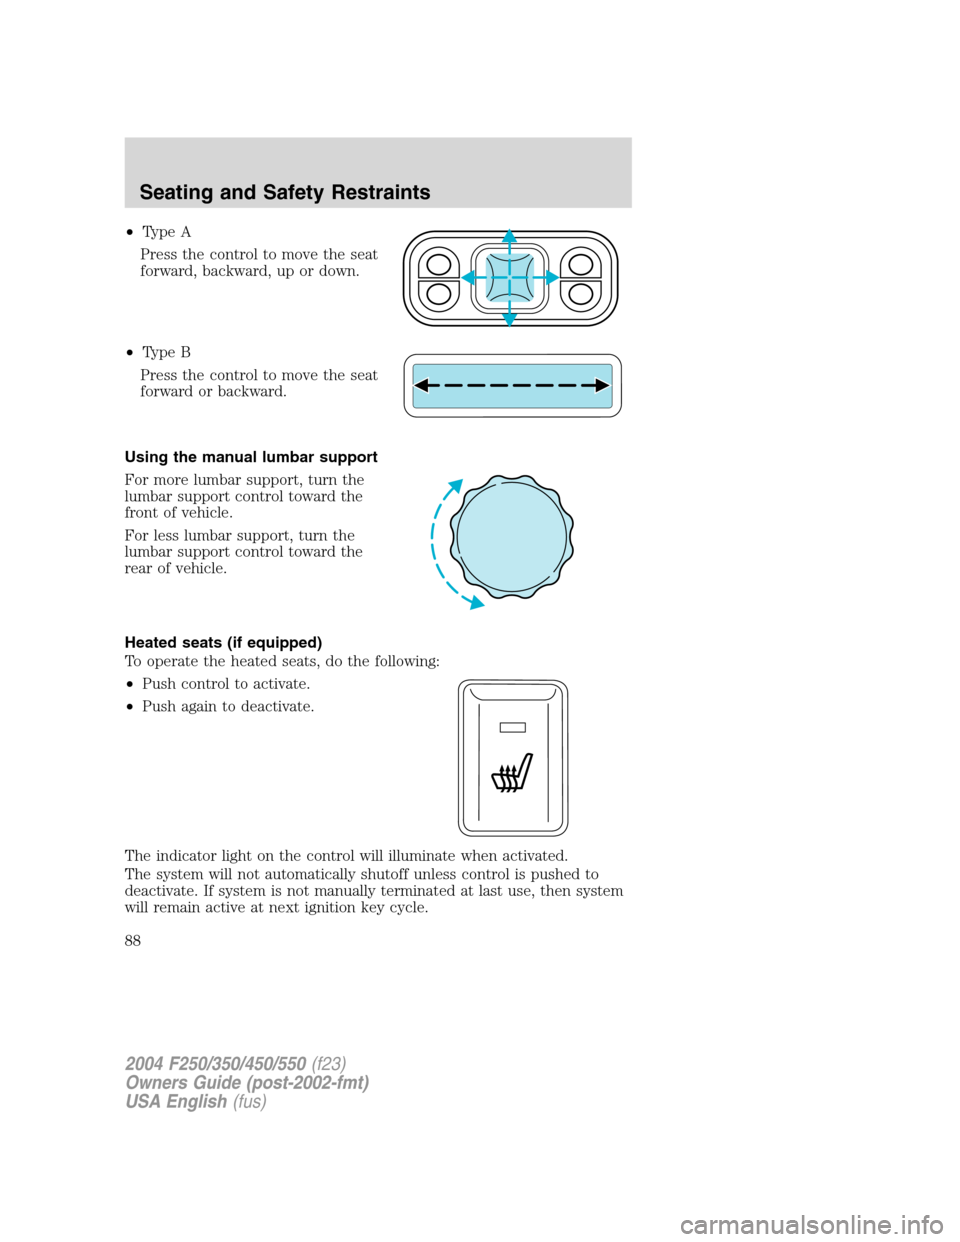
•Type A
Press the control to move the seat
forward, backward, up or down.
•Type B
Press the control to move the seat
forward or backward.
Using the manual lumbar support
For more lumbar support, turn the
lumbar support control toward the
front of vehicle.
For less lumbar support, turn the
lumbar support control toward the
rear of vehicle.
Heated seats (if equipped)
To operate the heated seats, do the following:
•Push control to activate.
•Push again to deactivate.
The indicator light on the control will illuminate when activated.
The system will not automatically shutoff unless control is pushed to
deactivate. If system is not manually terminated at last use, then system
will remain active at next ignition key cycle.
2004 F250/350/450/550(f23)
Owners Guide (post-2002-fmt)
USA English(fus)
Seating and Safety Restraints
88
Page 99 of 304
•2nd row center seating position (if equipped)
The lap belt will not adjust automatically. To fasten, grasp the tongue,
and with a continuous motion, pull out enough webbing to buckle the
tongue into the correct buckle. If you did not pull out enough webbing to
reach the buckle, allow the tongue to retract fully before trying to pull it
out again.
Safety belt warning light and indicator chime
The safety belt warning light illuminates in the instrument cluster and a
chime sounds to remind the occupants to fasten their safety belts.
Conditions of operation
If... Then...
The driver’s safety belt is not
buckled before the ignition
switch is turned to the ON
position...The safety belt warning light
illuminates 1-2 minutes and the
warning chime sounds 4-8 seconds.
The driver’s safety belt is
buckled while the indicator
light is illuminated and the
warning chime is sounding...The safety belt warning light and
warning chime turn off.
The driver’s safety belt is
buckled before the ignition
switch is turned to the ON
position...The safety belt warning light and
indicator chime remain off.
BeltMinder
The BeltMinder feature is a supplemental warning to the safety belt
warning function. This feature provides additional reminders to the
driver that the driver’s safety belt is unbuckled by intermittently
sounding a chime and illuminating the safety belt warning lamp in the
instrument cluster.
2004 F250/350/450/550(f23)
Owners Guide (post-2002-fmt)
USA English(fus)
Seating and Safety Restraints
99
Page 100 of 304
If... Then...
The driver’s safety belt is not
buckled before the vehicle has
reached at least 5 km/h (3
mph) and 1-2 minutes have
elapsed since the ignition
switch has been turned to
ON...The BeltMinder feature is activated -
the safety belt warning light
illuminates and the warning chime
sounds for 6 seconds every 30
seconds, repeating for approximately
5 minutes or until safety belt is
buckled.
The driver’s safety belt is
buckled while the safety belt
indicator light is illuminated
and the safety belt warning
chime is sounding...The BeltMinder feature will not
activate.
The driver’s safety belt is
buckled before the ignition
switch is turned to the ON
position...The BeltMinder feature will not
activate.
The following are reasons most often given for not wearing safety belts:
(All statistics based on U.S. data)
Reasons given... Consider...
“Crashes are rare events”36700 crashes occur every day.The
more we drive, the more we are
exposed to“rare”events, even for
good drivers.1 in 4 of us will be
seriously injured in a crash during
our lifetime.
“I’m not going far”3of4fatal crashes occur within25
miles of home.
“Belts are uncomfortable”We design our safety belts to enhance
comfort. If you are uncomfortable -
try different positions for the safety
belt upper anchorage and seatback
which should be as upright as
possible; this can improve comfort.
2004 F250/350/450/550(f23)
Owners Guide (post-2002-fmt)
USA English(fus)
Seating and Safety Restraints
100