2004 FORD SUPER DUTY warning
[x] Cancel search: warningPage 103 of 304
•This will disable BeltMinder if it is currently enabled, or enable
BeltMinder if it is currently disabled.
7. Confirmation of disabling BeltMinder is provided by the safety belt
warning light flashing four times per second for three seconds.
8. Confirmation of enabling BeltMinder is provided by:
•The safety belt warning light flashing four times per second for three
seconds.
•Followed by three seconds with the safety belt warning light off.
•Once again, the safety belt warning light will flash four times per
second for three seconds.
9. After receiving confirmation, the deactivation/activation procedure is
complete.
Safety belt extension assembly
If the safety belt is too short when fully extended, there is a 20 cm (8
inch) safety belt extension assembly that can be added (part number
611C22). This assembly can be obtained from your dealer at no cost.
Use only extensions manufactured by the same supplier as the safety
belt. Manufacturer identification is located at the end of the webbing on
the label. Also, use the safety belt extension only if the safety belt is too
short for you when fully extended.
Do not use extensions to change the fit of the shoulder belt
across the torso.
Safety belt maintenance
Inspect the safety belt systems periodically to make sure they work
properly and are not damaged. Inspect the safety belts to make sure
there are no nicks, tears or cuts. Replace if necessary. All safety belt
assemblies, including retractors, buckles, front seat belt buckle
assemblies, buckle support assemblies (slide bar-if equipped), shoulder
belt height adjusters (if equipped), shoulder belt guide on seatback (if
equipped), child safety seat LATCH and tether anchors, and attaching
hardware, should be inspected after a collision. Ford Motor Company
recommends that all safety belt assemblies used in vehicles involved in a
collision be replaced. However, if the collision was minor and a qualified
technician finds that the belts do not show damage and continue to
operate properly, they do not need to be replaced. Safety belt assemblies
not in use during a collision should also be inspected and replaced if
either damage or improper operation is noted.
2004 F250/350/450/550(f23)
Owners Guide (post-2002-fmt)
USA English(fus)
Seating and Safety Restraints
103
Page 108 of 304
The diagnostic module monitors its own internal circuits and the
supplemental air bag electrical system wiring (including the impact
sensors), the system wiring, the air bag system readiness light, the air
bag back up power and the air bag ignitors.
Determining if the system is operational
The SRS uses a readiness light in the instrument cluster or a tone to
indicate the condition of the system. Refer toAir bag readinesssection
in theInstrument clusterchapter. Routine maintenance of the air bag is
not required.
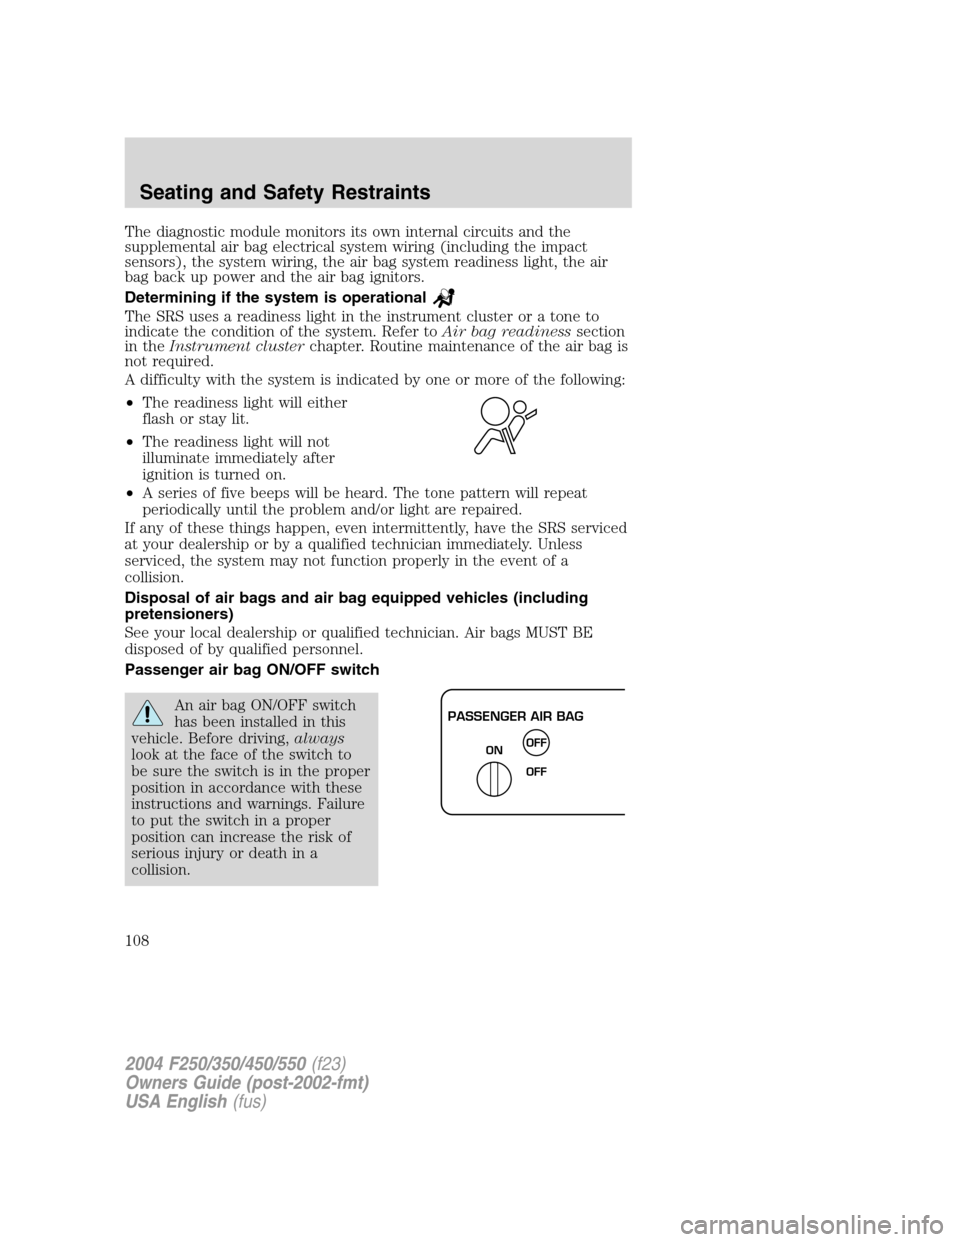
A difficulty with the system is indicated by one or more of the following:
•The readiness light will either
flash or stay lit.
•The readiness light will not
illuminate immediately after
ignition is turned on.
•A series of five beeps will be heard. The tone pattern will repeat
periodically until the problem and/or light are repaired.
If any of these things happen, even intermittently, have the SRS serviced
at your dealership or by a qualified technician immediately. Unless
serviced, the system may not function properly in the event of a
collision.
Disposal of air bags and air bag equipped vehicles (including
pretensioners)
See your local dealership or qualified technician. Air bags MUST BE
disposed of by qualified personnel.
Passenger air bag ON/OFF switch
An air bag ON/OFF switch
has been installed in this
vehicle. Before driving,always
look at the face of the switch to
be sure the switch is in the proper
position in accordance with these
instructions and warnings. Failure
to put the switch in a proper
position can increase the risk of
serious injury or death in a
collision.PASSENGER AIR BAG
OFF
OFF ON
2004 F250/350/450/550(f23)
Owners Guide (post-2002-fmt)
USA English(fus)
Seating and Safety Restraints
108
Page 111 of 304
Read all air bag Warning labels in the vehicle as well as the other
important air bag instructions and Warnings in this Owner’s Guide.
NHTSA deactivation criteria (excluding Canada)
1.Infant.An infant (less than 1 year old) must ride in the front seat
because:
•the vehicle has no rear seat;
•the vehicle has a rear seat too small to accommodate a rear-facing
infant seat; or
•the infant has a medical condition which, according to the infant’s
physician, makes it necessary for the infant to ride in the front so that
the driver can constantly monitor the child’s condition.
2.Child age 1 to 12.A child age 1 to 12 must ride in the front seat
because:
•the vehicle has no rear seat;
•although children ages 1 to 12 ride in the rear seat(s) whenever
possible, children ages 1 to 12 sometimes must ride in the front
because no space is available in the rear seat(s) of the vehicle; or
•the child has a medical condition which, according to the child’s
physician, makes it necessary for the child to ride in the front seat so
that the driver can constantly monitor the child’s condition.
3.Medical condition.A passenger has a medical condition which,
according to his or her physician:
•causes the passenger air bag to pose a special risk for the passenger;
and
•makes the potential harm from the passenger air bag in a crash
greater than the potential harm from turning OFF the air bag and
allowing the passenger, even if belted, to hit the dashboard or
windshield in a crash.
This vehicle has special energy management safety belts for the
driver and right front passenger. These particular belts are
specifically designed to work with air bags to help reduce the risk of
injury in a collision. The energy management safety belt is designed to
give or release additional belt webbing in some accidents to reduce
concentration of force on an occupant’s chest and reduce the risk of
certain bone fractures and injuries to underlying organs. In a crash, if
the air bag is turned OFF, this energy management safety belt might
permit the person wearing the belt to move forward enough to incur a
serious or fatal injury. The more severe the crash, and the heavier the
occupant, the greater the risk is. Be sure the air bag is turned ON for
any person who does not qualify under the NHTSA deactivation
criteria.
2004 F250/350/450/550(f23)
Owners Guide (post-2002-fmt)
USA English(fus)
Seating and Safety Restraints
111
Page 113 of 304
SAFETY RESTRAINTS FOR CHILDREN
See the following sections for directions on how to properly use safety
restraints for children. Also seeAir bag supplemental restraint system
(SRS)in this chapter for special instructions about using air bags.
Important child restraint precautions
You are required by law to use safety restraints for children in the U.S.
and Canada. If small children (generally children who are four years old
or younger and who weigh 18 kg [40 lbs] or less) ride in your vehicle,
you must put them in safety seats made especially for children. Many
states require that children use approved booster seats until they are
eight years old. Check your local and state or provincial laws for specific
requirements regarding the safety of children in your vehicle. When
possible, always place children under age 12 in the rear seat of your
vehicle. Accident statistics suggest that children are safer when properly
restrained in the rear seating positions than in the front seating position.
Never let a passenger hold a child on his or her lap while the
vehicle is moving. The passenger cannot protect the child from
injury in a collision.
Always follow the instructions and warnings that come with any infant or
child restraint you might use.
Children and safety belts
If the child is the proper size, restrain the child in a safety seat. Children
who are too large for child safety seats (as specified by your child safety
seat manufacturer) should always wear safety belts.
Follow all the important safety restraint and air bag precautions that
apply to adult passengers in your vehicle.
If the shoulder belt portion of a combination lap and shoulder belt can
be positioned so it does not cross or rest in front of the child’s face or
neck, the child should wear the lap and shoulder belt. Moving the child
closer to the center of the vehicle may help provide a good shoulder belt
fit.
Do not leave children, unreliable adults, or pets unattended in
your vehicle.
2004 F250/350/450/550(f23)
Owners Guide (post-2002-fmt)
USA English(fus)
Seating and Safety Restraints
113
Page 124 of 304
STARTING
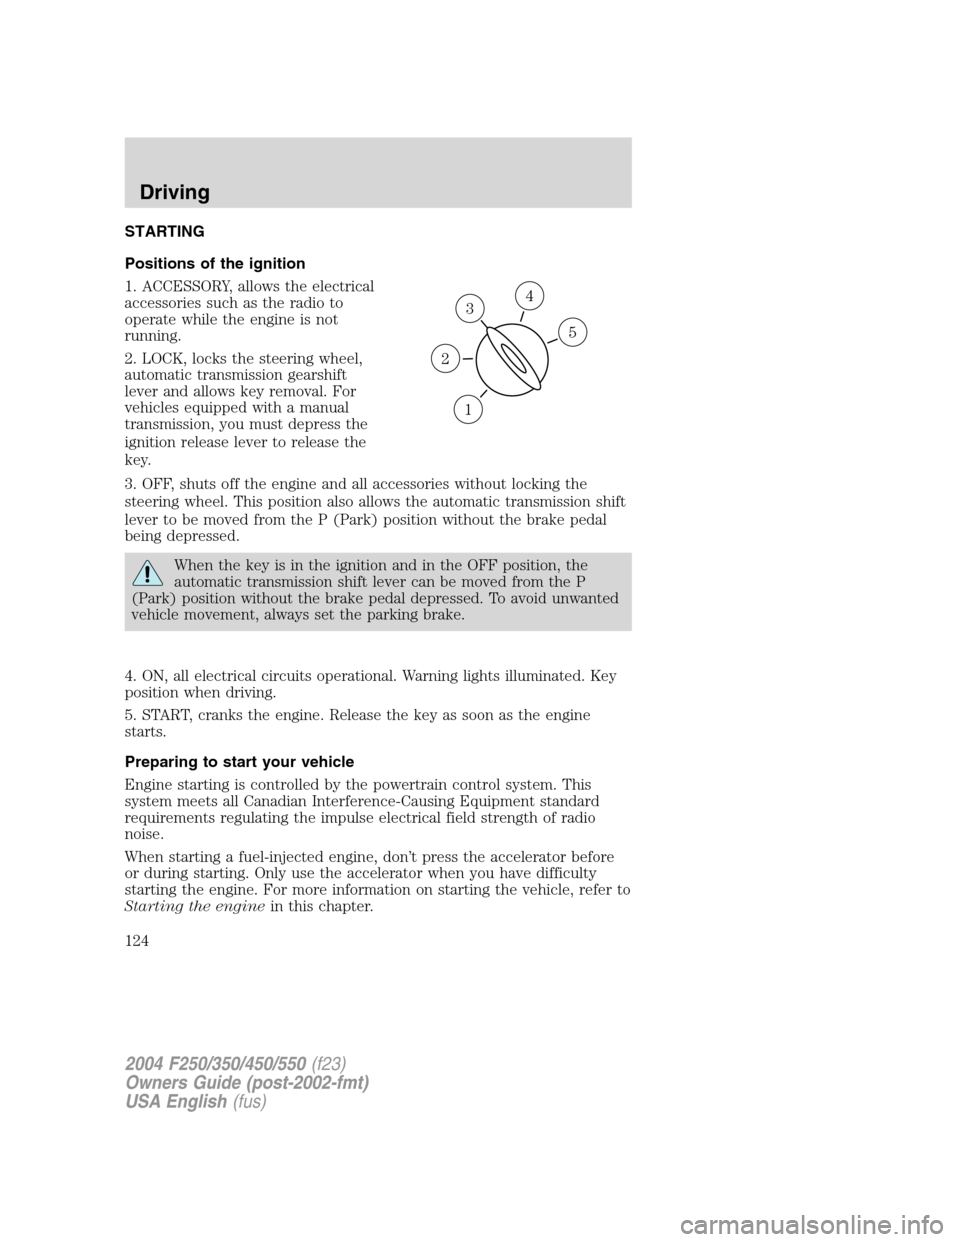
Positions of the ignition
1. ACCESSORY, allows the electrical
accessories such as the radio to
operate while the engine is not
running.
2. LOCK, locks the steering wheel,
automatic transmission gearshift
lever and allows key removal. For
vehicles equipped with a manual
transmission, you must depress the
ignition release lever to release the
key.
3. OFF, shuts off the engine and all accessories without locking the
steering wheel. This position also allows the automatic transmission shift
lever to be moved from the P (Park) position without the brake pedal
being depressed.
When the key is in the ignition and in the OFF position, the
automatic transmission shift lever can be moved from the P
(Park) position without the brake pedal depressed. To avoid unwanted
vehicle movement, always set the parking brake.
4. ON, all electrical circuits operational. Warning lights illuminated. Key
position when driving.
5. START, cranks the engine. Release the key as soon as the engine
starts.
Preparing to start your vehicle
Engine starting is controlled by the powertrain control system. This
system meets all Canadian Interference-Causing Equipment standard
requirements regulating the impulse electrical field strength of radio
noise.
When starting a fuel-injected engine, don’t press the accelerator before
or during starting. Only use the accelerator when you have difficulty
starting the engine. For more information on starting the vehicle, refer to
Starting the enginein this chapter.
3
1
2
5
4
2004 F250/350/450/550(f23)
Owners Guide (post-2002-fmt)
USA English(fus)
Driving
Driving
124
Page 129 of 304

Four-wheel anti-lock brake system (ABS)
Your vehicle is equipped with an Anti-lock Braking System (ABS). This
system helps you maintain steering control during emergency stops by
keeping the brakes from locking. Noise from the ABS pump motor and
brake pedal pulsation may be observed during ABS braking; this is
normal and should be no reason for concern.
ABS warning lamp
ABS
TheABSlamp in the instrument cluster momentarily illuminates when
the ignition is turned to ON. If the light does not illuminate during start
up, remains on or flashes, the ABS may be disabled and may need to be
serviced.
Even when the ABS is disabled,
normal braking is still effective. (If
your BRAKE warning lamp
illuminates with the parking brake
released, have your brake system serviced immediately.)
Using ABS
When hard braking is required, apply continuous force on the brake
pedal; do not pump the brake pedal since this will reduce the
effectiveness of the ABS and will increase your vehicle’s stopping
distance. The ABS will be activated immediately, allowing you to retain
full steering control during hard braking and on slippery surfaces.
However, the ABS does not decrease stopping distance.
Parking brake
To set the parking brake, press the
parking brake pedal down until the
pedal stops.
2004 F250/350/450/550(f23)
Owners Guide (post-2002-fmt)
USA English(fus)
Driving
129
Page 130 of 304
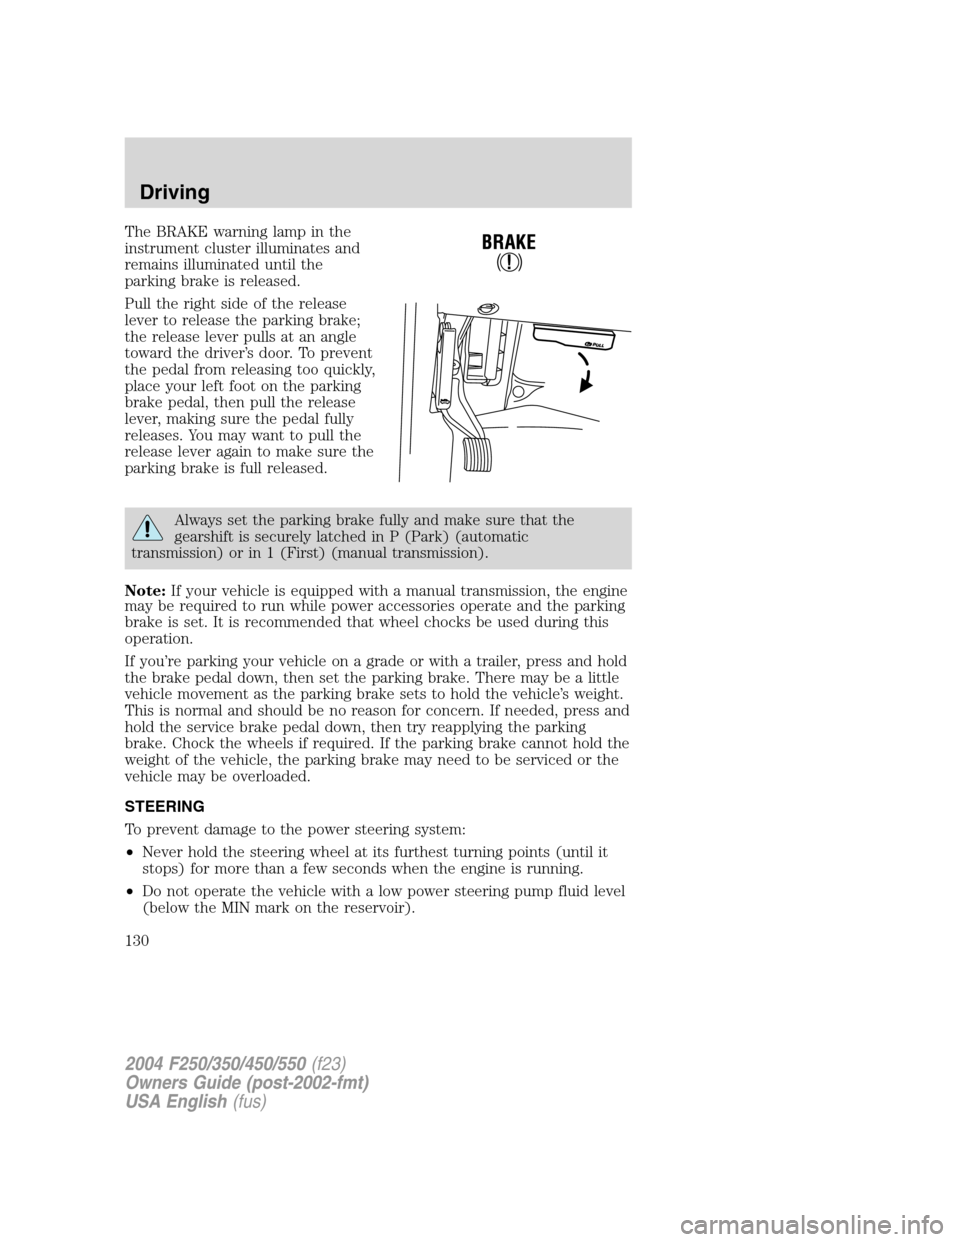
The BRAKE warning lamp in the
instrument cluster illuminates and
remains illuminated until the
parking brake is released.
Pull the right side of the release
lever to release the parking brake;
the release lever pulls at an angle
toward the driver’s door. To prevent
the pedal from releasing too quickly,
place your left foot on the parking
brake pedal, then pull the release
lever, making sure the pedal fully
releases. You may want to pull the
release lever again to make sure the
parking brake is full released.
Always set the parking brake fully and make sure that the
gearshift is securely latched in P (Park) (automatic
transmission) or in 1 (First) (manual transmission).
Note:If your vehicle is equipped with a manual transmission, the engine
may be required to run while power accessories operate and the parking
brake is set. It is recommended that wheel chocks be used during this
operation.
If you’re parking your vehicle on a grade or with a trailer, press and hold
the brake pedal down, then set the parking brake. There may be a little
vehicle movement as the parking brake sets to hold the vehicle’s weight.
This is normal and should be no reason for concern. If needed, press and
hold the service brake pedal down, then try reapplying the parking
brake. Chock the wheels if required. If the parking brake cannot hold the
weight of the vehicle, the parking brake may need to be serviced or the
vehicle may be overloaded.
STEERING
To prevent damage to the power steering system:
•Never hold the steering wheel at its furthest turning points (until it
stops) for more than a few seconds when the engine is running.
•Do not operate the vehicle with a low power steering pump fluid level
(below the MIN mark on the reservoir).
2004 F250/350/450/550(f23)
Owners Guide (post-2002-fmt)
USA English(fus)
Driving
130
Page 133 of 304

If the parking brake is fully released, but the brake warning lamp
remains illuminated, the brakes may not be working properly.
See your dealer or a qualified service technician.
Understanding the gearshift positions of the 4–speed automatic
transmission (if equipped-gasoline engines only)
P (Park)
This position locks the transmission and prevents the rear wheels from
turning.
To put your vehicle in gear:
•Start the engine
•Depress the brake pedal
•Move the gearshift lever into the desired gear
To put your vehicle in P (Park):
•Come to a complete stop
•Move the gearshift lever and securely latch it in P (Park)
Always set the parking brake fully and make sure the gearshift is
latched in P (Park). Turn the ignition to the LOCK position and
remove the key whenever you leave your vehicle.
R (Reverse)
With the gearshift lever in R (Reverse), the vehicle will move backward.
Always come to a complete stop before shifting into and out of R
(Reverse).
N (Neutral)
With the gearshift lever in N (Neutral), the vehicle can be started and is
free to roll. Hold the brake pedal down while in this position.
2004 F250/350/450/550(f23)
Owners Guide (post-2002-fmt)
USA English(fus)
Driving
133