2004 FORD SUPER DUTY lock
[x] Cancel search: lockPage 13 of 64
tank should not be allowed to drop below 1/4 full. This will help prevent
air from entering the fuel system and stalling the engine.
In cold weather below 0°C (32°F) your Diesel engine will slowly increase
to a higher idle speed if left idling in P (Park). As the engine warms-up,
the engine sound level will decrease due to the activation of
PCM-controlled sound reduction features.
Operation in snow
Vehicle operation in heavy snowfall or in dry loose snow that may swirl
around the front of the vehicle may feed excessive amounts of snow into
the air intake system. This could plug the air cleaner with snow and
cause the engine to stall and/or lose power.
Refer toAir filter restriction gaugeandEngine air filterin the
Instrumentationchapter for more information.
Operation in standing water
Ingestion of water into the Diesel engine can result in immediate and
severe damage to the engine. If driving through water, slow down to
avoid splashing water into the intake. If the engine stalls, and ingestion
of water into the engine is suspected, do not try to restart the engine.
Consult your dealer for service immediately.
Engine block heater (if equipped)
Refer to theDrivingchapter in your Owner Guide.
DUAL FUEL TANK SELECTOR CONTROL (IF EQUIPPED)
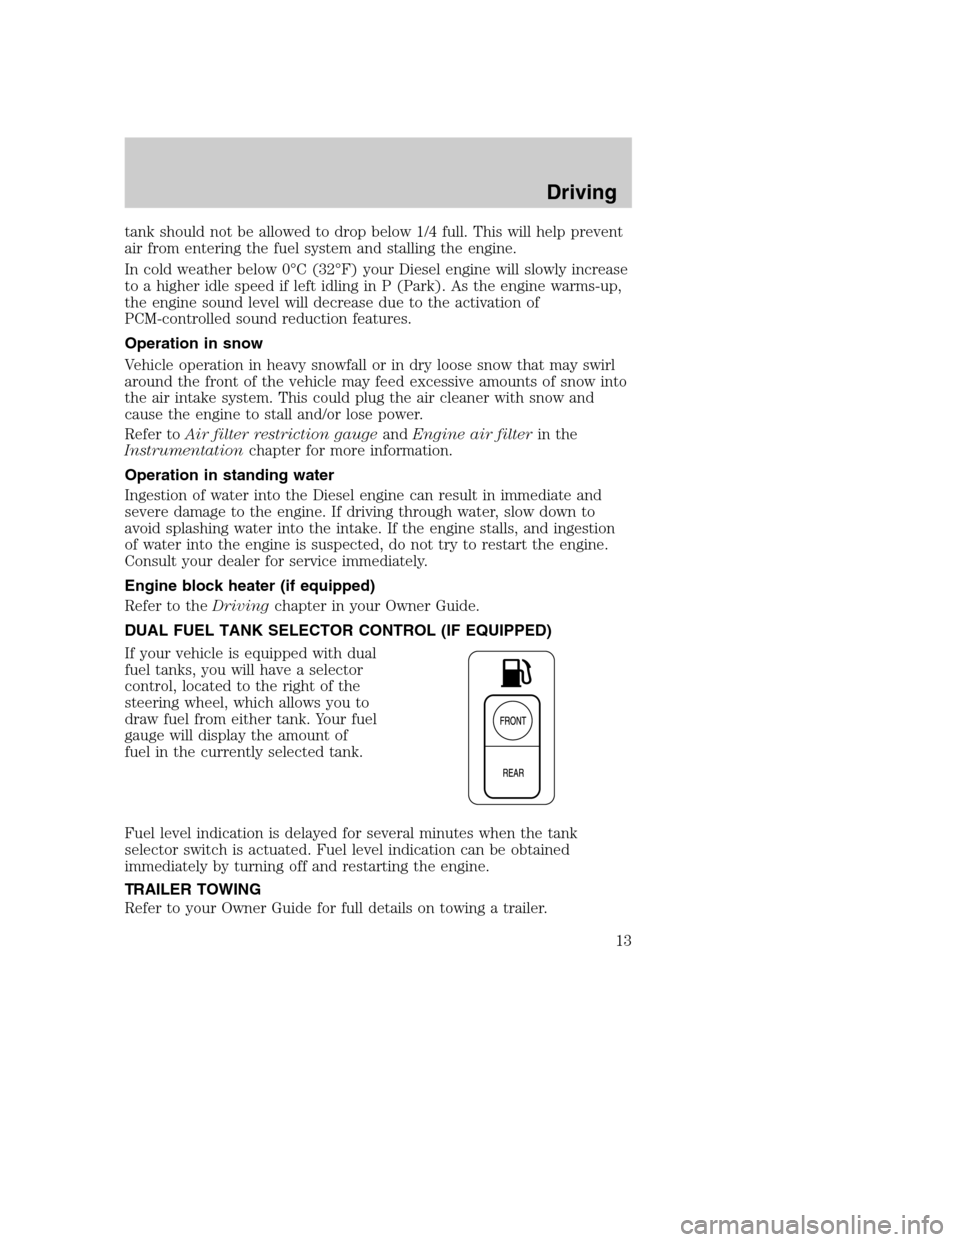
If your vehicle is equipped with dual
fuel tanks, you will have a selector
control, located to the right of the
steering wheel, which allows you to
draw fuel from either tank. Your fuel
gauge will display the amount of
fuel in the currently selected tank.
Fuel level indication is delayed for several minutes when the tank
selector switch is actuated. Fuel level indication can be obtained
immediately by turning off and restarting the engine.
TRAILER TOWING
Refer to your Owner Guide for full details on towing a trailer.
Driving
13
Page 22 of 64
ENGINE
Engines are more efficient when they are clean because grease and dirt
buildup keep the engine warmer than normal. When washing:
•Take care when using a power washer to clean the engine. The
high-pressure fluid could penetrate the sealed parts and cause
damage.
•Do not spray a hot engine with cold water to avoid cracking the
engine block or other engine components.
•Spray Motorcraft Engine Shampoo and Degreaser (ZC-20) on all parts
that require cleaning and pressure rinse clean.
•Never wash or rinse the engine while it is running; water in the
running engine may cause internal damage.
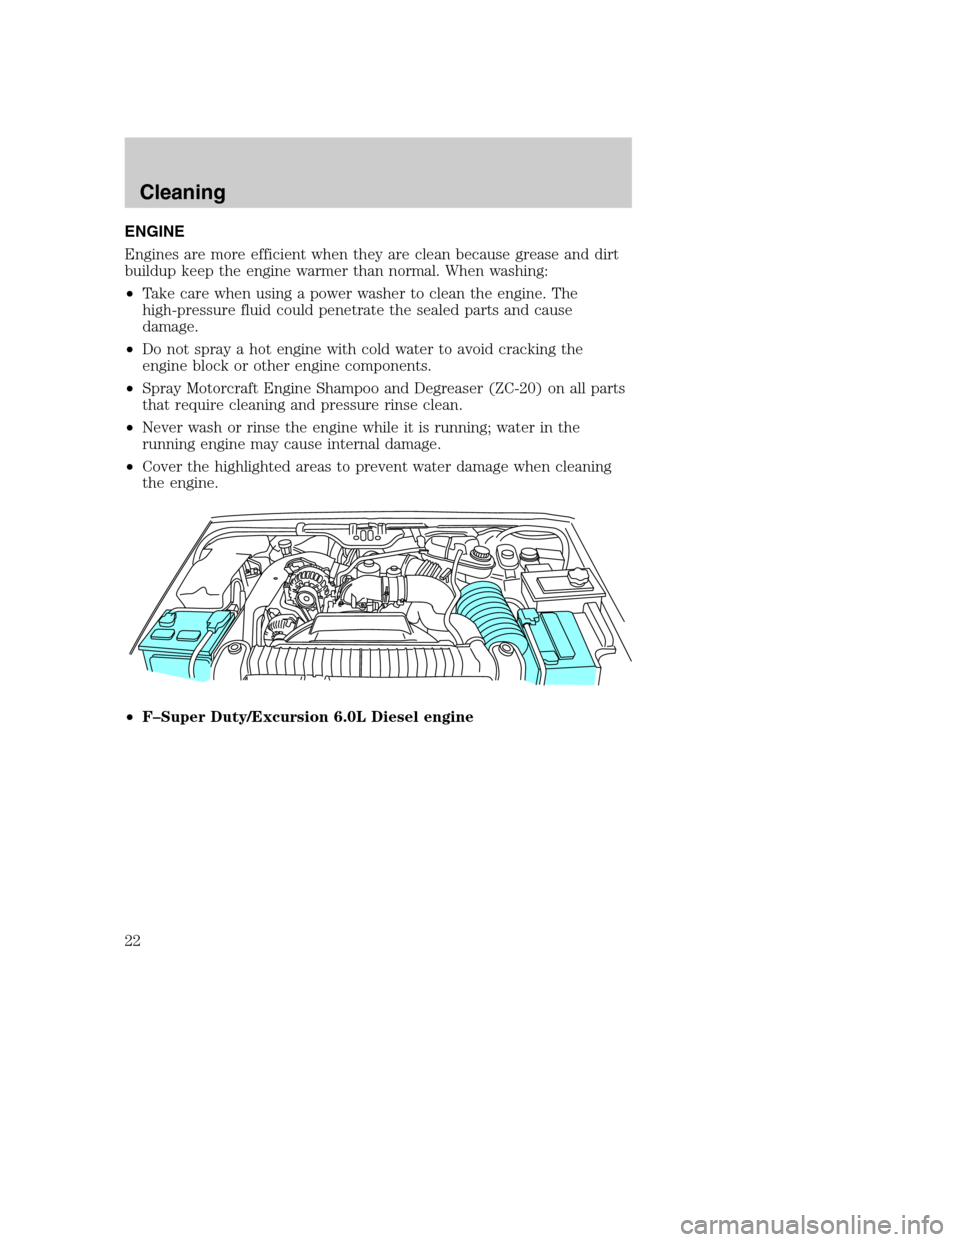
•Cover the highlighted areas to prevent water damage when cleaning
the engine.
•F–Super Duty/Excursion 6.0L Diesel engine
Cleaning
Cleaning
22
Page 26 of 64
Water should be drained from the
module assembly whenever the
warning light comes on. The WATER
IN FUEL light will come on when
approximately 100 cc (0.2 pints) of water accumulates in the module.
Replace the fuel filters with Ford Part No. 3C3Z-9N184–CA. This part
number includes filters and seals for both the engine-mounted and
frame-mounted filters.
DRAINING THE HFCM AND CHANGING THE FUEL FILTERS
Your vehicle is equipped with two fuel filters; one mounted on top of the
engine and the other, the HFCM, mounted inside the frame rail under
the driver-side floorboard near the transmission. Both filters should be
replaced at the same time. The Motorcraft part number for the
replacement filters is FD-4604.
HFCM drain procedure
1. Stop the vehicle andshut offthe engine.
The vehicle must be stopped with the engine off when draining
the HFCM. Fuel may ignite if separator is drained while the
engine is running or vehicle is moving.
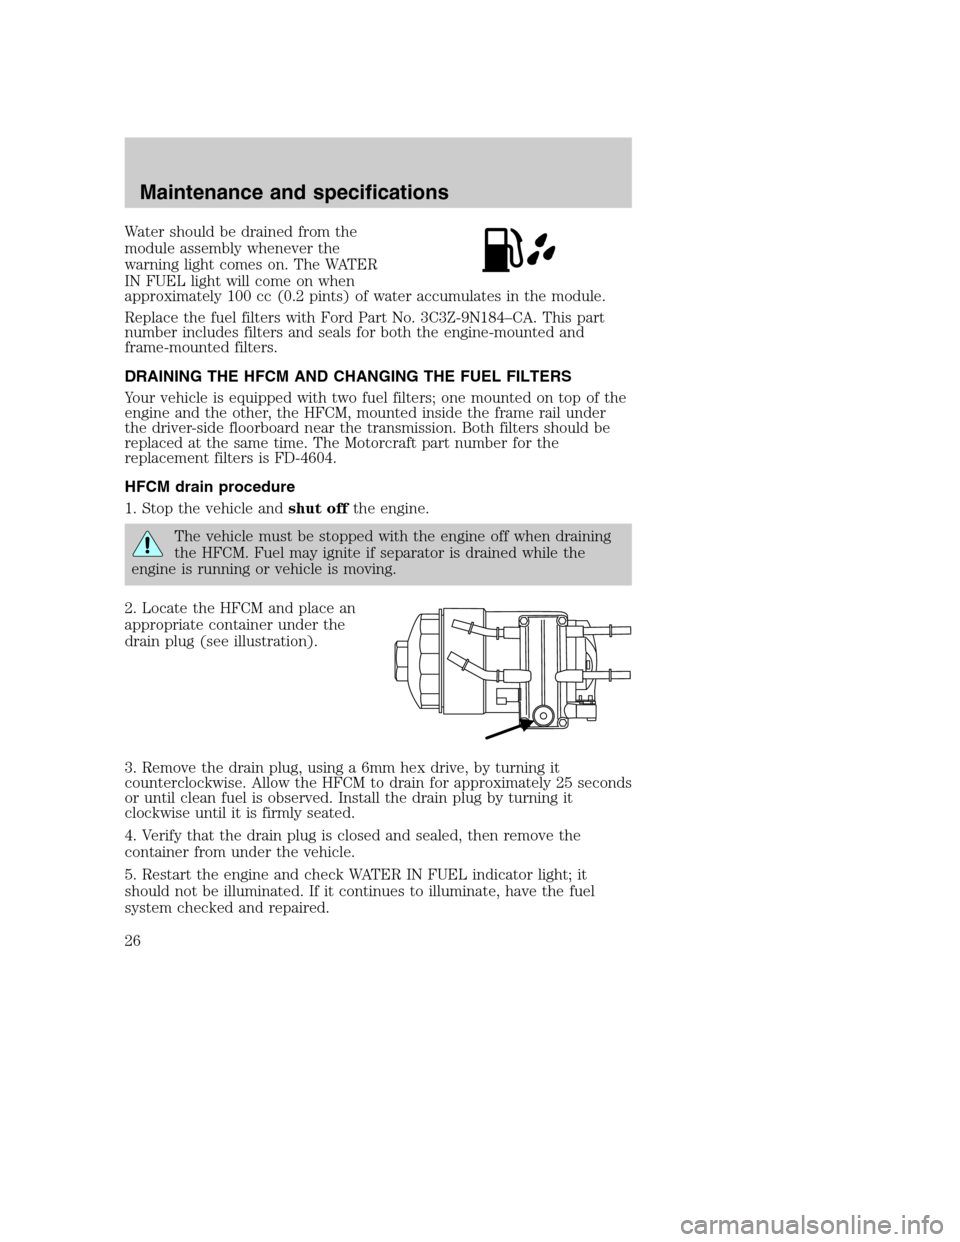
2. Locate the HFCM and place an
appropriate container under the
drain plug (see illustration).
3. Remove the drain plug, using a 6mm hex drive, by turning it
counterclockwise. Allow the HFCM to drain for approximately 25 seconds
or until clean fuel is observed. Install the drain plug by turning it
clockwise until it is firmly seated.
4. Verify that the drain plug is closed and sealed, then remove the
container from under the vehicle.
5. Restart the engine and check WATER IN FUEL indicator light; it
should not be illuminated. If it continues to illuminate, have the fuel
system checked and repaired.
Maintenance and specifications
26
Page 27 of 64
Removal - HFCM filter
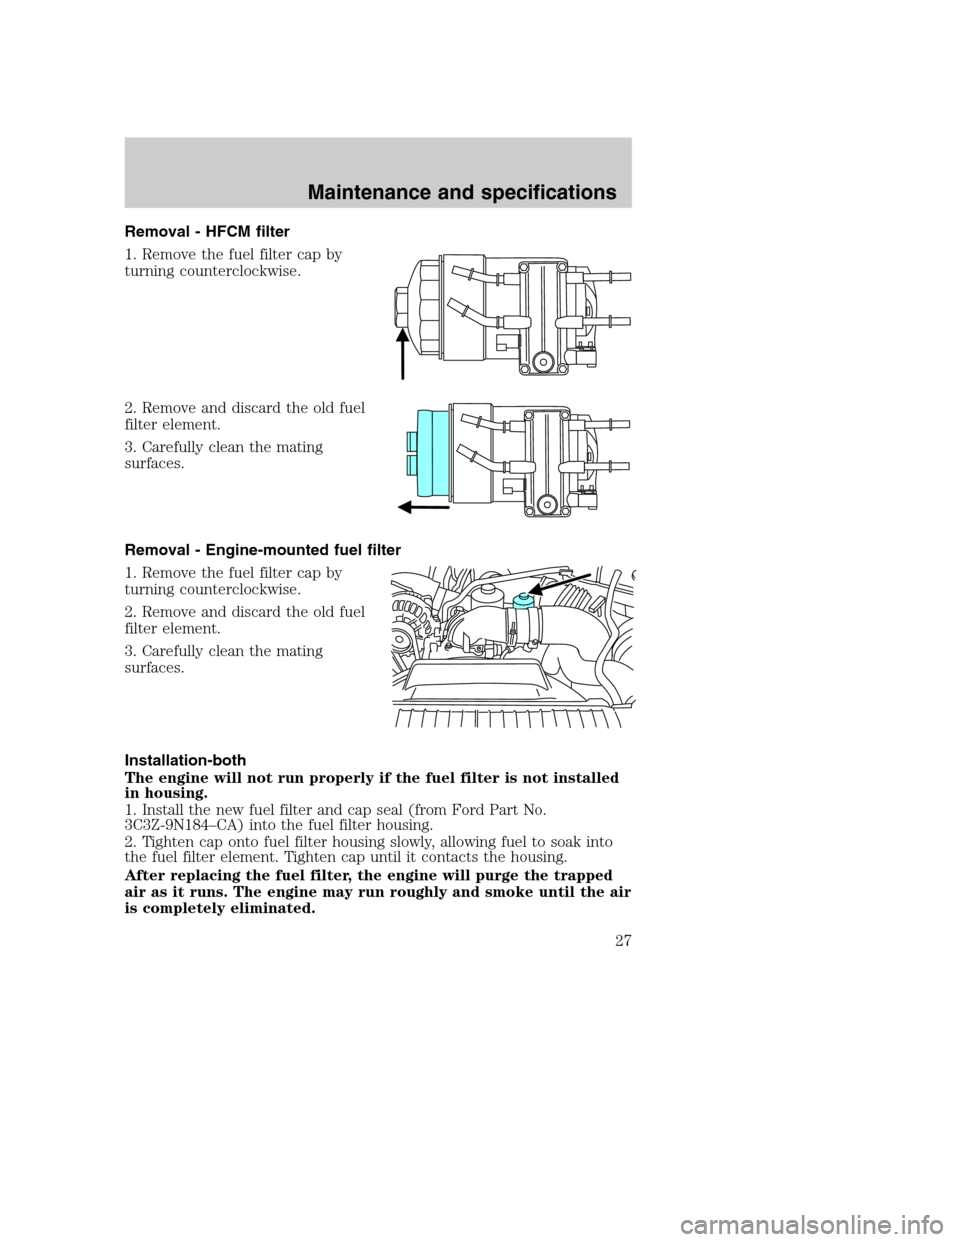
1. Remove the fuel filter cap by
turning counterclockwise.
2. Remove and discard the old fuel
filter element.
3. Carefully clean the mating
surfaces.
Removal - Engine-mounted fuel filter
1. Remove the fuel filter cap by
turning counterclockwise.
2. Remove and discard the old fuel
filter element.
3. Carefully clean the mating
surfaces.
Installation-both
The engine will not run properly if the fuel filter is not installed
in housing.
1. Install the new fuel filter and cap seal (from Ford Part No.
3C3Z-9N184–CA) into the fuel filter housing.
2. Tighten cap onto fuel filter housing slowly, allowing fuel to soak into
the fuel filter element. Tighten cap until it contacts the housing.
After replacing the fuel filter, the engine will purge the trapped
air as it runs. The engine may run roughly and smoke until the air
is completely eliminated.
Maintenance and specifications
27
Page 34 of 64
To reduce the risk of personal injury, make sure the engine is
cool before unscrewing the coolant pressure relief cap. The
cooling system is under pressure; steam and hot liquid can come out
forcefully when the cap is loosened slightly.
1. Before you begin, turn the engine off and let it cool.
2. When the engine is cool, wrap a thick cloth around the coolant
pressure relief cap on the coolant reservoir (a translucent plastic bottle).
Slowly turn cap counterclockwise (left) until pressure begins to release.
3. Step back while the pressure releases.
4. When you are sure that all the pressure has been released, use the
cloth to turn it counterclockwise and remove the cap.
5. Fill the coolant reservoir slowly with the proper coolant mixture (see
above), to within the“cold fill range”or the“cold full”level on the
reservoir. If you removed the radiator cap in an overflow system, fill the
radiator until the coolant is visible and radiator is almost full.
6. Replace the cap. Turn until tightly installed. (Cap must be tightly
installed to prevent coolant loss.)
After any coolant has been added, check the coolant concentration, refer
toChecking Engine Coolantsection. If the concentration is not 50/50
(protection to–34°F/–36°C), drain some coolant and adjust the
concentration. It may take several drains and additions to obtain a 50/50
coolant concentration.
Whenever coolant has been added, the coolant level in the coolant
reservoir should be checked the next few times you drive the vehicle. If
necessary, add enough 50/50 concentration of engine coolant and
distilled water to bring the liquid level to the proper level.
If you have to add more than 1.0 liter (1.0 quart) of engine coolant per
month, have your dealer check the engine cooling system. Your cooling
system may have a leak. Operating an engine with a low level of coolant
can result in engine overheating and possible engine damage.
Recycled engine coolant
Ford Motor Company does NOT recommend the use of recycled engine
coolant in vehicles originally equipped with Motorcraft Premium Gold
Engine Coolant since a Ford-approved recycling process is not yet
available.
Used engine coolant should be disposed of in an appropriate
manner. Follow your community’s regulations and standards for recycling
and disposing of automotive fluids.
Maintenance and specifications
34
Page 39 of 64
•Overloading or pulling heavy trailers during hot weather.
•Grill or radiator air blockage.
•Slipping or missing drive belt.
•Plugged or very dirty air cleaner element.
If fuses burn out
Burned-out or blown fuses usually indicate an electrical short-circuit,
although a fuse may occasionally burn out from vibration. Insert a second
fuse. If this fuse immediately burns out and you cannot locate the cause,
return your vehicle to your dealer for a circuit check.
Replacement fuses and circuit breakers must always be the same
rating as the original equipment shown. Never replace a fuse or
circuit breaker with one of a higher rating. Higher rated fuses or circuit
breakers could allow circuit overloading in the event of a circuit
malfunction, resulting in severe vehicle damage or personal injury due
to fire.
Refer to the“Owner Guide”for replacement of fuses.
MOTORCRAFT PART NUMBERS
Item Ford Part Number
Engine Oil Filter (Use this filter
Only)3C3Z-6731–AA (FL–2016)
Air Filter
1FA-1746
Battery (2 Required) BXT-65-750
1Always use the authorized Motorcraft air filter listed.Failure to use
the correct air filter may result in severe engine damage.
REFILL CAPACITIES
Component Capacity
Cooling system126.0L (27.5 quarts)
Engine oil214.2L (15.0 quarts)
Fuel tank (F-250/350/450/550) Refer to Owner Guide
Fuel tank (Excursion) 166.6L (44.0 gallons)
Radiator cap 110 kPa (16 psi)
Maintenance and specifications
39
Page 46 of 64
•Check parking brake for proper operation
•Check and lubricate all hinges, latches and outside locks
•Check and lubricate door rubber weatherstrips
•Check and clean body and door drain holes
•Check safety warning lamps (brake, ABS, air bag, safety belt) for
operation
•Check cooling system fluid level and coolant strength
•Check battery connections and clean if necessary
•Check clutch fluid level, if equipped
NORMAL SCHEDULE
The following section contains the“Normal Schedule.”This schedule is
presented at specific mileage intervals with exceptions noted.
Additional information available on the Web
To learn more about the importance of routine and dealer-performed
maintenance on your vehicle, please visit the Ford Customer Service
website. You’ll also find important warranty information, customer
assistance, technical expertise, frequently asked questions and much
more. The website location is at: www.ford.com/
Then go to the service pick at the web site.
12,000 km (7,500 miles)
•Change engine oil and replace oil filter
•Inspect tires for wear and measure tread depth
•Rotate tires
•Inspect engine air filter minder, replace filter as required
24,000 km (15,000 miles)
•Change engine oil and replace oil filter
•Inspect tires for wear and measure tread depth
•Rotate tires
•Inspect engine air filter minder, replace filter as required
•Replace engine- and frame-mounted fuel filters
•Inspect steering linkage, suspension and, if equipped, driveshaft and
ball joints
General Owner’s Information
46