Page 1 of 312
Introduction 4
Instrument Cluster 12
Warning and control lights 12
Gauges 16
Entertainment Systems 20
AM/FM stereo 20
AM/FM stereo cassette 22
AM/FM stereo with CD 25
AM/FM stereo cassette with CD 28
AM/FM stereo with in-dash six CD 32
Climate Controls 38
Heater only 38
Manual heating and air conditioning 39
Lights 41
Headlamps 41
Turn signal control 44
Bulb replacement 45
Driver Controls 52
Windshield wiper/washer control 52
Steering wheel adjustment 53
Moon roof 55
Power windows 57
Mirrors 59
Speed control 61
Message center 70
Table of Contents
1
2004 F250/350/450/550(f23)
Owners Guide (post-2002-fmt)
USA English(fus)
Table of Contents
ProCarManuals.com
Page 46 of 312
Function Number of
bulbsTrade number
Headlamps
(aerodynamic)2 9007
Headlamps (sealed
beam)2 H6054
Park/turn 2 3157 AK
Sidemarker 2 194
Tail/stop/turn/sidemarker 2 3157 K
Backup 2 3156K
High-mount stoplamp 1 922
Foglamp 2 9145
License plate lamp 2 194
Cargo lamp 2 906
Roofmarker 5 194
Rear fender clearance* 4
(a)
Interior visor lamp (if
equipped)4 194
Rear identification 3 194
All replacement bulbs are clear in color except where noted.
To replace all instrument panel lights - see your dealer
* Dual rear wheels or if equipped.
(a)Replace entire lamp assembly; bulb is not serviceable.
Replacing headlamp bulbs (aerodynamic)
1. Make sure that the headlamp control is in the OFF position and open
the hood.
2. Disconnect the electrical connector from the bulb by pulling rearward.
2004 F250/350/450/550(f23)
Owners Guide (post-2002-fmt)
USA English(fus)
Lights
46
ProCarManuals.com
Page 50 of 312
Replacing cargo lamp and high-mount brakelamp bulbs
1. Make sure the headlamp switch is
in the OFF position.
2. Remove the two screws and lamp
assembly from vehicle as wiring
permits.
3. Remove the bulb socket by
rotating counterclockwise.
4. Pull the bulb straight out of the
socket.
Replacing roof marker bulbs
1. Make sure the headlamp switch is
in the OFF position.
2. Remove the screw and lens from
the lamp assembly.
3. Pull the bulb straight out of the
socket.
Install the bulb(s) in reverse order.
Replacing foglamp bulbs (if equipped)
1. Make sure the headlamp switch is
in the OFF position.
2. Remove the bulb socket from the
foglamp by turning
counterclockwise.
3. Disconnect the electrical connector from the foglamp bulb.
Install the new bulb(s) in reverse order.
2004 F250/350/450/550(f23)
Owners Guide (post-2002-fmt)
USA English(fus)
Lights
50
ProCarManuals.com
Page 55 of 312

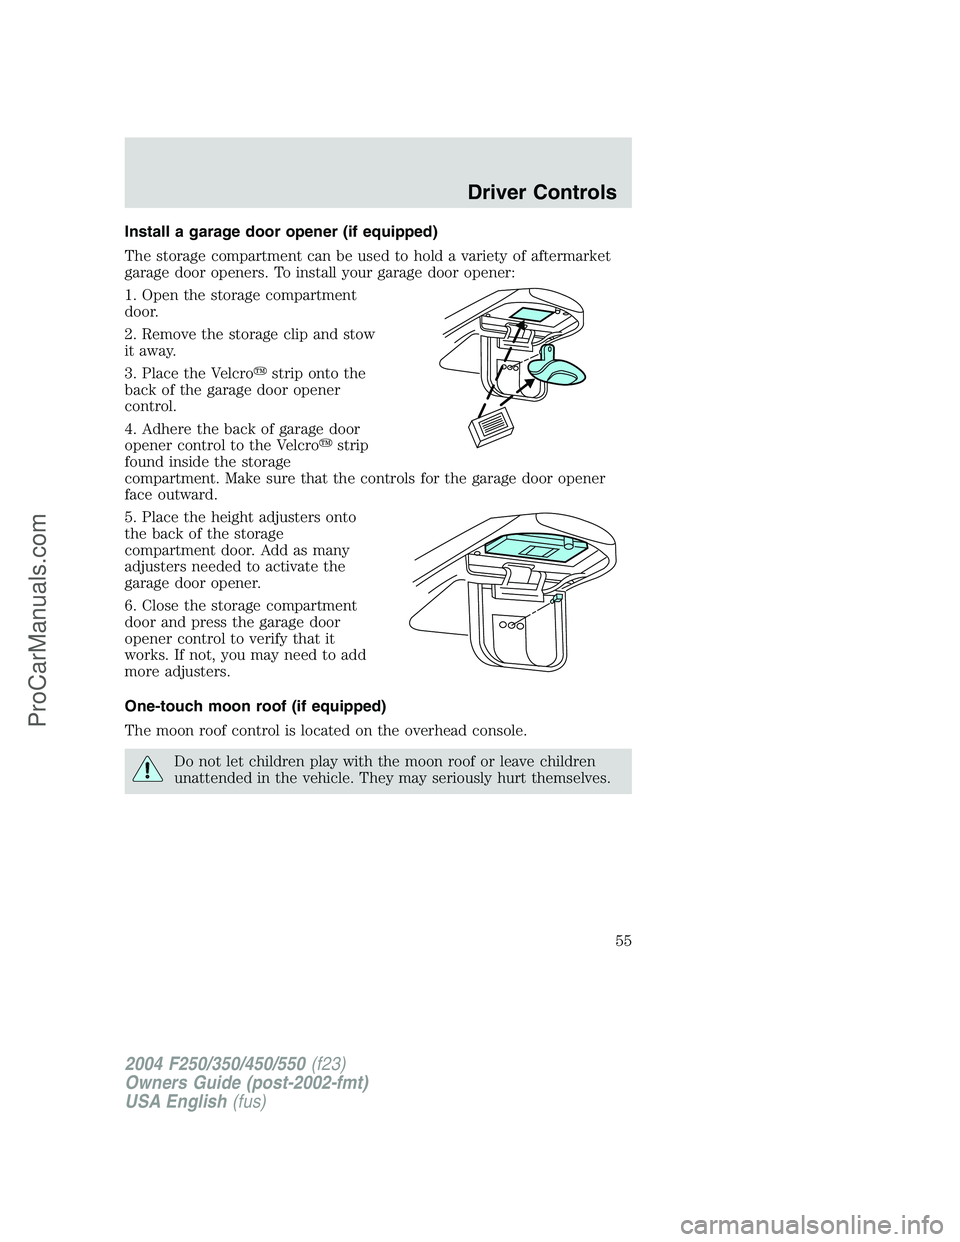
Install a garage door opener (if equipped)
The storage compartment can be used to hold a variety of aftermarket
garage door openers. To install your garage door opener:
1. Open the storage compartment
door.
2. Remove the storage clip and stow
it away.
3. Place the Velcro�strip onto the
back of the garage door opener
control.
4. Adhere the back of garage door
opener control to the Velcro�strip
found inside the storage
compartment. Make sure that the controls for the garage door opener
face outward.
5. Place the height adjusters onto
the back of the storage
compartment door. Add as many
adjusters needed to activate the
garage door opener.
6. Close the storage compartment
door and press the garage door
opener control to verify that it
works. If not, you may need to add
more adjusters.
One-touch moon roof (if equipped)
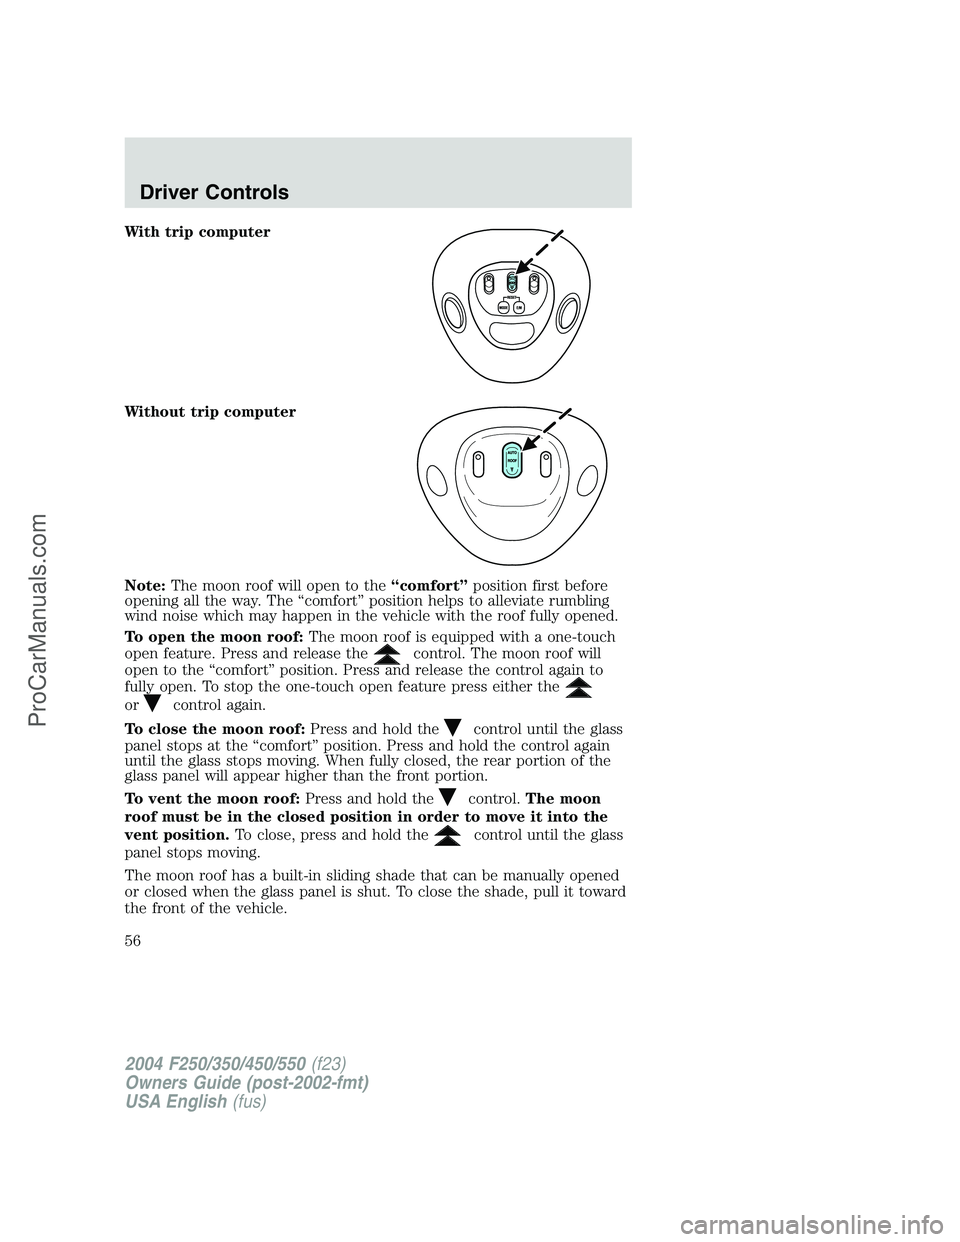
The moon roof control is located on the overhead console.
Do not let children play with the moon roof or leave children
unattended in the vehicle. They may seriously hurt themselves.
2004 F250/350/450/550(f23)
Owners Guide (post-2002-fmt)
USA English(fus)
Driver Controls
55
ProCarManuals.com
Page 56 of 312

With trip computer
Without trip computer
Note:The moon roof will open to the“comfort”position first before
opening all the way. The“comfort”position helps to alleviate rumbling
wind noise which may happen in the vehicle with the roof fully opened.
To open the moon roof:The moon roof is equipped with a one-touch
open feature. Press and release the
control. The moon roof will
open to the“comfort”position. Press and release the control again to
fully open. To stop the one-touch open feature press either the
orcontrol again.
To close the moon roof:Press and hold the
control until the glass
panel stops at the“comfort”position. Press and hold the control again
until the glass stops moving. When fully closed, the rear portion of the
glass panel will appear higher than the front portion.
To vent the moon roof:Press and hold the
control.The moon
roof must be in the closed position in order to move it into the
vent position.To close, press and hold the
control until the glass
panel stops moving.
The moon roof has a built-in sliding shade that can be manually opened
or closed when the glass panel is shut. To close the shade, pull it toward
the front of the vehicle.
2004 F250/350/450/550(f23)
Owners Guide (post-2002-fmt)
USA English(fus)
Driver Controls
56
ProCarManuals.com
Page 57 of 312

When closing the moon roof, you should verify that it is free of
obstructions and ensure that children and/or pets are not in the
proximity of the moon roof opening.
AUXILIARY POWER POINT
Power outlets are designed for
accessory plugs only. Do not
hang any type of accessory or
accessory bracket from the plug.
Improper use of the power
outlet can cause damage not
covered by your warranty.
The auxiliary power point is located
on the instrument panel.
Do not plug optional electrical accessories into the cigarette lighter. Use
the power point.
Do not use the power point for operating the cigarette lighter element.
The Maximum power each power point can supply depends on the fuse
rating. For example: a 20A fuse should supply a maximum of 240 Watts,
a 15A fuse should supply a maximum of 180 Watts and a 10A fuse should
supply a maximum of 120 Watts. Exceeding these limits will result in a
blown fuse.
Always keep the power point caps closed when not being used.
POWER WINDOWS (IF EQUIPPED)
Do not leave children unattended in the vehicle and do not let
children play with the power windows. They may seriously injure
themselves.
When closing the power windows, you should verify they are free
of obstructions and ensure that children and/or pets are not in
the proximity of the window openings.
POWER POINT
2004 F250/350/450/550(f23)
Owners Guide (post-2002-fmt)
USA English(fus)
Driver Controls
57
ProCarManuals.com
Page 76 of 312

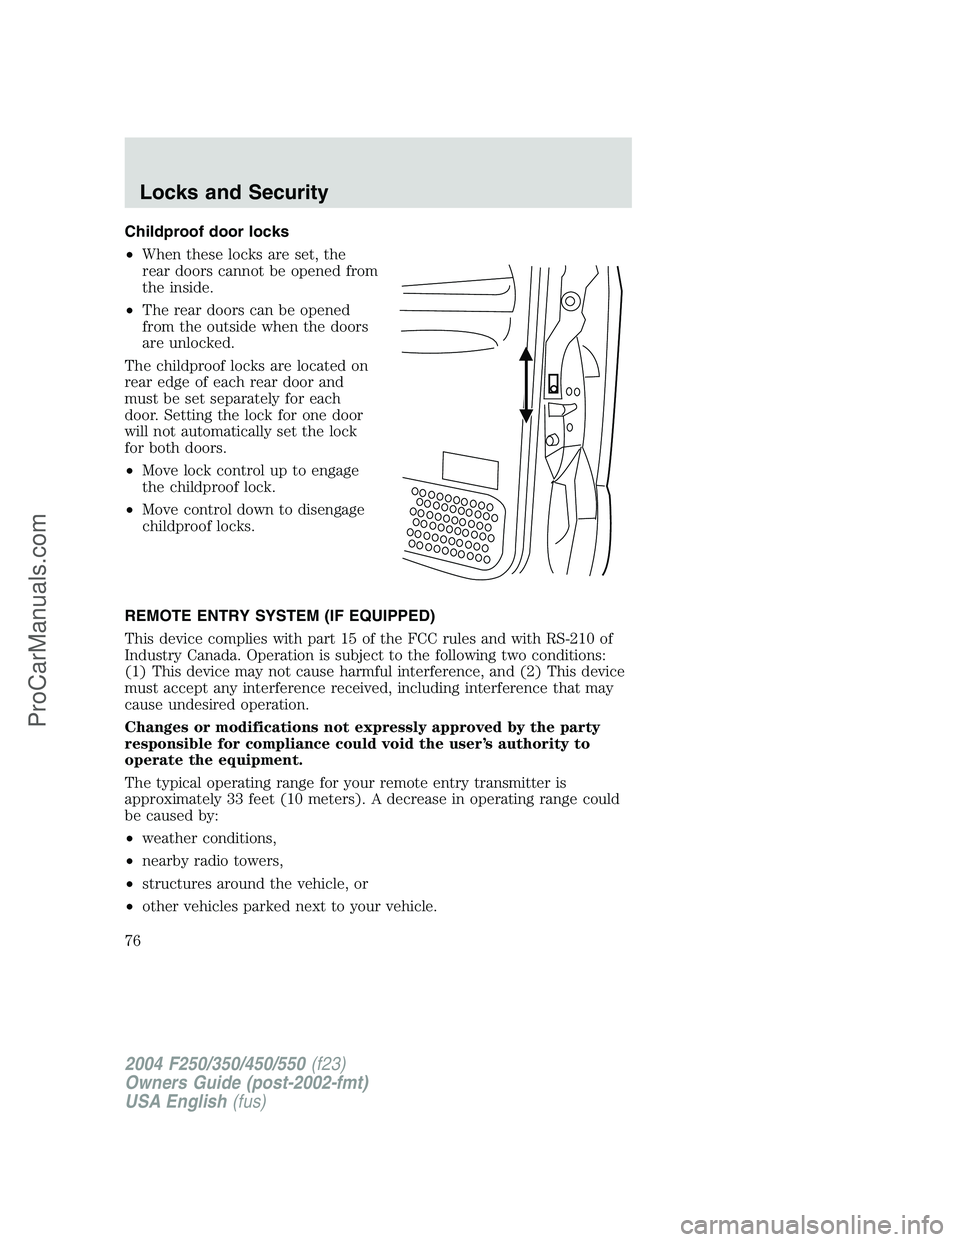
Childproof door locks
•When these locks are set, the
rear doors cannot be opened from
the inside.
•The rear doors can be opened
from the outside when the doors
are unlocked.
The childproof locks are located on
rear edge of each rear door and
must be set separately for each
door. Setting the lock for one door
will not automatically set the lock
for both doors.
•Move lock control up to engage
the childproof lock.
•Move control down to disengage
childproof locks.
REMOTE ENTRY SYSTEM (IF EQUIPPED)
This device complies with part 15 of the FCC rules and with RS-210 of
Industry Canada. Operation is subject to the following two conditions:
(1) This device may not cause harmful interference, and (2) This device
must accept any interference received, including interference that may
cause undesired operation.
Changes or modifications not expressly approved by the party
responsible for compliance could void the user’s authority to
operate the equipment.
The typical operating range for your remote entry transmitter is
approximately 33 feet (10 meters). A decrease in operating range could
be caused by:
•weather conditions,
•nearby radio towers,
•structures around the vehicle, or
•other vehicles parked next to your vehicle.
2004 F250/350/450/550(f23)
Owners Guide (post-2002-fmt)
USA English(fus)
Locks and Security
76
ProCarManuals.com
Page 199 of 312
Fuse/Relay
LocationFuse Amp
RatingPassenger Compartment Fuse
Panel Description
108—Not used
109 30A** Heated seats
110 50A** Ignition switch
111 30A** 4WD/Shift on the fly
112 30A** Left-hand power seats
113 30A** Starter motor
114 30A** Right-hand power seats
115 20A** Trailer tow battery charge
116 30A** Ignition switch
601 30A CB*** Window motors, Moonroof
602 60A** 4WABS module
210—Not used
211—Backup lamps relay (Diesel engine
only)
212—Not used
301—Front blower motor relay
302—Powertrain Control Module (PCM)
relay
303—Fuel heater relay (Diesel engine
only)
304—Heated backlight relay
305—Trailer tow battery charge relay
306—Delayed accessory relay
307—Starter relay
* Mini Fuses ** Maxi Fuses ***Circuit Breaker
2004 F250/350/450/550(f23)
Owners Guide (post-2002-fmt)
USA English(fus)
Roadside Emergencies
199
ProCarManuals.com