2004 FORD F150 spare wheel
[x] Cancel search: spare wheelPage 196 of 280

The use of tire sealants may damage your tires.
Spare tire information
Your vehicle is equipped with a spare tire that may be used as a spare or
a regular tire. The spare tire wheel may not match the road wheel, and is
not equipped with wheel trim. The wheel trim from the wheel/tire may
be used on the spare if the wheels match.
If your vehicle is equipped with 4WD, a spare tire of a different
size than the road tires should not be used. Use of such a tire
could result in damage to driveline components and an increased risk
of loss of vehicle control, vehicle rollover, personal injury or death.
Location of the spare tire and tools
The spare tire and tools for your vehicle are stowed in the following
locations:
Tool Location
Spare tire Under the vehicle, just forward of
the rear bumper
Jack, jack handle and lug nut
wrenchRegular Cab: Behind the interior
trim on the passenger side of the
cab
SuperCrew and SuperCab: Under
the rear seat on the passenger side
Removing the spare tire
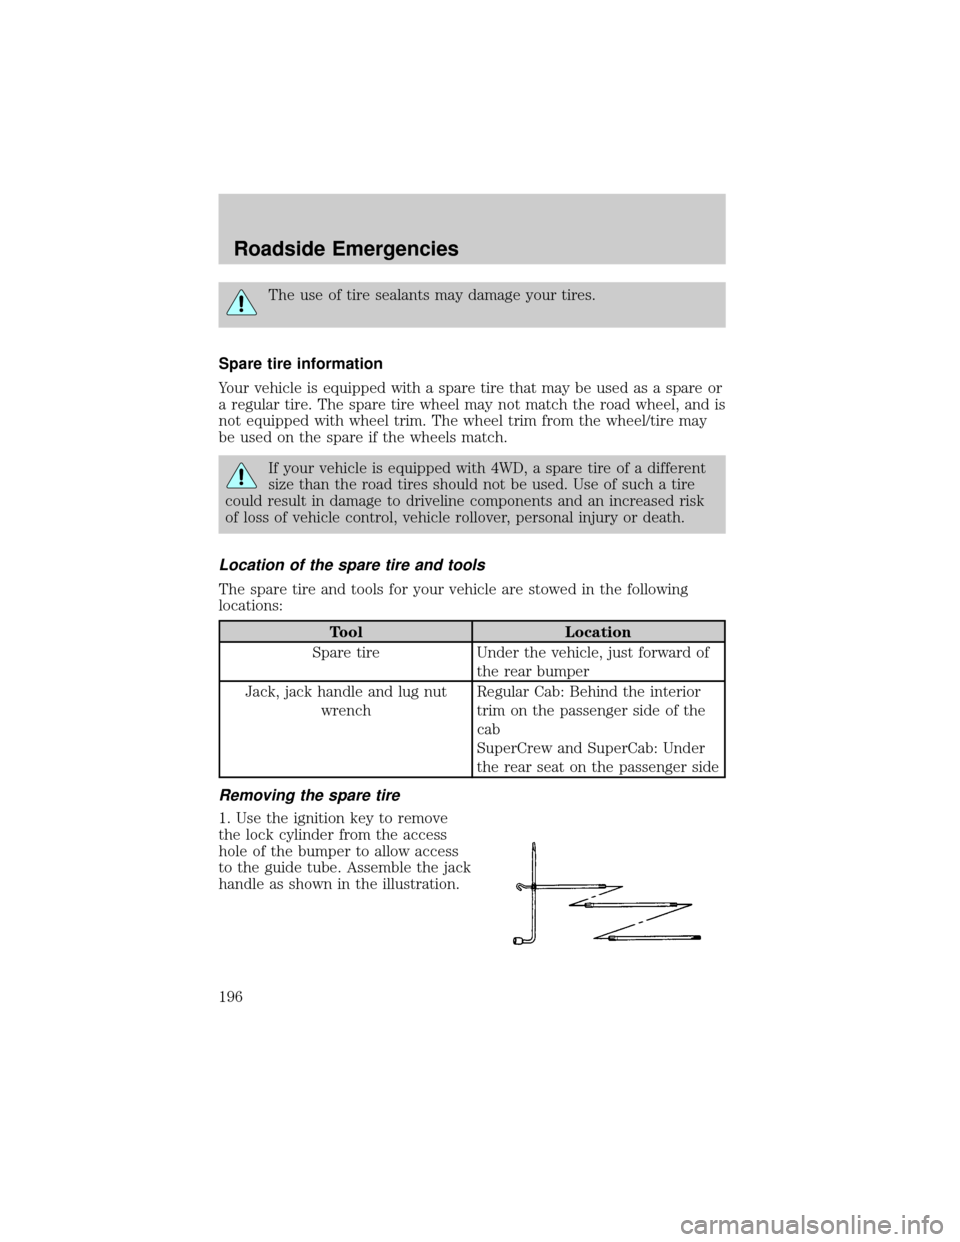
1. Use the ignition key to remove
the lock cylinder from the access
hole of the bumper to allow access
to the guide tube. Assemble the jack
handle as shown in the illustration.
Roadside Emergencies
196
Page 198 of 280

3. Block the diagonally opposite
wheel.
4. Obtain the spare tire and jack
from their storage locations.
5. Use the tip of the lug wrench to
remove any wheel trim.
6. Loosen each wheel lug nut
one-half turn counterclockwise but
do not remove them until the wheel
is raised off the ground.
7. Position the jack according to the following guides and turn the jack
handle clockwise until the wheel is completely off the ground.
When one of the rear wheels is off the ground, the transmission
alone will not prevent the vehicle from moving or slipping off the
jack, even if the transmission is in P (Park). To prevent the vehicle
from moving when you change the tire, be sure that the parking brake
is set and the diagonally opposite wheel is blocked. If the vehicle slips
off the jack, someone could be seriously injured.
²Front
Note:Use the frame rail as the jacking location point, NOT the control
arm.
Roadside Emergencies
198
Page 199 of 280

²Rear
To lessen the risk of
personal injury, do not put
any part of your body under the
vehicle while changing a tire. Do
not start the engine when your
vehicle is on the jack. The jack is
only meant for changing the tire.
²Never use the front or rear
differential as a jacking point.
8. Remove the lug nuts with the lug wrench.
9. Replace the flat tire with the spare tire, making sure the valve stem is
facing outward. Reinstall the lug nuts until the wheel is snug against the
hub. Do not fully tighten the lug nuts until the wheel has been lowered.
10. Lower the wheel by turning the jack handle counterclockwise.
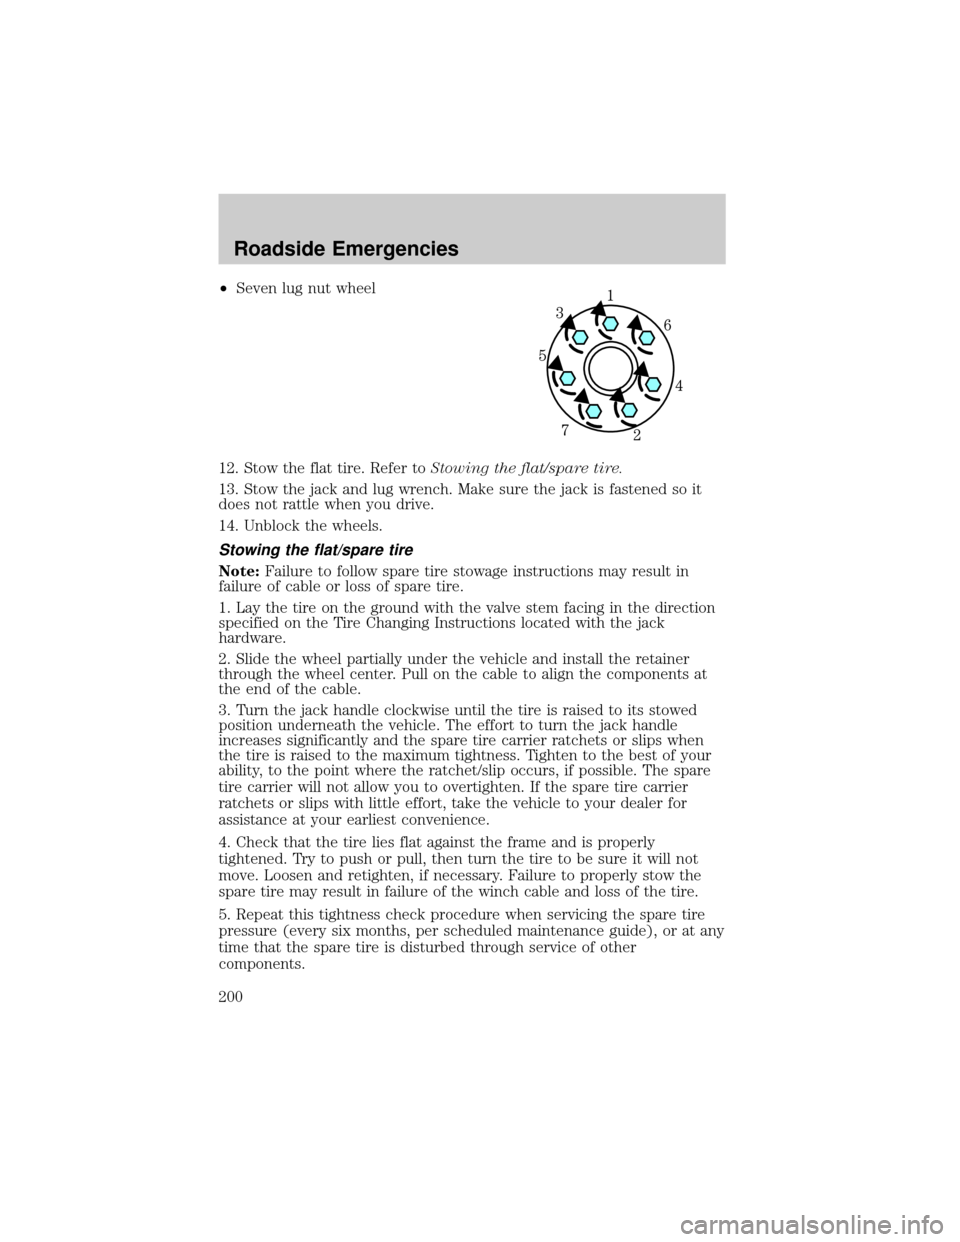
11. Remove the jack and fully
tighten the lug nuts in the order
shown.
²Six lug nut wheel
Roadside Emergencies
199
Page 200 of 280

²Seven lug nut wheel
12. Stow the flat tire. Refer toStowing the flat/spare tire.
13. Stow the jack and lug wrench. Make sure the jack is fastened so it
does not rattle when you drive.
14. Unblock the wheels.
Stowing the flat/spare tire
Note:Failure to follow spare tire stowage instructions may result in
failure of cable or loss of spare tire.
1. Lay the tire on the ground with the valve stem facing in the direction
specified on the Tire Changing Instructions located with the jack
hardware.
2. Slide the wheel partially under the vehicle and install the retainer
through the wheel center. Pull on the cable to align the components at
the end of the cable.
3. Turn the jack handle clockwise until the tire is raised to its stowed
position underneath the vehicle. The effort to turn the jack handle
increases significantly and the spare tire carrier ratchets or slips when
the tire is raised to the maximum tightness. Tighten to the best of your
ability, to the point where the ratchet/slip occurs, if possible. The spare
tire carrier will not allow you to overtighten. If the spare tire carrier
ratchets or slips with little effort, take the vehicle to your dealer for
assistance at your earliest convenience.
4. Check that the tire lies flat against the frame and is properly
tightened. Try to push or pull, then turn the tire to be sure it will not
move. Loosen and retighten, if necessary. Failure to properly stow the
spare tire may result in failure of the winch cable and loss of the tire.
5. Repeat this tightness check procedure when servicing the spare tire
pressure (every six months, per scheduled maintenance guide), or at any
time that the spare tire is disturbed through service of other
components.
Roadside Emergencies
200
Page 201 of 280

6. If removed, install the spare tire lock (if equipped) into the bumper
drive tube with the spare tire lock key (if equipped) and jack handle.
Wheel lug nut torque specifications
Retighten the lug nuts to the specified torque at 800 km (500 miles)
after any wheel disturbance (rotation, flat tire, wheel removal, etc.).
Bolt size Wheel lug nut torque*
Nm Lb-ft
M14 x 2.0 200 150
* Torque specifications are for nut and bolt threads free of dirt and
rust. Use only Ford recommended replacement fasteners.
When a wheel is installed, always remove any corrosion, dirt or
foreign materials present on the mounting surfaces of the wheel
or the surface of the front disc brake hub and rotor that contacts the
wheel. Installing wheels without correct metal-to-metal contact at the
wheel mounting surfaces can cause the wheel nuts to loosen and the
wheel to come off while the vehicle is in motion, resulting in loss of
control.
JUMP STARTING YOUR VEHICLE
The gases around the battery can explode if exposed to flames,
sparks, or lit cigarettes. An explosion could result in injury or
vehicle damage.
Batteries contain sulfuric acid which can burn skin, eyes and
clothing, if contacted.
Do not attempt to push-start your vehicle. Automatic
transmissions do not have push-start capability; doing so may
damage the catalytic converter.
Preparing your vehicle
When the battery is disconnected or a new battery is installed, the
transmission must relearn its shift strategy. As a result, the transmission
may have firm and/or soft shifts. This operation is considered normal and
will not affect function or durability of the transmission. Over time, the
adaptive learning process will fully update transmission operation.
Roadside Emergencies
201
Page 255 of 280

Improperly inflated tires can affect vehicle handling and can fail
suddenly, possibly resulting in loss of vehicle control, vehicle
rollover and/or personal injury.
Tire rotation
Because your vehicle's tires perform different jobs, they often wear
differently. To make sure your tires wear evenly and last longer, rotate
them as indicated in the scheduled maintenance guide. If you notice that
the tires wear unevenly, have them checked.
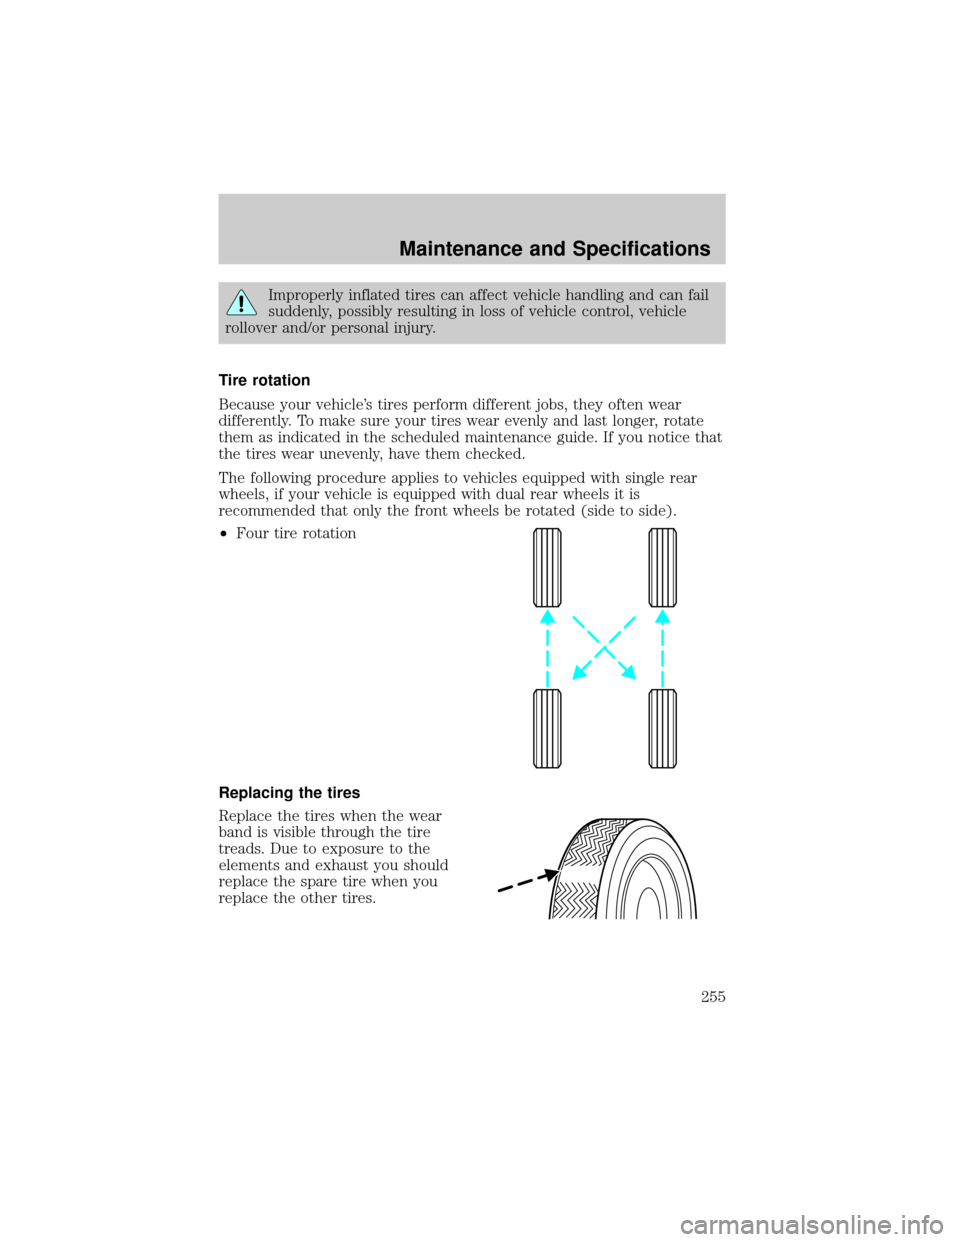
The following procedure applies to vehicles equipped with single rear
wheels, if your vehicle is equipped with dual rear wheels it is
recommended that only the front wheels be rotated (side to side).
²Four tire rotation
Replacing the tires
Replace the tires when the wear
band is visible through the tire
treads. Due to exposure to the
elements and exhaust you should
replace the spare tire when you
replace the other tires.
Maintenance and Specifications
255
Page 278 of 280

Moon roof ....................................65
Motorcraft parts ................241, 257
O
Octane rating ............................240
Oil (see Engine oil) ..................226
P
Parking brake ............................150
Parts (see Motorcraft parts) ....257
Power distribution box
(see Fuses) ...............................189
Power door locks ........................82
Power point .................................56
Power steering ..........................150
fluid, checking and adding ....247
fluid, refill capacity ................257
fluid, specifications .........261, 263
Power Windows ...........................58
Preparing to drive your
vehicle ........................................151
R
Radio ..........................18, 20, 23, 26
Relays ........................................188
Remote entry system .................85
illuminated entry ......................89
locking/unlocking doors ...........82
replacement/additional
transmitters ...............................88
Reverse sensing system ...........157
Roadside assistance ..................186
S
Safety Belt Maintenance ..........117Safety belts (see Safety
restraints) ..........102, 104±106, 108
Safety defects, reporting ..........215
Safety restraints ........102, 104±108
extension assembly ................117
for adults .........................104±106
for children .....................129±130
lap belt ....................................108
safety belt maintenance .........117
warning light and
chime ...............................109±110
Safety seats for children ..........133
Seat belts
(see Safety restraints) .............102
Seats ............................................97
child safety seats ....................133
heated ................................37, 100
memory seat .....................86, 100
SecuriLock passive anti-theft
system ..........................................95
Servicing your vehicle ..............222
Setting the clock
AM/FM stereo ...........................20
AM/FM/CD .................................23
AM/FM/In-dash 6 CD ................29
AM/FM/Tape/CD .......................26
Snowplowing .................7, 183±184
Spare tire
(see Changing the Tire) ...........196
Spark plugs,
specifications .....................257, 263
Special notice
ambulance conversions ..............7
four-wheel drive
vehicles ............................184±185
utility-type vehicles ....................7
Index
278