Page 3 of 248
Maintenance and Specifications 181
Engine compartment 183
Engine oil 185
Battery 189
Fuel information 196
Air filter(s) 213
Tire Information 215
Part numbers 227
Refill capacities 228
Lubricant specifications 231
Accessories 240
Index 243
All rights reserved. Reproduction by any means, electronic or mechanical
including photocopying, recording or by any information storage and retrieval
system or translation in whole or part is not permitted without written
authorization from Ford Motor Company. Ford may change the contents without
notice and without incurring obligation.
Copyright © 2004 Ford Motor Company
Table of Contents
3
2004 F150 Classic(p96)
Owners Guide (post-2002-fmt)
USA English(fus)
Page 5 of 248
to such questions are contained in comments highlighted by the warning
triangle symbol. These comments should be read and observed.
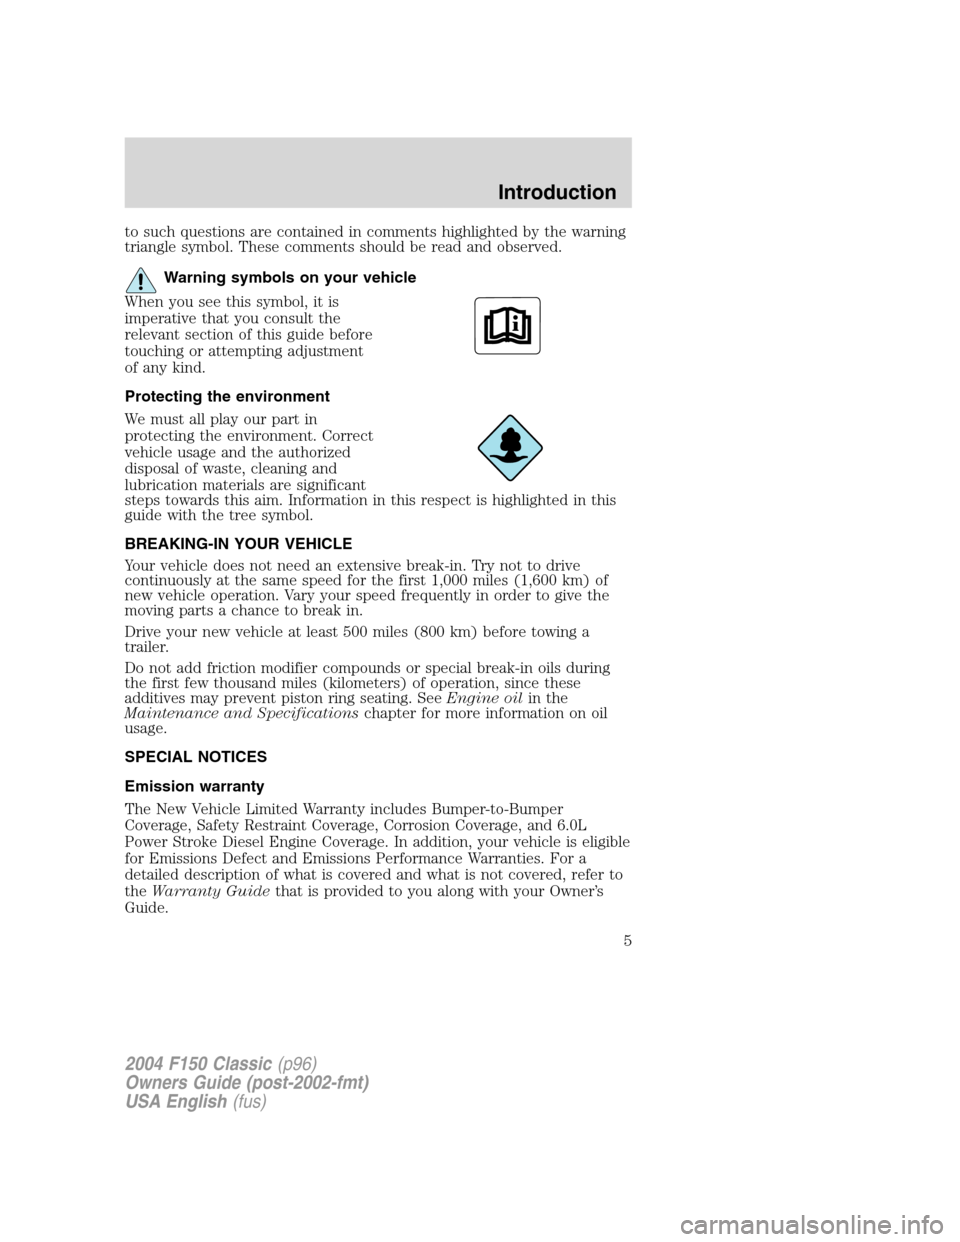
Warning symbols on your vehicle
When you see this symbol, it is
imperative that you consult the
relevant section of this guide before
touching or attempting adjustment
of any kind.
Protecting the environment
We must all play our part in
protecting the environment. Correct
vehicle usage and the authorized
disposal of waste, cleaning and
lubrication materials are significant
steps towards this aim. Information in this respect is highlighted in this
guide with the tree symbol.
BREAKING-IN YOUR VEHICLE
Your vehicle does not need an extensive break-in. Try not to drive
continuously at the same speed for the first 1,000 miles (1,600 km) of
new vehicle operation. Vary your speed frequently in order to give the
moving parts a chance to break in.
Drive your new vehicle at least 500 miles (800 km) before towing a
trailer.
Do not add friction modifier compounds or special break-in oils during
the first few thousand miles (kilometers) of operation, since these
additives may prevent piston ring seating. SeeEngine oilin the
Maintenance and Specificationschapter for more information on oil
usage.
SPECIAL NOTICES
Emission warranty
The New Vehicle Limited Warranty includes Bumper-to-Bumper
Coverage, Safety Restraint Coverage, Corrosion Coverage, and 6.0L
Power Stroke Diesel Engine Coverage. In addition, your vehicle is eligible
for Emissions Defect and Emissions Performance Warranties. For a
detailed description of what is covered and what is not covered, refer to
theWarranty Guidethat is provided to you along with your Owner’s
Guide.
2004 F150 Classic(p96)
Owners Guide (post-2002-fmt)
USA English(fus)
Introduction
5
Page 9 of 248
Vehicle Symbol Glossary
Power Windows
Front/Rear
Power Window Lockout
Child Safety Door
Lock/UnlockInterior Luggage
Compartment Release
Symbol
Panic AlarmEngine Oil
Engine CoolantEngine Coolant
Temperature
Do Not Open When HotBattery
Avoid Smoking, Flames,
or SparksBattery Acid
Explosive GasFan Warning
Power Steering FluidMaintain Correct Fluid
LevelMAX
MIN
Emission SystemEngine Air Filter
Passenger Compartment
Air FilterJack
Check fuel cap
2004 F150 Classic(p96)
Owners Guide (post-2002-fmt)
USA English(fus)
Introduction
9
Page 12 of 248

Air bag readiness:If this light fails
to illuminate when ignition is turned
to ON, continues to flash or remains
on, have the system serviced
immediately. A chime will also
sound when a malfunction in the supplemental restraint system has been
detected.
Safety belt:Reminds you to fasten
your safety belt. A chime will also
sound to remind you to fasten your
safety belt.
Charging system:Illuminates when
the battery is not charging properly.
Oil pressure/Engine coolant:
Illuminates when any of the
following conditions has occurred:
•The engine coolant temperature
is high.
•The engine oil pressure is low.
Low fuel:Illuminates when the fuel
level in the fuel tank is at or near
empty (refer toFuel gaugein this
chapter).
Speed control:Illuminates when
the speed control is activated. Turns
off when the speed control system
is deactivated.
Transmission control indicator
light (TCIL):Illuminates when the
overdrive function of the
transmission has been turned off,
refer to theDrivingchapter. If the
light flashes steadily or does not illuminate, have the transmission
serviced soon, or damage may occur.
LOW
FUEL
CRUISE
OVERDRIVE
2004 F150 Classic(p96)
Owners Guide (post-2002-fmt)
USA English(fus)
Instrument Cluster
12
Page 16 of 248
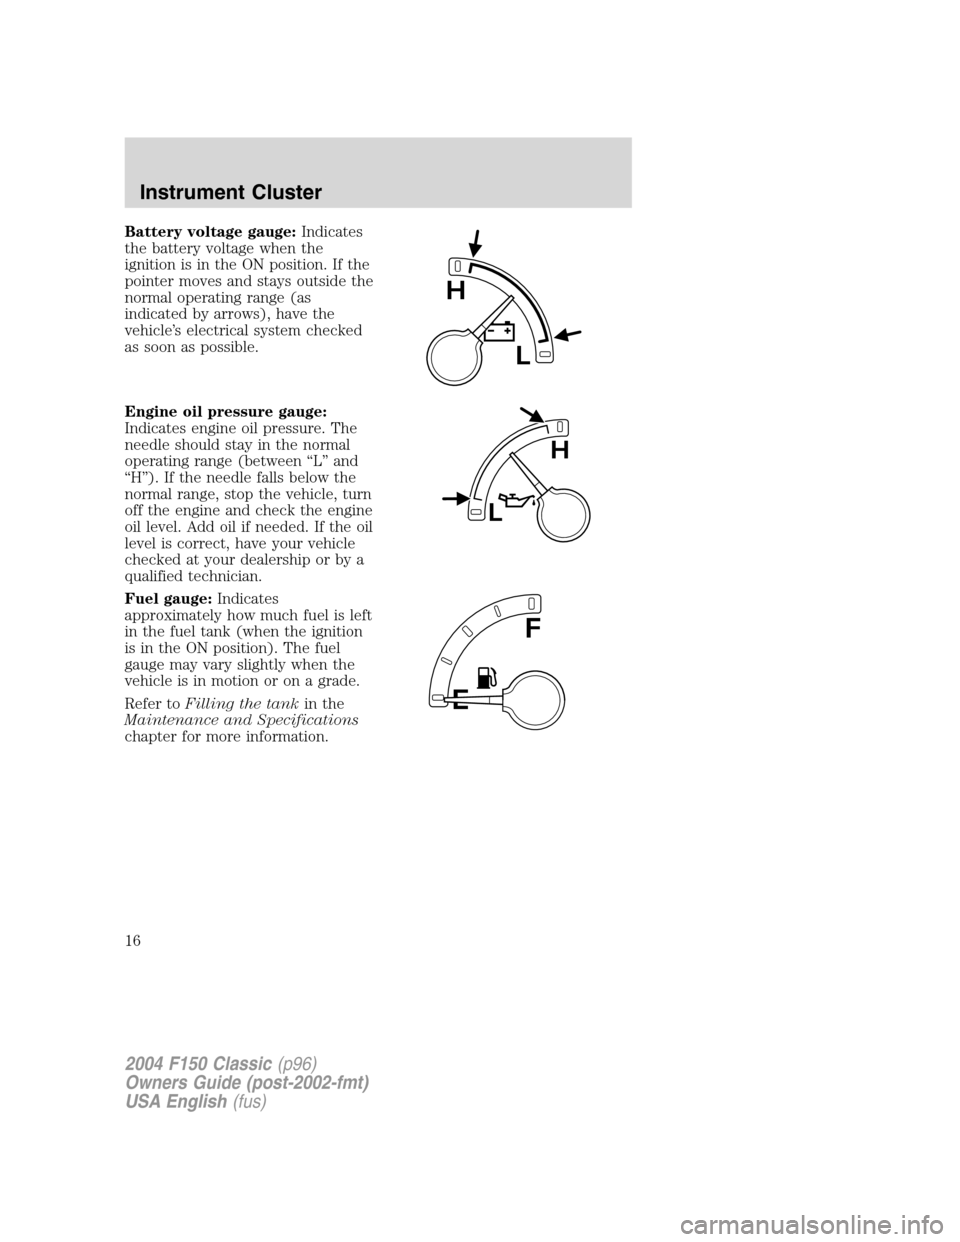
Battery voltage gauge:Indicates
the battery voltage when the
ignition is in the ON position. If the
pointer moves and stays outside the
normal operating range (as
indicated by arrows), have the
vehicle’s electrical system checked
as soon as possible.
Engine oil pressure gauge:
Indicates engine oil pressure. The
needle should stay in the normal
operating range (between“L”and
“H”). If the needle falls below the
normal range, stop the vehicle, turn
off the engine and check the engine
oil level. Add oil if needed. If the oil
level is correct, have your vehicle
checked at your dealership or by a
qualified technician.
Fuel gauge:Indicates
approximately how much fuel is left
in the fuel tank (when the ignition
is in the ON position). The fuel
gauge may vary slightly when the
vehicle is in motion or on a grade.
Refer toFilling the tankin the
Maintenance and Specifications
chapter for more information.
L
H
L
H
E
F
2004 F150 Classic(p96)
Owners Guide (post-2002-fmt)
USA English(fus)
Instrument Cluster
16
Page 39 of 248
Function Number of
bulbsTrade number
Cargo lamp 2 912
License plate lamp 2 194
Running board lamp (if equipped) 4 168
All replacement bulbs are clear in color except where noted.
To replace all instrument panel lights - see your dealer
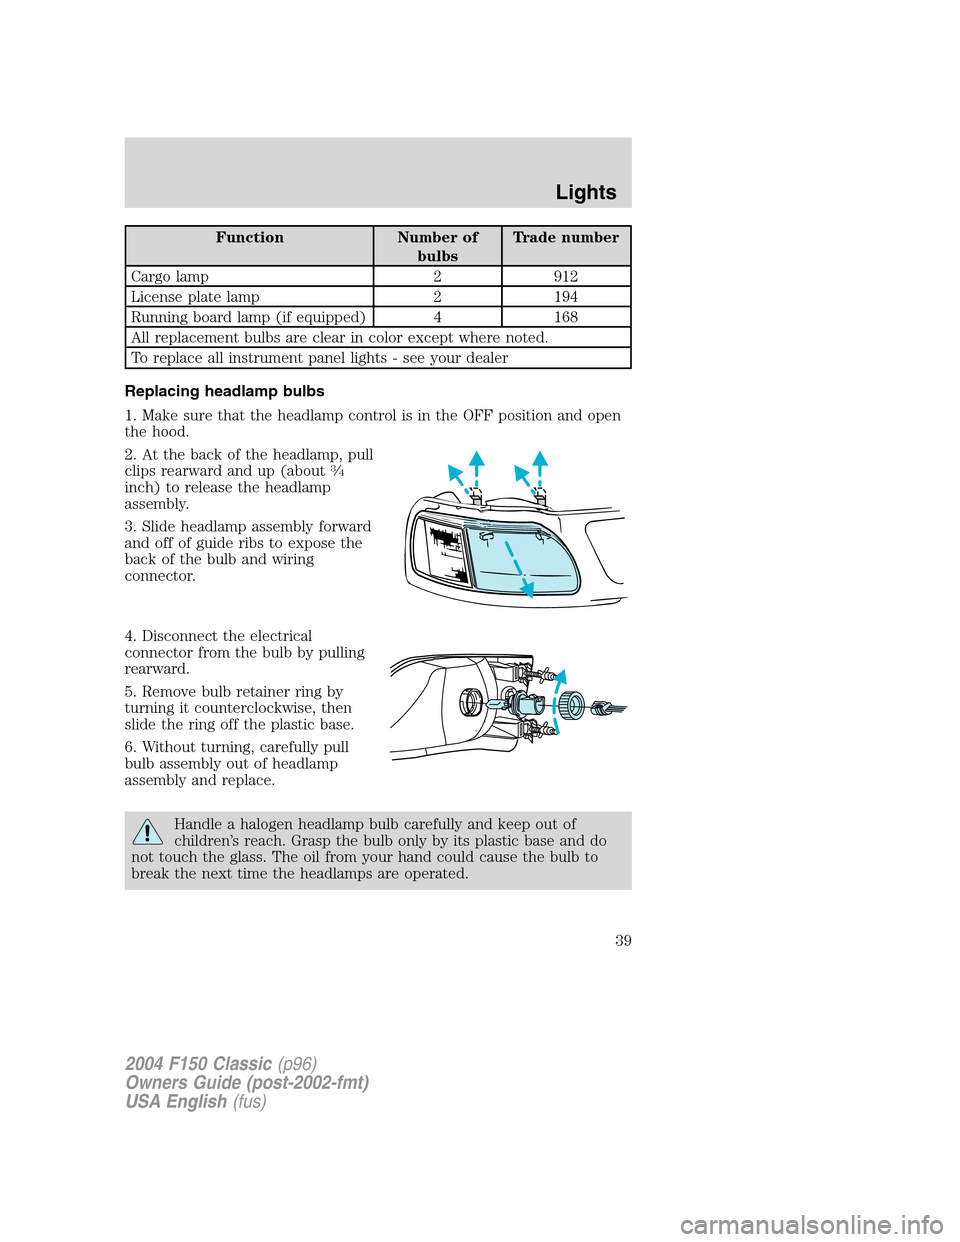
Replacing headlamp bulbs
1. Make sure that the headlamp control is in the OFF position and open
the hood.
2. At the back of the headlamp, pull
clips rearward and up (about
3⁄4
inch) to release the headlamp
assembly.
3. Slide headlamp assembly forward
and off of guide ribs to expose the
back of the bulb and wiring
connector.
4. Disconnect the electrical
connector from the bulb by pulling
rearward.
5. Remove bulb retainer ring by
turning it counterclockwise, then
slide the ring off the plastic base.
6. Without turning, carefully pull
bulb assembly out of headlamp
assembly and replace.
Handle a halogen headlamp bulb carefully and keep out of
children’s reach. Grasp the bulb only by its plastic base and do
not touch the glass. The oil from your hand could cause the bulb to
break the next time the headlamps are operated.
2004 F150 Classic(p96)
Owners Guide (post-2002-fmt)
USA English(fus)
Lights
39
Page 147 of 248
Fuse/Relay
LocationFuse Amp
RatingPassenger Compartment Fuse
Panel Description
26 10A Right-hand low beam headlamp
27 5A Foglamp relay and foglamp
indicator, Main light switch
(upstream)
28 10A Left-hand low beam headlamp
29 5A Autolamp module, Transmission
overdrive control switch, Central
security module, Beltminder
30 30A Passive Anti-theft transceiver,
Cluster, Ignition coils, PCM relay,
Coil on plugs, Radio noise
capacitor, ECC diode
31—Not used
Relay 1—Interior lamp relay
Relay 2—Battery saver relay
Relay 3—Not used
Relay 4—One-touch down window relay
Relay 5—Accessory delay relay
Power distribution box
The power distribution box is located in the engine compartment. The
power distribution box contains high-current fuses that protect your
vehicle’s main electrical systems from overloads.
Always disconnect the battery before servicing high current
fuses.
Always replace the cover to the power distribution box before
reconnecting the battery or refilling fluid reservoirs
If the battery has been disconnected and reconnected, refer to the
Batterysection of theMaintenance and Specificationschapter.
2004 F150 Classic(p96)
Owners Guide (post-2002-fmt)
USA English(fus)
Roadside Emergencies
147
Page 178 of 248
WINDOWS AND WIPER BLADES
The windshield, rear and side windows and the wiper blades should be
cleaned regularly. If the wipers do not wipe properly, substances on the
vehicle’s glass or the wiper blades may be the cause. These may include
hot wax treatments used by commercial car washes, tree sap, or other
organic contamination. To clean these items, please follow these tips:
•The windshield, rear windows and side windows may be cleaned with
a non-abrasive cleaner such as Motorcraft Ultra Clear Spray Glass
Cleaner (ZC-23), available from your dealer.
•Do not use abrasives, as they may cause scratches.
•Do not use fuel, kerosene, or paint thinner to clean any parts.
•Wiper blades can be cleaned with isopropyl (rubbing) alcohol or
windshield washer solution. Be sure to replace wiper blades when they
appear worn or do not function properly.
INSTRUMENT PANEL AND CLUSTER LENS
Clean the instrument panel with a damp cloth, then dry with a dry cloth.
•Avoid cleaners or polish that increase the gloss of the upper portion of
the instrument panel. The dull finish in this area helps protect the
driver from undesirable windshield reflection.
Do not use chemical solvents or strong detergents when cleaning
the steering wheel or instrument panel to avoid contamination of
the air bag system.
•
Be certain to wash or wipe your hands clean if you have been in
contact with certain products such as insect repellent and suntan lotion
in order to avoid possible damage to the interior painted surfaces.
INTERIOR TRIM
•Clean the interior trim areas with a damp cloth, then dry by wiping
with a dry, soft, clean cloth.
•Do not use household or glass cleaners as these may damage the
finish.
INTERIOR
For fabric, carpets, cloth seats and safety belts:
•Remove dust and loose dirt with a vacuum cleaner.
•Remove light stains and soil with Motorcraft Extra Strength
Upholstery Cleaner (ZC-41).
2004 F150 Classic(p96)
Owners Guide (post-2002-fmt)
USA English(fus)
Cleaning
178