Page 9 of 248
Vehicle Symbol Glossary
Power Windows
Front/Rear
Power Window Lockout
Child Safety Door
Lock/UnlockInterior Luggage
Compartment Release
Symbol
Panic AlarmEngine Oil
Engine CoolantEngine Coolant
Temperature
Do Not Open When HotBattery
Avoid Smoking, Flames,
or SparksBattery Acid
Explosive GasFan Warning
Power Steering FluidMaintain Correct Fluid
LevelMAX
MIN
Emission SystemEngine Air Filter
Passenger Compartment
Air FilterJack
Check fuel cap
2004 F150 Classic(p96)
Owners Guide (post-2002-fmt)
USA English(fus)
Introduction
9
Page 13 of 248
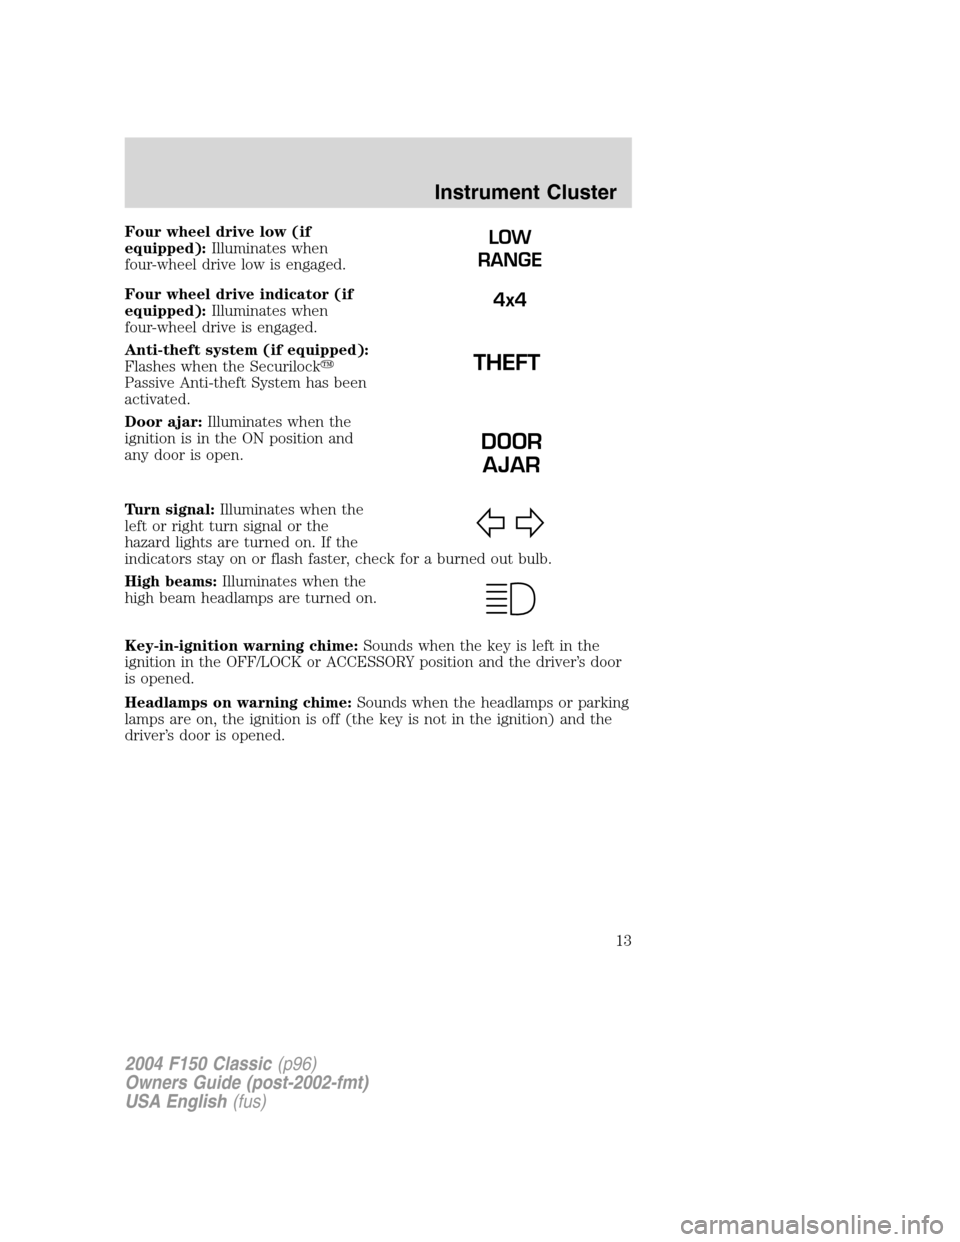
Four wheel drive low (if
equipped):Illuminates when
four-wheel drive low is engaged.
Four wheel drive indicator (if
equipped):Illuminates when
four-wheel drive is engaged.
Anti-theft system (if equipped):
Flashes when the Securilock�
Passive Anti-theft System has been
activated.
Door ajar:Illuminates when the
ignition is in the ON position and
any door is open.
Turn signal:Illuminates when the
left or right turn signal or the
hazard lights are turned on. If the
indicators stay on or flash faster, check for a burned out bulb.
High beams:Illuminates when the
high beam headlamps are turned on.
Key-in-ignition warning chime:Sounds when the key is left in the
ignition in the OFF/LOCK or ACCESSORY position and the driver’s door
is opened.
Headlamps on warning chime:Sounds when the headlamps or parking
lamps are on, the ignition is off (the key is not in the ignition) and the
driver’s door is opened.LOW
RANGE
4x4
DOOR
AJAR
2004 F150 Classic(p96)
Owners Guide (post-2002-fmt)
USA English(fus)
Instrument Cluster
13
Page 25 of 248
16.Scan:Press to hear a brief
sampling of all listenable stations or
CD tracks. Press again to stop.
17.Disc/Tune:Radio: Press
orto manually tune down or up
the frequency band.
CD: Press
orto select the previous or next track on the CD.
18.CD door:Insert a CD label side
up.
PREMIUM AM/FM STEREO/CASSETTE/SINGLE CD (IF EQUIPPED)
1.Power/volume:Press to turn
ON/OFF; turn
clockwise/counterclockwise to
increase/decrease volume.
2004 F150 Classic(p96)
Owners Guide (post-2002-fmt)
USA English(fus)
Entertainment Systems
25
Page 45 of 248
TILT STEERING WHEEL (IF EQUIPPED)
To adjust the steering wheel:
1. Pull and hold the steering wheel
release control toward you.
2. Move the steering wheel up or
down until you find the desired
location.
3. Release the steering wheel
release control. This will lock the
steering wheel in position.
Never adjust the steering wheel when the vehicle is moving.
OVERHEAD CONSOLE (IF EQUIPPED)
The appearance of your vehicle’s overhead console will vary according to
your option package.
Storage compartment (if equipped)
Press the release on the door to
open the storage compartment.
The storage compartment may be
used to secure sunglasses or a
similar object.
Installing a garage door opener (if equipped)
The storage compartment can be converted to accommodate a variety of
aftermarket garage door openers:
2004 F150 Classic(p96)
Owners Guide (post-2002-fmt)
USA English(fus)
Driver Controls
45
Page 55 of 248
KEYS
The key operates all locks on your vehicle. In case of loss, replacement
keys are available from your dealer.
You should always carry a second key with you in a safe place in case
you require it in an emergency.
Refer toSecuriLock�Passive Anti-Theft Systemfor more information.
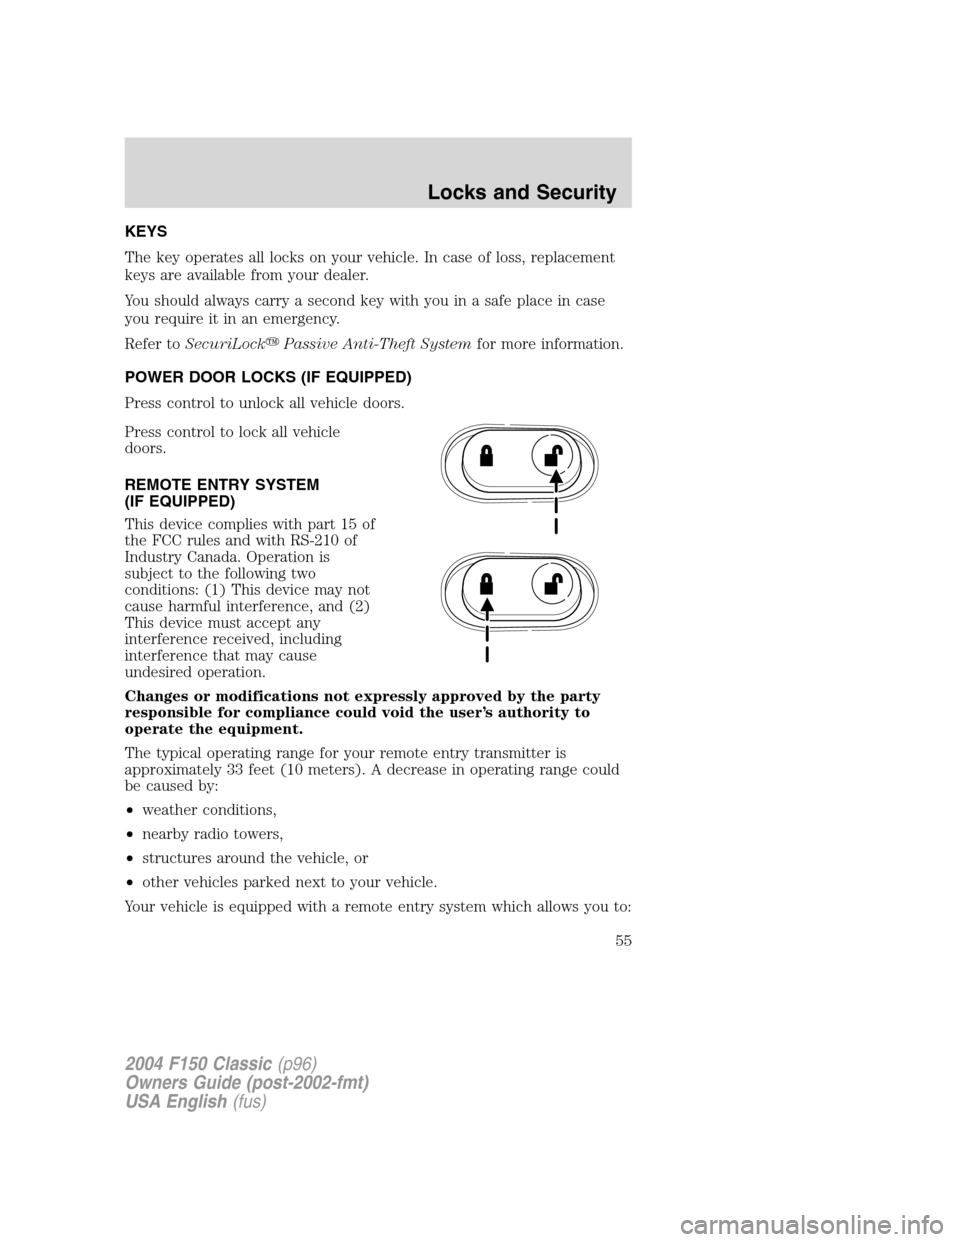
POWER DOOR LOCKS (IF EQUIPPED)
Press control to unlock all vehicle doors.
Press control to lock all vehicle
doors.
REMOTE ENTRY SYSTEM
(IF EQUIPPED)
This device complies with part 15 of
the FCC rules and with RS-210 of
Industry Canada. Operation is
subject to the following two
conditions: (1) This device may not
cause harmful interference, and (2)
This device must accept any
interference received, including
interference that may cause
undesired operation.
Changes or modifications not expressly approved by the party
responsible for compliance could void the user’s authority to
operate the equipment.
The typical operating range for your remote entry transmitter is
approximately 33 feet (10 meters). A decrease in operating range could
be caused by:
•weather conditions,
•nearby radio towers,
•structures around the vehicle, or
•other vehicles parked next to your vehicle.
Your vehicle is equipped with a remote entry system which allows you to:
2004 F150 Classic(p96)
Owners Guide (post-2002-fmt)
USA English(fus)
Locks and Security
Locks and Security
55
Page 56 of 248
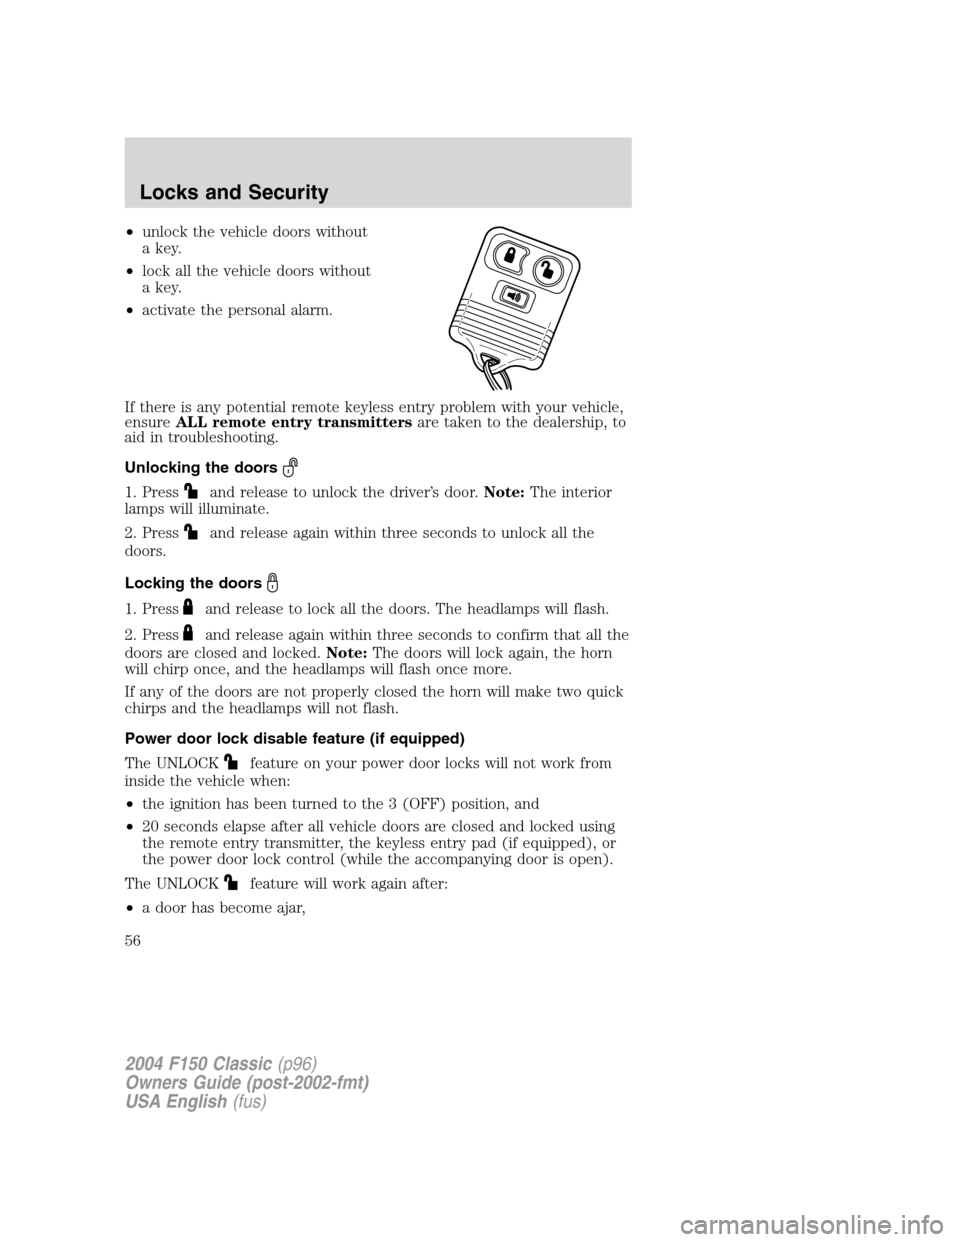
•unlock the vehicle doors without
a key.
•lock all the vehicle doors without
a key.
•activate the personal alarm.
If there is any potential remote keyless entry problem with your vehicle,
ensureALL remote entry transmittersare taken to the dealership, to
aid in troubleshooting.
Unlocking the doors
1. Pressand release to unlock the driver’s door.Note:The interior
lamps will illuminate.
2. Press
and release again within three seconds to unlock all the
doors.
Locking the doors
1. Pressand release to lock all the doors. The headlamps will flash.
2. Press
and release again within three seconds to confirm that all the
doors are closed and locked.Note:The doors will lock again, the horn
will chirp once, and the headlamps will flash once more.
If any of the doors are not properly closed the horn will make two quick
chirps and the headlamps will not flash.
Power door lock disable feature (if equipped)
The UNLOCK
feature on your power door locks will not work from
inside the vehicle when:
•the ignition has been turned to the 3 (OFF) position, and
•20 seconds elapse after all vehicle doors are closed and locked using
the remote entry transmitter, the keyless entry pad (if equipped), or
the power door lock control (while the accompanying door is open).
The UNLOCK
feature will work again after:
•a door has become ajar,
2004 F150 Classic(p96)
Owners Guide (post-2002-fmt)
USA English(fus)
Locks and Security
56
Page 57 of 248
•the ignition is turned to the 4 (ON) position, or
•using the UNLOCK
control on your remote entry transmitter or
unlocking via the keyless entry keypad (if equipped).
Power door lock disable feature — activation/deactivation
Please see your dealer in order to activate/deactivate this feature.
Sounding a panic alarm
Press
to activate the alarm. Press again or turn the ignition to 1
(ACCESSORY) or 4 (ON) to deactivate.
Note:The panic alarm will only operate when the ignition is in the 3
(OFF) position.
Replacing the battery
The remote entry transmitter uses one coin type three-volt lithium
battery CR2032 or equivalent.
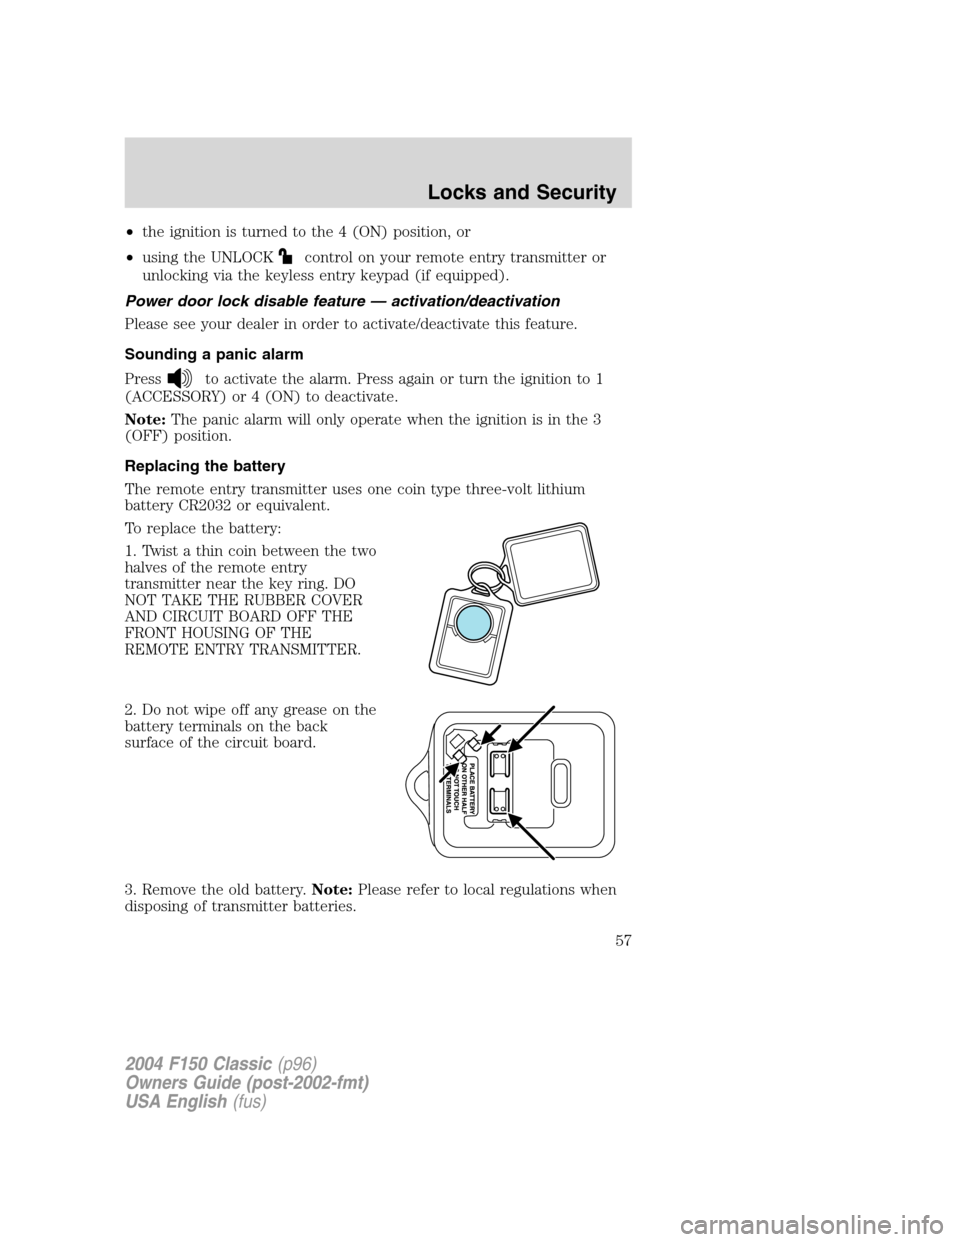
To replace the battery:
1. Twist a thin coin between the two
halves of the remote entry
transmitter near the key ring. DO
NOT TAKE THE RUBBER COVER
AND CIRCUIT BOARD OFF THE
FRONT HOUSING OF THE
REMOTE ENTRY TRANSMITTER.
2. Do not wipe off any grease on the
battery terminals on the back
surface of the circuit board.
3. Remove the old battery.Note:Please refer to local regulations when
disposing of transmitter batteries.
2004 F150 Classic(p96)
Owners Guide (post-2002-fmt)
USA English(fus)
Locks and Security
57
Page 58 of 248
4. Insert the new battery. Refer to the diagram inside the remote entry
transmitter for the correct orientation of the battery. Press the battery
down to ensure that the battery is fully seated in the battery housing
cavity.
5. Snap the two halves back together.
Note:Replacement of the battery willnotcause the remote transmitter
to become deprogrammed from your vehicle. The remote transmitter
should operate normally after battery replacement.
Replacing lost remote entry transmitters
If you would like to have your remote entry transmitter reprogrammed
because you lost one, or would like to buy additional remote entry
transmitters, you can either reprogram them yourself, or takeall
remote entry transmittersto your authorized dealer for
reprogramming.
How to reprogram your remote entry transmitters
You must haveall remote entry transmitters(maximum of four)
available before beginning this procedure.
To reprogram the remote entry
transmitters:
1. Ensure the vehicle is
electronically unlocked.
2. Put the key in the ignition.
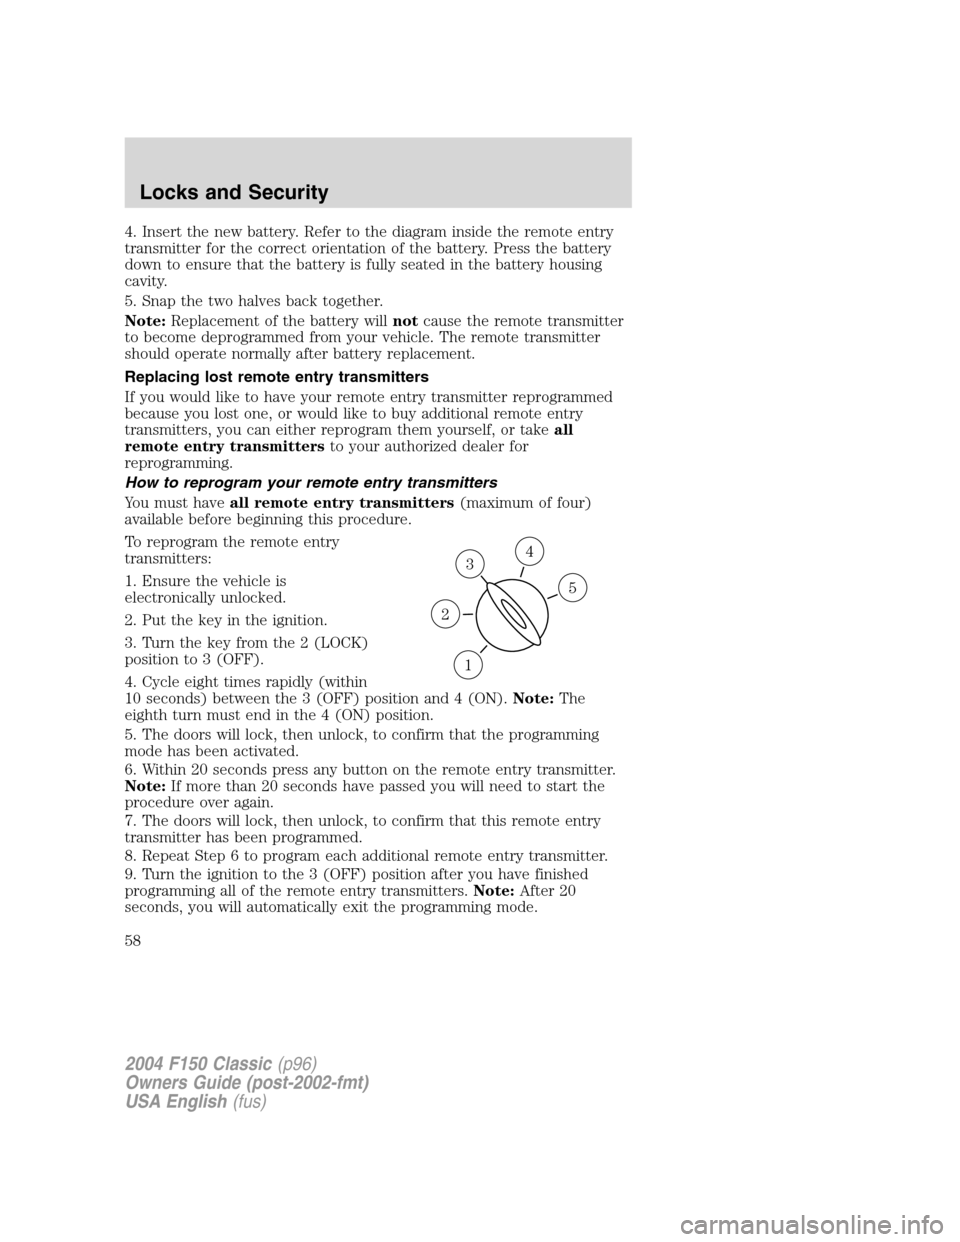
3. Turn the key from the 2 (LOCK)
position to 3 (OFF).
4. Cycle eight times rapidly (within
10 seconds) between the 3 (OFF) position and 4 (ON).Note:The
eighth turn must end in the 4 (ON) position.
5. The doors will lock, then unlock, to confirm that the programming
mode has been activated.
6. Within 20 seconds press any button on the remote entry transmitter.
Note:If more than 20 seconds have passed you will need to start the
procedure over again.
7. The doors will lock, then unlock, to confirm that this remote entry
transmitter has been programmed.
8. Repeat Step 6 to program each additional remote entry transmitter.
9. Turn the ignition to the 3 (OFF) position after you have finished
programming all of the remote entry transmitters.Note:After 20
seconds, you will automatically exit the programming mode.
3
1
2
5
4
2004 F150 Classic(p96)
Owners Guide (post-2002-fmt)
USA English(fus)
Locks and Security
58