Page 127 of 248

Avoid sudden braking as well. Although a 4WD vehicle may accelerate
better than a two-wheel drive vehicle in snow and ice, it won’t stop any
faster, because as in other vehicles, braking occurs at all four wheels. Do
not become overconfident as to road conditions.
Make sure you allow sufficient distance between you and other vehicles
for stopping. Drive slower than usual and consider using one of the lower
gears. In emergency stopping situations, avoid locking of the wheels. Use
a“squeeze”technique, push on the brake pedal with a steadily increasing
force which allows the wheels to brake yet continue to roll so that you
may steer in the direction you want to travel. If you lock the wheels,
release the brake pedal and repeat the squeeze technique. If your vehicle
is equipped with a Four Wheel Anti-Lock Brake System (ABS), apply the
brake steadily. Do not“pump”the brakes. Refer to theBrakessection of
this chapter for additional information on the operation of the anti-lock
brake system.
Never drive with chains on the front tires of 4WD vehicles without also
putting them on the rear tires. This could cause the rear to slide and
swing around during braking.
Tires, Replacement Requirements
Do not use a size and type of tire and wheel other than that
originally provided by Ford Motor Company because it can affect
the safety and performance of your vehicle, which could result in an
increased risk of loss of vehicle control, vehicle rollover and/or serious
personal injury or death.
Make sure all tires and wheels on the vehicle are of the same size, type,
tread design and load-carrying capacity. If you have questions regarding
tire replacement, see an authorized Ford or Lincoln/Mercury dealer.
If you nevertheless decide to equip your 4WD for off-road use with tires
larger than what Ford Motor Company recommends, you should not use
these tires for highway driving.
If you use any tire/wheel combination not recommended by Ford Motor
Company, it may adversely affect vehicle handling and could cause
steering, suspension, axle or transfer case failure as well as the increased
risk of loss of vehicle control.
Do not use“aftermarket lift kits”or other suspension modifications,
whether or not they are used with larger tires and wheels.
These“aftermarket lift kits”could adversely affect the vehicle’s handling
characteristics, which could lead to loss of vehicle control or rollover and
serious injury.
2004 F150 Classic(p96)
Owners Guide (post-2002-fmt)
USA English(fus)
Driving
127
Page 128 of 248

Tires can be damaged during off-road use. For your safety, tires that are
damaged should not be used for highway driving because they are more
likely to blow out or fail.
You should carefully observe the recommended tire inflation pressure
found on the safety compliance certification label attached to the left
front door lock facing or door latch post pillar. Failure to follow tire
pressure recommendations can adversely affect the way your vehicle
handles. Do not exceed the Ford Motor Company recommended pressure
even if it is less than the maximum pressure allowed for the tire.
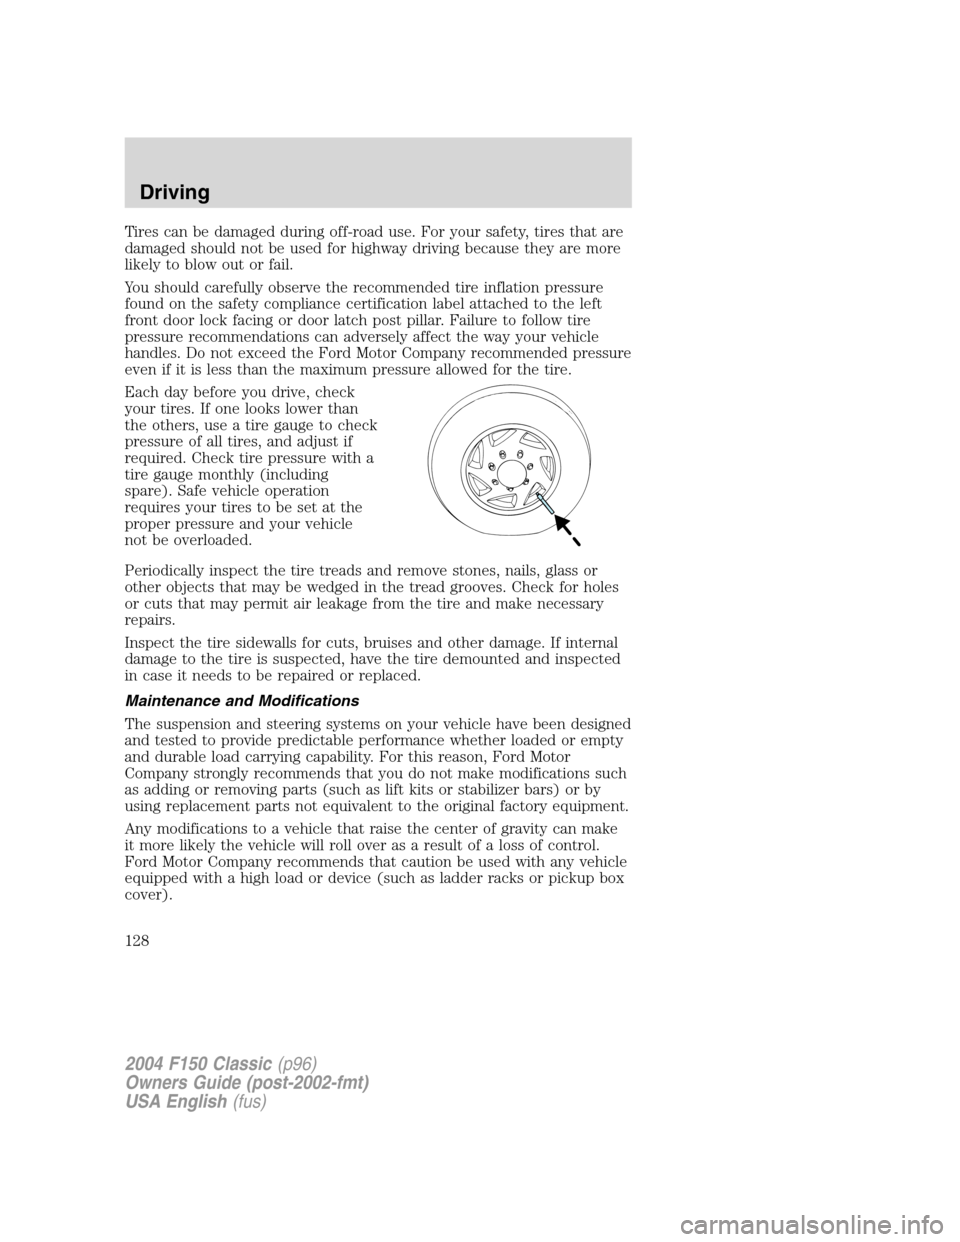
Each day before you drive, check
your tires. If one looks lower than
the others, use a tire gauge to check
pressure of all tires, and adjust if
required. Check tire pressure with a
tire gauge monthly (including
spare). Safe vehicle operation
requires your tires to be set at the
proper pressure and your vehicle
not be overloaded.
Periodically inspect the tire treads and remove stones, nails, glass or
other objects that may be wedged in the tread grooves. Check for holes
or cuts that may permit air leakage from the tire and make necessary
repairs.
Inspect the tire sidewalls for cuts, bruises and other damage. If internal
damage to the tire is suspected, have the tire demounted and inspected
in case it needs to be repaired or replaced.
Maintenance and Modifications
The suspension and steering systems on your vehicle have been designed
and tested to provide predictable performance whether loaded or empty
and durable load carrying capability. For this reason, Ford Motor
Company strongly recommends that you do not make modifications such
as adding or removing parts (such as lift kits or stabilizer bars) or by
using replacement parts not equivalent to the original factory equipment.
Any modifications to a vehicle that raise the center of gravity can make
it more likely the vehicle will roll over as a result of a loss of control.
Ford Motor Company recommends that caution be used with any vehicle
equipped with a high load or device (such as ladder racks or pickup box
cover).
2004 F150 Classic(p96)
Owners Guide (post-2002-fmt)
USA English(fus)
Driving
128
Page 141 of 248

GETTING ROADSIDE ASSISTANCE
To fully assist you should you have a vehicle concern, Ford Motor
Company offers a complimentary roadside assistance program. This
program is separate from the New Vehicle Limited Warranty. The service
is available:
•24–hours, seven days a week
•for the New Vehicle Limited Warranty period of three years or 36,000
miles (60,000 km), whichever occurs first on Ford and Mercury
vehicles, and four years or 50,000 miles (80,000 km) on Lincoln
vehicles.
Roadside assistance will cover:
•changing a flat tire
•jump-starts
•lock-out assistance
•limited fuel delivery
•towing of your disabled vehicle to the nearest Ford Motor Company
dealership, or your selling dealer if within 35 miles (56.3 km) of the
nearest Ford Motor Company dealership (one tow per disablement).
Even non-warranty related tows, like accidents or getting stuck in the
mud or snow, are covered (some exclusions apply, such as impound
towing or repossession).
Canadian customers refer to your Owner Information Guide for
information on:
•coverage period
•exact fuel amounts
•towing of your disabled vehicle
•emergency travel expense reimbursement
•travel planning benefits
USING ROADSIDE ASSISTANCE
Complete the roadside assistance identification card and place it in your
wallet for quick reference. In the United States, this card is found in the
Owner Guide portfolio in the glove compartment in Ford vehicles and is
mailed to you if you own a Mercury or Lincoln. In Canada, the card is
found in theOwner Information Guidein the glove compartment.
U.S. Ford or Mercury vehicle customers who require roadside assistance,
call 1–800–241–3673; Lincoln vehicle customers call 1–800–521–4140.
2004 F150 Classic(p96)
Owners Guide (post-2002-fmt)
USA English(fus)
Roadside Emergencies
Roadside Emergencies
141
Page 145 of 248
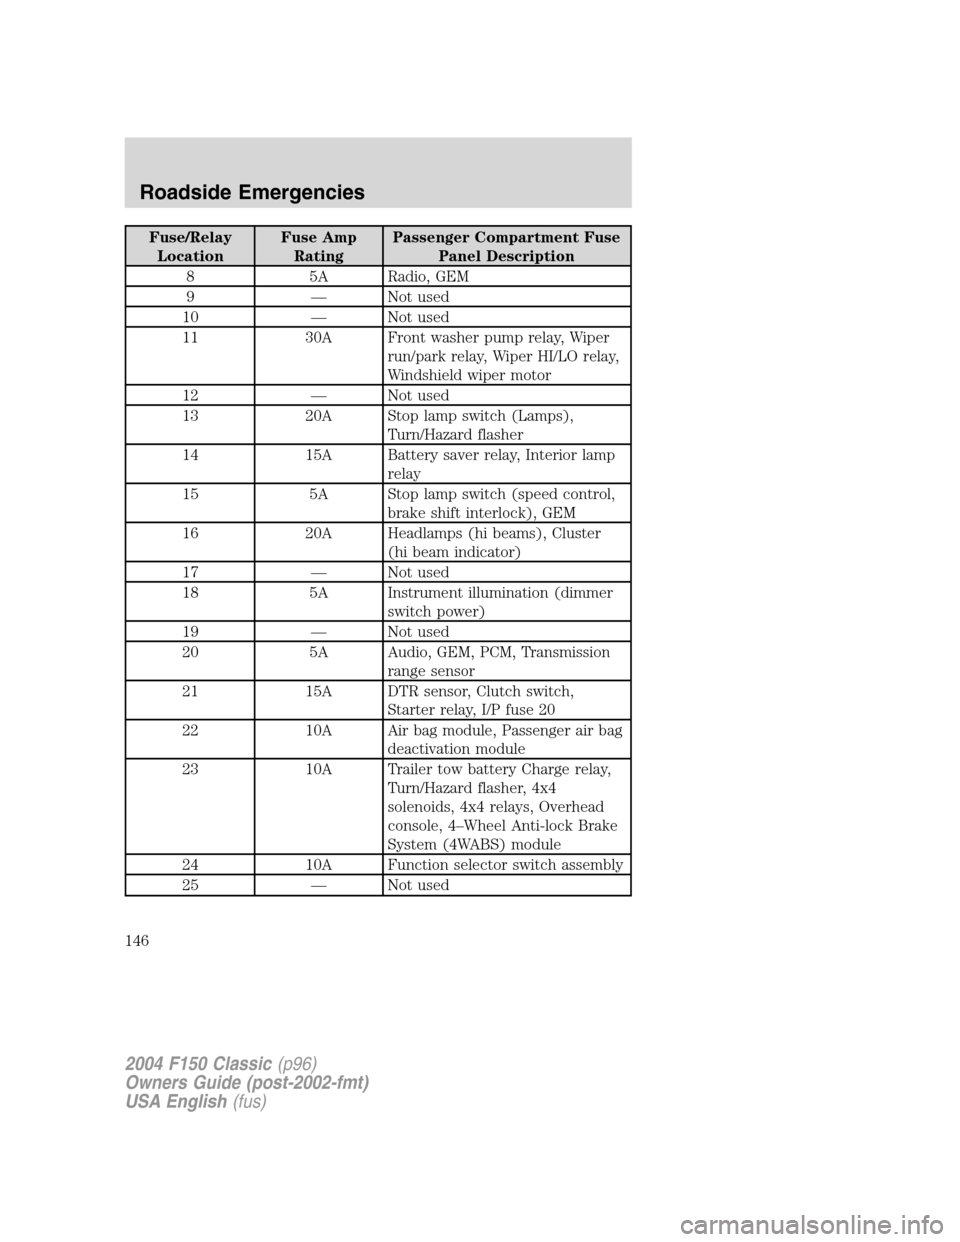
The fuses are coded as follows.
Fuse/Relay
LocationFuse Amp
RatingPassenger Compartment Fuse
Panel Description
1 15A Audio
2 5A Powertrain Control Module
(PCM), Cluster
3 20A Cigar lighter, Data link connector
4 5A Power mirror switch
5 15A Speed control module, Reverse
lamp, Climate mode switch,
Daytime Running Lamps (DRL)
relay, Digital Transmission Range
(DTR) sensor
6 5A Cluster, Brake shift interlock
solenoid, GEM
7—Not used
FUSE1 12 22
21323
617 27
718 28
819 29
930
20
31 21 11 10
RELAY
5 RELAY
4 RELAY
3 RELAY
2 RELAY
1
31424
41525
51626
2004 F150 Classic(p96)
Owners Guide (post-2002-fmt)
USA English(fus)
Roadside Emergencies
145
Page 146 of 248

Fuse/Relay
LocationFuse Amp
RatingPassenger Compartment Fuse
Panel Description
8 5A Radio, GEM
9—Not used
10—Not used
11 30A Front washer pump relay, Wiper
run/park relay, Wiper HI/LO relay,
Windshield wiper motor
12—Not used
13 20A Stop lamp switch (Lamps),
Turn/Hazard flasher
14 15A Battery saver relay, Interior lamp
relay
15 5A Stop lamp switch (speed control,
brake shift interlock), GEM
16 20A Headlamps (hi beams), Cluster
(hi beam indicator)
17—Not used
18 5A Instrument illumination (dimmer
switch power)
19—Not used
20 5A Audio, GEM, PCM, Transmission
range sensor
21 15A DTR sensor, Clutch switch,
Starter relay, I/P fuse 20
22 10A Air bag module, Passenger air bag
deactivation module
23 10A Trailer tow battery Charge relay,
Turn/Hazard flasher, 4x4
solenoids, 4x4 relays, Overhead
console, 4–Wheel Anti-lock Brake
System (4WABS) module
24 10A Function selector switch assembly
25—Not used
2004 F150 Classic(p96)
Owners Guide (post-2002-fmt)
USA English(fus)
Roadside Emergencies
146
Page 148 of 248
The high-current fuses are coded as follows.
Fuse/Relay
LocationFuse Amp
RatingPower Distribution Box
Description
1 20A * Power point
2 30A* Powertrain Control Module (PCM)
3 30A* Main light switch, Headlamp relay,
Multifunction switch
4—Not used
5 20A* Trailer tow back-up/park lamps
6 15A* Main light switch, Park lamp relay
7 20A* Horn
8 15A* Power door locks, Central
Security Module (CSM), Lock
relays
9 15A* Daytime Running Lamps (DRL),
Fog lamps
10 20A* Fuel pump
11 20A* Alternator field
12—Not used
2004 F150 Classic(p96)
Owners Guide (post-2002-fmt)
USA English(fus)
Roadside Emergencies
148
Page 149 of 248
Fuse/Relay
LocationFuse Amp
RatingPower Distribution Box
Description
13 15A* A/C clutch
14—Not used
15—Not used
16 15A* Bi-fuel injector module, fuel
selector switch and alternative
fuel injectors (Bi-fuel vehicles
only)
17 2A* Speed control
18 15A* PCM, Fuel injectors, Fuel pump
relay, Mass air flow sensor
19 10A* Trailer/Camper adapter (right
stop/turn lamp)
20 10A* Trailer/Camper adapter (left
stop/turn lamp)
21—Not used
22—Not used
23 15A* HEGO sensor, Automatic
transmission
24—Not used
101 30A** Trailer tow battery charge
102 50/20A** Four-wheel Anti-lock Brake
System (4WABS)
module/Rear-wheel Anti-lock
Brake System (RABS) module,
Ignition switch
103 50A** Central junction box
104 30A** 4x4 shift motor & clutch
105 40A** Climate control front blower
106 20A** Intercooler pump (supercharged
engine only)
107—Not used
108 30A** Trailer tow electric brake
2004 F150 Classic(p96)
Owners Guide (post-2002-fmt)
USA English(fus)
Roadside Emergencies
149
Page 153 of 248
Location of the spare tire and tools
The spare tire and tools for your vehicle are stowed in the following
locations:
Tool Location
Spare tire Under the vehicle, just forward of
the rear bumper
Jack, lug nut wrench Under the seat on the passenger
side
Jack handle On top of the radiator support at
the front of the engine
compartment
Key, spare tire lock In the glove box
Removing the spare tire
1. If equipped with a two piece lug wrench, assemble the lug wrench as
shown in the illustration.
•To assemble, screw the parts
together. To disassemble,
unscrew.
2. Attach the spare tire lock key (A)
to the jack handle (B).
2004 F150 Classic(p96)
Owners Guide (post-2002-fmt)
USA English(fus)
Roadside Emergencies
153