2004 FORD F150 tow
[x] Cancel search: towPage 97 of 248
Installing child safety seats in the front row lap belt seating
positions
1. Lengthen the lap belt. To lengthen the belt, hold the tongue so that its
bottom is perpendicular to the direction of webbing while sliding the
tongue up the webbing.
2. Place the child safety seat in the center seating position.
3. Route the tongue and webbing through the child seat according to the
child seat manufacturer’s instructions.
4. Insert the belt tongue into the proper buckle for the center seating
position until you hear a snap and feel it latch. Make sure the tongue is
securely fastened to the buckle by pulling on tongue.
5. Push down on the child seat while pulling on the loose end of the lap
belt webbing to tighten the belt.
6. Before placing the child into the child seat, forcibly tilt the child seat
from side to side and in forward direction to make sure that the seat is
held securely in place. If the child seat moves excessively, repeat steps 5
through 6, or properly install the child seat in a different position.
Installing child safety seat in the second row center seating
position with an automatic locking retractor lap belt
1. Place the child safety seat in the center seating position.
2. In a continuous motion, pull out enough webbing from the retractor to
route the tongue through the child seat.
3. While holding the webbing to prevent it from retracting, route the
webbing through the child seat according to the child seat
manufacturer’s instructions. Be sure the belt webbing is not twisted.
4. Insert the tongue into the correct buckle for that seating position until
you hear and feel the buckle engage. Make sure the buckle is latched
securely by pulling on the webbing.
5. If you have not pulled out enough webbing to reach, allow the
webbing to fully retract before attempting to pull it out again and repeat
steps 2 through 4.
6. Pull the webbing through the child seat toward the retractor while
pushing down with your knee on the child seat.
7. Allow the safety belt to retract to remove any slack in the belt. It will
make a clicking noise while doing this.
8. Before placing the child in the seat, forcibly move the seat forward
and side-to-side to make sure the seat is securely held in place.
2004 F150 Classic(p96)
Owners Guide (post-2002-fmt)
USA English(fus)
Seating and Safety Restraints
97
Page 113 of 248
N (Neutral)
With the gearshift lever in N (Neutral), the vehicle can be started and is
free to roll. Hold the brake pedal down while in this position.
(Overdrive)
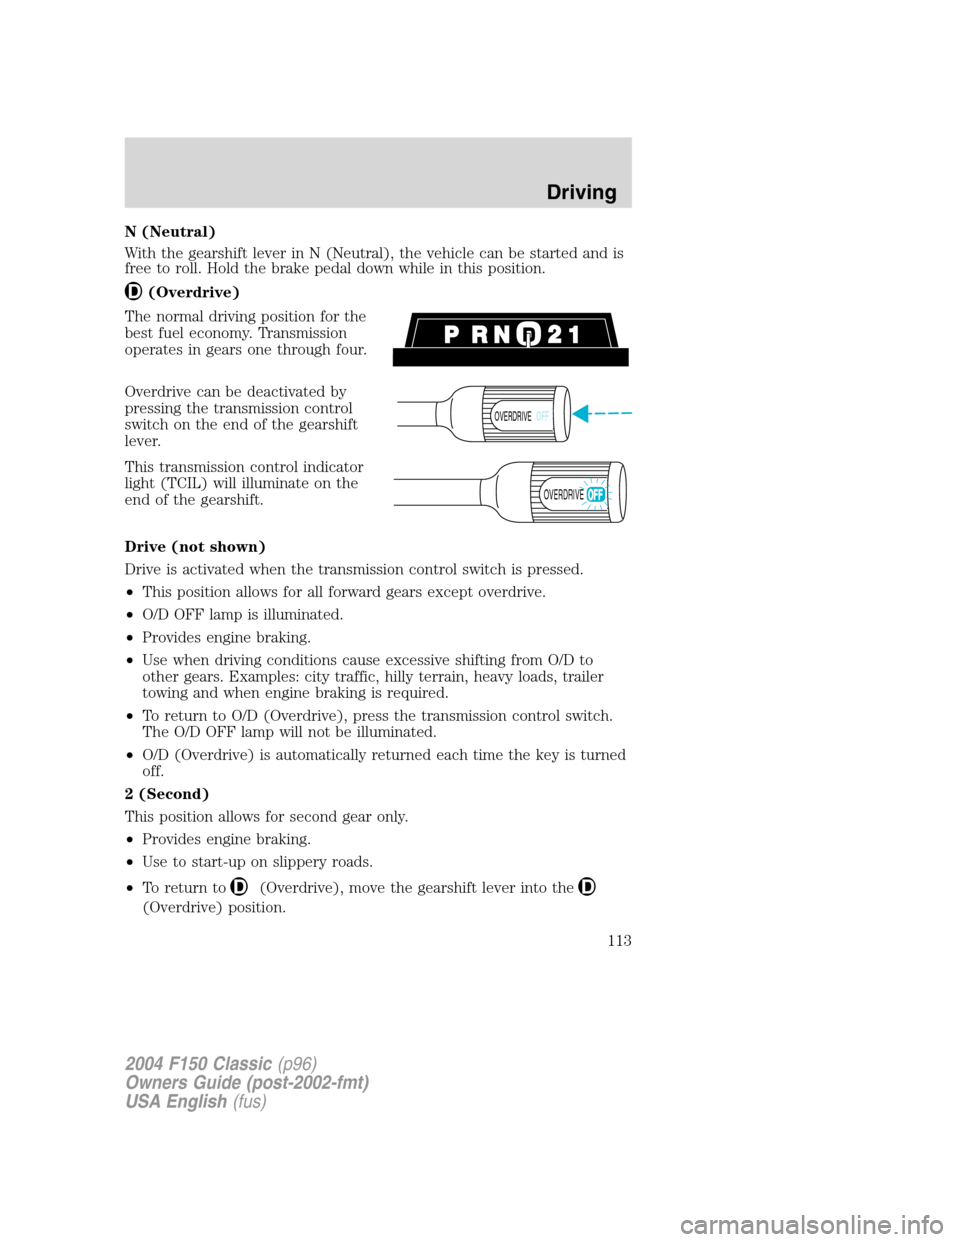
The normal driving position for the
best fuel economy. Transmission
operates in gears one through four.
Overdrive can be deactivated by
pressing the transmission control
switch on the end of the gearshift
lever.
This transmission control indicator
light (TCIL) will illuminate on the
end of the gearshift.
Drive (not shown)
Drive is activated when the transmission control switch is pressed.
•This position allows for all forward gears except overdrive.
•O/D OFF lamp is illuminated.
•Provides engine braking.
•Use when driving conditions cause excessive shifting from O/D to
other gears. Examples: city traffic, hilly terrain, heavy loads, trailer
towing and when engine braking is required.
•To return to O/D (Overdrive), press the transmission control switch.
The O/D OFF lamp will not be illuminated.
•O/D (Overdrive) is automatically returned each time the key is turned
off.
2 (Second)
This position allows for second gear only.
•Provides engine braking.
•Use to start-up on slippery roads.
•To return to
(Overdrive), move the gearshift lever into the
(Overdrive) position.
OVERDRIVEOFF
OVERDRIVE
2004 F150 Classic(p96)
Owners Guide (post-2002-fmt)
USA English(fus)
Driving
113
Page 117 of 248
Removing the key
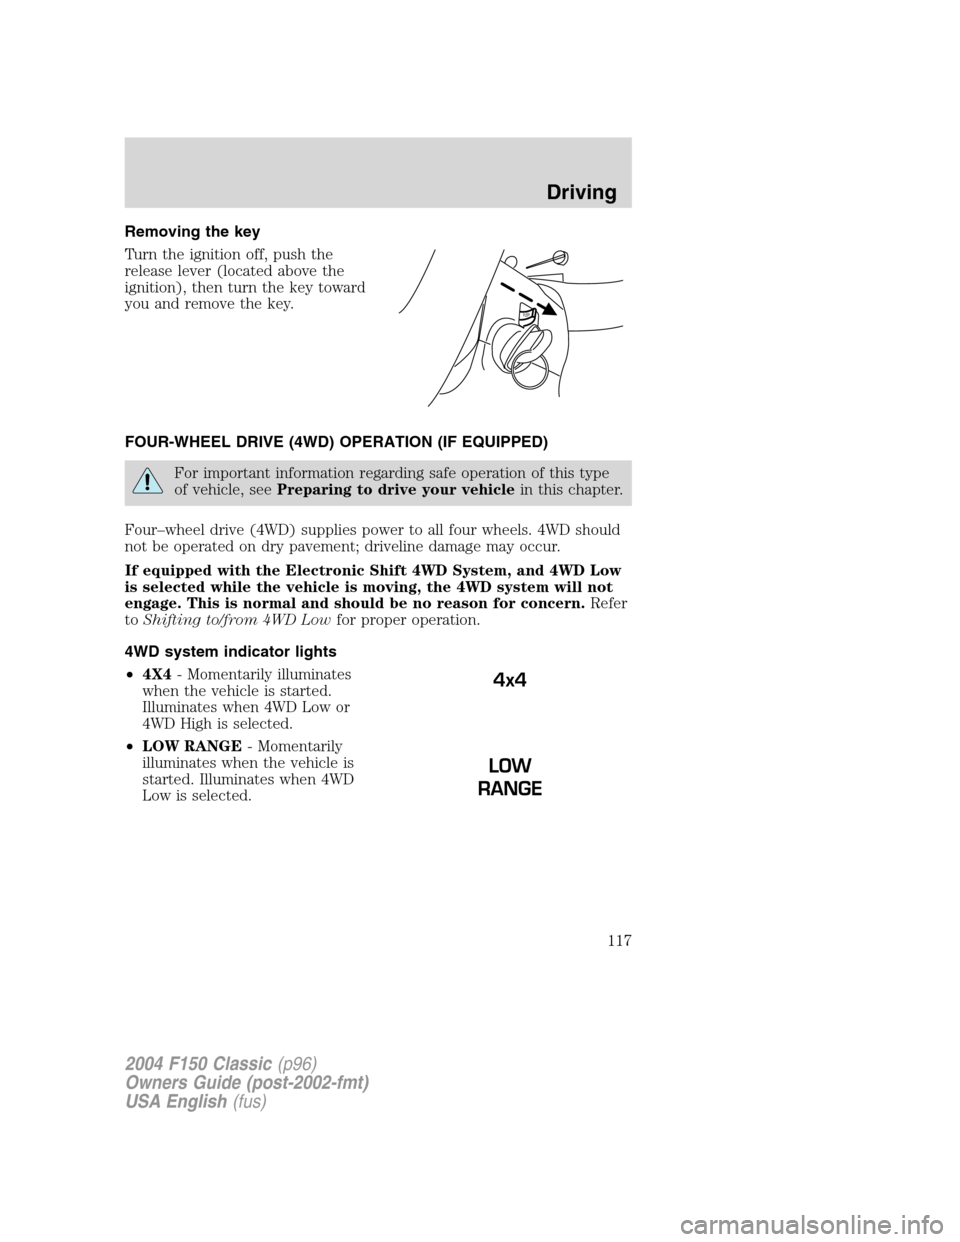
Turn the ignition off, push the
release lever (located above the
ignition), then turn the key toward
you and remove the key.
FOUR-WHEEL DRIVE (4WD) OPERATION (IF EQUIPPED)
For important information regarding safe operation of this type
of vehicle, seePreparing to drive your vehiclein this chapter.
Four–wheel drive (4WD) supplies power to all four wheels. 4WD should
not be operated on dry pavement; driveline damage may occur.
If equipped with the Electronic Shift 4WD System, and 4WD Low
is selected while the vehicle is moving, the 4WD system will not
engage. This is normal and should be no reason for concern.Refer
toShifting to/from 4WD Lowfor proper operation.
4WD system indicator lights
•4X4- Momentarily illuminates
when the vehicle is started.
Illuminates when 4WD Low or
4WD High is selected.
•LOW RANGE- Momentarily
illuminates when the vehicle is
started. Illuminates when 4WD
Low is selected.
PUSH
4x4
2004 F150 Classic(p96)
Owners Guide (post-2002-fmt)
USA English(fus)
Driving
117
Page 119 of 248
4. Move the transfer case lever through N (Neutral) directly to the
desired position. The LOW RANGE indicator will illuminate once the
transfer case has engaged.
•If the transfer casewill notengage into 4L (4WD Low), drive abve 5
mph (8 km/h), then repeat steps 1 through 4.
Note:Some noise may be heard as the system shifts or engages; this is
normal.
Note:For proper operation in 4WD Low, ensure the transfer case shift
lever is moved entirely rearward into the 4L (4WD Low) positions and
that the LOW RANGE light is illuminated.
Using the N (Neutral) position
The transfer case N (Neutral) position overrides the transmission
and puts the vehicle in neutral regardless of transmission
gearshift lever position. The vehicle can move forward or
backward.
This position should only be used when towing the vehicle.
Do not leave the vehicle unattended with the transfer case in the
N (Neutral) position. Always set the parking brake fully and turn
off the ignition when leaving the vehicle.
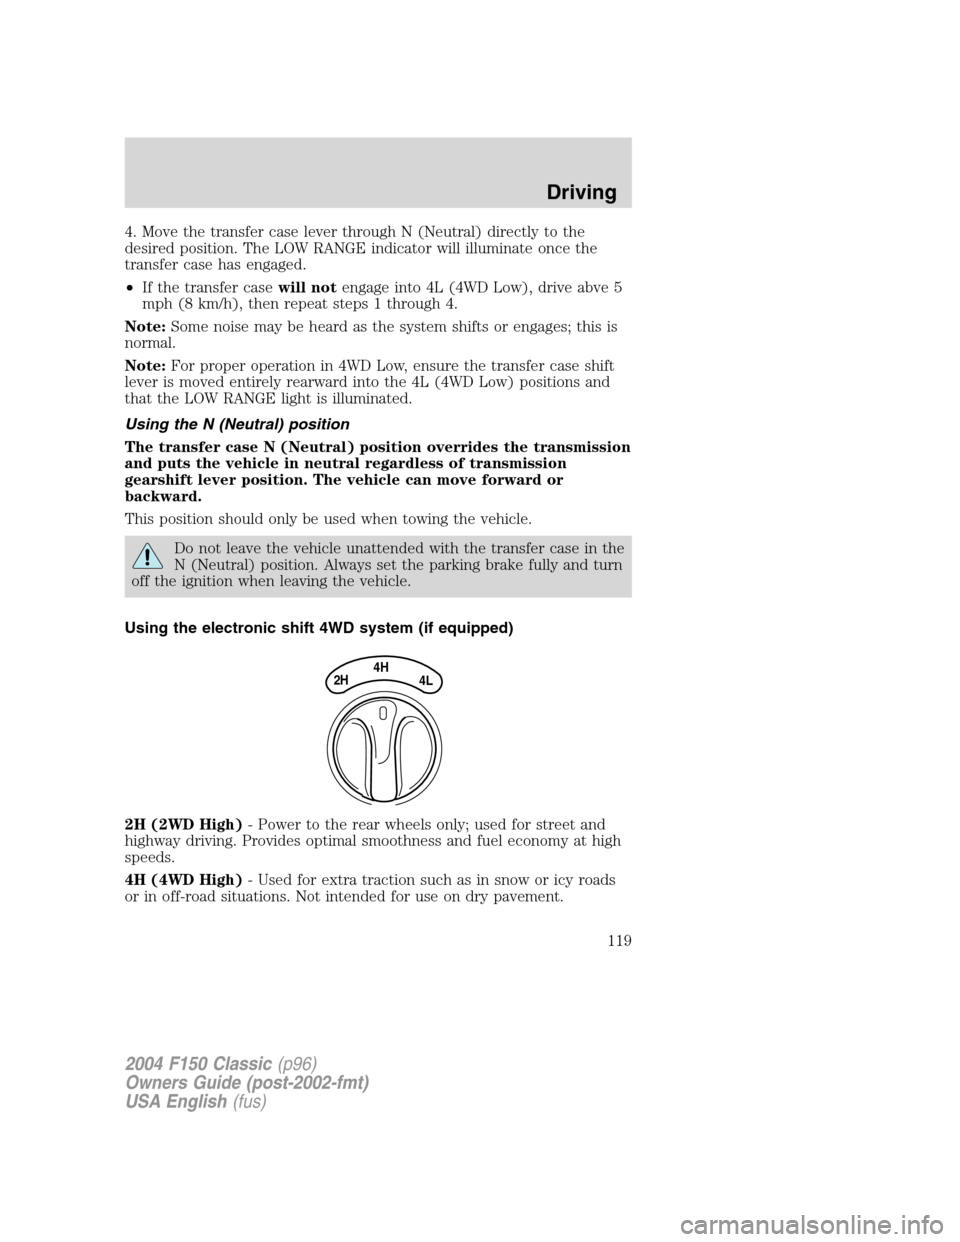
Using the electronic shift 4WD system (if equipped)
2H (2WD High)- Power to the rear wheels only; used for street and
highway driving. Provides optimal smoothness and fuel economy at high
speeds.
4H (4WD High)- Used for extra traction such as in snow or icy roads
or in off-road situations. Not intended for use on dry pavement.
4H
2H4L
2004 F150 Classic(p96)
Owners Guide (post-2002-fmt)
USA English(fus)
Driving
119
Page 130 of 248
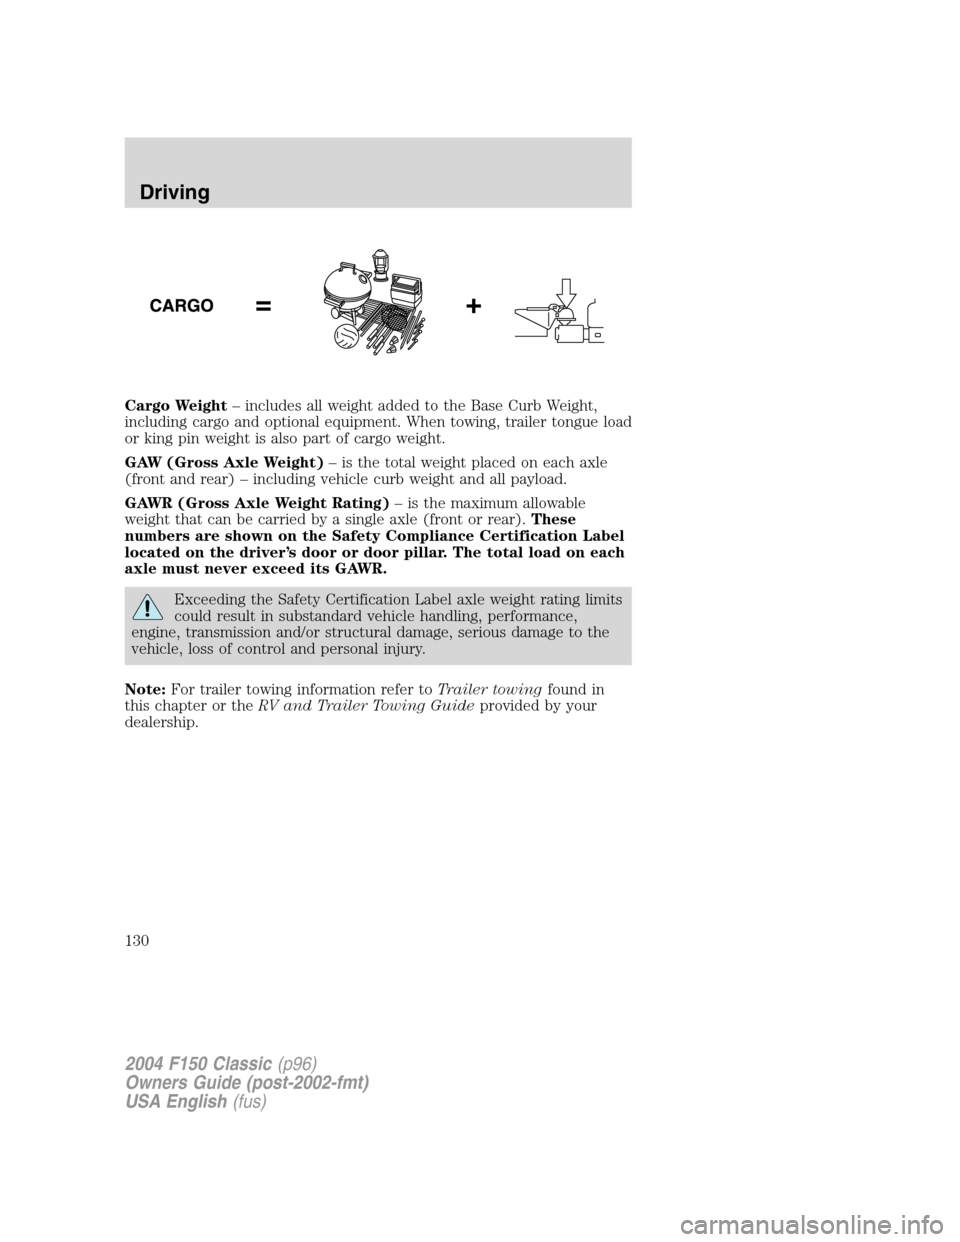
Cargo Weight–includes all weight added to the Base Curb Weight,
including cargo and optional equipment. When towing, trailer tongue load
or king pin weight is also part of cargo weight.
GAW (Gross Axle Weight)–is the total weight placed on each axle
(front and rear)–including vehicle curb weight and all payload.
GAWR (Gross Axle Weight Rating)–is the maximum allowable
weight that can be carried by a single axle (front or rear).These
numbers are shown on the Safety Compliance Certification Label
located on the driver’s door or door pillar. The total load on each
axle must never exceed its GAWR.
Exceeding the Safety Certification Label axle weight rating limits
could result in substandard vehicle handling, performance,
engine, transmission and/or structural damage, serious damage to the
vehicle, loss of control and personal injury.
Note:For trailer towing information refer toTrailer towingfound in
this chapter or theRV and Trailer Towing Guideprovided by your
dealership.
2004 F150 Classic(p96)
Owners Guide (post-2002-fmt)
USA English(fus)
Driving
130
Page 132 of 248
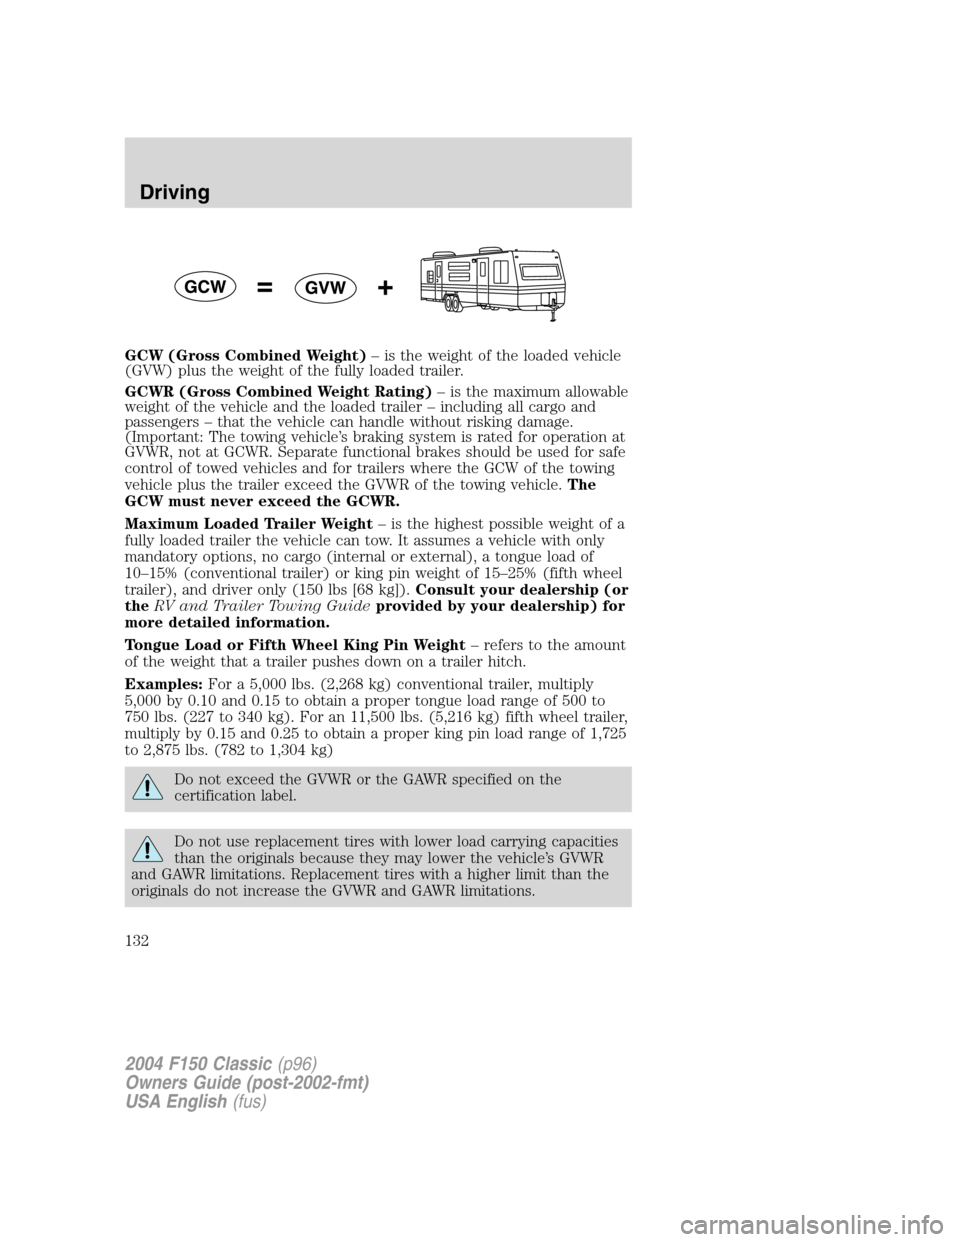
GCW (Gross Combined Weight)–is the weight of the loaded vehicle
(GVW) plus the weight of the fully loaded trailer.
GCWR (Gross Combined Weight Rating)–is the maximum allowable
weight of the vehicle and the loaded trailer–including all cargo and
passengers–that the vehicle can handle without risking damage.
(Important: The towing vehicle’s braking system is rated for operation at
GVWR, not at GCWR. Separate functional brakes should be used for safe
control of towed vehicles and for trailers where the GCW of the towing
vehicle plus the trailer exceed the GVWR of the towing vehicle.The
GCW must never exceed the GCWR.
Maximum Loaded Trailer Weight–is the highest possible weight of a
fully loaded trailer the vehicle can tow. It assumes a vehicle with only
mandatory options, no cargo (internal or external), a tongue load of
10–15% (conventional trailer) or king pin weight of 15–25% (fifth wheel
trailer), and driver only (150 lbs [68 kg]).Consult your dealership (or
theRV and Trailer Towing Guideprovided by your dealership) for
more detailed information.
Tongue Load or Fifth Wheel King Pin Weight–refers to the amount
of the weight that a trailer pushes down on a trailer hitch.
Examples:For a 5,000 lbs. (2,268 kg) conventional trailer, multiply
5,000 by 0.10 and 0.15 to obtain a proper tongue load range of 500 to
750 lbs. (227 to 340 kg). For an 11,500 lbs. (5,216 kg) fifth wheel trailer,
multiply by 0.15 and 0.25 to obtain a proper king pin load range of 1,725
to 2,875 lbs. (782 to 1,304 kg)
Do not exceed the GVWR or the GAWR specified on the
certification label.
Do not use replacement tires with lower load carrying capacities
than the originals because they may lower the vehicle’s GVWR
and GAWR limitations. Replacement tires with a higher limit than the
originals do not increase the GVWR and GAWR limitations.
2004 F150 Classic(p96)
Owners Guide (post-2002-fmt)
USA English(fus)
Driving
132
Page 133 of 248
Exceeding any vehicle weight rating limitation could result in
serious damage to the vehicle and/or personal injury.
Special loading instructions for owners of pickup trucks and
utility-type vehicles
For important information regarding safe operation of this type
of vehicle, see thePreparing to drive your vehiclesection in
this chapter.
Loaded vehicles may handle differently than unloaded vehicles.
Extra precautions, such as slower speeds and increased stopping
distance, should be taken when driving a heavily loaded vehicle.
Your vehicle can haul more cargo and people than most passenger cars.
Depending upon the type and placement of the load, hauling cargo and
people may raise the center of gravity of the vehicle.
Calculating the load your vehicle can carry/tow
1. Use the appropriate maximum GCWR chart (in theTrailer towing
section in this chapter) for your type of engine, wheel size and rear axle
ratio.
2. Weigh your vehicle without cargo. To obtain correct weights, take your
vehicle to a shipping company or an inspection station for trucks.
3. Subtract your loaded weight from the maximum GCWR in the chart.
This is the maximum trailer weight your vehicle can tow. It must be
below the maximum trailer weight shown in the chart.
TRAILER TOWING
Your vehicle may tow a class I, II or III trailer provided the maximum
trailer weight is less than or equal to the maximum trailer weight listed
for your engine and rear axle ratio on the following charts.
Your vehicle’s load capacity is designated by weight, not by volume, so
you cannot necessarily use all available space when loading a vehicle.
Towing a trailer places an additional load on your vehicle’s engine,
transmission, axle, brakes, tires and suspension. Inspect these
components carefully periodically during, and after any towing operation.
Exceeding the maximum GCWR could result in extensive damage
to your vehicle and personal injury.
2004 F150 Classic(p96)
Owners Guide (post-2002-fmt)
USA English(fus)
Driving
133
Page 134 of 248
Do not exceed the GVWR or the GAWR specified on the
certification label.
Towing trailers beyond the maximum recommended gross trailer
weight exceeds the limit of the vehicle and could result in
engine damage, transmission damage, structural damage, loss of vehicle
control, vehicle rollover and personal injury.
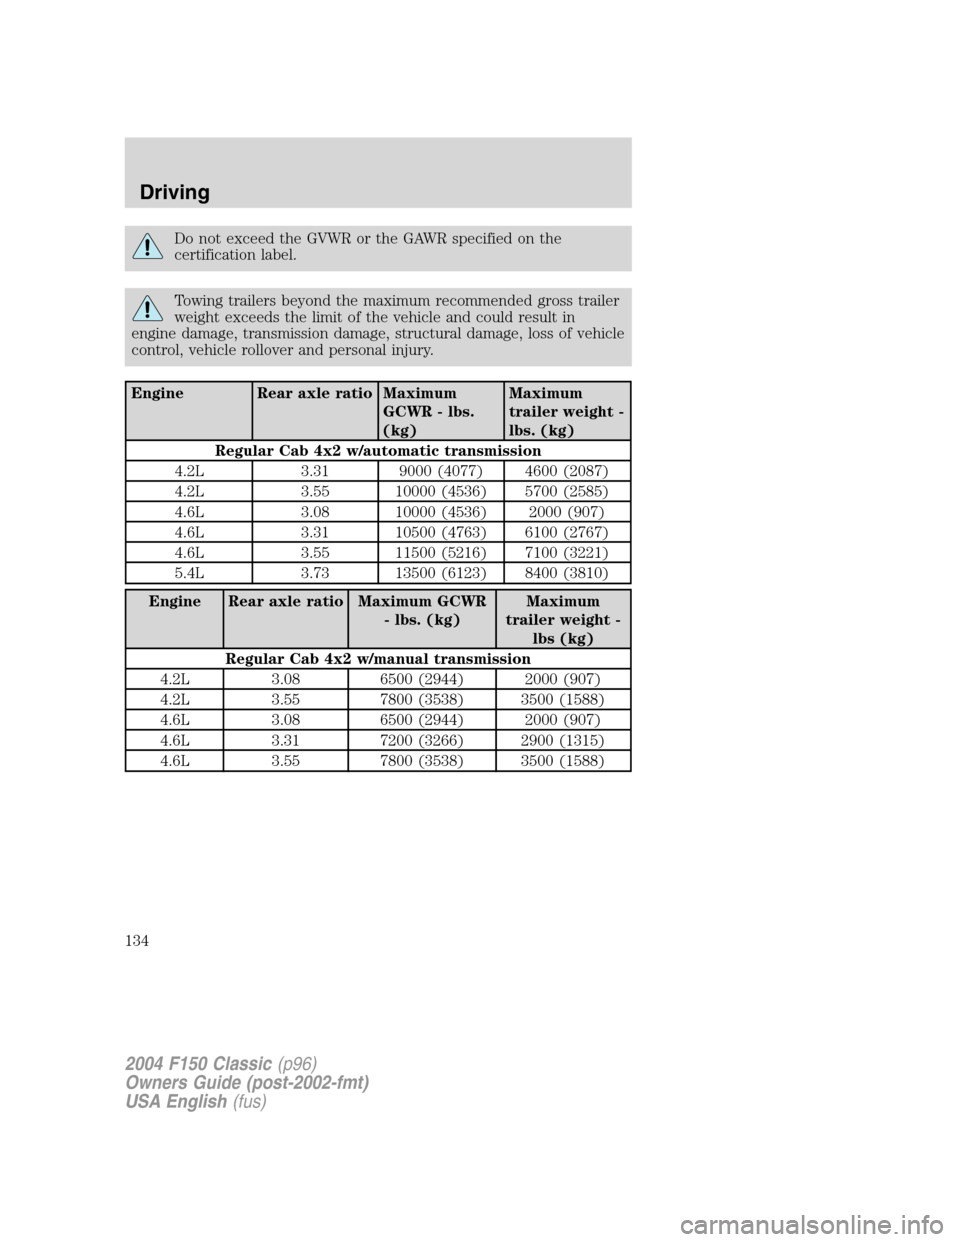
Engine Rear axle ratio Maximum
GCWR - lbs.
(kg)Maximum
trailer weight -
lbs. (kg)
Regular Cab 4x2 w/automatic transmission
4.2L 3.31 9000 (4077) 4600 (2087)
4.2L 3.55 10000 (4536) 5700 (2585)
4.6L 3.08 10000 (4536) 2000 (907)
4.6L 3.31 10500 (4763) 6100 (2767)
4.6L 3.55 11500 (5216) 7100 (3221)
5.4L 3.73 13500 (6123) 8400 (3810)
Engine Rear axle ratio Maximum GCWR
- lbs. (kg)Maximum
trailer weight -
lbs (kg)
Regular Cab 4x2 w/manual transmission
4.2L 3.08 6500 (2944) 2000 (907)
4.2L 3.55 7800 (3538) 3500 (1588)
4.6L 3.08 6500 (2944) 2000 (907)
4.6L 3.31 7200 (3266) 2900 (1315)
4.6L 3.55 7800 (3538) 3500 (1588)
2004 F150 Classic(p96)
Owners Guide (post-2002-fmt)
USA English(fus)
Driving
134