Page 28 of 248
16.Fast Forward (FF):Press to
fast forward the tape.
17.Rewind (REW):Press to
rewind the tape.
18.Select (SEL):Use with Bass,
Treble, Balance, Fade and Clock
controls.
19.Bass:Press BASS; then press
SEL
/to decrease/increase
the bass output.
Treble:Press TREB; then press
SEL
/to decrease/increase
the treble output.
20.Tune:Works in radio mode only.
Press TUNE
/to change
frequency down/up.
21.Seek:Press and release
SEEK
/for previous/next
strong station, selection or track.
22.AM/FM:Press to select AM/FM
frequency band.
FF2
REW1
SEL
SEEKTUNE
SEEKTUNE
2004 F150 Classic(p96)
Owners Guide (post-2002-fmt)
USA English(fus)
Entertainment Systems
28
Page 34 of 248
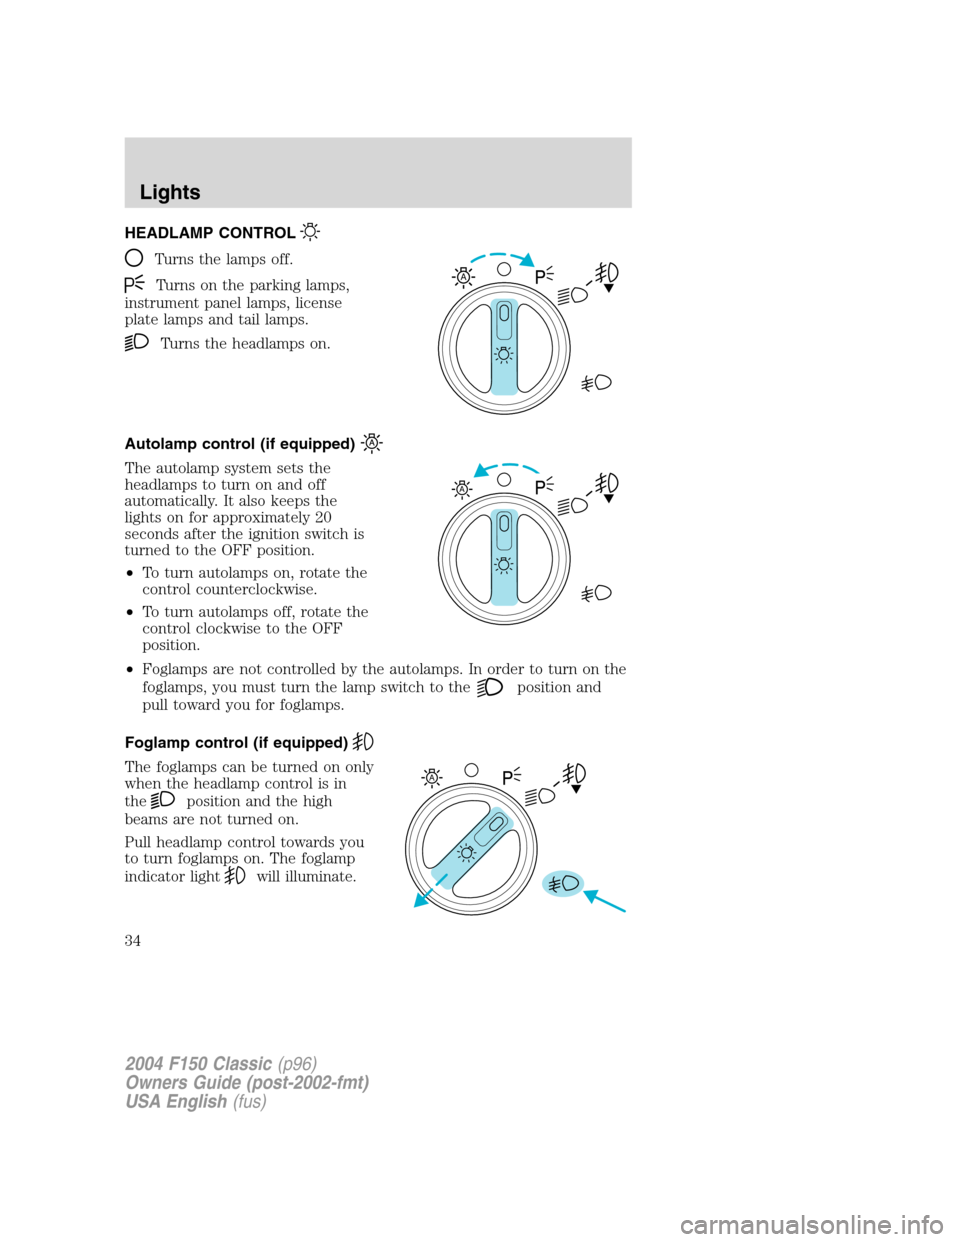
HEADLAMP CONTROL
Turns the lamps off.
Turns on the parking lamps,
instrument panel lamps, license
plate lamps and tail lamps.
Turns the headlamps on.
Autolamp control (if equipped)
The autolamp system sets the
headlamps to turn on and off
automatically. It also keeps the
lights on for approximately 20
seconds after the ignition switch is
turned to the OFF position.
•To turn autolamps on, rotate the
control counterclockwise.
•To turn autolamps off, rotate the
control clockwise to the OFF
position.
•Foglamps are not controlled by the autolamps. In order to turn on the
foglamps, you must turn the lamp switch to the
position and
pull toward you for foglamps.
Foglamp control (if equipped)
The foglamps can be turned on only
when the headlamp control is in
the
position and the high
beams are not turned on.
Pull headlamp control towards you
to turn foglamps on. The foglamp
indicator light
will illuminate.
A
A
A
2004 F150 Classic(p96)
Owners Guide (post-2002-fmt)
USA English(fus)
Lights
Lights
34
Page 39 of 248
Function Number of
bulbsTrade number
Cargo lamp 2 912
License plate lamp 2 194
Running board lamp (if equipped) 4 168
All replacement bulbs are clear in color except where noted.
To replace all instrument panel lights - see your dealer
Replacing headlamp bulbs
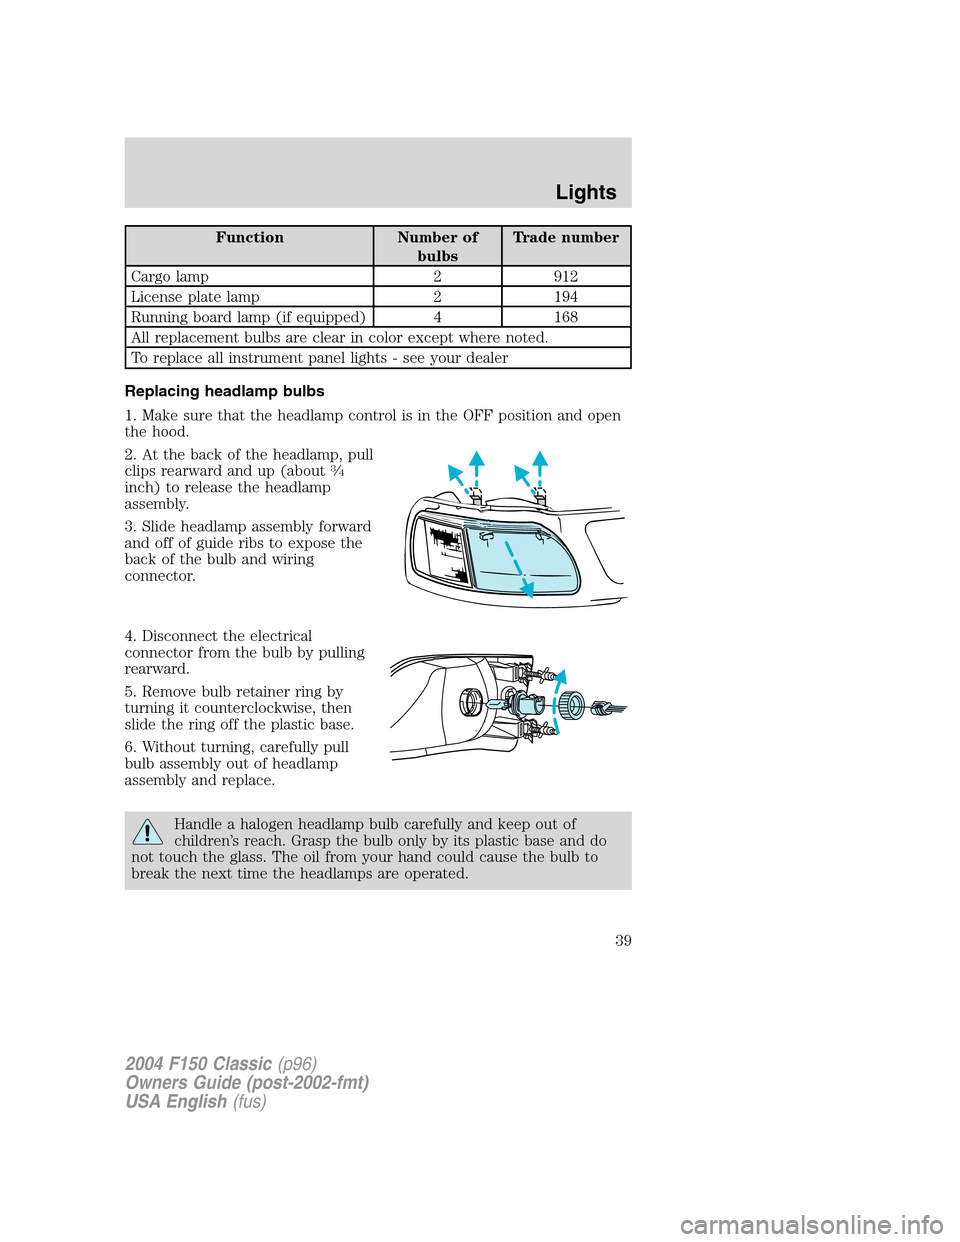
1. Make sure that the headlamp control is in the OFF position and open
the hood.
2. At the back of the headlamp, pull
clips rearward and up (about
3⁄4
inch) to release the headlamp
assembly.
3. Slide headlamp assembly forward
and off of guide ribs to expose the
back of the bulb and wiring
connector.
4. Disconnect the electrical
connector from the bulb by pulling
rearward.
5. Remove bulb retainer ring by
turning it counterclockwise, then
slide the ring off the plastic base.
6. Without turning, carefully pull
bulb assembly out of headlamp
assembly and replace.
Handle a halogen headlamp bulb carefully and keep out of
children’s reach. Grasp the bulb only by its plastic base and do
not touch the glass. The oil from your hand could cause the bulb to
break the next time the headlamps are operated.
2004 F150 Classic(p96)
Owners Guide (post-2002-fmt)
USA English(fus)
Lights
39
Page 40 of 248
7. Insert the glass end of the new bulb into the headlamp assembly.
When the grooves in the plastic base are aligned, push the bulb into the
lamp assembly until the plastic base contacts the rear of the lamp
assembly.
8. Install bulb retaining ring over the plastic base and lock the ring into
the socket by turning it clockwise until you feel a“stop.”
9. Connect the electrical connector into the plastic base until it“snaps.”
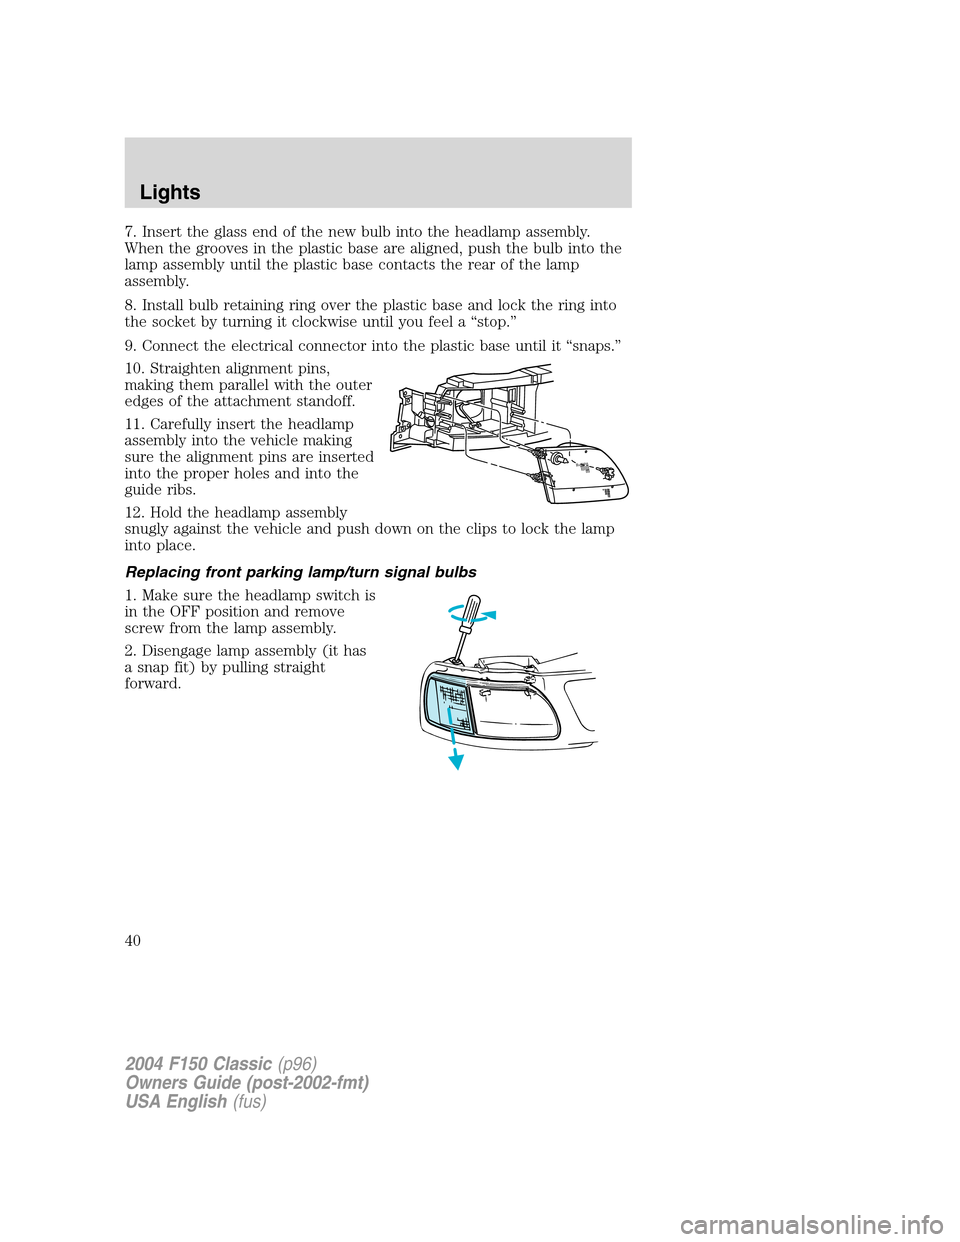
10. Straighten alignment pins,
making them parallel with the outer
edges of the attachment standoff.
11. Carefully insert the headlamp
assembly into the vehicle making
sure the alignment pins are inserted
into the proper holes and into the
guide ribs.
12. Hold the headlamp assembly
snugly against the vehicle and push down on the clips to lock the lamp
into place.
Replacing front parking lamp/turn signal bulbs
1. Make sure the headlamp switch is
in the OFF position and remove
screw from the lamp assembly.
2. Disengage lamp assembly (it has
a snap fit) by pulling straight
forward.
2004 F150 Classic(p96)
Owners Guide (post-2002-fmt)
USA English(fus)
Lights
40
Page 41 of 248
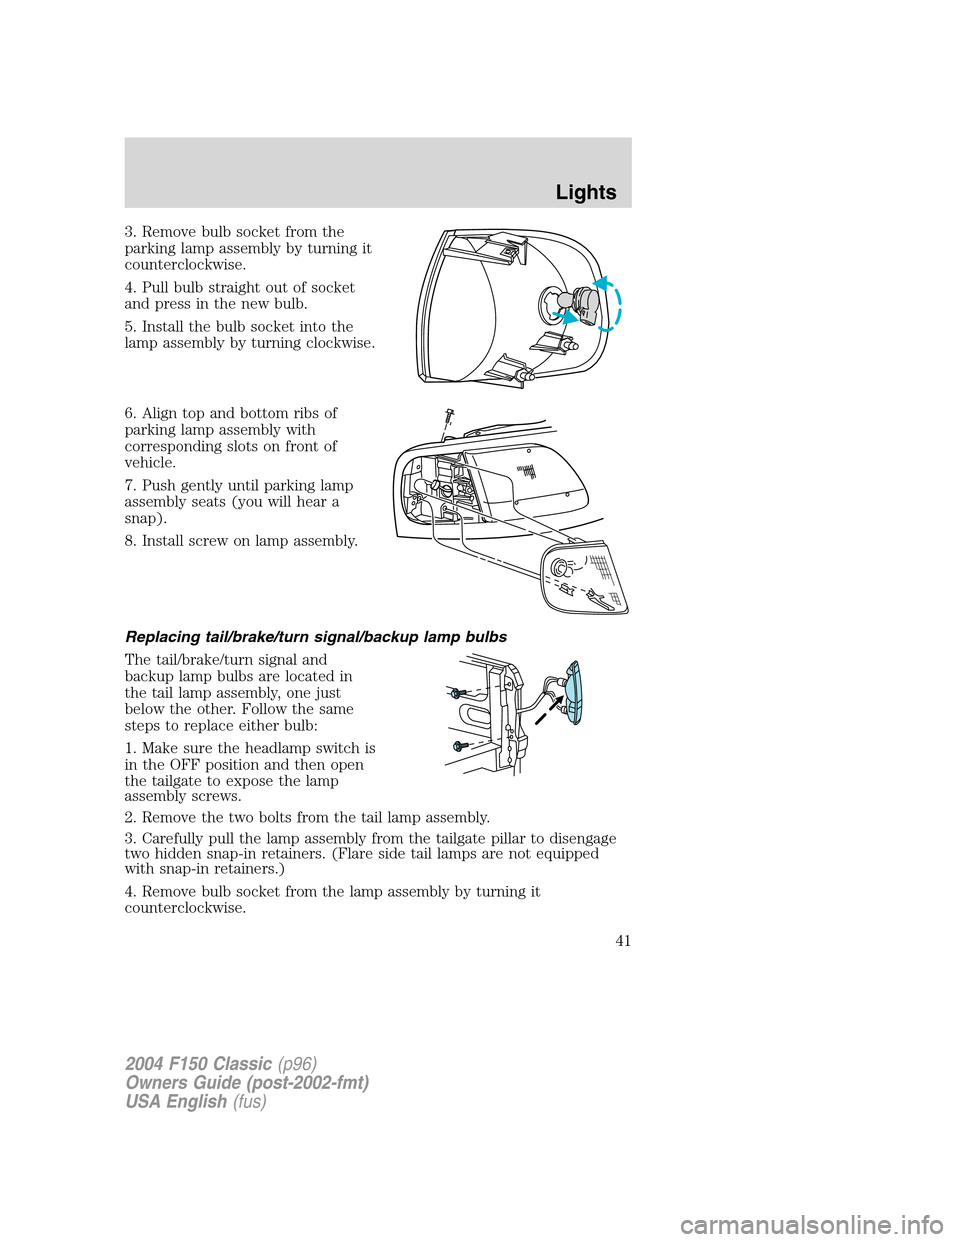
3. Remove bulb socket from the
parking lamp assembly by turning it
counterclockwise.
4. Pull bulb straight out of socket
and press in the new bulb.
5. Install the bulb socket into the
lamp assembly by turning clockwise.
6. Align top and bottom ribs of
parking lamp assembly with
corresponding slots on front of
vehicle.
7. Push gently until parking lamp
assembly seats (you will hear a
snap).
8. Install screw on lamp assembly.
Replacing tail/brake/turn signal/backup lamp bulbs
The tail/brake/turn signal and
backup lamp bulbs are located in
the tail lamp assembly, one just
below the other. Follow the same
steps to replace either bulb:
1. Make sure the headlamp switch is
in the OFF position and then open
the tailgate to expose the lamp
assembly screws.
2. Remove the two bolts from the tail lamp assembly.
3. Carefully pull the lamp assembly from the tailgate pillar to disengage
two hidden snap-in retainers. (Flare side tail lamps are not equipped
with snap-in retainers.)
4. Remove bulb socket from the lamp assembly by turning it
counterclockwise.
2004 F150 Classic(p96)
Owners Guide (post-2002-fmt)
USA English(fus)
Lights
41
Page 42 of 248
5. Pull bulb straight out of socket and press in the new bulb.
6. Install the bulb socket into the lamp assembly by turning clockwise.
7. Carefully install the tail lamp assembly on tailgate pillar snapping the
two snap-in retainers into place. (Flare side tail lamps do not snap into
place but have two tabs which fit into slots.)
8. Secure the tail lamp on the vehicle with two bolts.
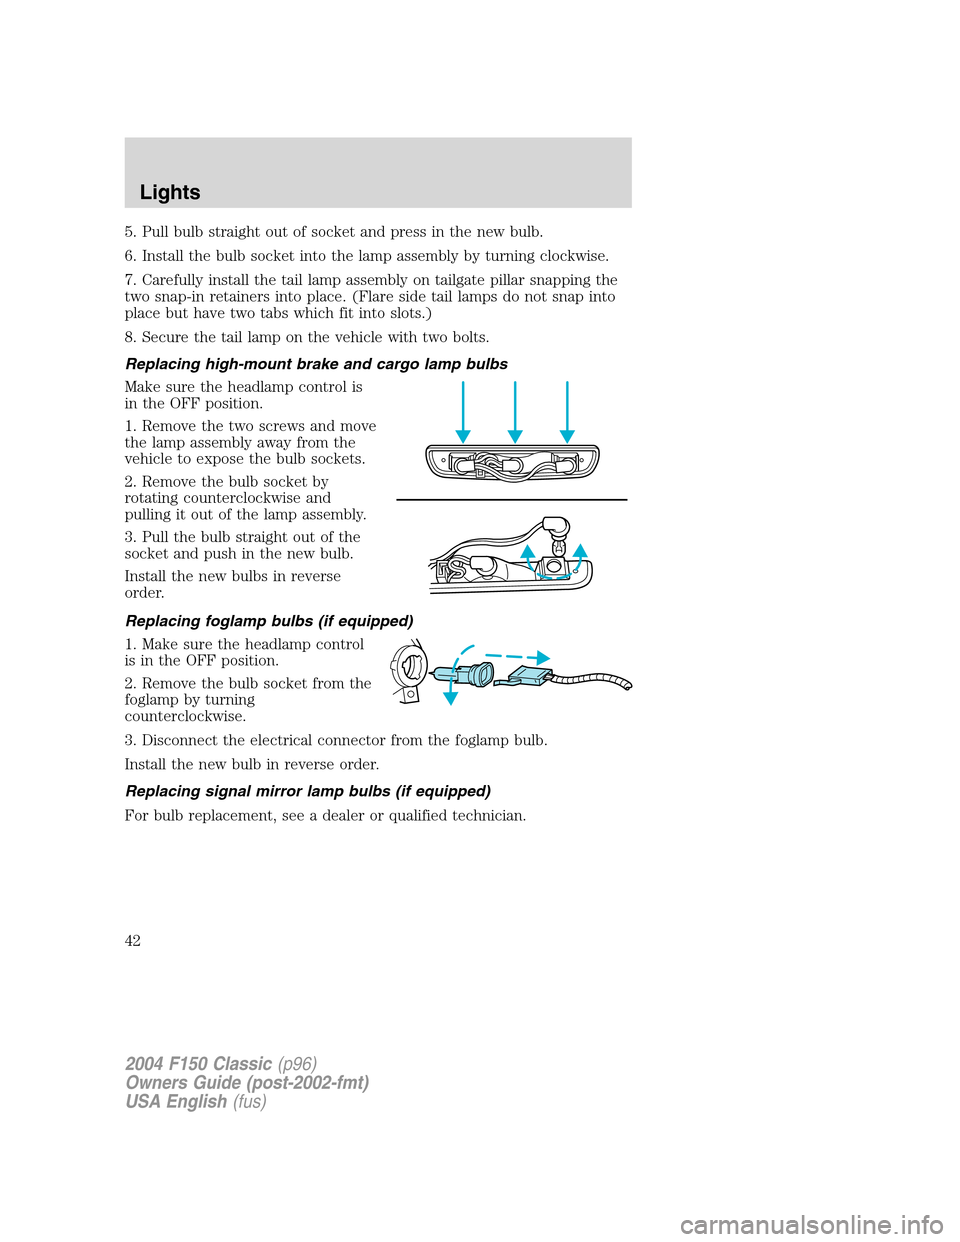
Replacing high-mount brake and cargo lamp bulbs
Make sure the headlamp control is
in the OFF position.
1. Remove the two screws and move
the lamp assembly away from the
vehicle to expose the bulb sockets.
2. Remove the bulb socket by
rotating counterclockwise and
pulling it out of the lamp assembly.
3. Pull the bulb straight out of the
socket and push in the new bulb.
Install the new bulbs in reverse
order.
Replacing foglamp bulbs (if equipped)
1. Make sure the headlamp control
is in the OFF position.
2. Remove the bulb socket from the
foglamp by turning
counterclockwise.
3. Disconnect the electrical connector from the foglamp bulb.
Install the new bulb in reverse order.
Replacing signal mirror lamp bulbs (if equipped)
For bulb replacement, see a dealer or qualified technician.
2004 F150 Classic(p96)
Owners Guide (post-2002-fmt)
USA English(fus)
Lights
42
Page 43 of 248
Replacing license plate lamp bulbs
The license plate bulbs are located
behind the rear bumper. To change
the license plate lamp bulbs:
1. Reach behind the rear bumper to
locate the bulb.
2. Twist the bulb socket
counterclockwise and carefully pull
to remove it from the lamp
assembly.
3. Pull out the old bulb from the
socket and push in the new bulb.
4. Install the bulb socket in lamp assembly by turning it clockwise.
Replacing running board lamp bulbs (if equipped)
The running board bulbs are located
behind the running board.
1. Reach behind the center bracket
of the running board to locate the
bulb.
2. Twist the bulb socket
counterclockwise and carefully pull
to remove it from the lamp
assembly.
3. Pull out the old bulb from the
socket and push in the new bulb.
Install the new bulb in reverse order.
2004 F150 Classic(p96)
Owners Guide (post-2002-fmt)
USA English(fus)
Lights
43
Page 44 of 248
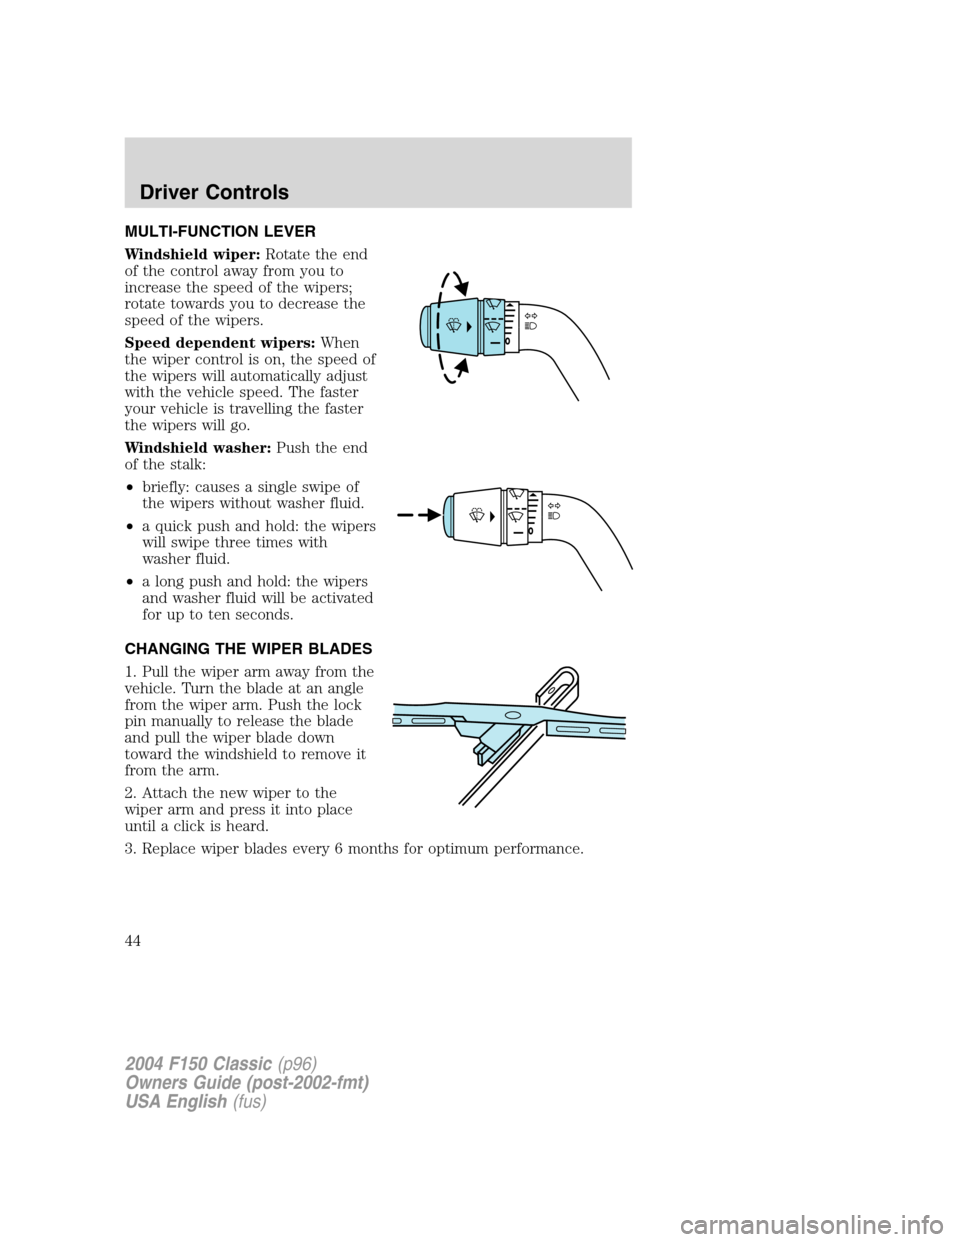
MULTI-FUNCTION LEVER
Windshield wiper:Rotate the end
of the control away from you to
increase the speed of the wipers;
rotate towards you to decrease the
speed of the wipers.
Speed dependent wipers:When
the wiper control is on, the speed of
the wipers will automatically adjust
with the vehicle speed. The faster
your vehicle is travelling the faster
the wipers will go.
Windshield washer:Push the end
of the stalk:
•briefly: causes a single swipe of
the wipers without washer fluid.
•a quick push and hold: the wipers
will swipe three times with
washer fluid.
•a long push and hold: the wipers
and washer fluid will be activated
for up to ten seconds.
CHANGING THE WIPER BLADES
1. Pull the wiper arm away from the
vehicle. Turn the blade at an angle
from the wiper arm. Push the lock
pin manually to release the blade
and pull the wiper blade down
toward the windshield to remove it
from the arm.
2. Attach the new wiper to the
wiper arm and press it into place
until a click is heard.
3. Replace wiper blades every 6 months for optimum performance.
2004 F150 Classic(p96)
Owners Guide (post-2002-fmt)
USA English(fus)
Driver Controls
Driver Controls
44