2004 FORD F SERIES MOTORHOME AND COMMERCIAL CHASSIS trailer
[x] Cancel search: trailerPage 37 of 120
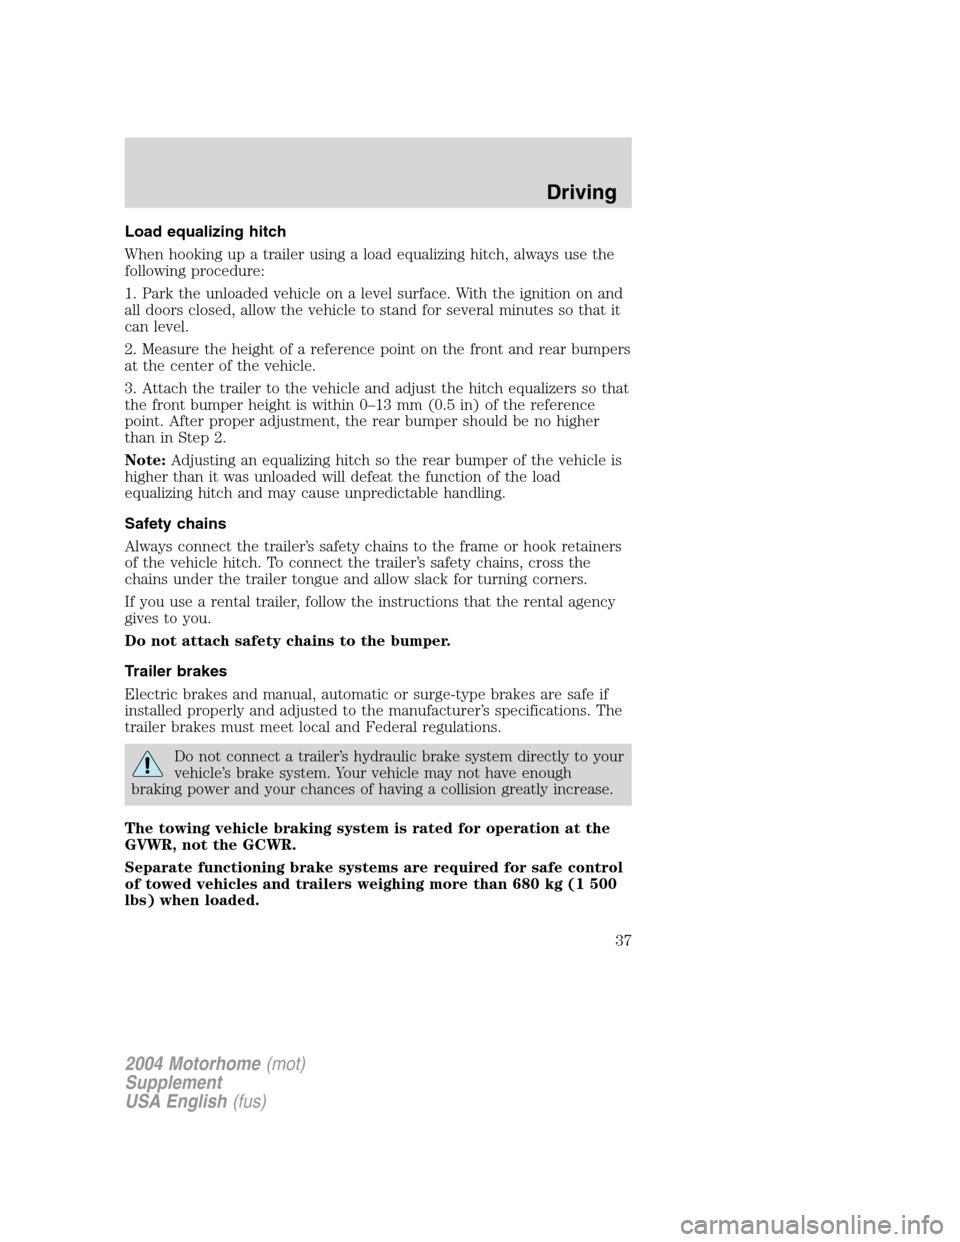
Load equalizing hitch
When hooking up a trailer using a load equalizing hitch, always use the
following procedure:
1. Park the unloaded vehicle on a level surface. With the ignition on and
all doors closed, allow the vehicle to stand for several minutes so that it
can level.
2. Measure the height of a reference point on the front and rear bumpers
at the center of the vehicle.
3. Attach the trailer to the vehicle and adjust the hitch equalizers so that
the front bumper height is within 0–13 mm (0.5 in) of the reference
point. After proper adjustment, the rear bumper should be no higher
than in Step 2.
Note:Adjusting an equalizing hitch so the rear bumper of the vehicle is
higher than it was unloaded will defeat the function of the load
equalizing hitch and may cause unpredictable handling.
Safety chains
Always connect the trailer’s safety chains to the frame or hook retainers
of the vehicle hitch. To connect the trailer’s safety chains, cross the
chains under the trailer tongue and allow slack for turning corners.
If you use a rental trailer, follow the instructions that the rental agency
gives to you.
Do not attach safety chains to the bumper.
Trailer brakes
Electric brakes and manual, automatic or surge-type brakes are safe if
installed properly and adjusted to the manufacturer’s specifications. The
trailer brakes must meet local and Federal regulations.
Do not connect a trailer’s hydraulic brake system directly to your
vehicle’s brake system. Your vehicle may not have enough
braking power and your chances of having a collision greatly increase.
The towing vehicle braking system is rated for operation at the
GVWR, not the GCWR.
Separate functioning brake systems are required for safe control
of towed vehicles and trailers weighing more than 680 kg (1 500
lbs) when loaded.
2004 Motorhome(mot)
Supplement
USA English(fus)
Driving
37
Page 38 of 120
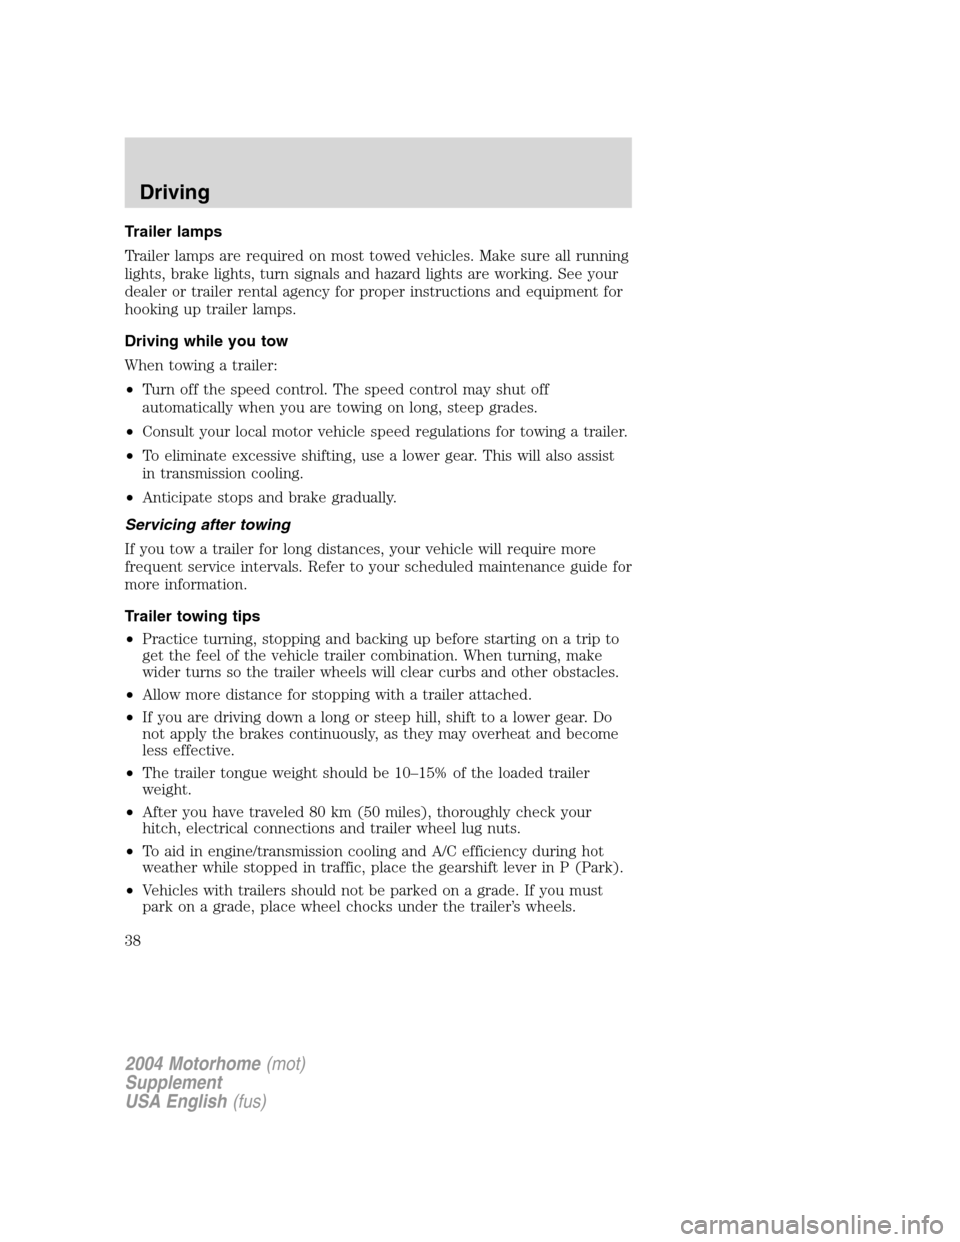
Trailer lamps
Trailer lamps are required on most towed vehicles. Make sure all running
lights, brake lights, turn signals and hazard lights are working. See your
dealer or trailer rental agency for proper instructions and equipment for
hooking up trailer lamps.
Driving while you tow
When towing a trailer:
•Turn off the speed control. The speed control may shut off
automatically when you are towing on long, steep grades.
•Consult your local motor vehicle speed regulations for towing a trailer.
•To eliminate excessive shifting, use a lower gear. This will also assist
in transmission cooling.
•Anticipate stops and brake gradually.
Servicing after towing
If you tow a trailer for long distances, your vehicle will require more
frequent service intervals. Refer to your scheduled maintenance guide for
more information.
Trailer towing tips
•Practice turning, stopping and backing up before starting on a trip to
get the feel of the vehicle trailer combination. When turning, make
wider turns so the trailer wheels will clear curbs and other obstacles.
•Allow more distance for stopping with a trailer attached.
•If you are driving down a long or steep hill, shift to a lower gear. Do
not apply the brakes continuously, as they may overheat and become
less effective.
•The trailer tongue weight should be 10–15% of the loaded trailer
weight.
•After you have traveled 80 km (50 miles), thoroughly check your
hitch, electrical connections and trailer wheel lug nuts.
•To aid in engine/transmission cooling and A/C efficiency during hot
weather while stopped in traffic, place the gearshift lever in P (Park).
•Vehicles with trailers should not be parked on a grade. If you must
park on a grade, place wheel chocks under the trailer’s wheels.
2004 Motorhome(mot)
Supplement
USA English(fus)
Driving
38
Page 43 of 120
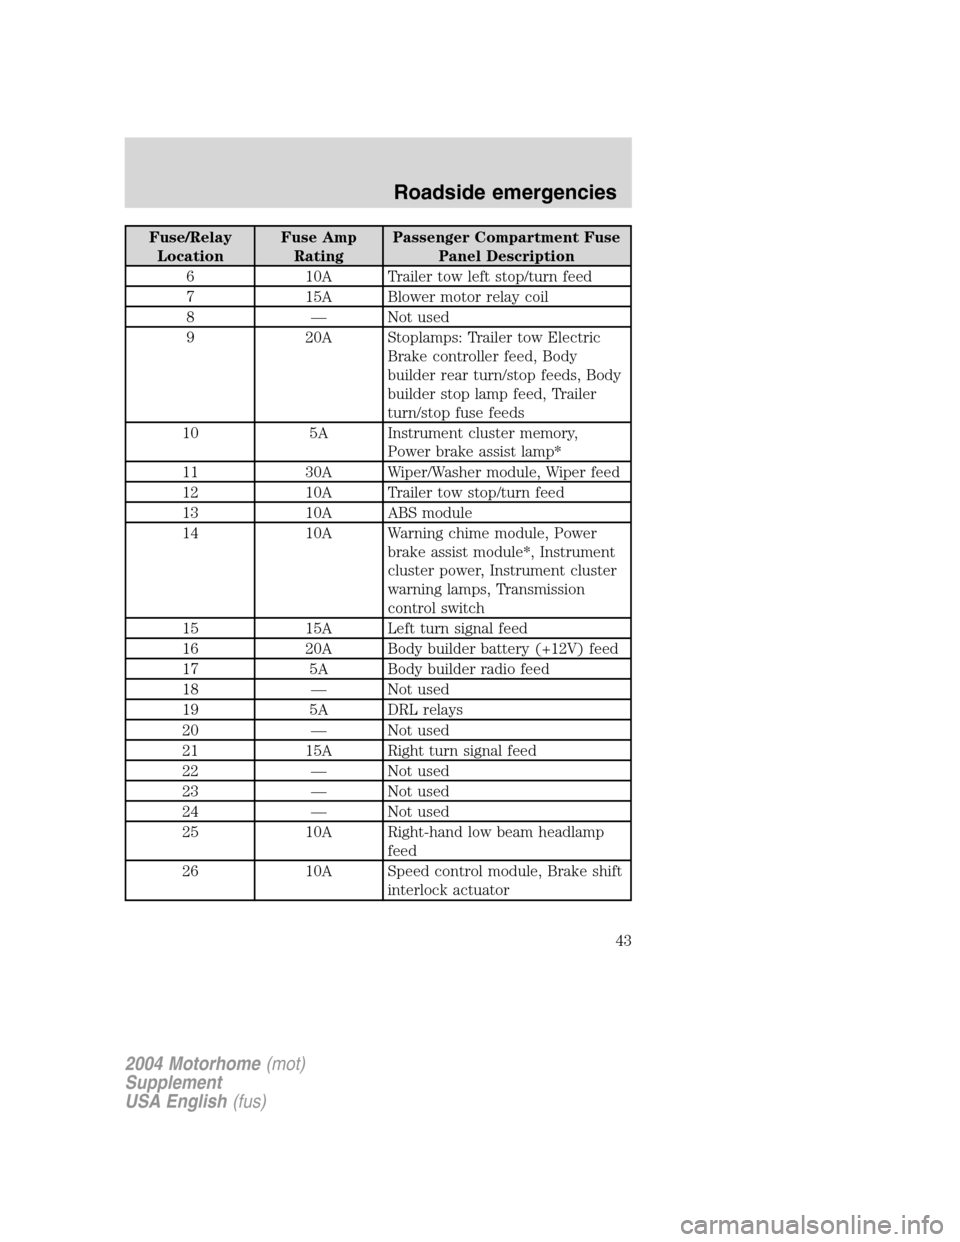
Fuse/Relay
LocationFuse Amp
RatingPassenger Compartment Fuse
Panel Description
6 10A Trailer tow left stop/turn feed
7 15A Blower motor relay coil
8—Not used
9 20A Stoplamps: Trailer tow Electric
Brake controller feed, Body
builder rear turn/stop feeds, Body
builder stop lamp feed, Trailer
turn/stop fuse feeds
10 5A Instrument cluster memory,
Power brake assist lamp*
11 30A Wiper/Washer module, Wiper feed
12 10A Trailer tow stop/turn feed
13 10A ABS module
14 10A Warning chime module, Power
brake assist module*, Instrument
cluster power, Instrument cluster
warning lamps, Transmission
control switch
15 15A Left turn signal feed
16 20A Body builder battery (+12V) feed
17 5A Body builder radio feed
18—Not used
19 5A DRL relays
20—Not used
21 15A Right turn signal feed
22—Not used
23—Not used
24—Not used
25 10A Right-hand low beam headlamp
feed
26 10A Speed control module, Brake shift
interlock actuator
2004 Motorhome(mot)
Supplement
USA English(fus)
Roadside emergencies
43
Page 46 of 120
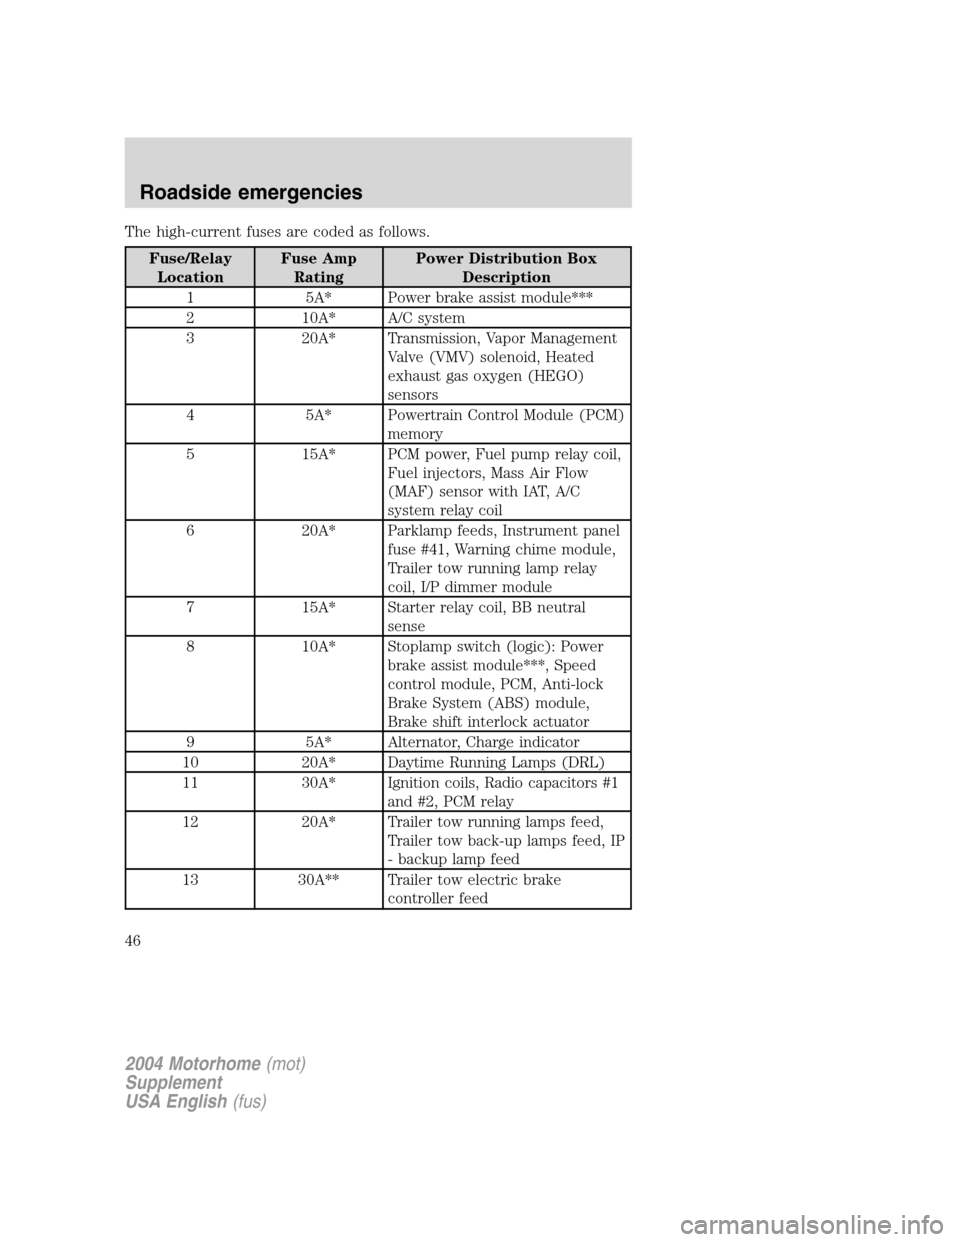
The high-current fuses are coded as follows.
Fuse/Relay
LocationFuse Amp
RatingPower Distribution Box
Description
1 5A* Power brake assist module***
2 10A* A/C system
3 20A* Transmission, Vapor Management
Valve (VMV) solenoid, Heated
exhaust gas oxygen (HEGO)
sensors
4 5A* Powertrain Control Module (PCM)
memory
5 15A* PCM power, Fuel pump relay coil,
Fuel injectors, Mass Air Flow
(MAF) sensor with IAT, A/C
system relay coil
6 20A* Parklamp feeds, Instrument panel
fuse #41, Warning chime module,
Trailer tow running lamp relay
coil, I/P dimmer module
7 15A* Starter relay coil, BB neutral
sense
8 10A* Stoplamp switch (logic): Power
brake assist module***, Speed
control module, PCM, Anti-lock
Brake System (ABS) module,
Brake shift interlock actuator
9 5A* Alternator, Charge indicator
10 20A* Daytime Running Lamps (DRL)
11 30A* Ignition coils, Radio capacitors #1
and #2, PCM relay
12 20A* Trailer tow running lamps feed,
Trailer tow back-up lamps feed, IP
- backup lamp feed
13 30A** Trailer tow electric brake
controller feed
2004 Motorhome(mot)
Supplement
USA English(fus)
Roadside emergencies
46
Page 87 of 120
Maintenance
•Keep tires properly inflated and use only recommended size.
•Operating a vehicle with the wheels out of alignment will reduce fuel
economy.
•Use recommended engine oil. Refer toLubricant specificationsin
this chapter.
•Perform all regularly scheduled maintenance items. Follow the
recommended maintenance schedule and owner maintenance checks
found in your vehicle scheduled maintenance guide.
Conditions
•Heavily loading a vehicle or towing a trailer may reduce fuel economy
at any speed.
•Carrying unnecessary weight may reduce fuel economy (approximately
0.4 km/L [1 mpg] is lost for every 180 kg [400 lb] of weight carried).
•Adding certain accessories to your vehicle (for example bug
deflectors, rollbars/light bars, running boards, ski/luggage racks) may
reduce fuel economy.
•Using fuel blended with alcohol may lower fuel economy.
•Fuel economy may decrease with lower temperatures during the first
12–16 km (8–10 miles) of driving.
•Driving on flat terrain offers improved fuel economy as compared to
driving on hilly terrain.
•Transmissions give their best fuel economy when operated in the top
cruise gear and with steady pressure on the gas pedal.
•Close windows for high speed driving.
EPA window sticker
Every new vehicle should have the EPA window sticker. Contact your
dealer if the window sticker is not supplied with your vehicle. The EPA
window sticker should be your guide for the fuel economy comparisons
with other vehicles.
It is important to note the box in the lower left corner of the window
sticker. These numbers represent the Range of L/100 km (MPG)
expected on the vehicle under optimum conditions. Your fuel economy
may vary depending upon the method of operation and conditions.
NOTE:Vehicles over 8500 GVW (Gross Vehicle Weight) will not have
fuel economy information printed on the EPA window sticker.
2004 Motorhome(mot)
Supplement
USA English(fus)
Maintenance and specifications
87
Page 92 of 120
Brake fluid is toxic. If brake fluid contacts the eyes, flush eyes
with running water for 15 minutes. Seek medical attention if
irritation persists. If taken internally, drink water and induce vomiting.
Seek medical attention immediately.
If you use a brake fluid that is not DOT 3, you will cause
permanent damage to your brakes.
Do not let the reservoir for the master cylinder run dry. This
may cause the brakes to fail.
Brake system fluid should be replaced on a regular basis to maintain
optimum braking performance, especially under heavy-duty driving
conditions such as frequent steep grades or heavy towing loads. Refer to
the scheduled maintenance guide for the service interval schedules.
TRANSMISSION FLUID
Checking automatic transmission fluid
Refer to your scheduled maintenance guide for scheduled intervals for
fluid checks and changes. Your transmission does not consume fluid.
However, the fluid level should be checked if the transmission is not
working properly, i.e., if the transmission slips or shifts slowly or if you
notice some sign of fluid leakage.
Automatic transmission fluid expands when warmed. To obtain an
accurate fluid check, drive the vehicle until it is at normal operating
temperature (approximately 30 km [20 miles]). If your vehicle has been
operated for an extended period at high speeds, in city traffic during hot
weather or pulling a trailer, the vehicle should be turned off for about 30
minutes to allow fluid to cool to normal operating temperature 66°C-
77°C (150°F - 170°F) before checking.
1. Drive the vehicle 30 km (20 miles) or until it reaches normal operating
temperature.
2. Park the vehicle on a level surface and engage the parking brake.
3. With the parking brake engaged and your foot on the brake pedal,
start the engine and move the gearshift lever through all of the gear
ranges. Allow sufficient time for each gear to engage.
4. Latch the gearshift lever in P (Park) and leave the engine running.
2004 Motorhome(mot)
Supplement
USA English(fus)
Maintenance and specifications
92
Page 118 of 120
Instrument panel
cluster ..........................................8
lighting up panel and
interior .......................................15
J
Jack ..............................................48
positioning .................................48
storage .......................................48
Jump-starting your vehicle ........52
K
Keys
positions of the ignition ...........20
L
Lamps
daytime running light ...............14
headlamps .................................14
headlamps, flash to pass ..........15
instrument panel, dimming .....15
replacing bulbs .........................15
Lights, warning and indicator ......8
anti-lock brakes (ABS) ............25
Load limits .............................31, 33
GAWR ........................................31
GVWR ........................................31
trailer towing ............................31
Lubricant specifications ...112–113
M
Motorcraft parts ..................82, 109
O
Octane rating ..............................81
Oil (see Engine oil) ....................69P
Parking brake ..............................26
Parts (see Motorcraft parts) ....109
Power distribution box
(see Fuses) .................................45
Power steering
fluid, checking and adding ......90
fluid, refill capacity ................110
fluid, specifications .........112–113
R
Relays ....................................41, 48
Roadside assistance ....................39
S
Safety defects, reporting ............65
Servicing your vehicle ................67
Spark plugs,
specifications .............109, 113–114
Special notice ................................5
Specification chart,
lubricants ...........................112–113
Speed control ..............................17
Starting your vehicle ............20–22
jump starting ............................52
Steering wheel
tilting .........................................16
T
Tilt steering wheel ......................16
Tires .......................................48, 96
changing ..............................48, 51
replacing ....................................49
snow tires and chains ............108
2004 Motorhome(mot)
Supplement
USA English(fus)
Index
118
Page 119 of 120
tire grades .................................97
treadwear ..................................96
Towing .........................................36
trailer towing ............................36
wrecker ......................................56
Transmission ...............................27
brake-shift interlock (BSI) ......27
fluid, checking and adding
(automatic) ...............................92
fluid, refill capacities ..............110
lubricant specifications ..112–113
V
Vehicle Identification Number
(VIN) ..........................................114Vehicle loading
......................31, 33
Ventilating your vehicle
.............23
W
Warning lights (see Lights)
.........8
Water, Driving through
...............31
Windshield washer fluid and
wipers
..........................................16
Wrecker towing
...........................56
2004 Motorhome(mot)
Supplement
USA English(fus)
Index
119