Page 14 of 296

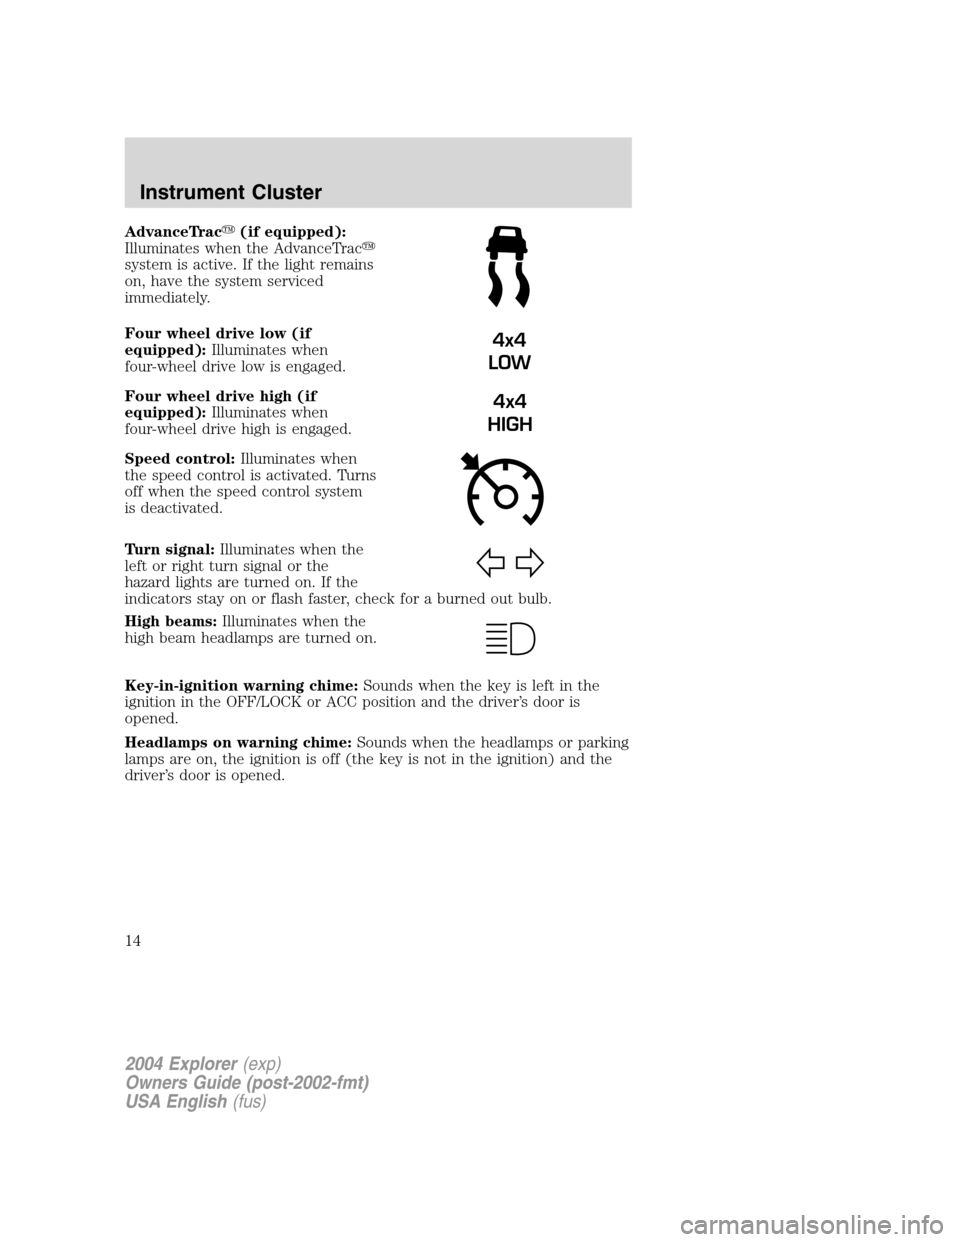
AdvanceTrac�(if equipped):
Illuminates when the AdvanceTrac�
system is active. If the light remains
on, have the system serviced
immediately.
Four wheel drive low (if
equipped):Illuminates when
four-wheel drive low is engaged.
Four wheel drive high (if
equipped):Illuminates when
four-wheel drive high is engaged.
Speed control:Illuminates when
the speed control is activated. Turns
off when the speed control system
is deactivated.
Turn signal:Illuminates when the
left or right turn signal or the
hazard lights are turned on. If the
indicators stay on or flash faster, check for a burned out bulb.
High beams:Illuminates when the
high beam headlamps are turned on.
Key-in-ignition warning chime:Sounds when the key is left in the
ignition in the OFF/LOCK or ACC position and the driver’s door is
opened.
Headlamps on warning chime:Sounds when the headlamps or parking
lamps are on, the ignition is off (the key is not in the ignition) and the
driver’s door is opened.
4x4
LOW
4x4
HIGH
2004 Explorer(exp)
Owners Guide (post-2002-fmt)
USA English(fus)
Instrument Cluster
14
Page 39 of 296

Move the control to the full down position (past detent) to prevent
interior lamps from illuminating when the doors are opened.
AIMING THE HEADLAMPS
The headlamps on your vehicle are properly aimed before leaving the
assembly plant. If your vehicle is involved in an accident or if you have
problems fixing the alignment of your headlamps, have them checked by
a qualified service technician.
Headlamp aim adjustment
The headlamps on your vehicle can only be vertically adjusted. Your
vehicle does not require horizontal aim adjustments.
To adjust the headlamps:
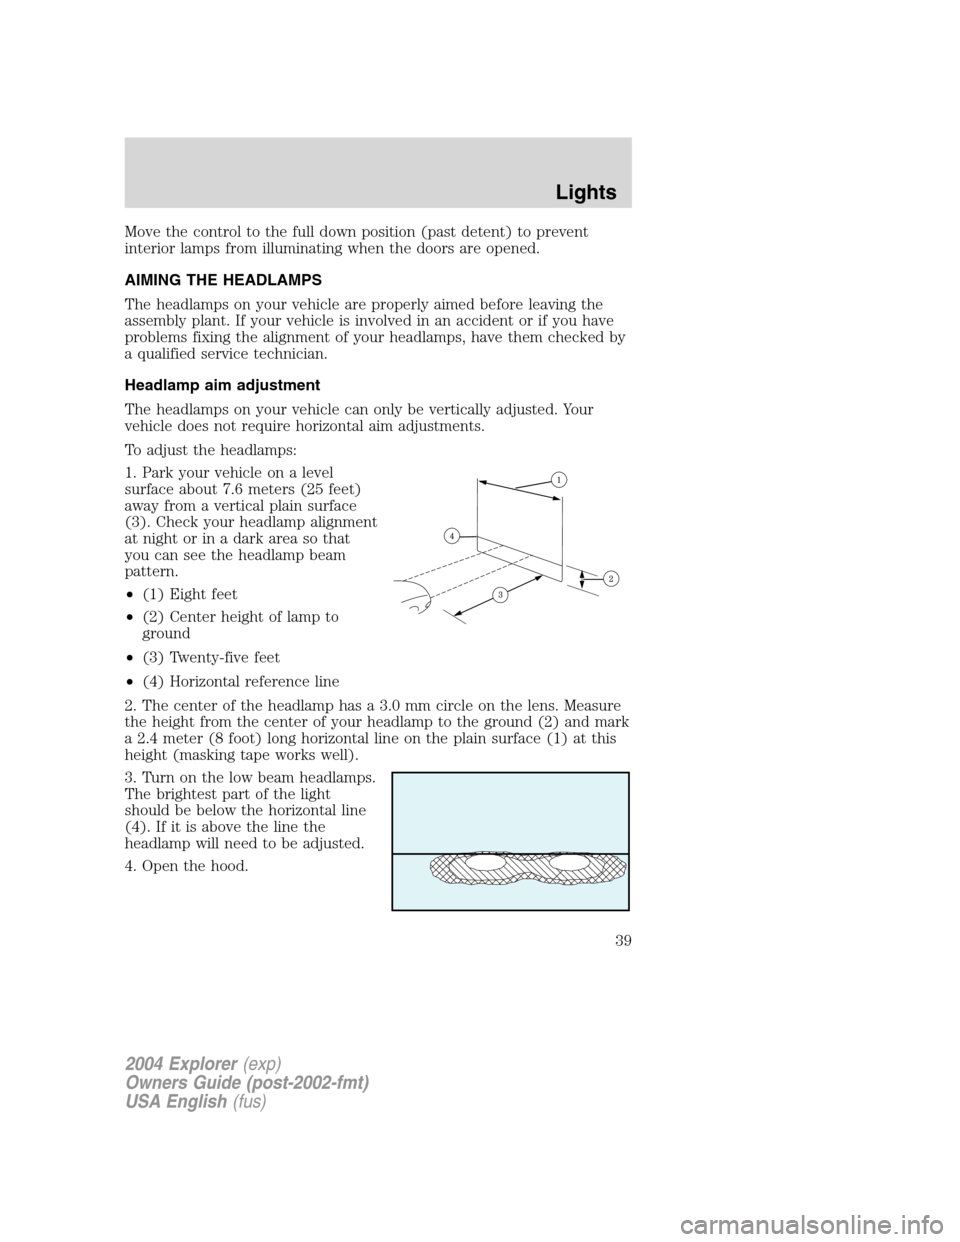
1. Park your vehicle on a level
surface about 7.6 meters (25 feet)
away from a vertical plain surface
(3). Check your headlamp alignment
at night or in a dark area so that
you can see the headlamp beam
pattern.
•(1) Eight feet
•(2) Center height of lamp to
ground
•(3) Twenty-five feet
•(4) Horizontal reference line
2. The center of the headlamp has a 3.0 mm circle on the lens. Measure
the height from the center of your headlamp to the ground (2) and mark
a 2.4 meter (8 foot) long horizontal line on the plain surface (1) at this
height (masking tape works well).
3. Turn on the low beam headlamps.
The brightest part of the light
should be below the horizontal line
(4). If it is above the line the
headlamp will need to be adjusted.
4. Open the hood.
2004 Explorer(exp)
Owners Guide (post-2002-fmt)
USA English(fus)
Lights
39
Page 41 of 296

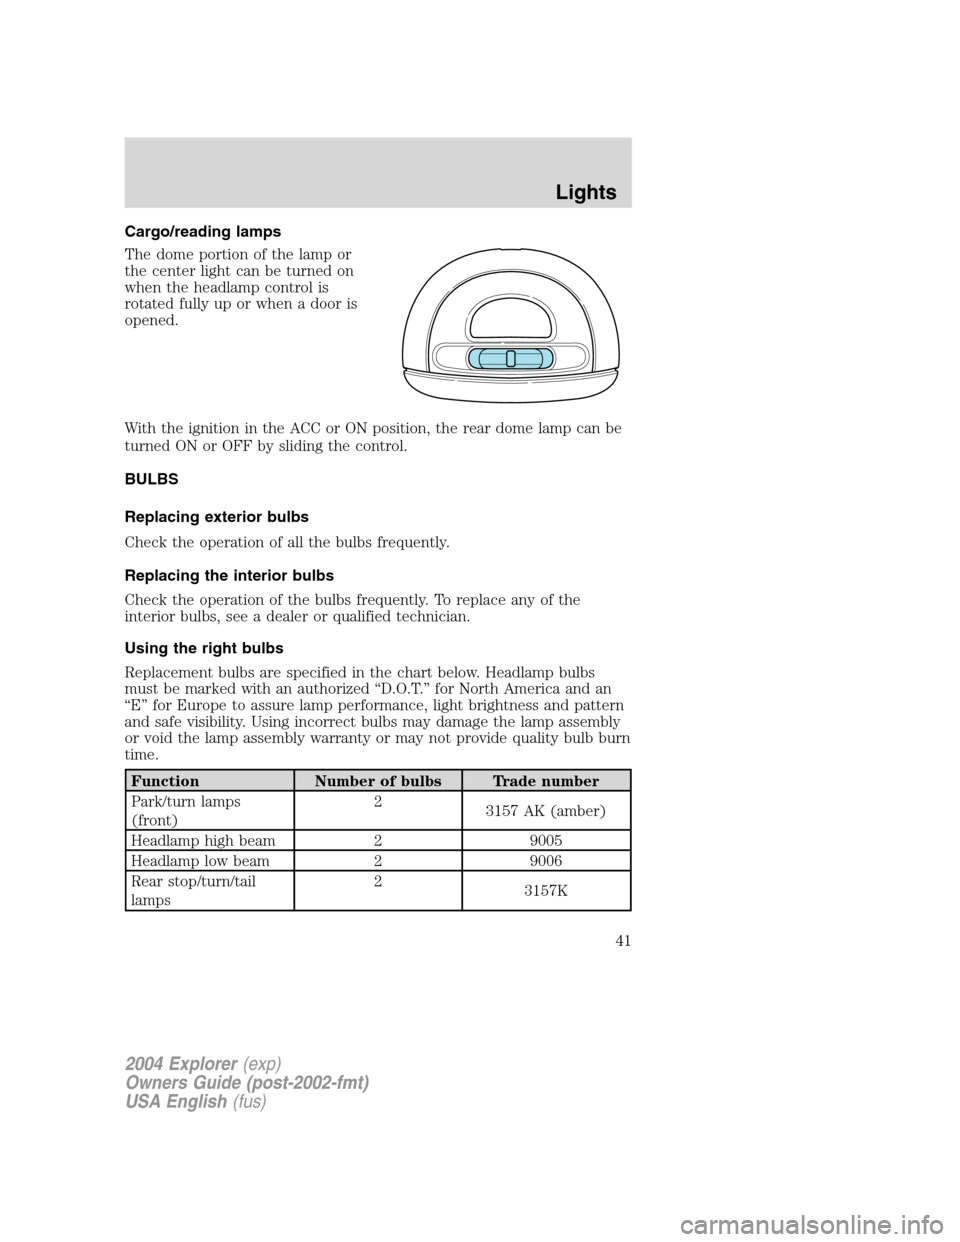
Cargo/reading lamps
The dome portion of the lamp or
the center light can be turned on
when the headlamp control is
rotated fully up or when a door is
opened.
With the ignition in the ACC or ON position, the rear dome lamp can be
turned ON or OFF by sliding the control.
BULBS
Replacing exterior bulbs
Check the operation of all the bulbs frequently.
Replacing the interior bulbs
Check the operation of the bulbs frequently. To replace any of the
interior bulbs, see a dealer or qualified technician.
Using the right bulbs
Replacement bulbs are specified in the chart below. Headlamp bulbs
must be marked with an authorized “D.O.T.” for North America and an
“E” for Europe to assure lamp performance, light brightness and pattern
and safe visibility. Using incorrect bulbs may damage the lamp assembly
or void the lamp assembly warranty or may not provide quality bulb burn
time.
Function Number of bulbs Trade number
Park/turn lamps
(front)2
3157 AK (amber)
Headlamp high beam 2 9005
Headlamp low beam 2 9006
Rear stop/turn/tail
lamps2
3157K
2004 Explorer(exp)
Owners Guide (post-2002-fmt)
USA English(fus)
Lights
41
Page 191 of 296

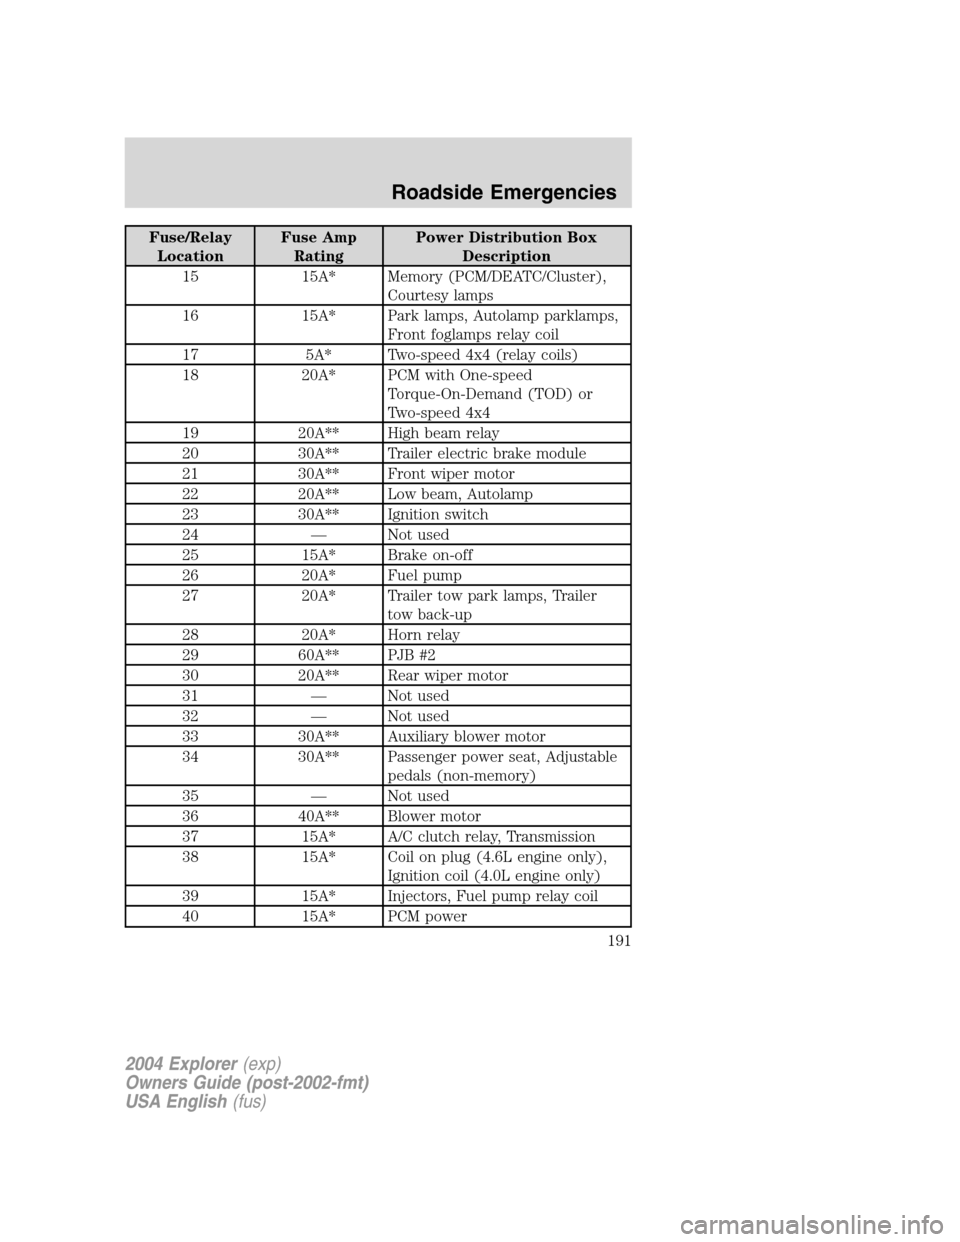
Fuse/Relay
LocationFuse Amp
RatingPower Distribution Box
Description
15 15A* Memory (PCM/DEATC/Cluster),
Courtesy lamps
16 15A* Park lamps, Autolamp parklamps,
Front foglamps relay coil
17 5A* Two-speed 4x4 (relay coils)
18 20A* PCM with One-speed
Torque-On-Demand (TOD) or
Two-speed 4x4
19 20A** High beam relay
20 30A** Trailer electric brake module
21 30A** Front wiper motor
22 20A** Low beam, Autolamp
23 30A** Ignition switch
24 — Not used
25 15A* Brake on-off
26 20A* Fuel pump
27 20A* Trailer tow park lamps, Trailer
tow back-up
28 20A* Horn relay
29 60A** PJB #2
30 20A** Rear wiper motor
31 — Not used
32 — Not used
33 30A** Auxiliary blower motor
34 30A** Passenger power seat, Adjustable
pedals (non-memory)
35 — Not used
36 40A** Blower motor
37 15A* A/C clutch relay, Transmission
38 15A* Coil on plug (4.6L engine only),
Ignition coil (4.0L engine only)
39 15A* Injectors, Fuel pump relay coil
40 15A* PCM power
2004 Explorer(exp)
Owners Guide (post-2002-fmt)
USA English(fus)
Roadside Emergencies
191
Page 192 of 296
Fuse/Relay
LocationFuse Amp
RatingPower Distribution Box
Description
41 15A* HEGO, VMV, CMS, PCM diode,
ESM, CVS
42 10A* Right low beam
43 10A* Left low beam
44 15A* Front foglamps
45 2A* Brake pressure switch
(non-AdvanceTrac vehicles)
46 20A* High beams
47 — Horn relay
48 — Fuel pump relay
49 — High beam relay
50 — Front foglamps relay
51 — DRL relay (Canada)
52 — A/C clutch relay
53 — Trailer tow right turn relay
54 — Trailer tow left turn relay
55 — Blower motor relay
56 — Starter relay
57 — PCM relay
58 — Ignition relay
59 — AdvanceTrac stop lamp relay
60 — PCM diode
61 — A/C clutch diode
62 30A CB Power windows circuit breaker
* Mini Fuses ** Cartridge Fuses
Rear relay box
The relay box is located on the rear passenger side quarter trim panel.
See your dealer or a certified technician for service of this relay box.
2004 Explorer(exp)
Owners Guide (post-2002-fmt)
USA English(fus)
Roadside Emergencies
192