2004 FORD EXPLORER change wheel
[x] Cancel search: change wheelPage 166 of 296
Vehicles with a higher center of gravity such as utility and
four-wheel drive vehicles handle differently than vehicles with a
lower center of gravity. Utility and four-wheel drive vehicles arenot
designed for cornering at speeds as high as passenger cars any more
than low-slung sports cars are designed to perform satisfactorily under
off-road conditions. Avoid sharp turns, excessive speed and abrupt
maneuvers in these vehicles. Failure to drive cautiously could result in
an increased risk of loss of vehicle control, vehicle rollover, personal
injury and death.
•If the vehicle goes from one type of surface to another (i.e., from
concrete to gravel) there will be a change in the way the vehicle
responds to a maneuver (steering, acceleration or braking). Again,
avoid these abrupt inputs.
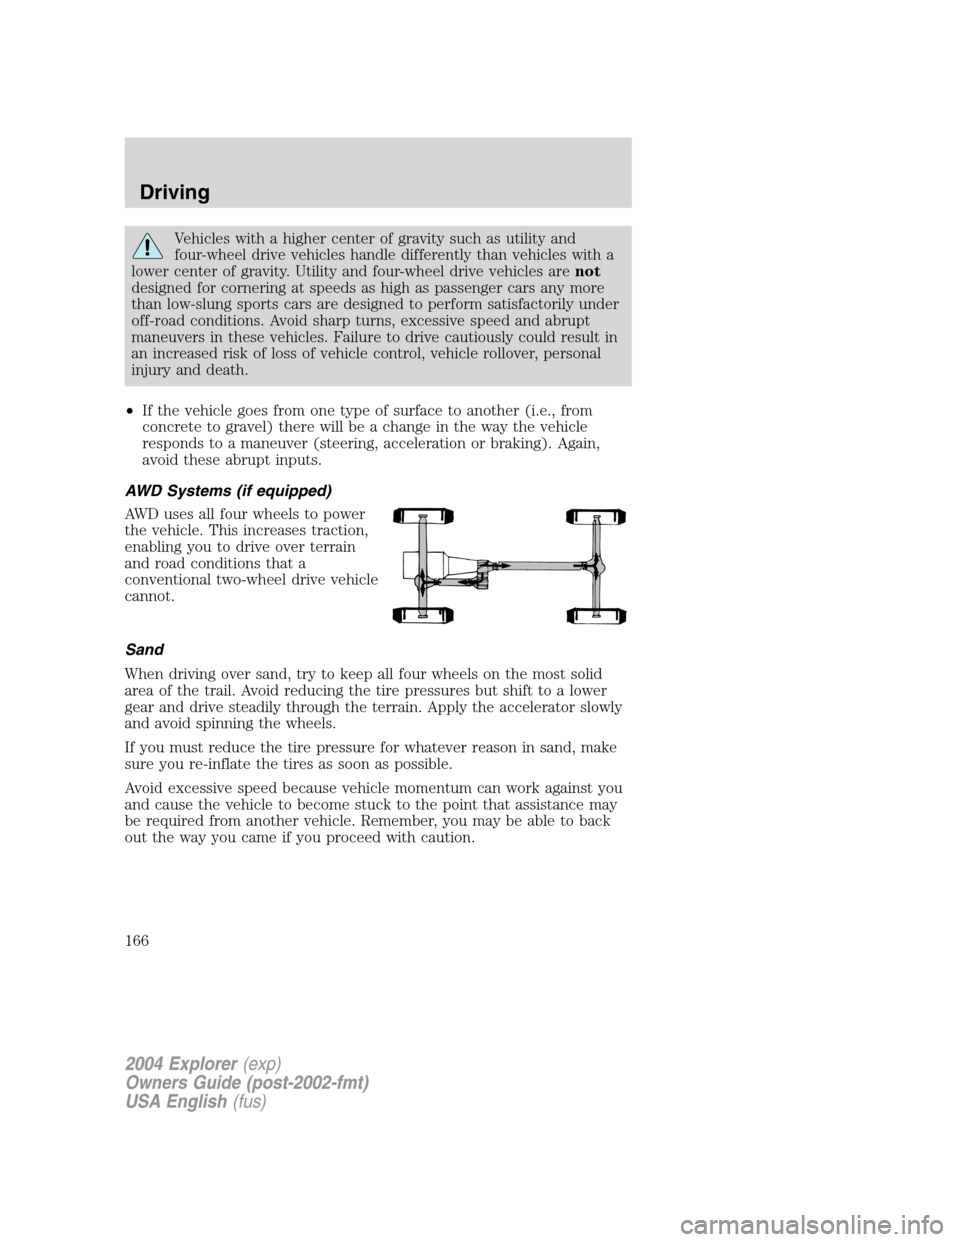
AWD Systems (if equipped)
AWD uses all four wheels to power
the vehicle. This increases traction,
enabling you to drive over terrain
and road conditions that a
conventional two-wheel drive vehicle
cannot.
Sand
When driving over sand, try to keep all four wheels on the most solid
area of the trail. Avoid reducing the tire pressures but shift to a lower
gear and drive steadily through the terrain. Apply the accelerator slowly
and avoid spinning the wheels.
If you must reduce the tire pressure for whatever reason in sand, make
sure you re-inflate the tires as soon as possible.
Avoid excessive speed because vehicle momentum can work against you
and cause the vehicle to become stuck to the point that assistance may
be required from another vehicle. Remember, you may be able to back
out the way you came if you proceed with caution.
2004 Explorer(exp)
Owners Guide (post-2002-fmt)
USA English(fus)
Driving
166
Page 167 of 296
Mud and water
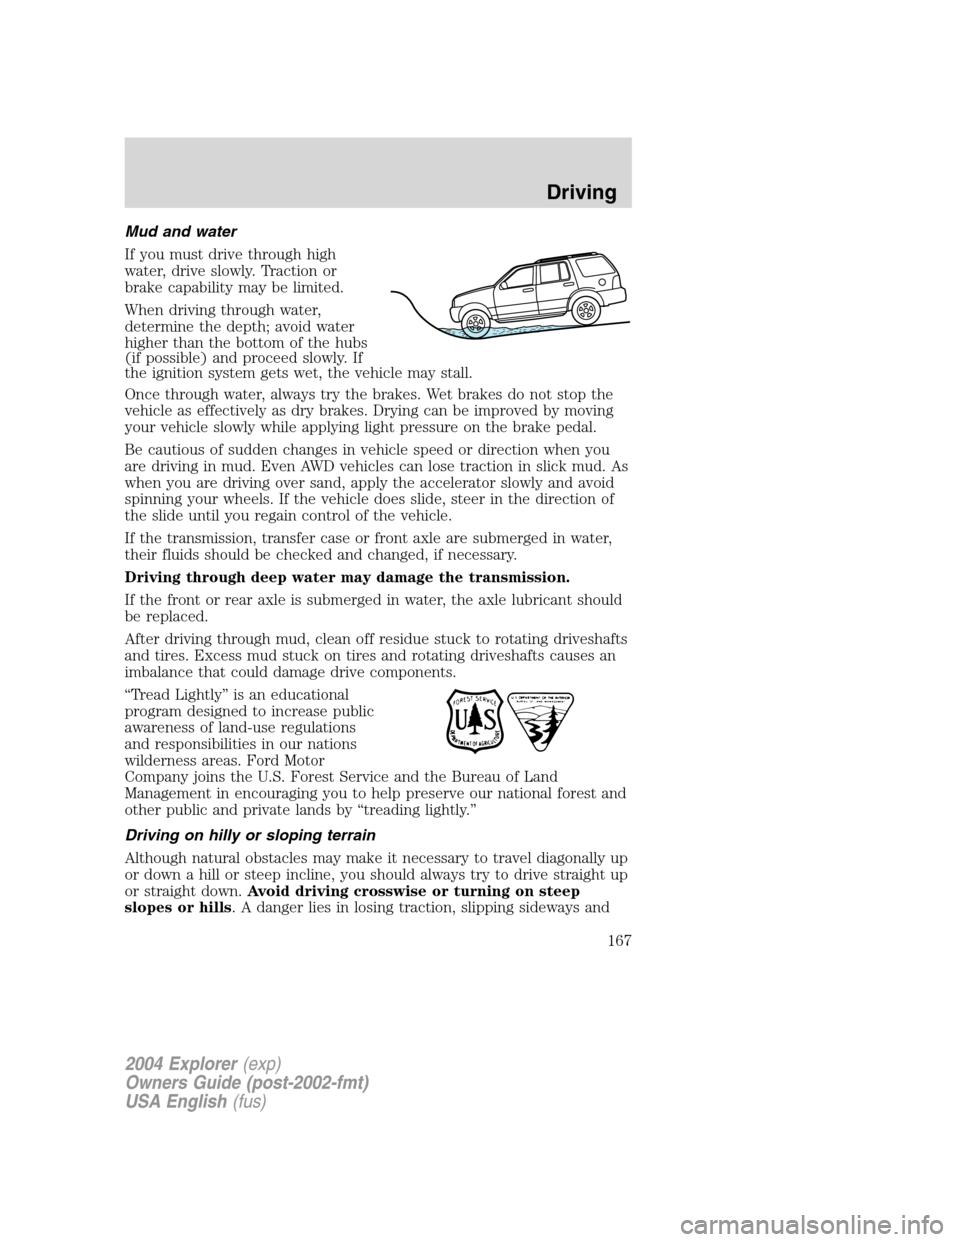
If you must drive through high
water, drive slowly. Traction or
brake capability may be limited.
When driving through water,
determine the depth; avoid water
higher than the bottom of the hubs
(if possible) and proceed slowly. If
the ignition system gets wet, the vehicle may stall.
Once through water, always try the brakes. Wet brakes do not stop the
vehicle as effectively as dry brakes. Drying can be improved by moving
your vehicle slowly while applying light pressure on the brake pedal.
Be cautious of sudden changes in vehicle speed or direction when you
are driving in mud. Even AWD vehicles can lose traction in slick mud. As
when you are driving over sand, apply the accelerator slowly and avoid
spinning your wheels. If the vehicle does slide, steer in the direction of
the slide until you regain control of the vehicle.
If the transmission, transfer case or front axle are submerged in water,
their fluids should be checked and changed, if necessary.
Driving through deep water may damage the transmission.
If the front or rear axle is submerged in water, the axle lubricant should
be replaced.
After driving through mud, clean off residue stuck to rotating driveshafts
and tires. Excess mud stuck on tires and rotating driveshafts causes an
imbalance that could damage drive components.
“Tread Lightly” is an educational
program designed to increase public
awareness of land-use regulations
and responsibilities in our nations
wilderness areas. Ford Motor
Company joins the U.S. Forest Service and the Bureau of Land
Management in encouraging you to help preserve our national forest and
other public and private lands by “treading lightly.”
Driving on hilly or sloping terrain
Although natural obstacles may make it necessary to travel diagonally up
or down a hill or steep incline, you should always try to drive straight up
or straight down.Avoid driving crosswise or turning on steep
slopes or hills. A danger lies in losing traction, slipping sideways and
2004 Explorer(exp)
Owners Guide (post-2002-fmt)
USA English(fus)
Driving
167
Page 169 of 296
Avoid sudden applications of power and quick changes of direction on
snow and ice. Apply the accelerator slowly and steadily when starting
from a full stop.
Avoid sudden braking as well. Although an AWD vehicle may accelerate
better than a two-wheel drive vehicle in snow and ice, it won’t stop any
faster, because as in other vehicles, braking occurs at all four wheels. Do
not become overconfident as to road conditions.
Make sure you allow sufficient distance between you and other vehicles
for stopping. Drive slower than usual and consider using one of the lower
gears. In emergency stopping situations, avoid locking of the wheels. Use
a “squeeze” technique, push on the brake pedal with a steadily increasing
force which allows the wheels to brake yet continue to roll so that you
may steer in the direction you want to travel. If you lock the wheels,
release the brake pedal and repeat the squeeze technique. If your vehicle
is equipped with a four wheel anti-lock brake system (ABS), apply the
brake steadily. Do not “pump” the brakes. Refer to theBrakessection of
this chapter for additional information on the operation of the anti-lock
brake system.
Never drive with chains on the front tires of AWD vehicles without also
putting them on the rear tires. This could cause the rear to slide and
swing around during braking.
Tires, Replacement Requirements
Do not use a size and type of tire and wheel other than that
originally provided by Ford Motor Company because it can affect
the safety and performance of your vehicle, which could result in an
increased risk of loss of vehicle control, vehicle rollover, and/or serious
personal injury or death.
AWD vehicles are equipped with tires designed to provide for safe ride
and handling capability.
Make sure all tires and wheels on the vehicle are of the same size, type,
tread design and load-carrying capacity. If you have questions regarding
tire replacement, see an authorized Ford or Lincoln Mercury dealer.
If you nevertheless decide to equip your AWD for off-road use with tires
larger than what Ford Motor Company recommends, you should not use
these tires for highway driving.
If you use any tire/wheel combination not recommended by Ford Motor
Company, it may adversely affect vehicle handling and could cause
steering, suspension, axle or transfer case failure as well as the increased
risk of loss of vehicle control.
2004 Explorer(exp)
Owners Guide (post-2002-fmt)
USA English(fus)
Driving
169
Page 180 of 296
Exceeding these limits may allow water to enter vehicle components:
•causing internal damage to the components.
•affecting driveability, emissions and reliability.
Replace the rear axle lubricant any time the axle has been submerged in
water. Rear axle lubricant quantities are not to be checked or changed
unless a leak is suspected or repair required.
RECREATIONAL TOWING (ALL WHEELS ON THE GROUND)
Follow these guidelines for your specific powertrain combination to tow
your vehicle with all four wheels on the ground (such as behind a
recreational vehicle).
These guidelines are designed to ensure that your transmission is not
damaged due to insufficient lubrication.
Rear Wheel Drive (RWD) 4x2 vehicles:
This applies to all 4x2 trucks/sport utilities with rear wheel drive
capability.
•Place the transmission in N (Neutral).
•Maximum speed is 56 km/h (35 mph).
•Maximum distance is 80 km (50 miles).
If a distance of 80 km (50 miles) or a speed of 56 km/h (35 mph) must
be exceeded, you must disconnect the driveshaft. Ford recommends the
driveshaft be removed/installed only by a qualified technician. See your
local dealer for driveshaft removal/installation.
Improper removal/installation of the driveshaft can cause
transmission fluid loss, damage to the driveshaft and internal
transmission components.
4x4 vehicles with electronic shift transfer case (Neutral tow kit
accessory):
On vehicles equipped with 4WD, an accessory is available that allows you
to tow your vehicle, behind another vehicle, with all the wheels on the
ground. Contact your dealer for more details. Do not tow your vehicle
with all wheels on the ground unless you install the neutral tow kit as
vehicle damage may occur.
AWD vehicles:
Vehicles equipped with AWD cannot be towed with any wheels on the
ground as vehicle damage may occur.
2004 Explorer(exp)
Owners Guide (post-2002-fmt)
USA English(fus)
Driving
180
Page 199 of 296
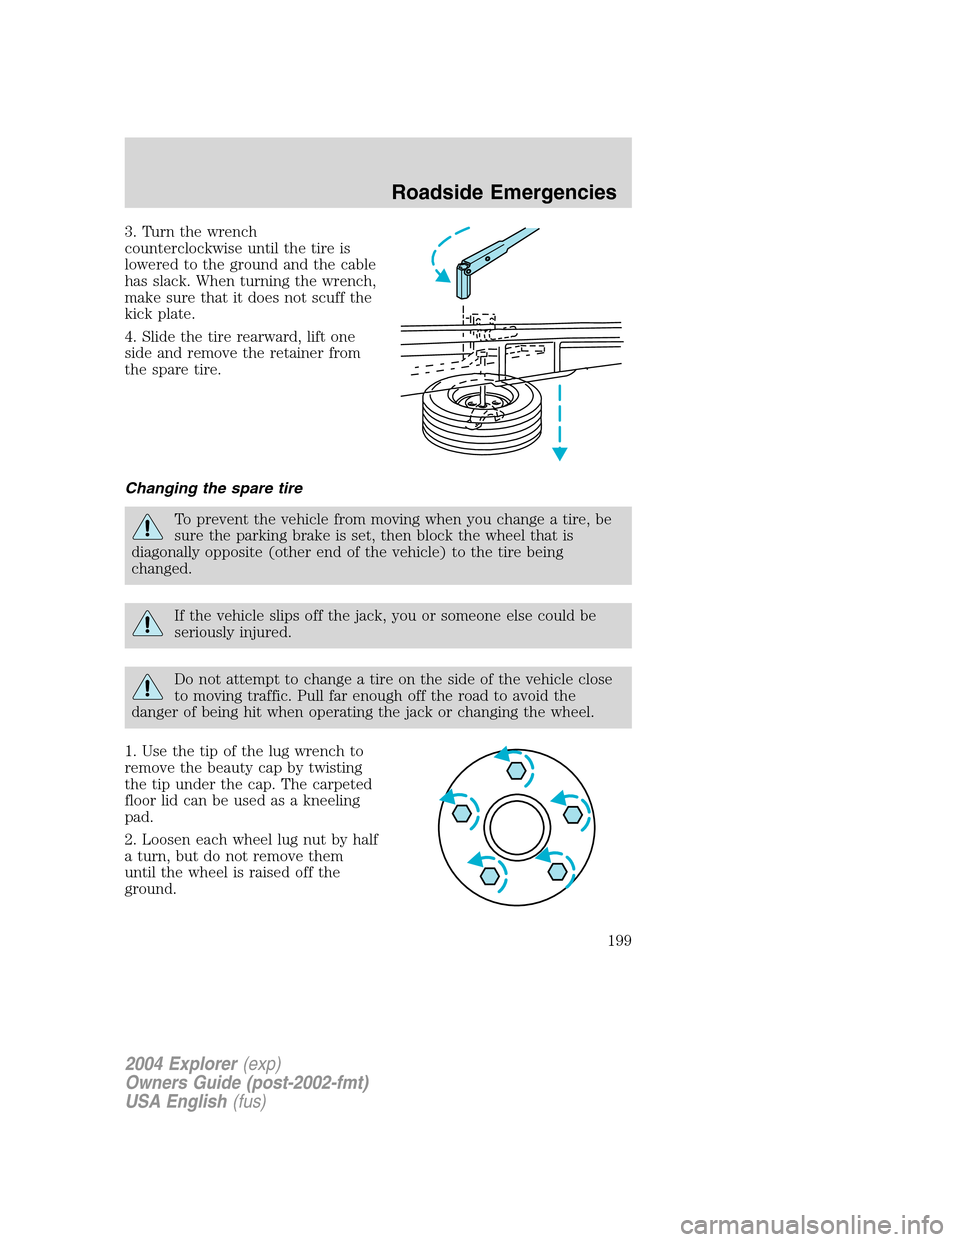
3. Turn the wrench
counterclockwise until the tire is
lowered to the ground and the cable
has slack. When turning the wrench,
make sure that it does not scuff the
kick plate.
4. Slide the tire rearward, lift one
side and remove the retainer from
the spare tire.
Changing the spare tire
To prevent the vehicle from moving when you change a tire, be
sure the parking brake is set, then block the wheel that is
diagonally opposite (other end of the vehicle) to the tire being
changed.
If the vehicle slips off the jack, you or someone else could be
seriously injured.
Do not attempt to change a tire on the side of the vehicle close
to moving traffic. Pull far enough off the road to avoid the
danger of being hit when operating the jack or changing the wheel.
1. Use the tip of the lug wrench to
remove the beauty cap by twisting
the tip under the cap. The carpeted
floor lid can be used as a kneeling
pad.
2. Loosen each wheel lug nut by half
a turn, but do not remove them
until the wheel is raised off the
ground.
2004 Explorer(exp)
Owners Guide (post-2002-fmt)
USA English(fus)
Roadside Emergencies
199
Page 260 of 296
3.65:Indicates the aspect ratio which gives the tire’s ratio of height to
width.
4.R:Indicates a “radial” type tire.
5.15:Indicates the wheel or rim diameter in inches. If you change your
wheel size, you will have to purchase new tires to match the new wheel
diameter.
6.95:Indicates the tire’s load index. It is an index that relates to how
much weight a tire can carry. You may find this information in your
owner’s guide. If not, contact a local tire dealer.
Note:You may not find this information on all tires because it is not
required by federal law.
7.H:Indicates the tire’s speed rating. The speed rating denotes the
speed at which a tire is designed to be driven for extended periods of
time under a standard condition of load and inflation pressure. The tires
on your vehicle may operate at different conditions for load and inflation
pressure. These speed ratings may need to be adjusted for the difference
in conditions. The ratings range from 159 km/h (99 mph) to 299 km/h
(186 mph). These ratings are listed in the following chart.
Note:You may not find this information on all tires because it is not
required by federal law.
Letter rating Speed rating - km/h (mph)
Q 159 km/h (99 mph)
R 171 km/h (106 mph)
S 180 km/h (112 mph)
T 190 km/h (118 mph)
U 200 km/h (124 mph)
H 210 km/h (130 mph)
V 240 km/h (149 mph)
W 270 km/h (168 mph)
Y 299 km/h (186 mph)
Note:For tires with a maximum speed capability over 240 km/h (149
mph), tire manufacturers sometimes use the letters ZR. For those with
a maximum speed capability over 299 km/h (186 mph), tire
manufacturers always use the letters ZR.
8.U.S. DOT Tire Identification Number (TIN):This begins with the
letters “DOT” and indicates that the tire meets all federal standards. The
2004 Explorer(exp)
Owners Guide (post-2002-fmt)
USA English(fus)
Maintenance and Specifications
260
Page 263 of 296
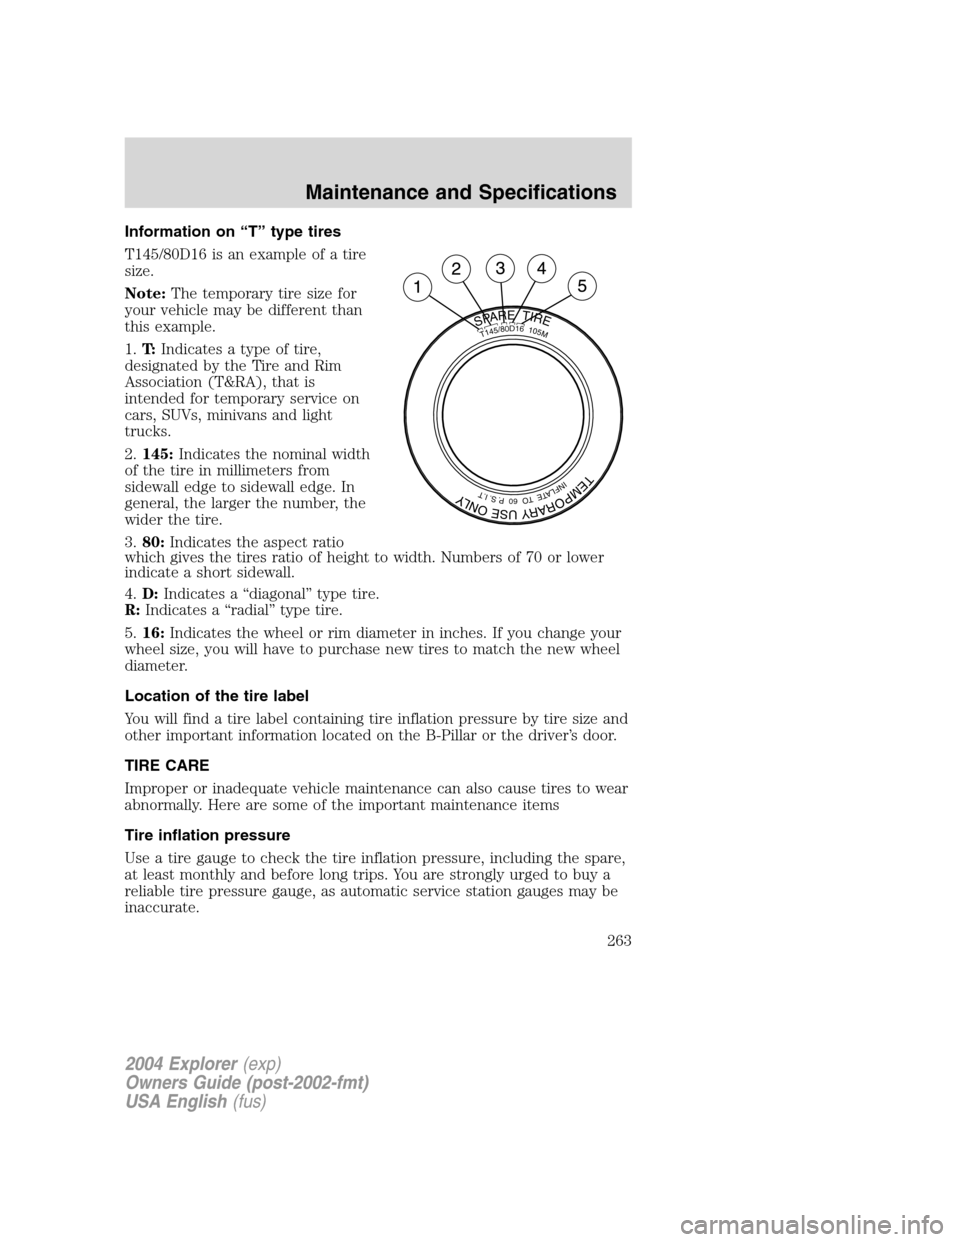
Information on “T” type tires
T145/80D16 is an example of a tire
size.
Note:The temporary tire size for
your vehicle may be different than
this example.
1.T:Indicates a type of tire,
designated by the Tire and Rim
Association (T&RA), that is
intended for temporary service on
cars, SUVs, minivans and light
trucks.
2.145:Indicates the nominal width
of the tire in millimeters from
sidewall edge to sidewall edge. In
general, the larger the number, the
wider the tire.
3.80:Indicates the aspect ratio
which gives the tires ratio of height to width. Numbers of 70 or lower
indicate a short sidewall.
4.D:Indicates a “diagonal” type tire.
R:Indicates a “radial” type tire.
5.16:Indicates the wheel or rim diameter in inches. If you change your
wheel size, you will have to purchase new tires to match the new wheel
diameter.
Location of the tire label
You will find a tire label containing tire inflation pressure by tire size and
other important information located on the B-Pillar or the driver’s door.
TIRE CARE
Improper or inadequate vehicle maintenance can also cause tires to wear
abnormally. Here are some of the important maintenance items
Tire inflation pressure
Use a tire gauge to check the tire inflation pressure, including the spare,
at least monthly and before long trips. You are strongly urged to buy a
reliable tire pressure gauge, as automatic service station gauges may be
inaccurate.
SPARETIRE
TEMPORARYUSEONLY
INFLATETO60P.S.I.T
T145/80D16105M
2004 Explorer(exp)
Owners Guide (post-2002-fmt)
USA English(fus)
Maintenance and Specifications
263
Page 270 of 296
is on, visually check each tire to verify that no tire is flat. If one or more
tires are flat, repair of fix as necessary. If all tires appear to be inflated,
carefully drive the vehicle to the nearest location where air can be added
to the tires. Turn the ignition to the “off” position. Inflate all the tires to
the recommended cold pressure.
The system uses radio-frequency to monitor the tire pressure on all tires
excluding the spare tire. The sensors transmit the tire pressure readings
to the receiver module located in the vehicle. The receiver module then
electronically transmits the status to the message center. For more tire
warning information, refer to theMessage Centerin theDriver controls
chapter.
This device complies with part 15 of the FCC rules and with RS-210 of
Industry Canada. Operation is subject to the following two conditions:
(1) This device may not cause harmful interference, and (2) This device
must accept any interference received, including interference that may
cause undesired operation.
The tire pressure monitoring system is NOT a substitute for
manually checking tire pressure. The tire pressure should be
checked periodically (at least monthly) using a tire gauge, see
Checking the tire pressurein this chapter. Failure to properly
maintain your tire pressure could increase the risk of tire failure, loss
of control, vehicle rollover and personal injury.
Changing tires with TPMS
It is recommended that you always
have your tires serviced by a dealer
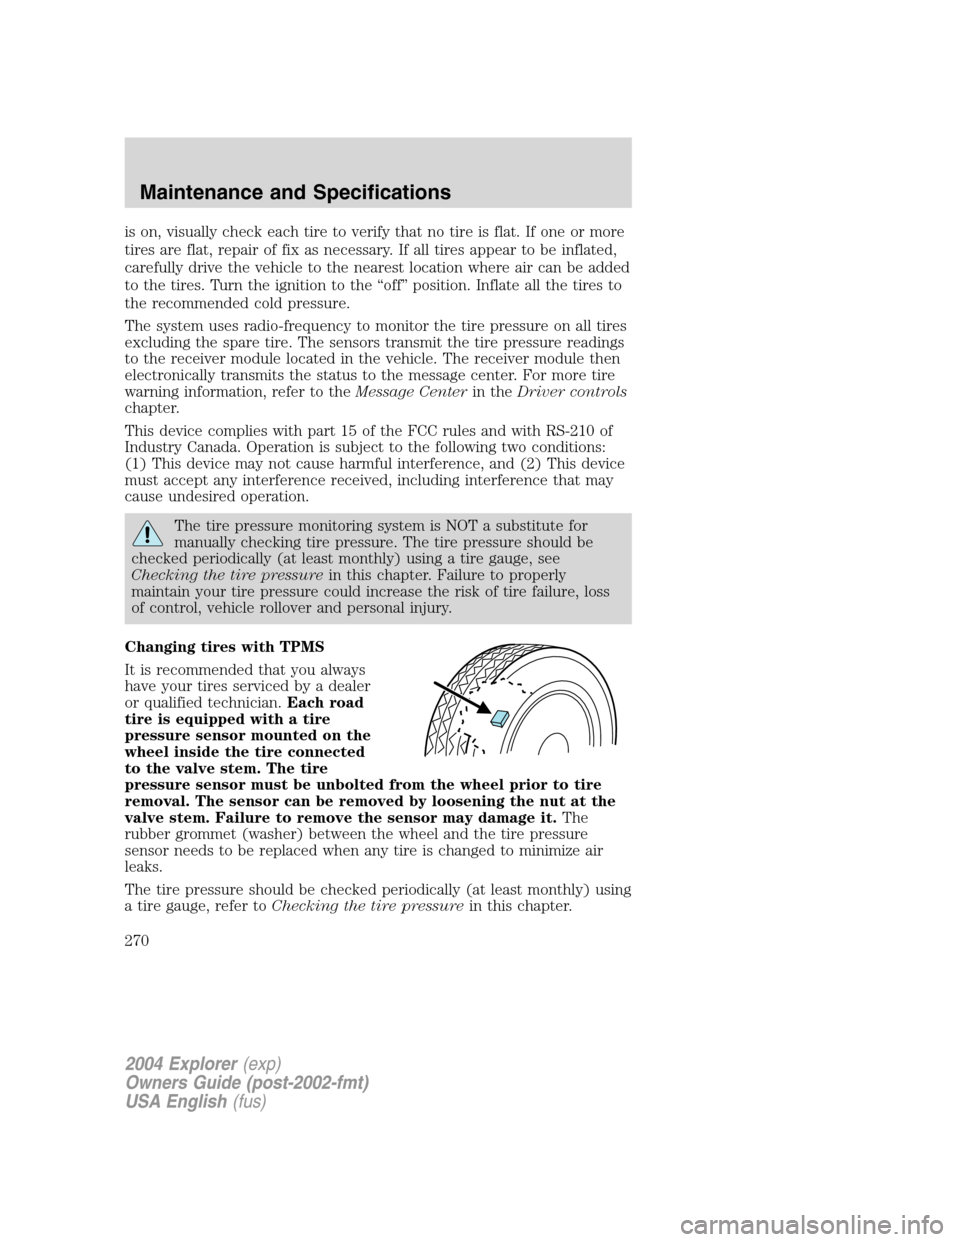
or qualified technician.Each road
tire is equipped with a tire
pressure sensor mounted on the
wheel inside the tire connected
to the valve stem. The tire
pressure sensor must be unbolted from the wheel prior to tire
removal. The sensor can be removed by loosening the nut at the
valve stem. Failure to remove the sensor may damage it.The
rubber grommet (washer) between the wheel and the tire pressure
sensor needs to be replaced when any tire is changed to minimize air
leaks.
The tire pressure should be checked periodically (at least monthly) using
a tire gauge, refer toChecking the tire pressurein this chapter.
2004 Explorer(exp)
Owners Guide (post-2002-fmt)
USA English(fus)
Maintenance and Specifications
270