Page 80 of 344
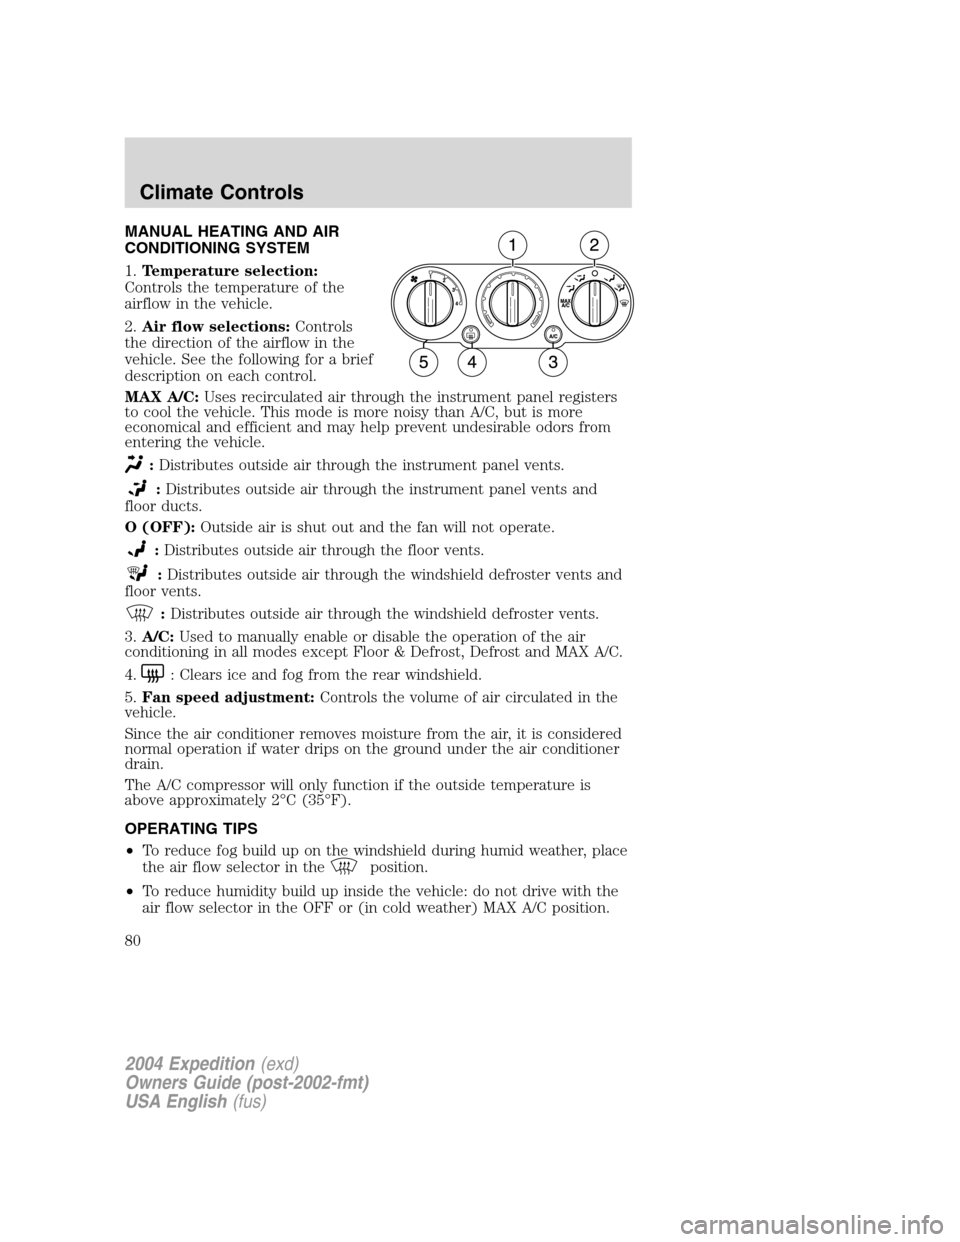
MANUAL HEATING AND AIR
CONDITIONING SYSTEM
1.Temperature selection:
Controls the temperature of the
airflow in the vehicle.
2.Air flow selections:Controls
the direction of the airflow in the
vehicle. See the following for a brief
description on each control.
MAX A/C:Uses recirculated air through the instrument panel registers
to cool the vehicle. This mode is more noisy than A/C, but is more
economical and efficient and may help prevent undesirable odors from
entering the vehicle.
:Distributes outside air through the instrument panel vents.
:Distributes outside air through the instrument panel vents and
floor ducts.
O (OFF):Outside air is shut out and the fan will not operate.
:Distributes outside air through the floor vents.
:Distributes outside air through the windshield defroster vents and
floor vents.
:Distributes outside air through the windshield defroster vents.
3.A/C:Used to manually enable or disable the operation of the air
conditioning in all modes except Floor & Defrost, Defrost and MAX A/C.
4.
: Clears ice and fog from the rear windshield.
5.Fan speed adjustment:Controls the volume of air circulated in the
vehicle.
Since the air conditioner removes moisture from the air, it is considered
normal operation if water drips on the ground under the air conditioner
drain.
The A/C compressor will only function if the outside temperature is
above approximately 2°C (35°F).
OPERATING TIPS
•To reduce fog build up on the windshield during humid weather, place
the air flow selector in the
position.
•To reduce humidity build up inside the vehicle: do not drive with the
air flow selector in the OFF or (in cold weather) MAX A/C position.
2004 Expedition(exd)
Owners Guide (post-2002-fmt)
USA English(fus)
Climate Controls
Climate Controls
80
Page 81 of 344
•Under normal weather conditions, do not leave the air flow selector in
MAX A/C or OFF when the vehicle is parked. This allows the vehicle
to“breathe”using the outside air inlet vents.
•Do not put objects under the front seats that will interfere with the
airflow to the back seats.
•Remove any snow, ice or leaves from the air intake area at the base of
the windshield.
To aid in side window defogging/demisting in cold weather:
1. Select
2. Select A/C
3. Modulate the temperature control to maintain comfort.
4. Set the fan speed to HI
5. Direct the outer instrument panel vents towards the side windows
To increase airflow to the outer instrument panel vents, close the vents
located in the middle of the instrument panel.
Do not place objects on top of the instrument panel as these
objects may become projectiles in a collision or sudden stop.
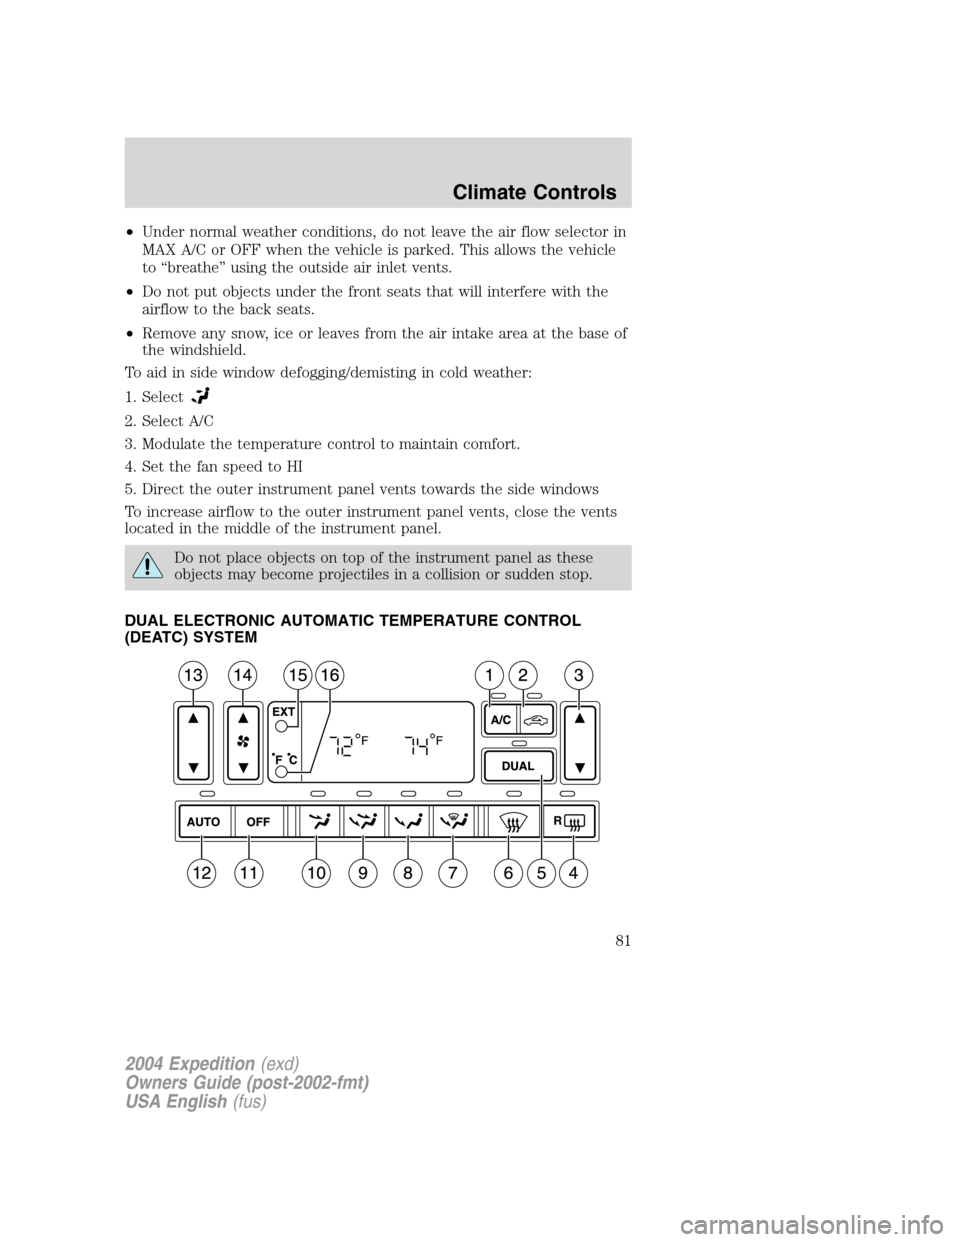
DUAL ELECTRONIC AUTOMATIC TEMPERATURE CONTROL
(DEATC) SYSTEM
2004 Expedition(exd)
Owners Guide (post-2002-fmt)
USA English(fus)
Climate Controls
81
Page 82 of 344
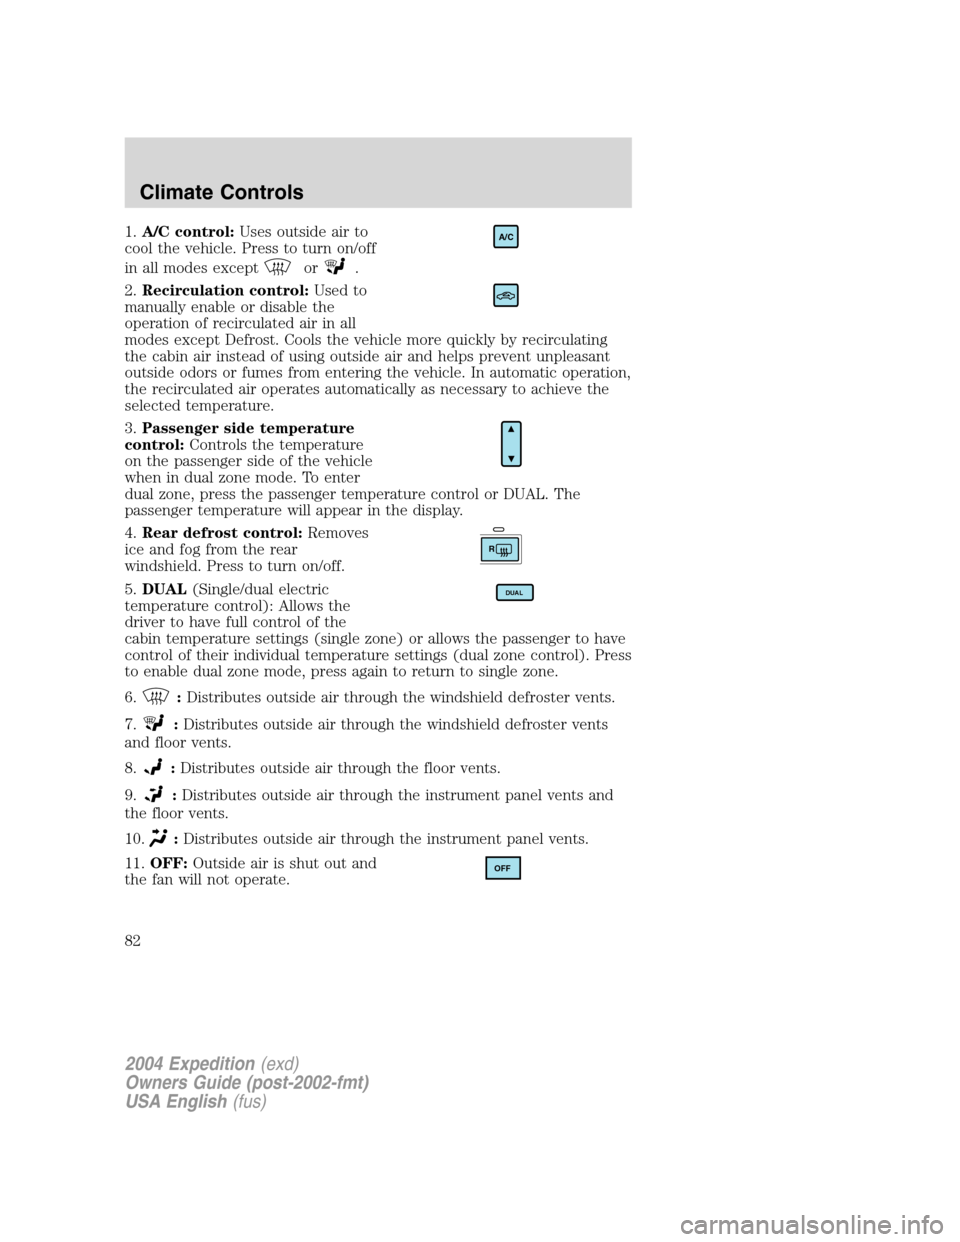
1.A/C control:Uses outside air to
cool the vehicle. Press to turn on/off
in all modes except
or.
2.Recirculation control:Used to
manually enable or disable the
operation of recirculated air in all
modes except Defrost. Cools the vehicle more quickly by recirculating
the cabin air instead of using outside air and helps prevent unpleasant
outside odors or fumes from entering the vehicle. In automatic operation,
the recirculated air operates automatically as necessary to achieve the
selected temperature.
3.Passenger side temperature
control:Controls the temperature
on the passenger side of the vehicle
when in dual zone mode. To enter
dual zone, press the passenger temperature control or DUAL. The
passenger temperature will appear in the display.
4.Rear defrost control:Removes
ice and fog from the rear
windshield. Press to turn on/off.
5.DUAL(Single/dual electric
temperature control): Allows the
driver to have full control of the
cabin temperature settings (single zone) or allows the passenger to have
control of their individual temperature settings (dual zone control). Press
to enable dual zone mode, press again to return to single zone.
6.
:Distributes outside air through the windshield defroster vents.
7.
:Distributes outside air through the windshield defroster vents
and floor vents.
8.
:Distributes outside air through the floor vents.
9.
:Distributes outside air through the instrument panel vents and
the floor vents.
10.
:Distributes outside air through the instrument panel vents.
11.OFF:Outside air is shut out and
the fan will not operate.
A/C
R
DUAL
OFF
2004 Expedition(exd)
Owners Guide (post-2002-fmt)
USA English(fus)
Climate Controls
82
Page 84 of 344
•Remove any snow, ice or leaves from the air intake area at the base of
the windshield.
To aid in side window defogging/demisting in cold weather:
1. Select
2. Select A/C
3. Modulate the temperature control to maintain comfort.
4. Set the fan speed to HI
5. Direct the outer instrument panel vents towards the side windows
To increase airflow to the outer instrument panel vents, close the vents
located in the middle of the instrument panel.
Do not place objects on top of the instrument panel as these
objects may become projectiles in a collision or sudden stop.
2004 Expedition(exd)
Owners Guide (post-2002-fmt)
USA English(fus)
Climate Controls
84
Page 88 of 344
Daytime running lamps (DRL) (if equipped)
Turns the foglamps on at full intensity output. To activate:
•the ignition must be in the ON position and
•the headlamp control must be in the OFF or Parking lamps position.
Always remember to turn on your headlamps at dusk or during
inclement weather. The Daytime Running Lamp (DRL) system
does not activate with your tail lamps and generally may not provide
adequate lighting during these conditions. Failure to activate your
headlamps under these conditions may result in a collision.
High beams
Push the lever toward the
instrument panel to activate. Pull
the lever towards you to deactivate.
Flash to pass
Pull toward you slightly to activate
and release to deactivate.
INT2OFFOFFINT1
INT2OFFOFFINT1
2004 Expedition(exd)
Owners Guide (post-2002-fmt)
USA English(fus)
Lights
88
Page 89 of 344
PANEL DIMMER CONTROL
Use to adjust the brightness of the
instrument panel and all applicable
switches in the vehicle during
headlamp and parklamp operation.
Move the control to the full upright
position, past detent, to turn on the
interior lamps.
Move the control to the full down
position, past detent, to prevent the interior lights from illuminating
when the doors are opened.
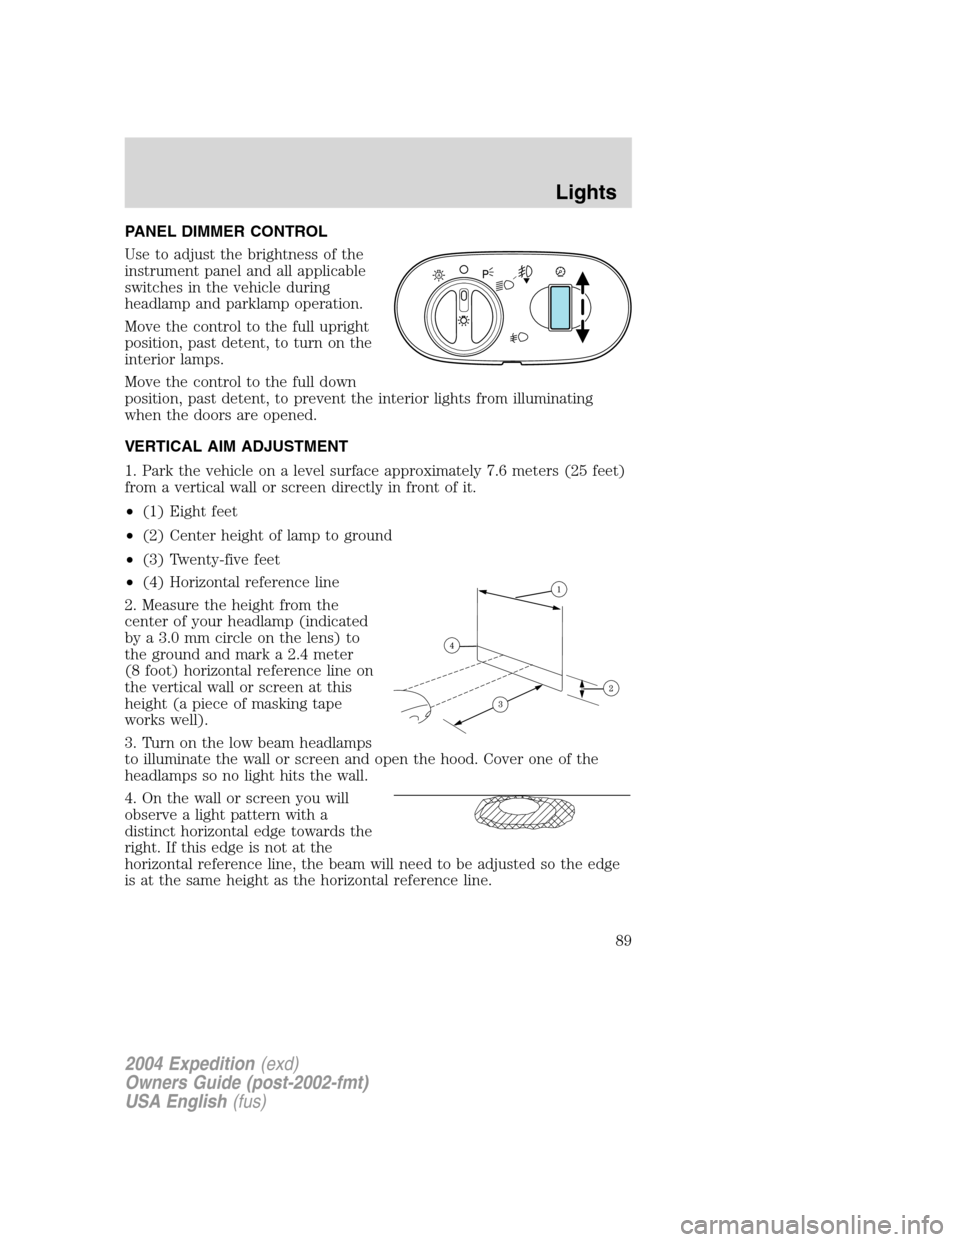
VERTICAL AIM ADJUSTMENT
1. Park the vehicle on a level surface approximately 7.6 meters (25 feet)
from a vertical wall or screen directly in front of it.
•(1) Eight feet
•(2) Center height of lamp to ground
•(3) Twenty-five feet
•(4) Horizontal reference line
2. Measure the height from the
center of your headlamp (indicated
by a 3.0 mm circle on the lens) to
the ground and mark a 2.4 meter
(8 foot) horizontal reference line on
the vertical wall or screen at this
height (a piece of masking tape
works well).
3. Turn on the low beam headlamps
to illuminate the wall or screen and open the hood. Cover one of the
headlamps so no light hits the wall.
4. On the wall or screen you will
observe a light pattern with a
distinct horizontal edge towards the
right. If this edge is not at the
horizontal reference line, the beam will need to be adjusted so the edge
is at the same height as the horizontal reference line.
A
2004 Expedition(exd)
Owners Guide (post-2002-fmt)
USA English(fus)
Lights
89
Page 91 of 344
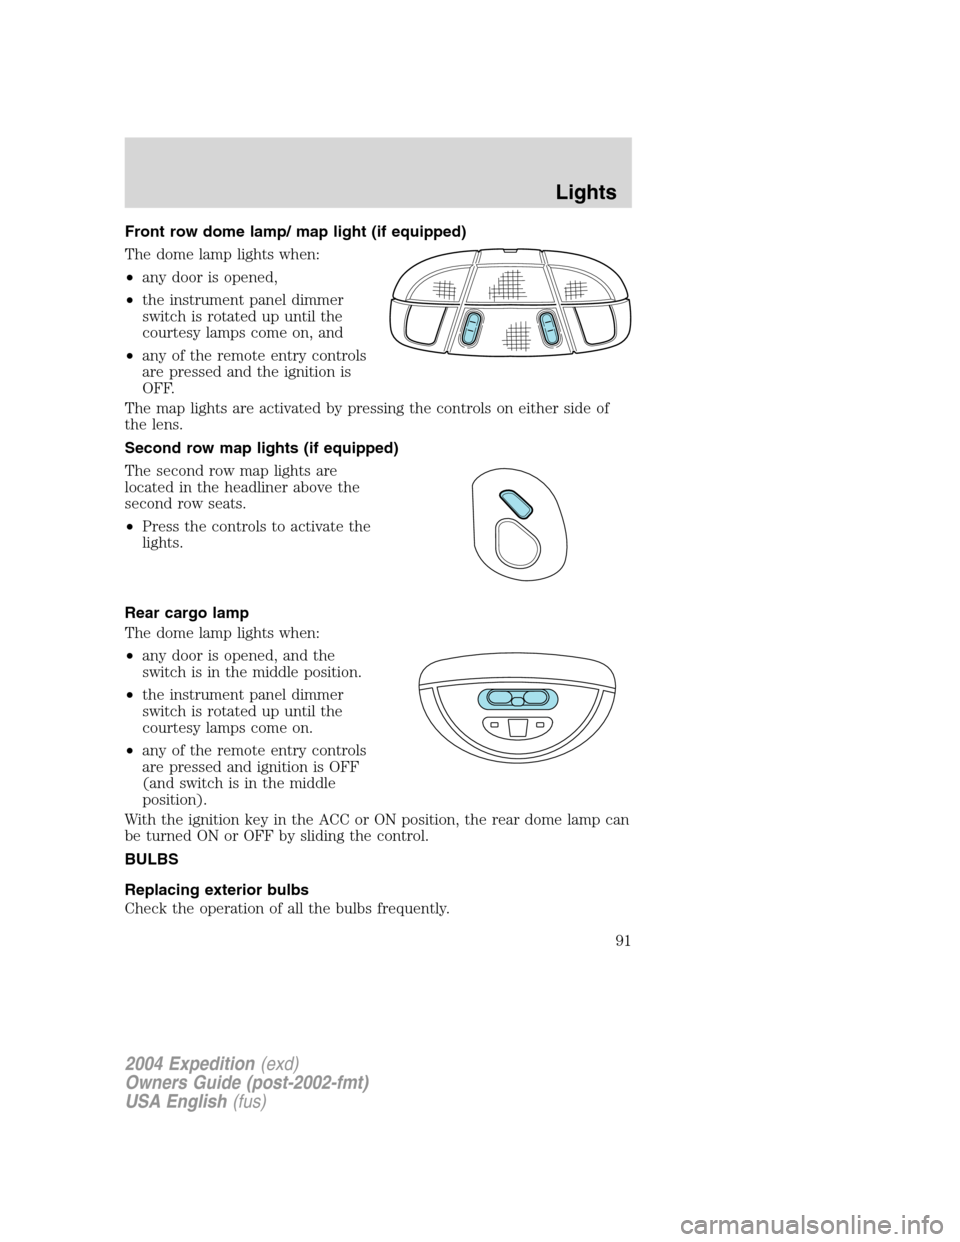
Front row dome lamp/ map light (if equipped)
The dome lamp lights when:
•any door is opened,
•the instrument panel dimmer
switch is rotated up until the
courtesy lamps come on, and
•any of the remote entry controls
are pressed and the ignition is
OFF.
The map lights are activated by pressing the controls on either side of
the lens.
Second row map lights (if equipped)
The second row map lights are
located in the headliner above the
second row seats.
•Press the controls to activate the
lights.
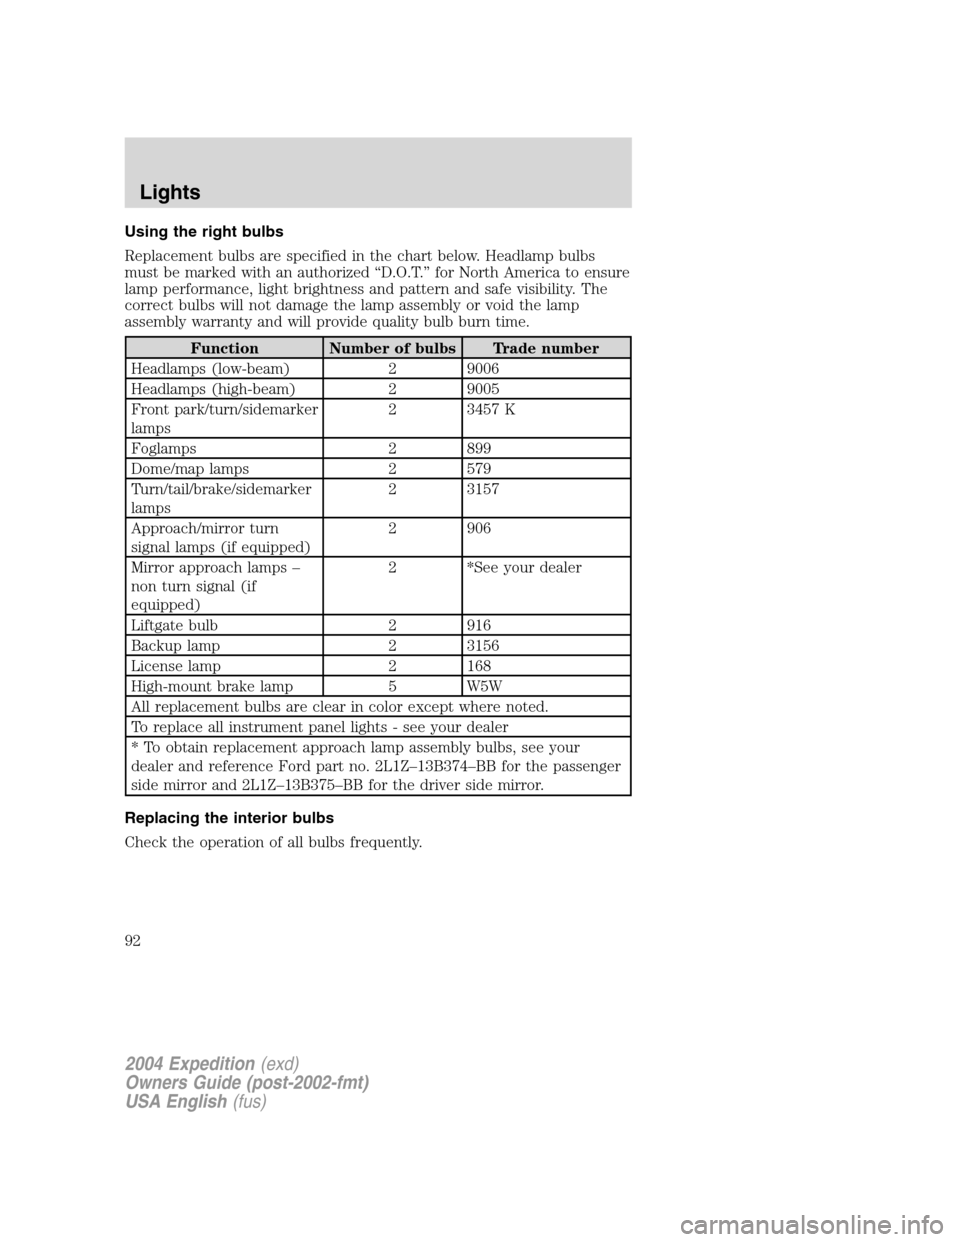
Rear cargo lamp
The dome lamp lights when:
•any door is opened, and the
switch is in the middle position.
•the instrument panel dimmer
switch is rotated up until the
courtesy lamps come on.
•any of the remote entry controls
are pressed and ignition is OFF
(and switch is in the middle
position).
With the ignition key in the ACC or ON position, the rear dome lamp can
be turned ON or OFF by sliding the control.
BULBS
Replacing exterior bulbs
Check the operation of all the bulbs frequently.
2004 Expedition(exd)
Owners Guide (post-2002-fmt)
USA English(fus)
Lights
91
Page 92 of 344
Using the right bulbs
Replacement bulbs are specified in the chart below. Headlamp bulbs
must be marked with an authorized“D.O.T.”for North America to ensure
lamp performance, light brightness and pattern and safe visibility. The
correct bulbs will not damage the lamp assembly or void the lamp
assembly warranty and will provide quality bulb burn time.
Function Number of bulbs Trade number
Headlamps (low-beam) 2 9006
Headlamps (high-beam) 2 9005
Front park/turn/sidemarker
lamps2 3457 K
Foglamps 2 899
Dome/map lamps 2 579
Turn/tail/brake/sidemarker
lamps2 3157
Approach/mirror turn
signal lamps (if equipped)2 906
Mirror approach lamps–
non turn signal (if
equipped)2 *See your dealer
Liftgate bulb 2 916
Backup lamp 2 3156
License lamp 2 168
High-mount brake lamp 5 W5W
All replacement bulbs are clear in color except where noted.
To replace all instrument panel lights - see your dealer
* To obtain replacement approach lamp assembly bulbs, see your
dealer and reference Ford part no. 2L1Z–13B374–BB for the passenger
side mirror and 2L1Z–13B375–BB for the driver side mirror.
Replacing the interior bulbs
Check the operation of all bulbs frequently.
2004 Expedition(exd)
Owners Guide (post-2002-fmt)
USA English(fus)
Lights
92